For nearly a quarter century, I’ve tested every digital camera that crossed my path to see how well it handled infrared photography. Some didn’t pass muster, like my beloved Minolta DiMAGE A1. Its APO zoom lens’s optical design and internal coatings threw a bright “hot spot” into every IR photo. And the problem would have persisted even if I removed the camera’s “hot mirror” to allow hand-held infrared shooting.
But five happier finds were gems! Even today, they’d be affordable ways to explore digital IR before investing in more-expensive kit. There are probably other little-known gems out there, but here are five that I’ve actually used (listed in order of decreasing resolution):
Panasonic Lumix ZS3/TZ7
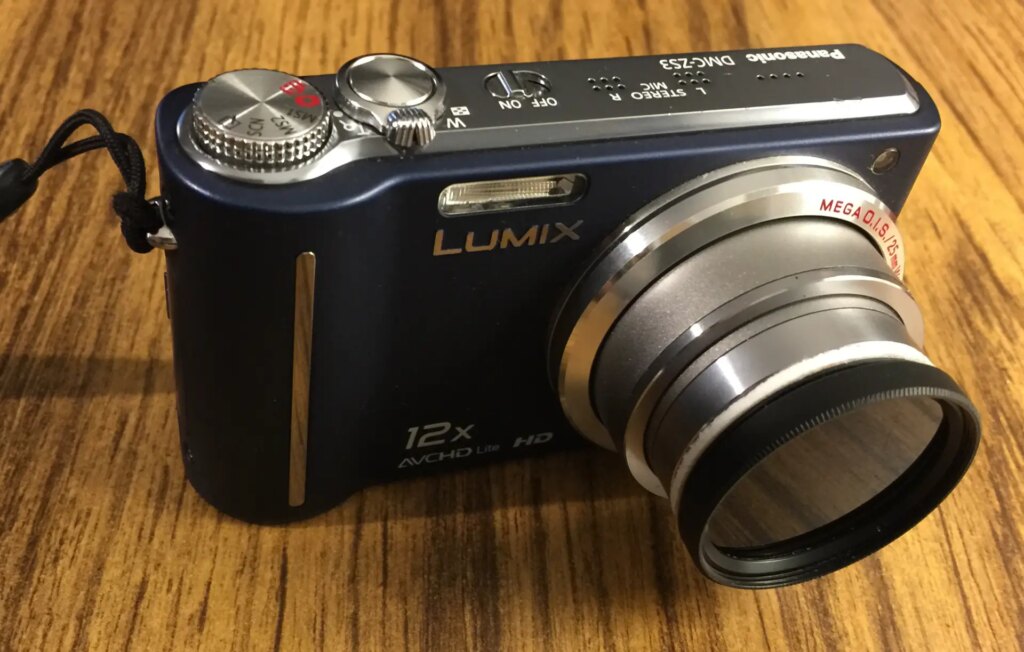
I recently converted this 10-megapixel camera to shoot infrared, just before my wife and I circumnavigated Iceland. The process was easy, and the camera performed beautifully. You can read more about it– and see five of its photos– in my first article for 35mmc. But here’s a sixth bonus image:
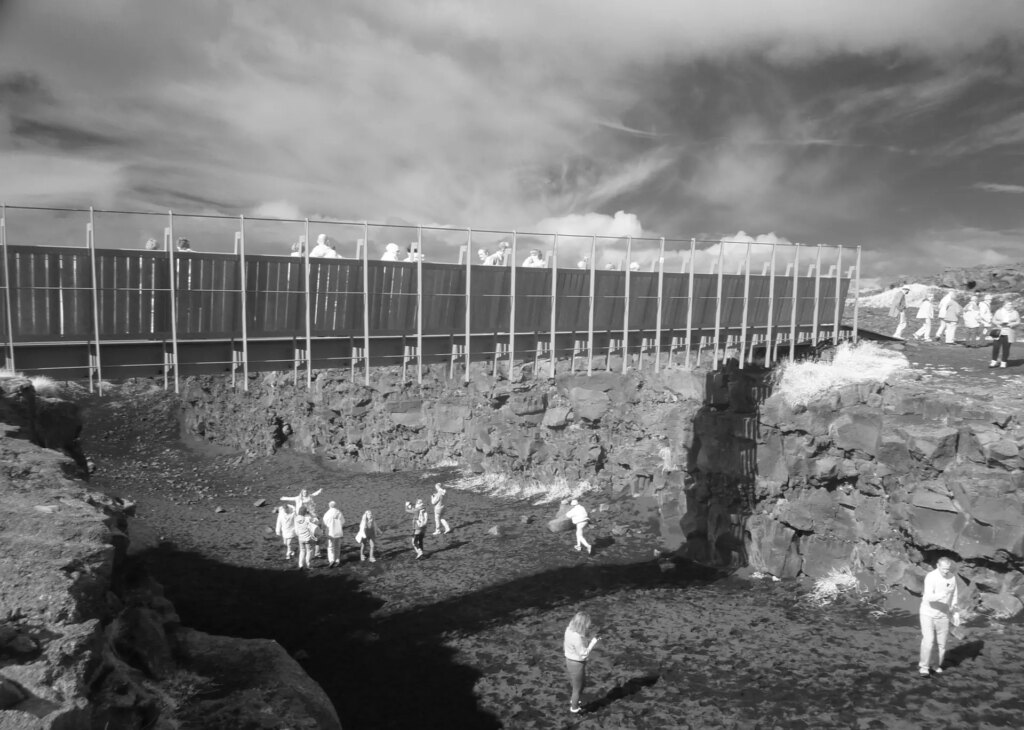
This 50-foot bridge in Iceland’s Reykjanes Peninsula spans one of the few places on earth where the North American and Eurasian tectonic plates meet on land, rather than under water. In Iceland, one can literally walk between North America and Europe in seconds… just stroll cross this bridge or the rift channel below it!
Minolta DiMAGE S414
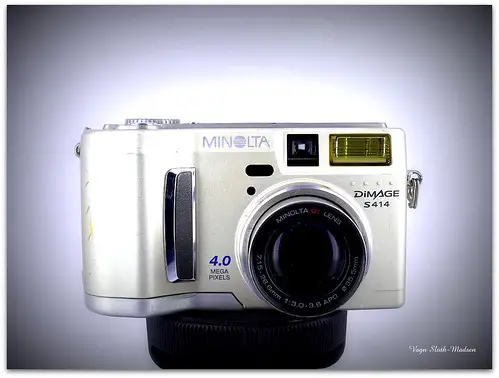
This handsome 4-megapixel point-and-shoot was not only a great travel companion, but also one of the two cameras that gave me the most beautiful color interpretations of infrared wavelengths. While many IR cameras output garish pink, red, orange or purple tones, the S414 “saw” lovely browns, raspberry reds, and creamy whites. Here’s an unadulterated shot taken at the New England Botanic Garden at Tower Hill, in Boylston, Massachusetts:
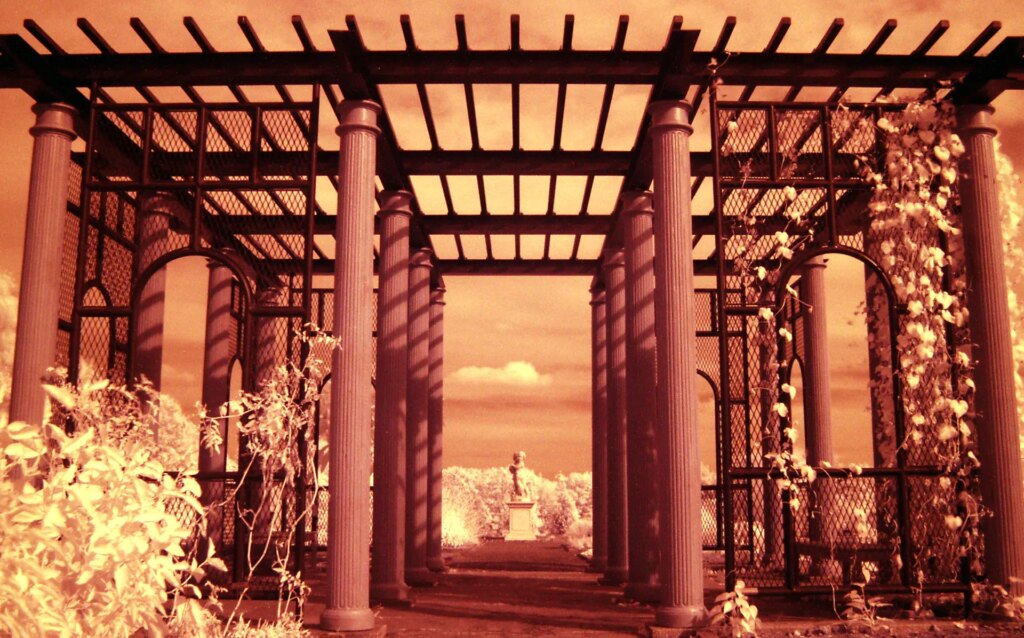
I didn’t want to risk losing colors like these, and left the S414’s IR hot mirror in place. Nor did I mind the long resulting tripod exposures. Sadly, I killed the poor thing by pressing a too-tight IR filter holder onto the lens too often. And after a couple years, the camera stopped working. Lesson learned.
Nikon Coolpix 990
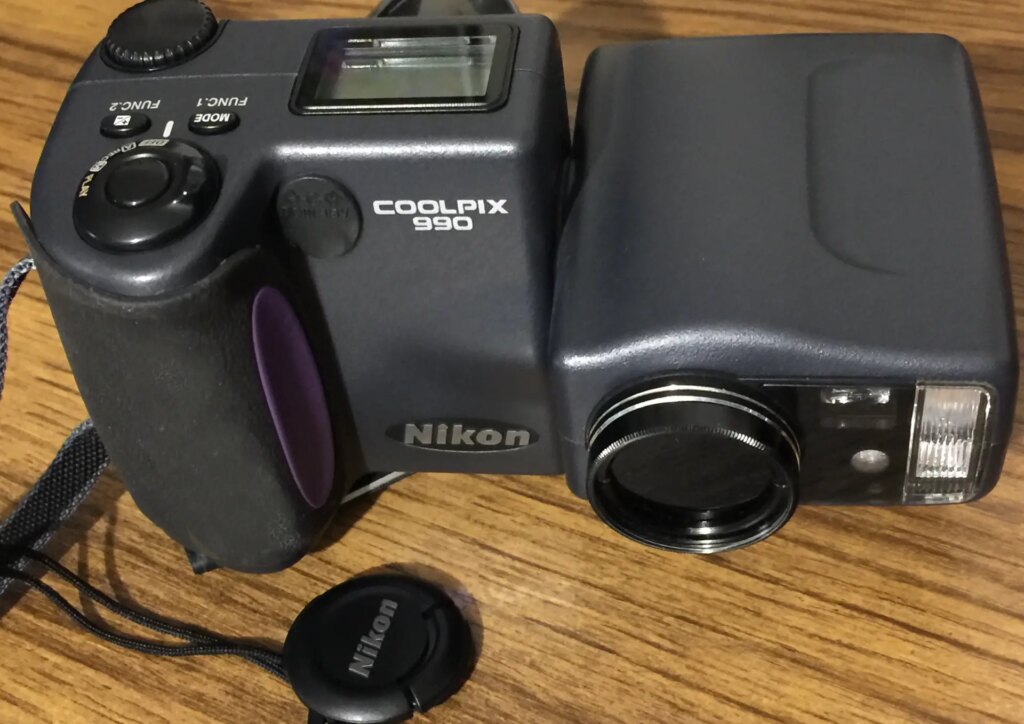
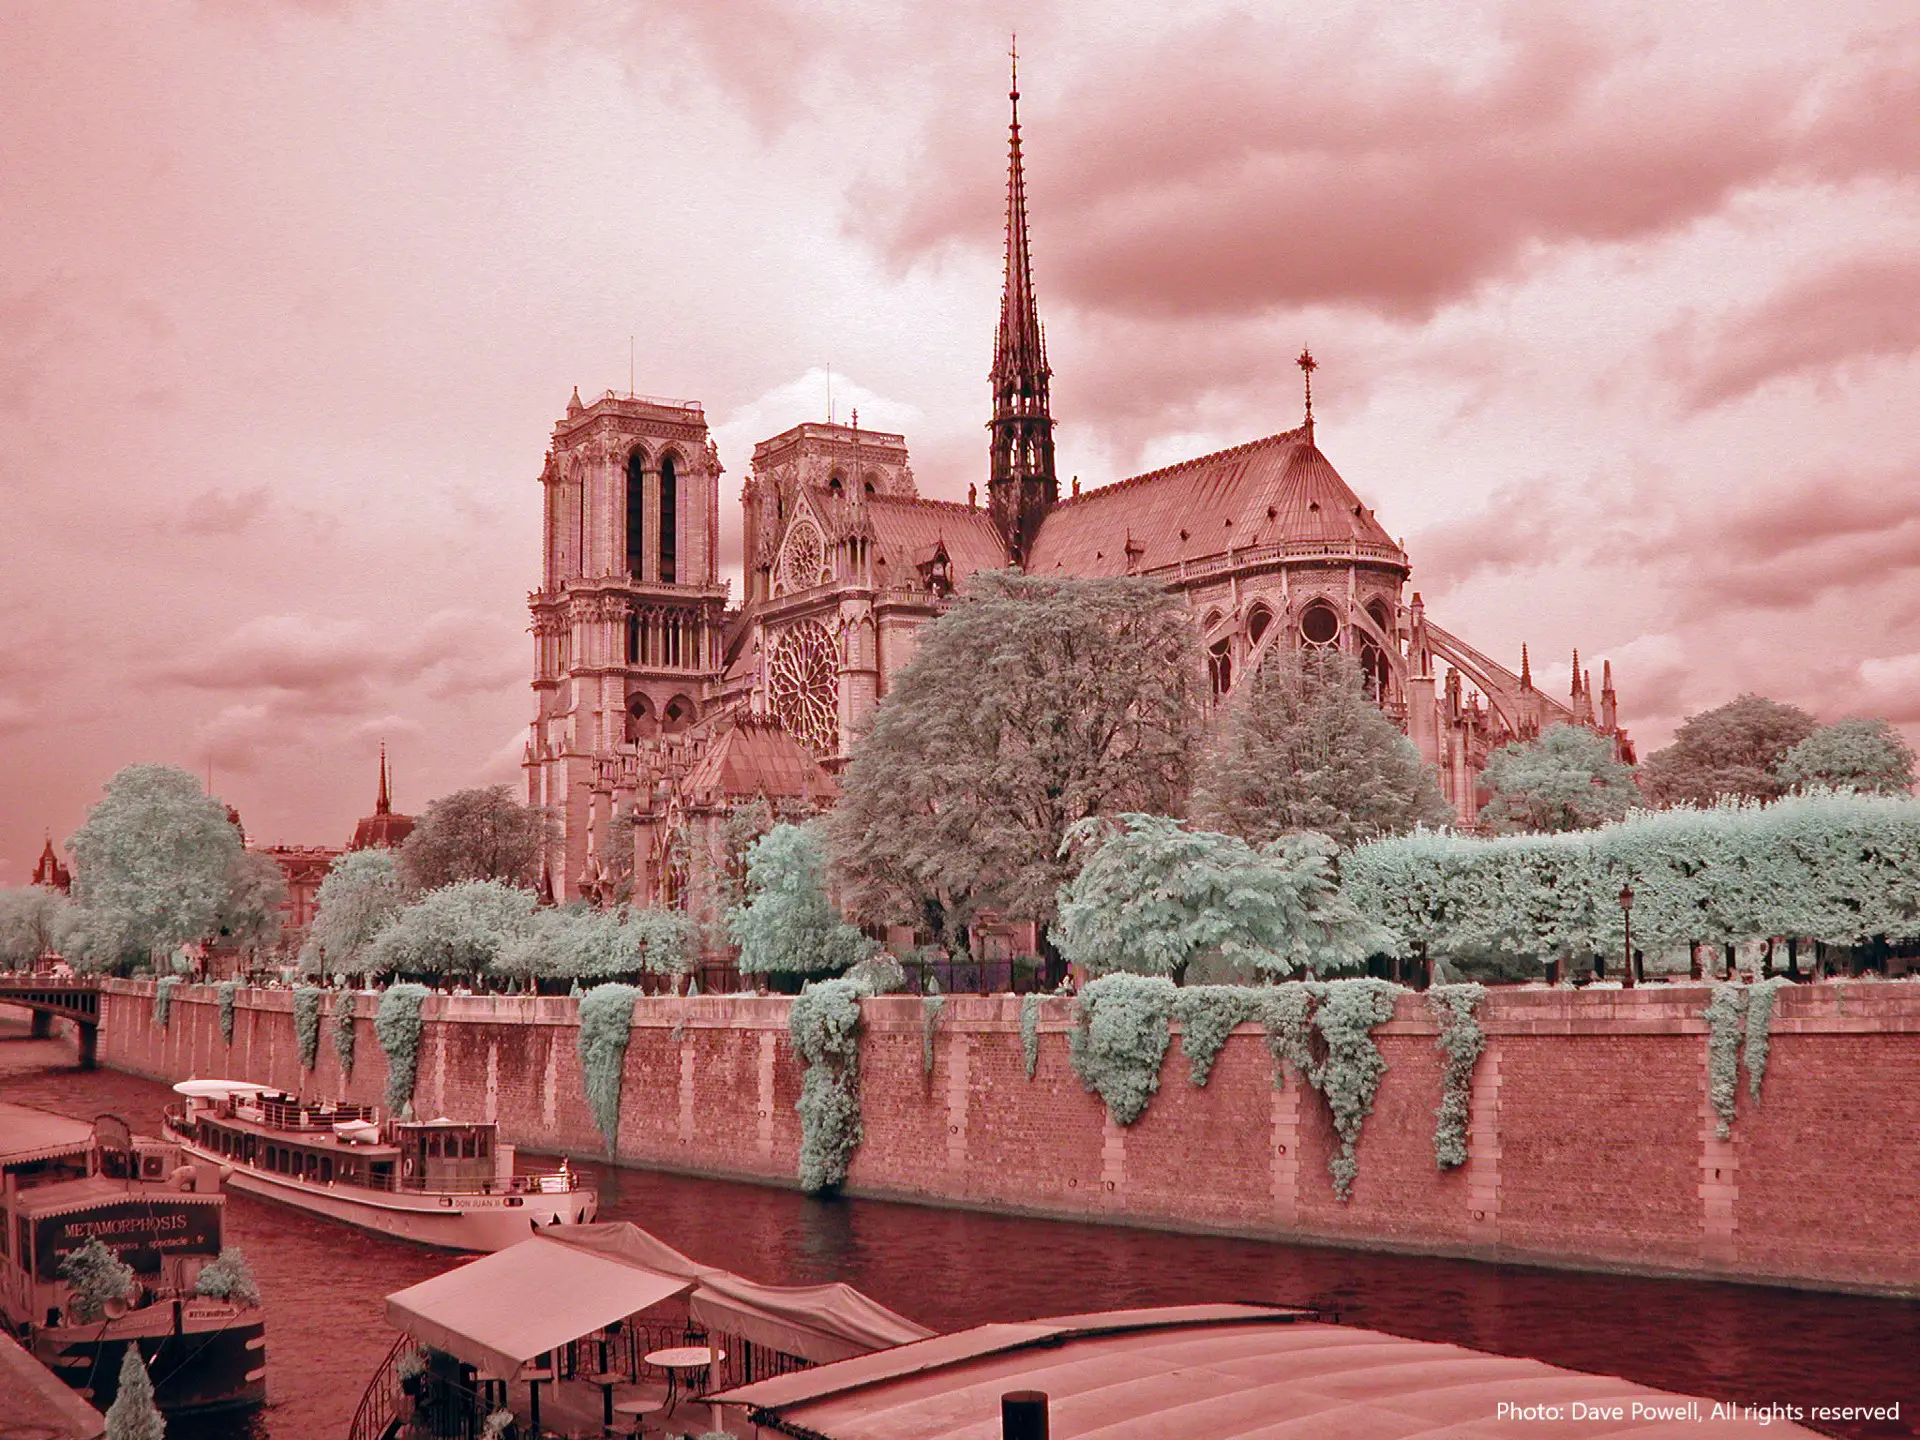
This IR-converted, 3.34-megapixel, Nikon Coolpix 990 isn’t exactly unknown to IR fans. But it’s a true gem whose CCD sensor translates infrared wavelengths into gorgeous “antiquarian” blacks, ruddy browns, teals and whites like the ones below– captured on a cloudy Paris day, only a few years before Notre Dame’s terrible fire:
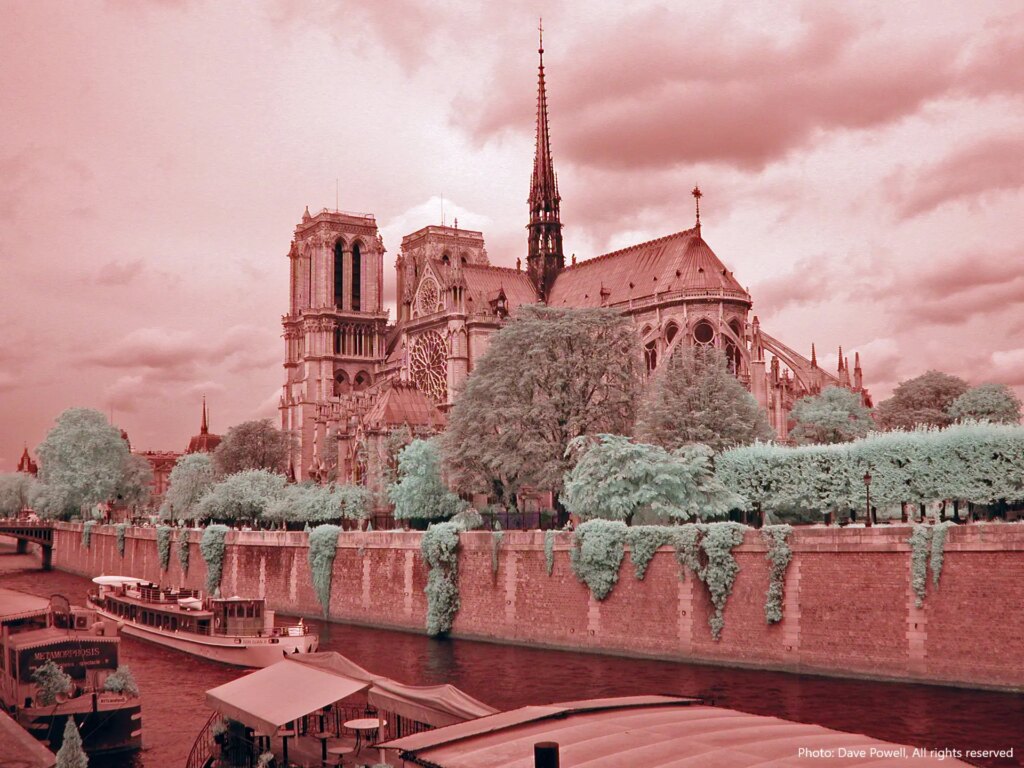
As with the Minolta S414, I rarely converted Coolpix 990 photos to monochrome. Nor did I “colorize” the above image in any way.
TIP: You won’t usually see an infrared camera’s output at its best until you spread its R/G/B-channel histograms across their full tonal ranges, using a photo editor’s Levels command. That’s all I did to the above file.
The 990 has a couple weaknesses, though:
• Strong pressure from installed AA batteries often breaks the battery-door latch. Before buying this camera (or its Coolpix 995 sibling), always confirm that the latch still holds batteries in their compartment! The photo below shows how I used a piece of scrap metal, the threaded knob from an old leather ready-case, and the 990’s own tripod mount to keep its battery door shut. (And yes, I could have just taped it closed, but where’s the fun in that?)
• The 990’s second problem is a rear LCD that’s virtually unusable on sunny days. Some creative hacksawing and Dremeling allowed me to attach the back of a cheap plastic slide viewer to the camera (using white double-stick mounting tape, as also shown below). This setup both shades and magnifies the LCD… making it much easier to frame and review shots. (TIP: Try this with other digicams’ small LCDs!):
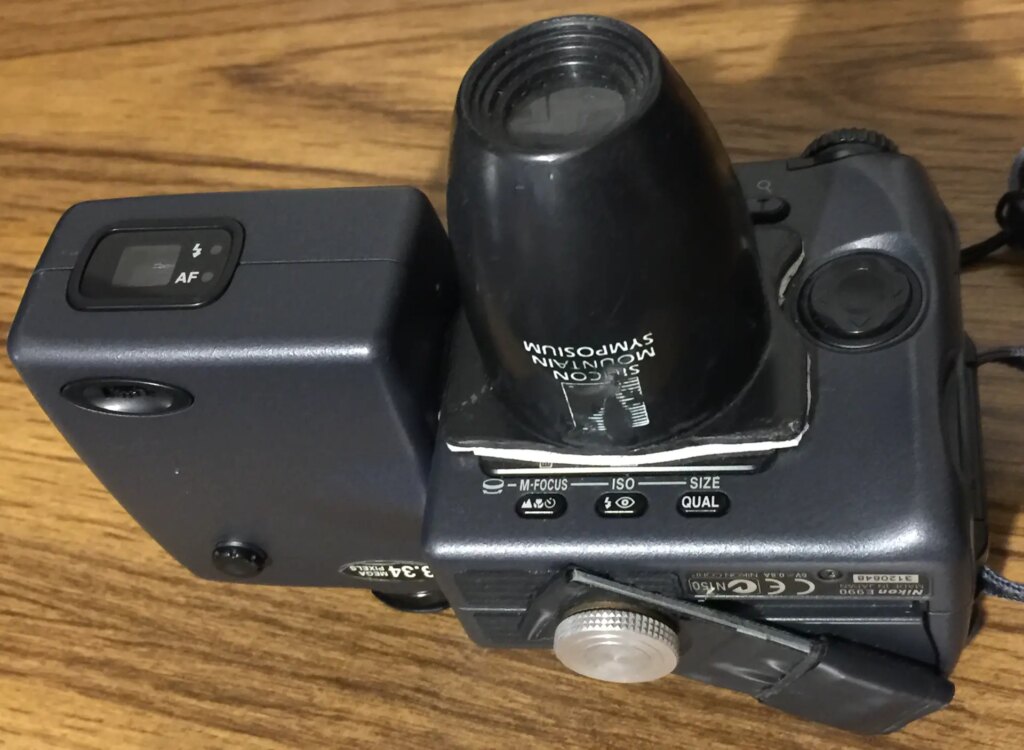
This circa-2000 camera may be low-res, and my customizations made it a tad awkward to hang around my neck. But I still use it for those wonderful CCD tones! In fact, just before Covid hit Europe, the camera accompanied my wife and me to Venice [article coming soon].
Olympus C-2100UZ (Ultra Zoom)
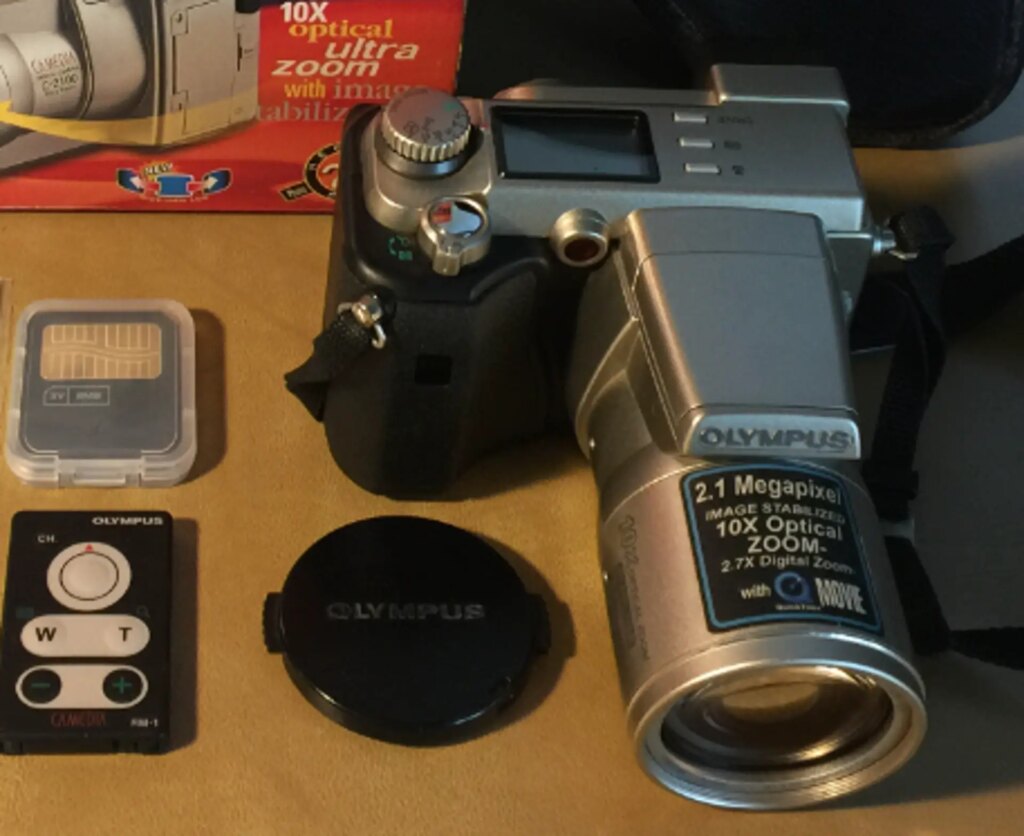
The 2.1-megapixel Olympus C-2020Z is a well-known IR gem (which doesn’t need converting for hand-held shooting). But I’ve never owned one. Instead, I happened across this long-nosed cousin: the C-2100UZ (Ultra Zoom). Both cameras use the same sensor, but the 2100UZ’s sits behind a stabilized, 38-380mm (equivalent), f/2.8-3.5 lens.
Here’s one of its IRs:
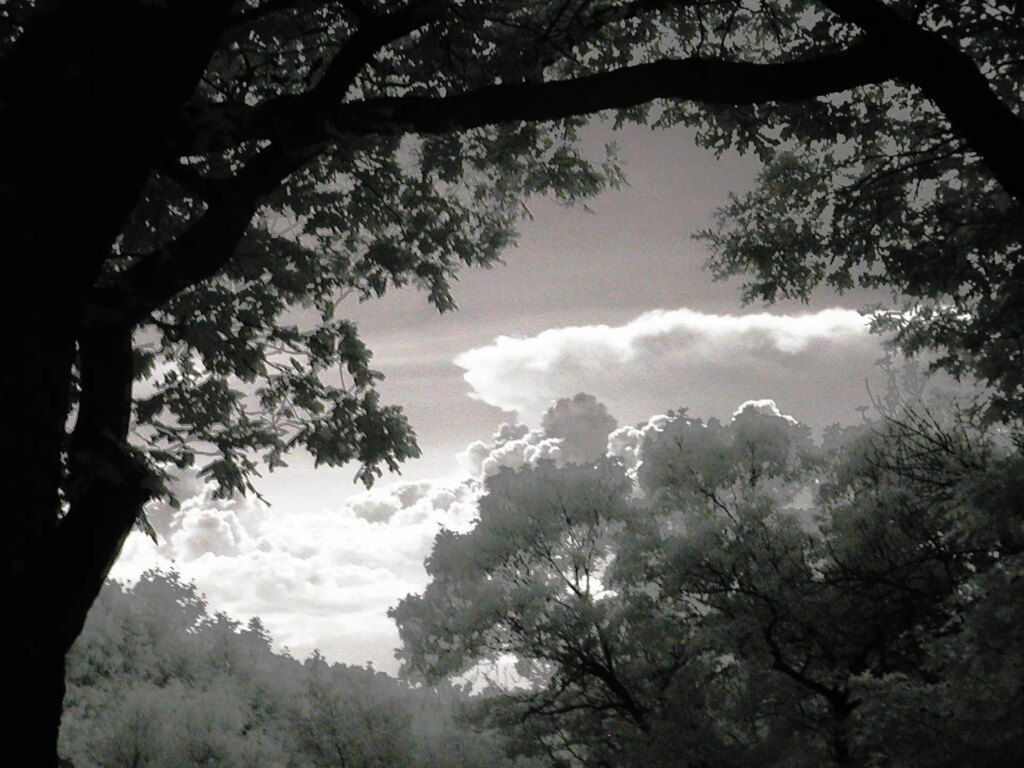
The camera’s two biggest drawbacks are the necessity of using a tripod when shooting infrareds (with the lens fully zoomed), and its use of SmartMedia cards (which can be pricey and hard-to-find today).
Still, it’s a great travel companion because of the excellent 10x zoom… and the fact that one can simply hold an IR filter up in front of the lens (at any zoom setting) to switch from visible-light to Infrared shooting!
But if you fear that 2.1 megapixels might be too few for making decent prints, consider our last affordable gem– the humble, unassuming:
Polaroid PDC-700
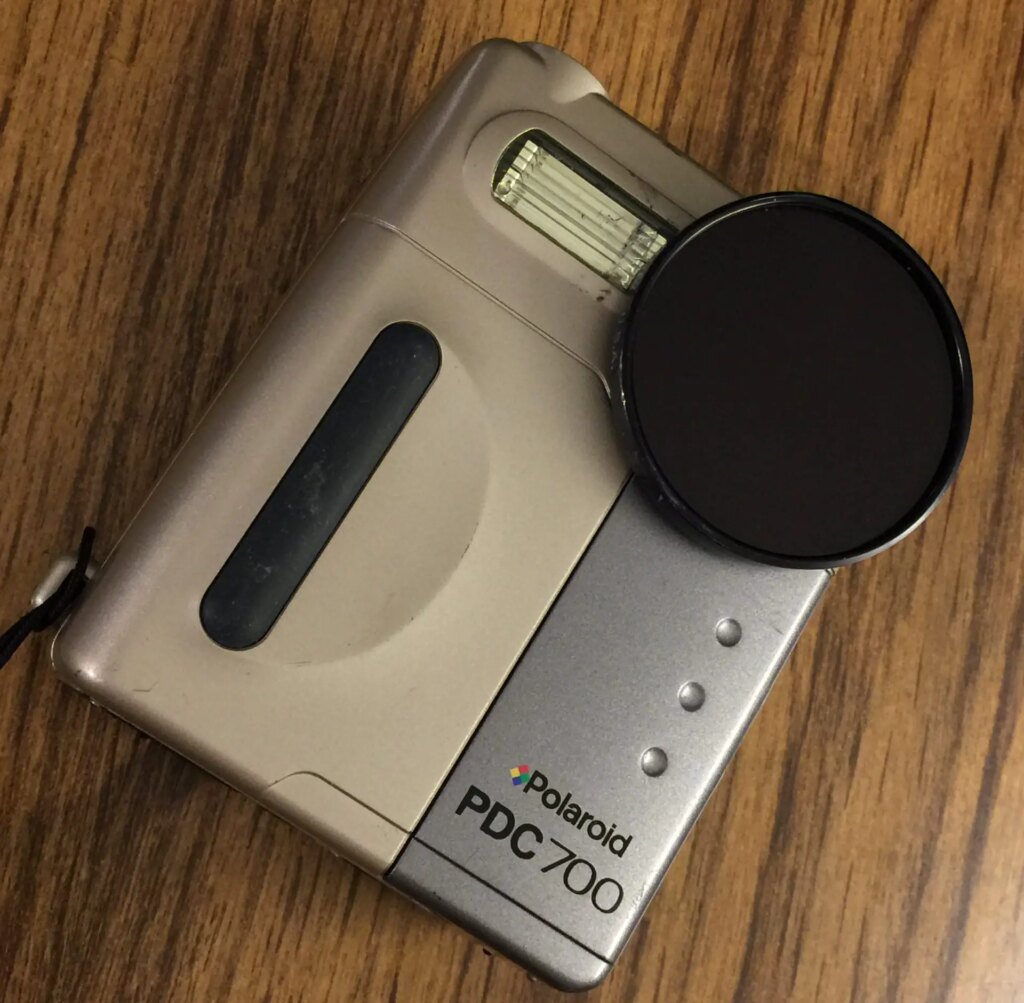
Before Polaroid declared bankruptcy in 2001, I wrote the user manuals for its PDC line of mass-market digitals. One day, I asked the company’s development engineer if any of their digicams were good for infrared. He recommended the PDC-700.
I brought it to the New England Botanic Garden at Tower Hill (mentioned earlier), with an infrared bandpass filter attached via double-stick mounting tape (as in the above photo). The camera was so IR-sensitive that I could even shoot from moving vehicles and at odd angles. I sat on the ground to capture these Tower Hill steps:
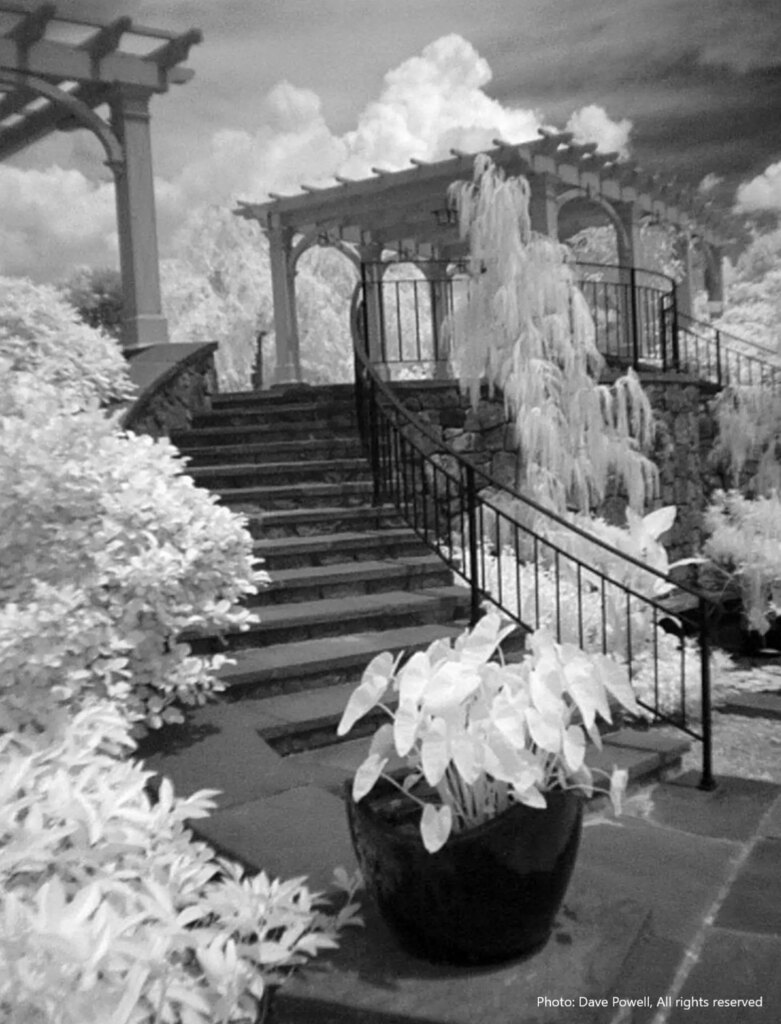
After seeing the photos, the folks at Tower Hill offered me an exhibit, which I called “The Invisible Garden.” The Boston Globe newspaper reviewed it favorably, and I sold a few 8×10 and 16×20 exhibit prints.
But that’s really quite astonishing, considering that it all resulted from a 0.8-megapixel camera! Put in perspective, when I first sent the camera’s original image file to my Epson printer, the printout was less than an inch tall! So how could I sell 8×10 and 16×20 enlargements? Three things made it possible:
• In Photoshop, I first converted PDC-700 source files to 32-bit mode. The higher data resolution smoothed the “tone banding” and “image breakup” that would have occurred during my extreme upscaling. (I dropped the enlarged images back to 8-bit mode for printing.)
• Also, most people accept some softness and “glow” as part of the “infrared look.” (Plus, the camera’s low resolution actually contributed nice film-like “grain.”)
• And third, my vastly enlarged prints held up well because people tended to view them from farther away than they would smaller prints.
A 12×18 print still anchors my gallery wall and draws visitors’ attention. It also constantly reminds me that camera specs aren’t as important as what the photographer does with them.
All Still Usable!
If you’d like to explore digital infrared, it doesn’t need to cost a lot! Consider starting with a Polaroid PDC-700, Olympus C-2020Z/C-2100UZ, or Minolta DiMAGE S414. As I write this, they all sell on eBay for under $40. You could also convert a Nikon Coolpix 990, but it still commands into three figures (for an unconverted unit). You may have to wait for a bargain! (Another well-known IR gem is Minolta’s 5.2-megapixel DiMAGE 7. I’ve never used one, but have read that it’s better for IR shooting than the later 7i model.)
However, the best buy of all may be Panasonic’s 10-megapixel Lumix ZS3/TZ7. It is compact, sports a stabilized 12x Leica zoom, and also sells for under $40. Sometimes, well under! And, as described in my earlier article, you can IR-convert it yourself!
TIP: And if you’d (initially) like to avoid buying an expensive IR bandpass filter, try stretching one or two pieces of heavy-duty black leaf-bag plastic (or holding a developed black slide) in front of your camera’s lens. The results will be soft and dark, but you’ll soon know if you’d like to delve deeper into our dramatic infrared world.
–Dave Powell is a Westford, Mass. writer and avid amateur photographer.
Share this post:


Comments
Dan Mountin on 5 Largely Unknown Digital-Infrared Gems – By Dave Powell
Comment posted: 03/08/2022
I recently converted a Lumix ZS8, a younger sibling to the ZS3 but with 14mp and 16x zoom. Bought a boxed, almost new example for $40 on an auction site. Spent an hour total converting it following a video online. Easy peasy!
I couldn’t be more delighted and the results have exceeded even my modest expectations! Full spectrum. No focus issues. Can be used hand held. Because I’m using an external IR pass filter, I can still swap and use an IR cut filter for “normal” photos. All in, the camera with IR pass filter cost less than $75!!
Comment posted: 03/08/2022
Tim Bradshaw on 5 Largely Unknown Digital-Infrared Gems – By Dave Powell
Comment posted: 03/08/2022
I had assumed that to use a digital camera for IR you usually needed to spend lots of money to have filters removed. But I think what you're saying is that you really only need to do this if you want it to be reasonably fast: if you're happy for it to have some really minute effective ISO, you can often just strap an IR filter to the lens, put it on a tripod, and use it. Is that right?
I'm asking because I have an ancient Minolta Dimage Xg which I have been loth to throw away and I might have just found a use for it!
Comment posted: 03/08/2022
Toby Van de Velde on 5 Largely Unknown Digital-Infrared Gems – By Dave Powell
Comment posted: 04/08/2022
I’d be keen to read about your post process workflow with your IR work.
Have you got an article about this please?
I have a D90 converted to 720mm and always open to new processing methods.
Toby.
Comment posted: 04/08/2022
Ben Garcia on 5 Largely Unknown Digital-Infrared Gems – By Dave Powell
Comment posted: 04/08/2022
So if I was to test a camera, which filter (frequency-wise) should I try?
Comment posted: 04/08/2022
Eric on 5 Largely Unknown Digital-Infrared Gems – By Dave Powell
Comment posted: 04/08/2022
Comment posted: 04/08/2022
Comment posted: 04/08/2022
Comment posted: 04/08/2022
Keith Devereux on 5 Largely Unknown Digital-Infrared Gems – By Dave Powell
Comment posted: 09/08/2022
Comment posted: 09/08/2022
Jiri Krecek on 5 Largely Unknown Digital-Infrared Gems – By Dave Powell
Comment posted: 28/12/2022
IR is an awesome and inspiring way to give a new life to something many of us would normally leave buried at the bottom of the lowest drawer in a closet. It certainly piqued my interest to such a degree I had two cameras converted and now predominantly shoot IR with some regular B&W or color peppered in between.
Took me a good while to figure out a reasonable postproduction workflow to bring out vintage grain and halation back into the digital IR pictures, but now, life is good!
Glad you've given these cameras a second chance!
And for those who would scoff at a 3MP or an 8MP camera, they clearly forgot how tiny those RAW files are! Lightning fast processing...
Comment posted: 28/12/2022