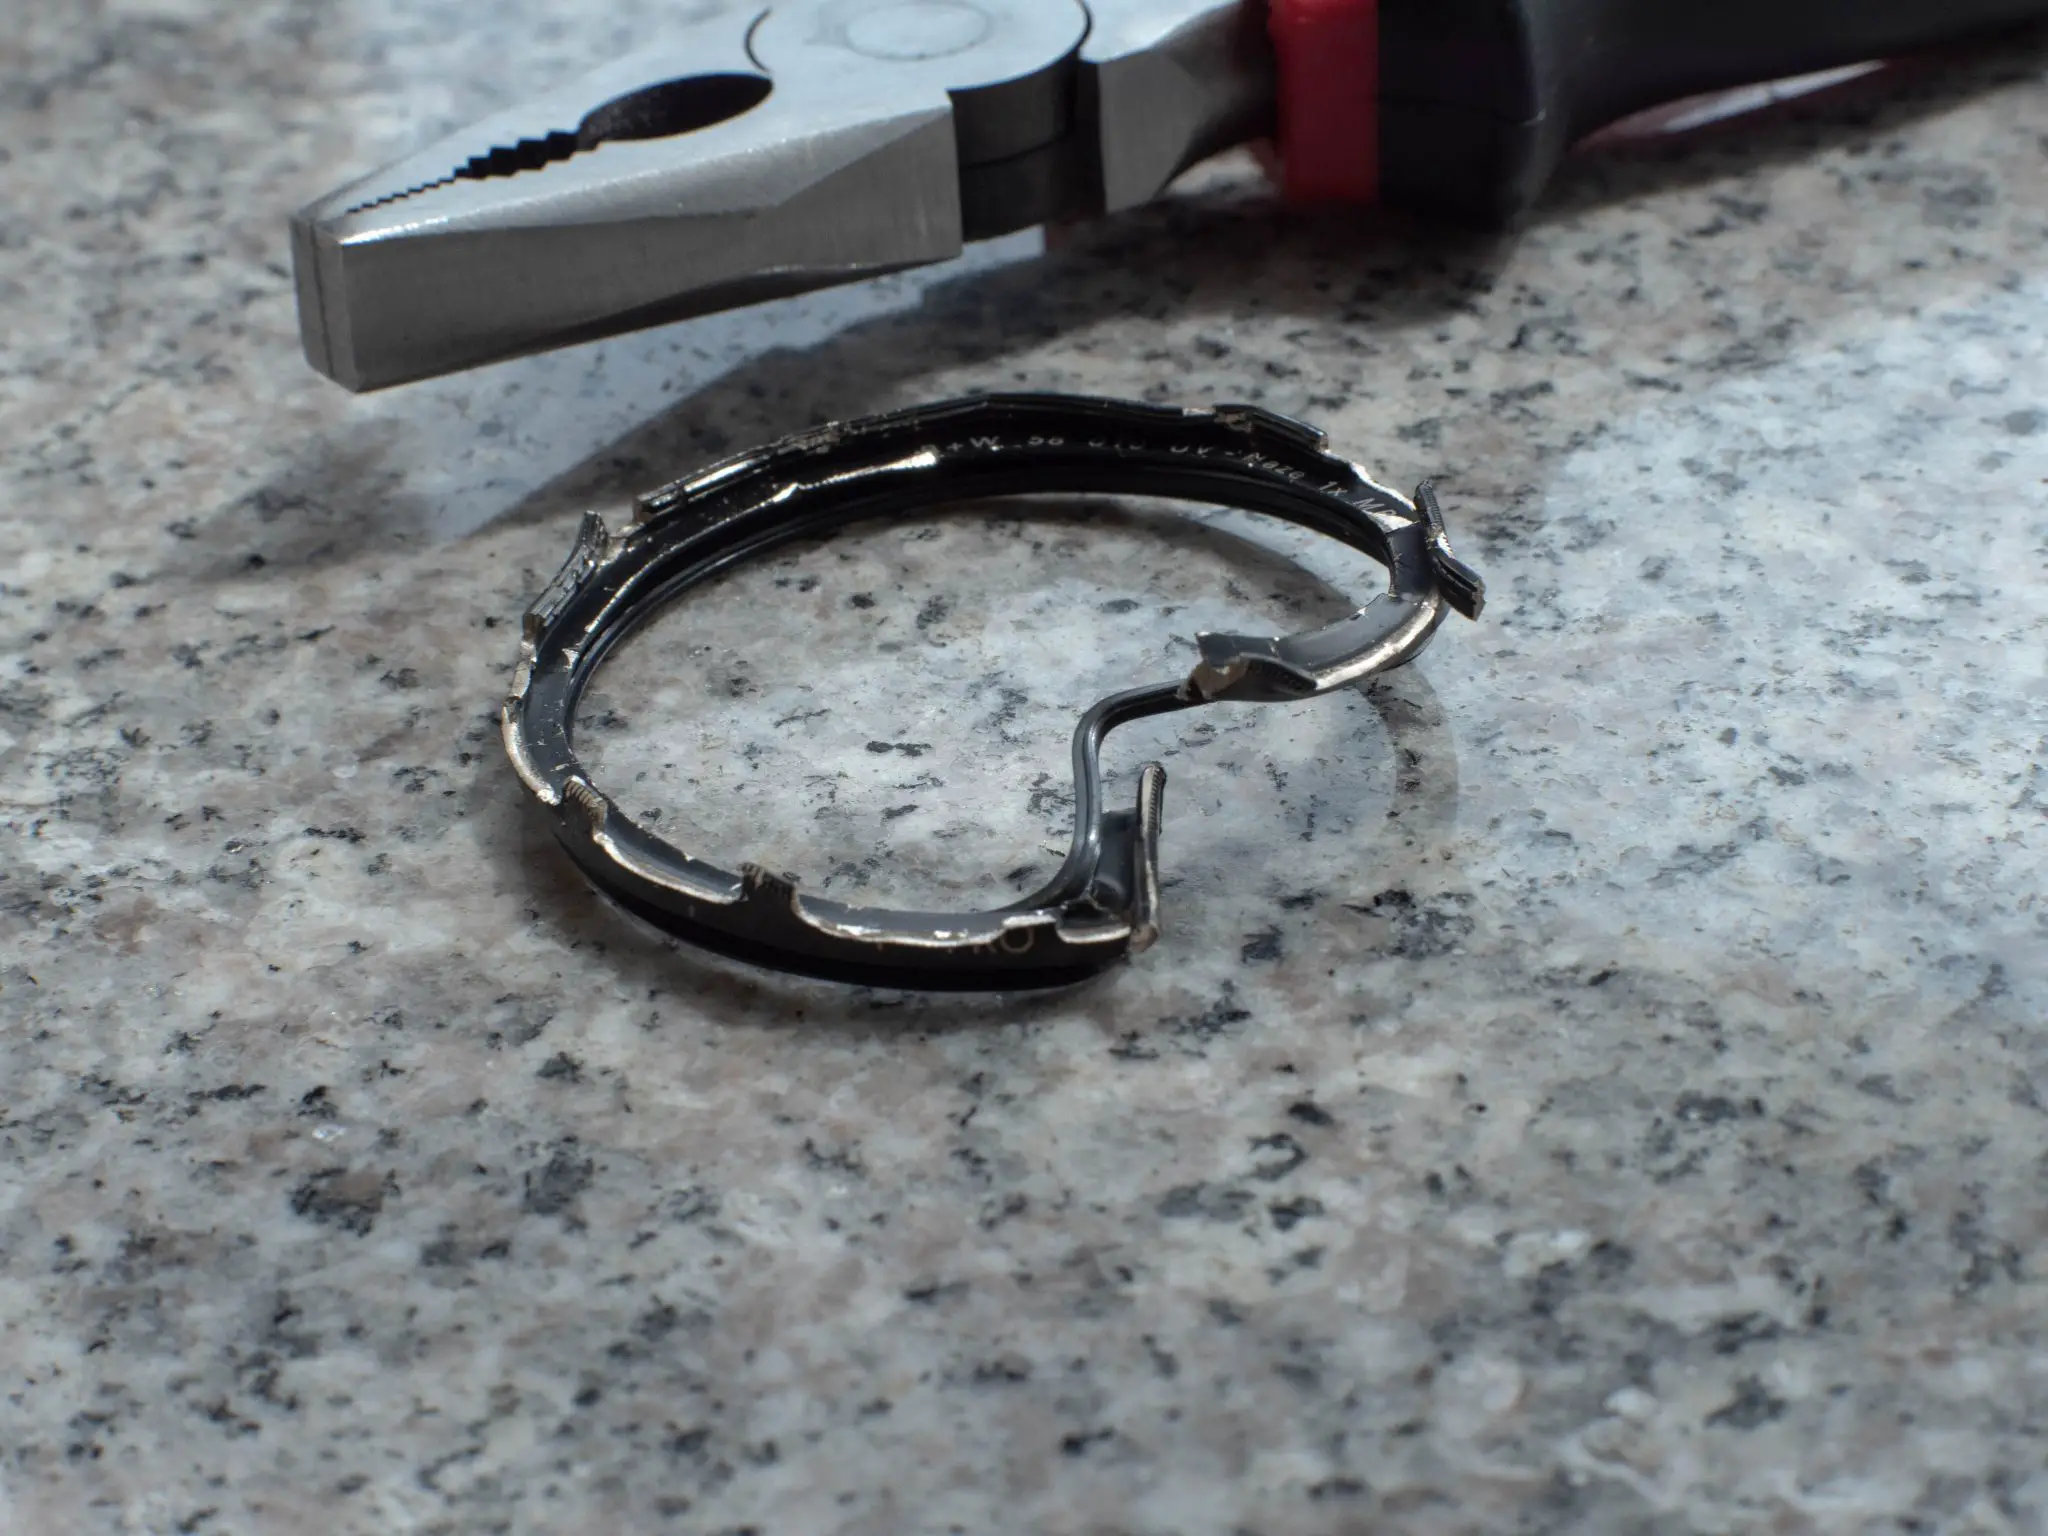
The errant lens filter and the new pliers
Here is how I repaired my Voigtlander Nokton lens, the 42.5mm for the M43 system. I had dropped it. The lens filter, a B&W ultraviolet model, was shattered, and, worse, stuck on. I am sure that what I did is not recommended. I share for what it is worth.
The peril of carrying two cameras is juggling them. I had dropped the digital while fumbling with the analog. I didn’t notice until later that I had cracked the lens filter. Since it also was dented, that meant among my tasks for the day, my first after arriving in Shenzhen, China, was to locate a pair of pliers. I am astonished at the image quality on the frames after the accident. My shots are still useable by my standards.
I was not sure the lens itself was undamaged, but to the naked eye it looked as if it was still good. It is my favorite, for the wide aperture of f/0.95 and the color rendition. But no matter what I did, I could not remove the lens filter.
The initial task was purchasing pliers. I had to translate the term. The internet made that easy enough. It also provided pictures. But China has developed, which means, alas, consumers treat products as disposable. As my guide explained, people don’t use pliers much anymore, because they don’t bother to fix things. We wandered around a shopping district too fancy to have hardware stores. We eventually found a supermarket with a modest selection of tools, and, among them, heavy-duty pliers for under $1.
The pliers turned out to be more robust than the lens filter. I had the presence of mind to remove the lens from the camera body, to avoid somehow harming the mount with my violent exertions. All I succeeded in doing was prying off bits of the metal perimeter. I realized at the rate I was going, there wouldn’t be much left to grip. I had to try another tactic. I had an idea.
A digression. My father was a handyman. He earned a doctorate in mechanical engineering. He worked in the auto industry his whole career. He was always tinkering with stuff around the house. My wife scoffed at me. Her late aunt, who made it to ninety-nine years, used to call me a handyman. My wife was right that I could not live up to the title, as much as I was honored. I changed the lightbulbs when we visited. I also moved the clocks forward or backward as needed, for daylight savings time. Perhaps the trick with my lens filter establishes my bona fides. Or at least it remedied a specific problem.
Here is what I did. I turned over the pliers. They had rubber coated handles. I gently tapped on the filter. The surface was already so compromised that bits of glass had fallen in. It was easier than I anticipated to break through altogether; the challenge was avoiding hitting the lens itself. I believe I succeeded, though I suppose I should take a loupe and check out the front element. Reviews customarily describe the lens as “built like a tank.” I can attest that it is sturdier than a lens filter.
Then I could gain greater purchase on the thread. I had the right idea. But there was an even better approach. Once I was holding onto a thin ring of metal, sans the interior circle of glass, the former could be crumpled and peeled away from the threading of the lens.
Photography again taught me patience. I am ready to head out again to document my days…
Share this post:


Comments
David Hill on How I Removed a Cracked, Stuck-On Lens Filter – By Frank H. Wu
Comment posted: 05/07/2018
Art Tafil on How I Removed a Cracked, Stuck-On Lens Filter – By Frank H. Wu
Comment posted: 05/07/2018
Although I've used the Incredible Hulk method of removing messed-up filters in the past, I've found a better and readily available method of doing this.
Since most shoe soles are of a "Gum Rubber" or synthetic composition today, I just take off my shoe, turn it sole side up, firmly press the filter and lens into the sole and turn.
You can generate a tremendous amount of torque to the stuck filter especially if you're holding the shoe between your legs.
Given that the outer edge of a filter is serrated it'll dig-in to the filter without slipping.
Since I discovered this trick about 50 years ago, I haven't had any problems with stubborn/stuck filters.
I hope this helps.
Graham Orbell on How I Removed a Cracked, Stuck-On Lens Filter – By Frank H. Wu
Comment posted: 06/07/2018
David Hill on How I Removed a Cracked, Stuck-On Lens Filter – By Frank H. Wu
Comment posted: 06/07/2018
ROGER B on How I Removed a Cracked, Stuck-On Lens Filter – By Frank H. Wu
Comment posted: 04/04/2021
Can use a pin, or toothpick tip, or cotton swab (I remove the bulk of cotton before using) to apply an ever so tiny amount of the oil.
This tiny amount of lubricant can be evenly distributed on the threads by installing and removing the filter several times, then carefully wipe off any residue. Just a 'whisper' of lubricant is all that is needed to do the job.
The only thing I don't like is if any oil gets on the lens element. It is tough to remove.
Concerning filter thread quality, my best luck has been with the B W ones, and same goes for their hoods. There is some feel of quality when installing that brand, IMO. I'm sure there are others that are just as good. I tend to avoid the cheap Chinese knockoffs, but not always.