Epson V800 – Home Scanning Colour Negatives – by Aukje

By Aukje

My second year of shooting film Part 14

(read Part 13 here)

A while ago I decided to take the next step with my film photography, or moreover in gaining knowledge and understanding of how the final image comes about. Today I want to share the why, what and how of my scanning adventure.

Why would I want to scan myself?

Last September my man and I visited Scotland for a two-week holiday. I had anticipated this trip for quite a while, because Scotland is one of my favourite places to go, it’s just so incredibly beautiful. For some reason we had not been there since I started my photography obsession, so I had been waiting for a chance to shoot there. And this time I would not only shoot digital, but I brought my M2 as well. After the holiday I sent my film to a new lab, because I had a disappointing experience with spots on scans a while back with Ag photo lab. Therefore this time I decided to give Filmdev a try. However when the scans came back, I was disappointed, I didn’t like the look, and they needed quite a bit of work to get them to my liking. I realised however that it was too soon to blame the lab, it just meant that I would need to start a conversation about how I prefer my scans. But here is my problem: I didn’t really know what to tell them. I felt I needed more knowledge of the scanning process to have a meaningful discussion with a lab.
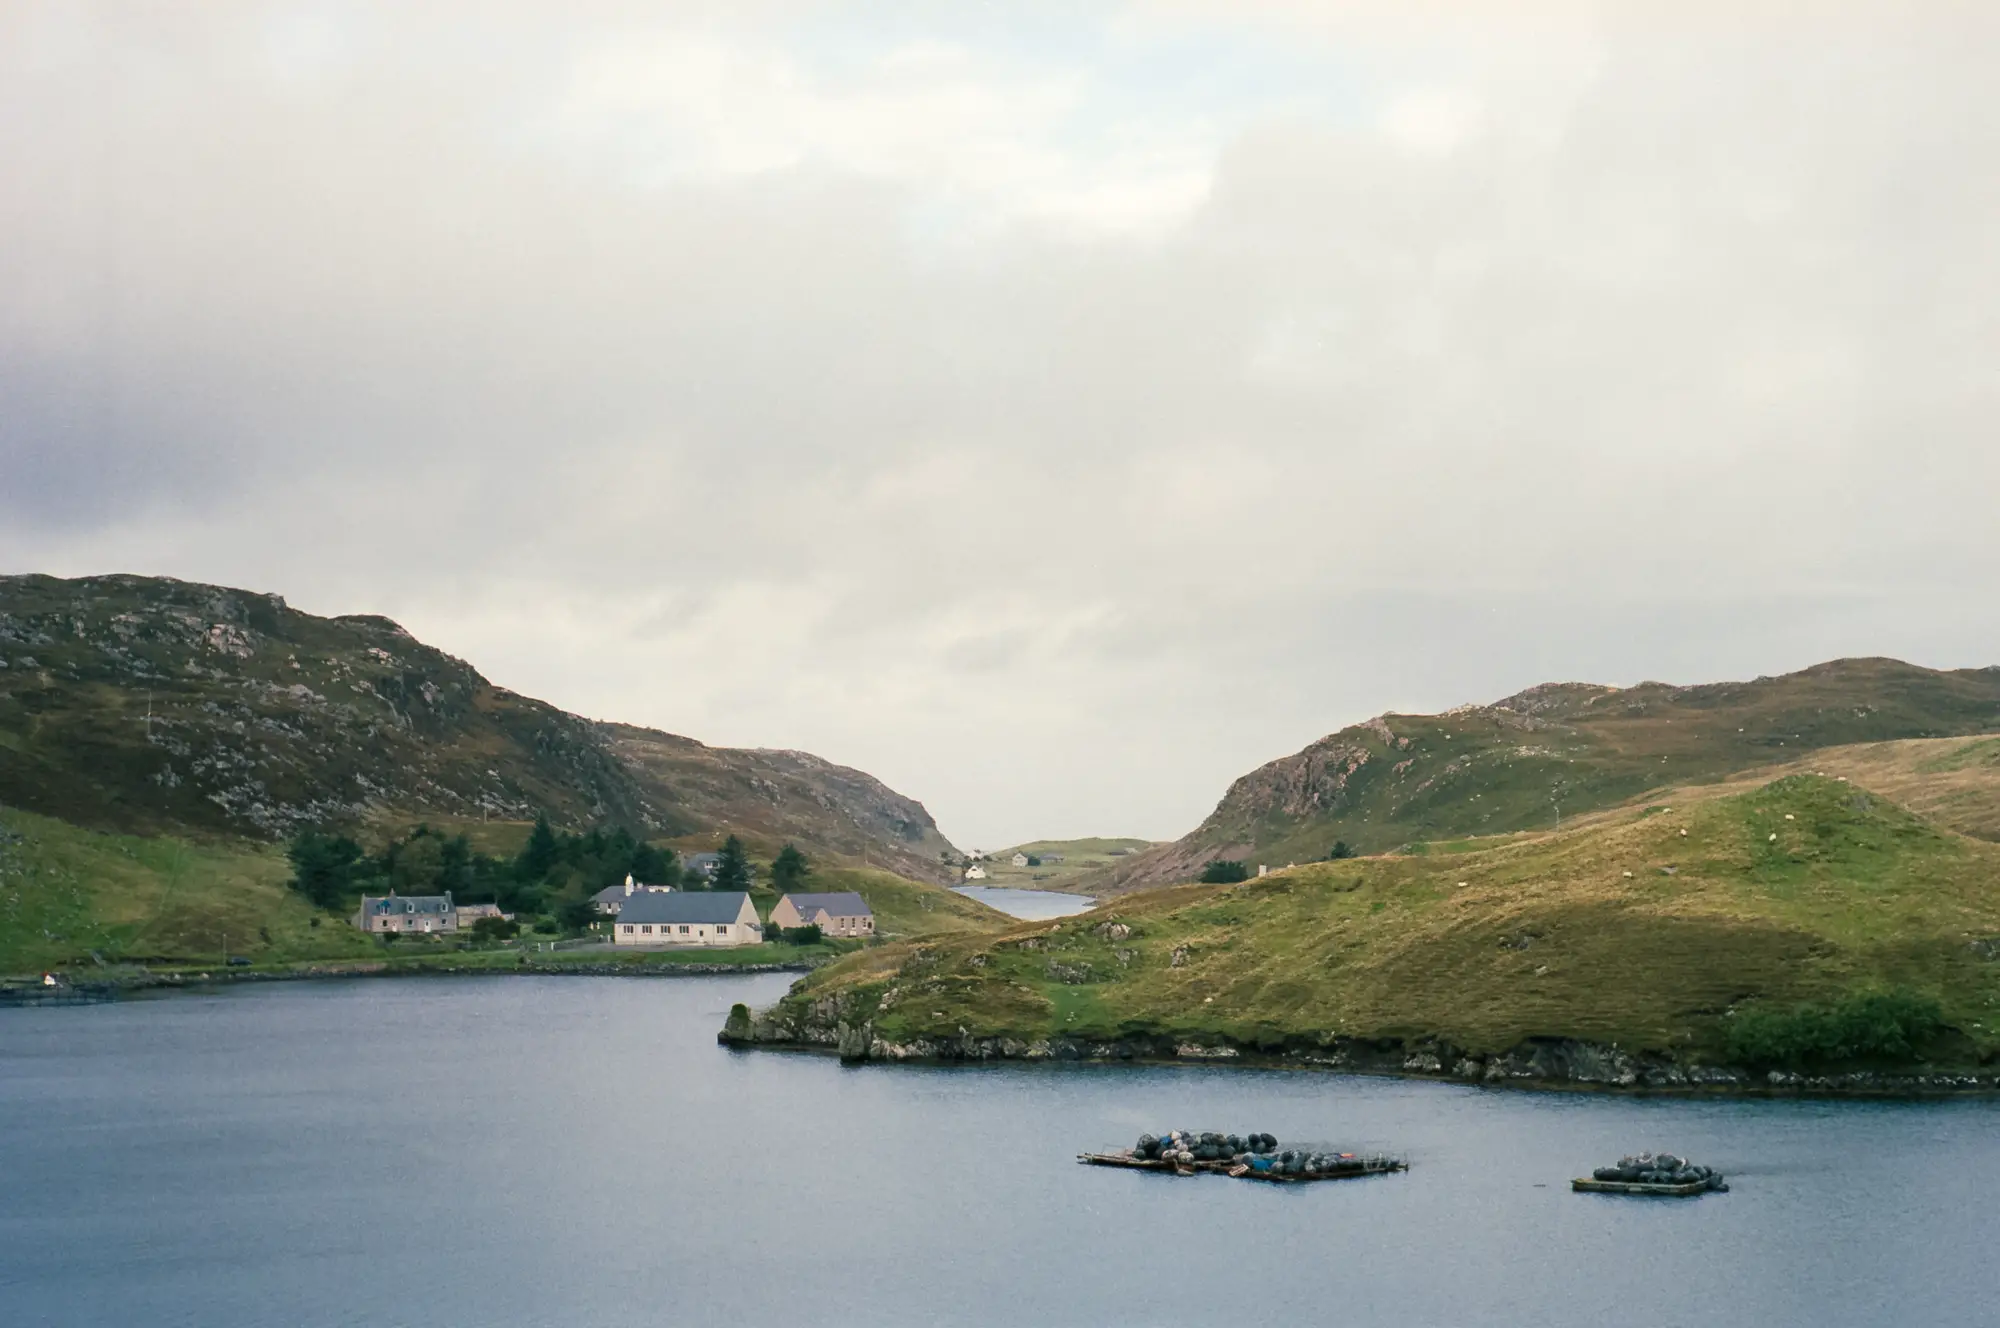
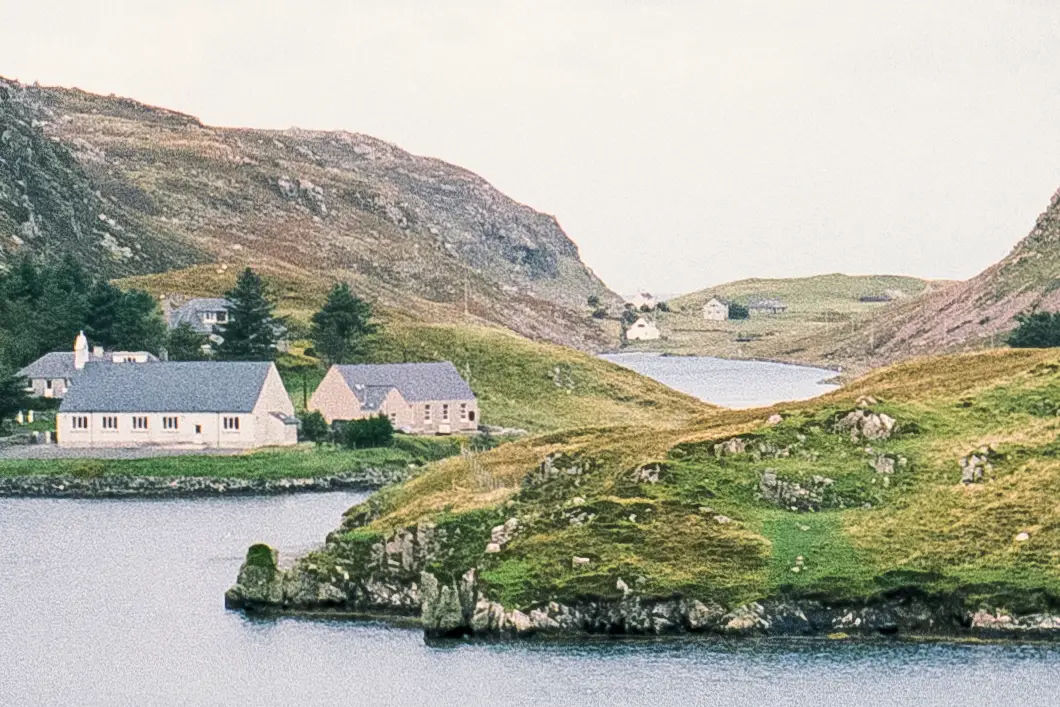
One of the photos from Scotland that led to buying a scanner. This file is scanned by myself.
One of the photos from Scotland that led to buying a scanner. This file is scanned by myself. (Kodak Portra 400)

Besides this experience I had been toying with the idea of home scanning earlier. There have been a couple of posts on this site discussing the cons and pros, and I did like the idea of having more control. But up till now I was afraid that my own scans would never be as good as the scans from the lab, and I felt that it would be a huge frustration spending a lot of time scanning with results that are always second-best. However the experience with the scans I didn’t like pushed me over the final hurdle, and I decided to go and buy a scanner. If only to get more experience, and get to the point where I can tell a lab exactly what I want.

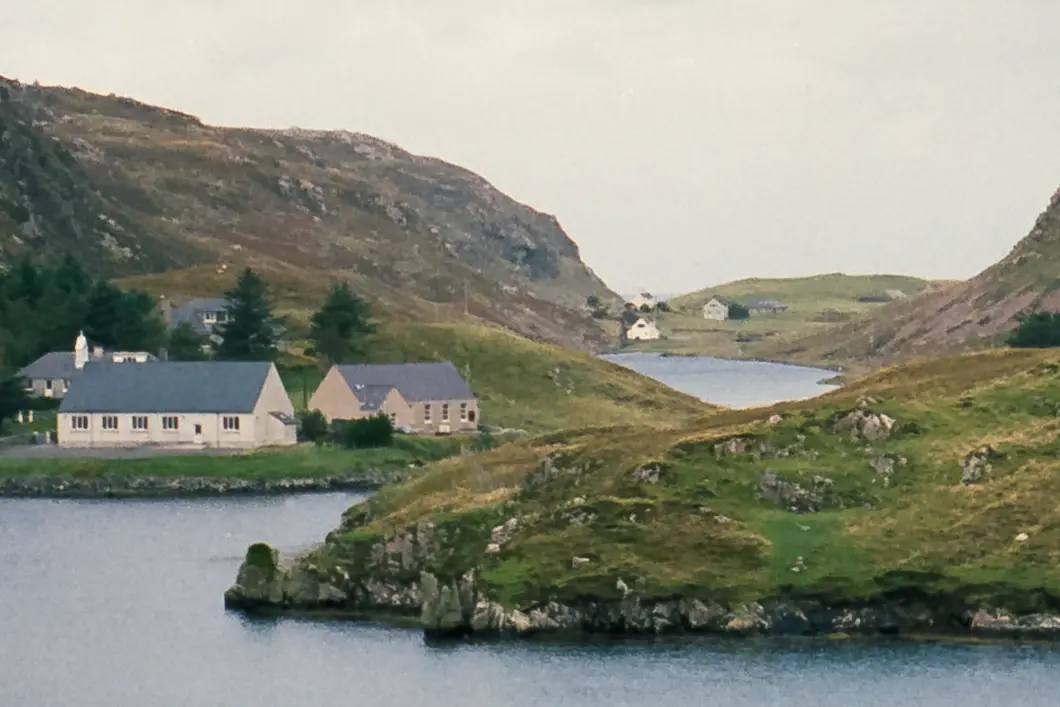
The issue with the scans I got from the lab are, I believe now, due to sharpening. Here are a few crops from the image above, where you can see the difference between the scans from the lab, my own scan, and a scan with added sharpening in Lightroom. My conclusion is that I don’t like the grainy structure you get from sharpening.
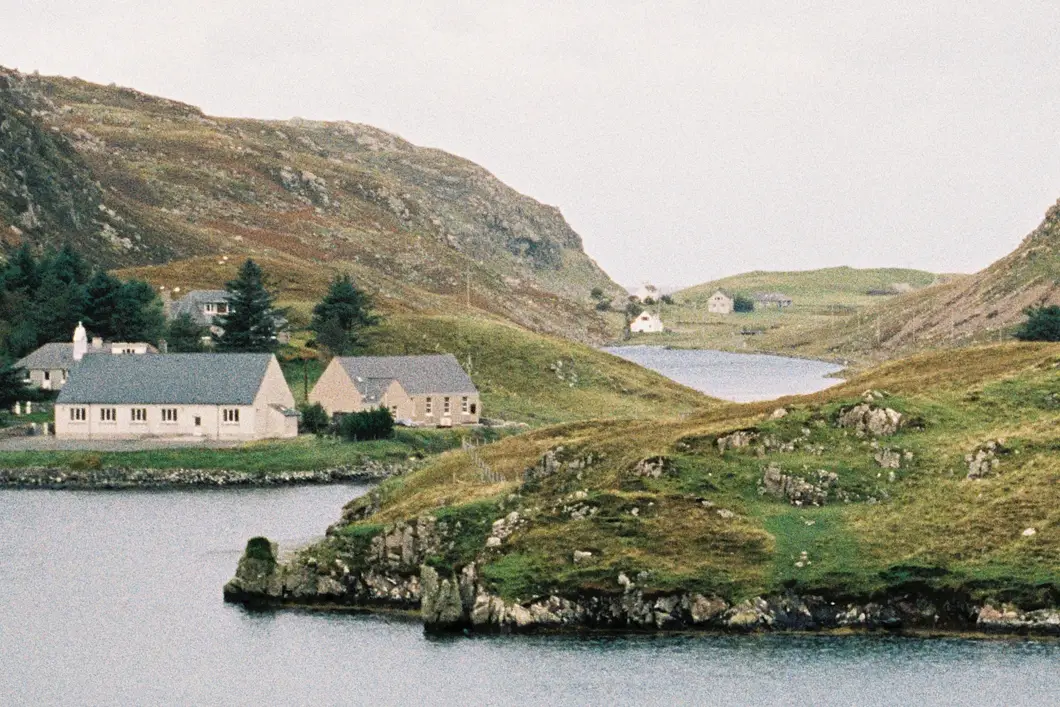
Scan from Filmdev.co.uk
Scan from Filmdev.co.uk with a rather grainy structure
Scanned on my V800
Scanned on my V800
Scanned with the V800 with added sharpening in Lightroom. The texture is now similar to the scan from Filmdev.co.uk
Scanned with the V800 with added sharpening in Lightroom


Which scanner?

Well after the first decision of buying a scanner, the next question becomes which one. After reading a lot online, and taking my budget into account, I decided to go for an Epson Perfection V800 Photo. I decided to go for a flatbed scanner because of flexibility and ease of use (I also scan instax photos). I started with the V600, but I was a bit disappointed with the quality of the scanner itself, it didn’t feel very robust. I also read that the quality of the colours would be better with the V800, and since I mainly shoot colour I decided to put down the extra cash. I think if I would have shot mainly medium format film in black and white I would have kept the V600, but with the smaller 35mm you need all the resolution you can get.

M2 with Summilux 50mm on Ektar 100, scanned on the V800 with auto exposure and minimal post processing.
Scanned on the V800 with auto exposure and minimal post processing. (Kodak Ektar 100)

Software and settings

There are a couple of options with respect to the software to use with your scanner. This is all very personal of course, but I decided to go for Silverfast. There are three main choices:

  1. The Epson Scan: the software that comes with the scanner.
  2. Some version of Silverfast (by LaserSoft Imaging). With this scanner Silverfast SE 8, the most basic version of their software, is free. Upgrades can be purchased afterwards. The version I use is Ai studio 8, which I bought for 99 dollar, including a calibration target to be used when scanning slide film.
  3. Vuescan by Hamrick: also widely used, and can be bought for 80-90 dollar for the professional version, or about 30-40 dollar for the standard edition.

I did a trial with Vuescan and I didn’t immediately like it, so I started with Epson Scan and Silverfast, as the basic version of Silverfast came with the scanner. I decided to go for Silverfast because there were more options for preparing the scan and defining the scan areas. Besides that, I liked the auto exposure scans better from Silverfast. Here is a comparison between a scan from Epson and Silverfast:
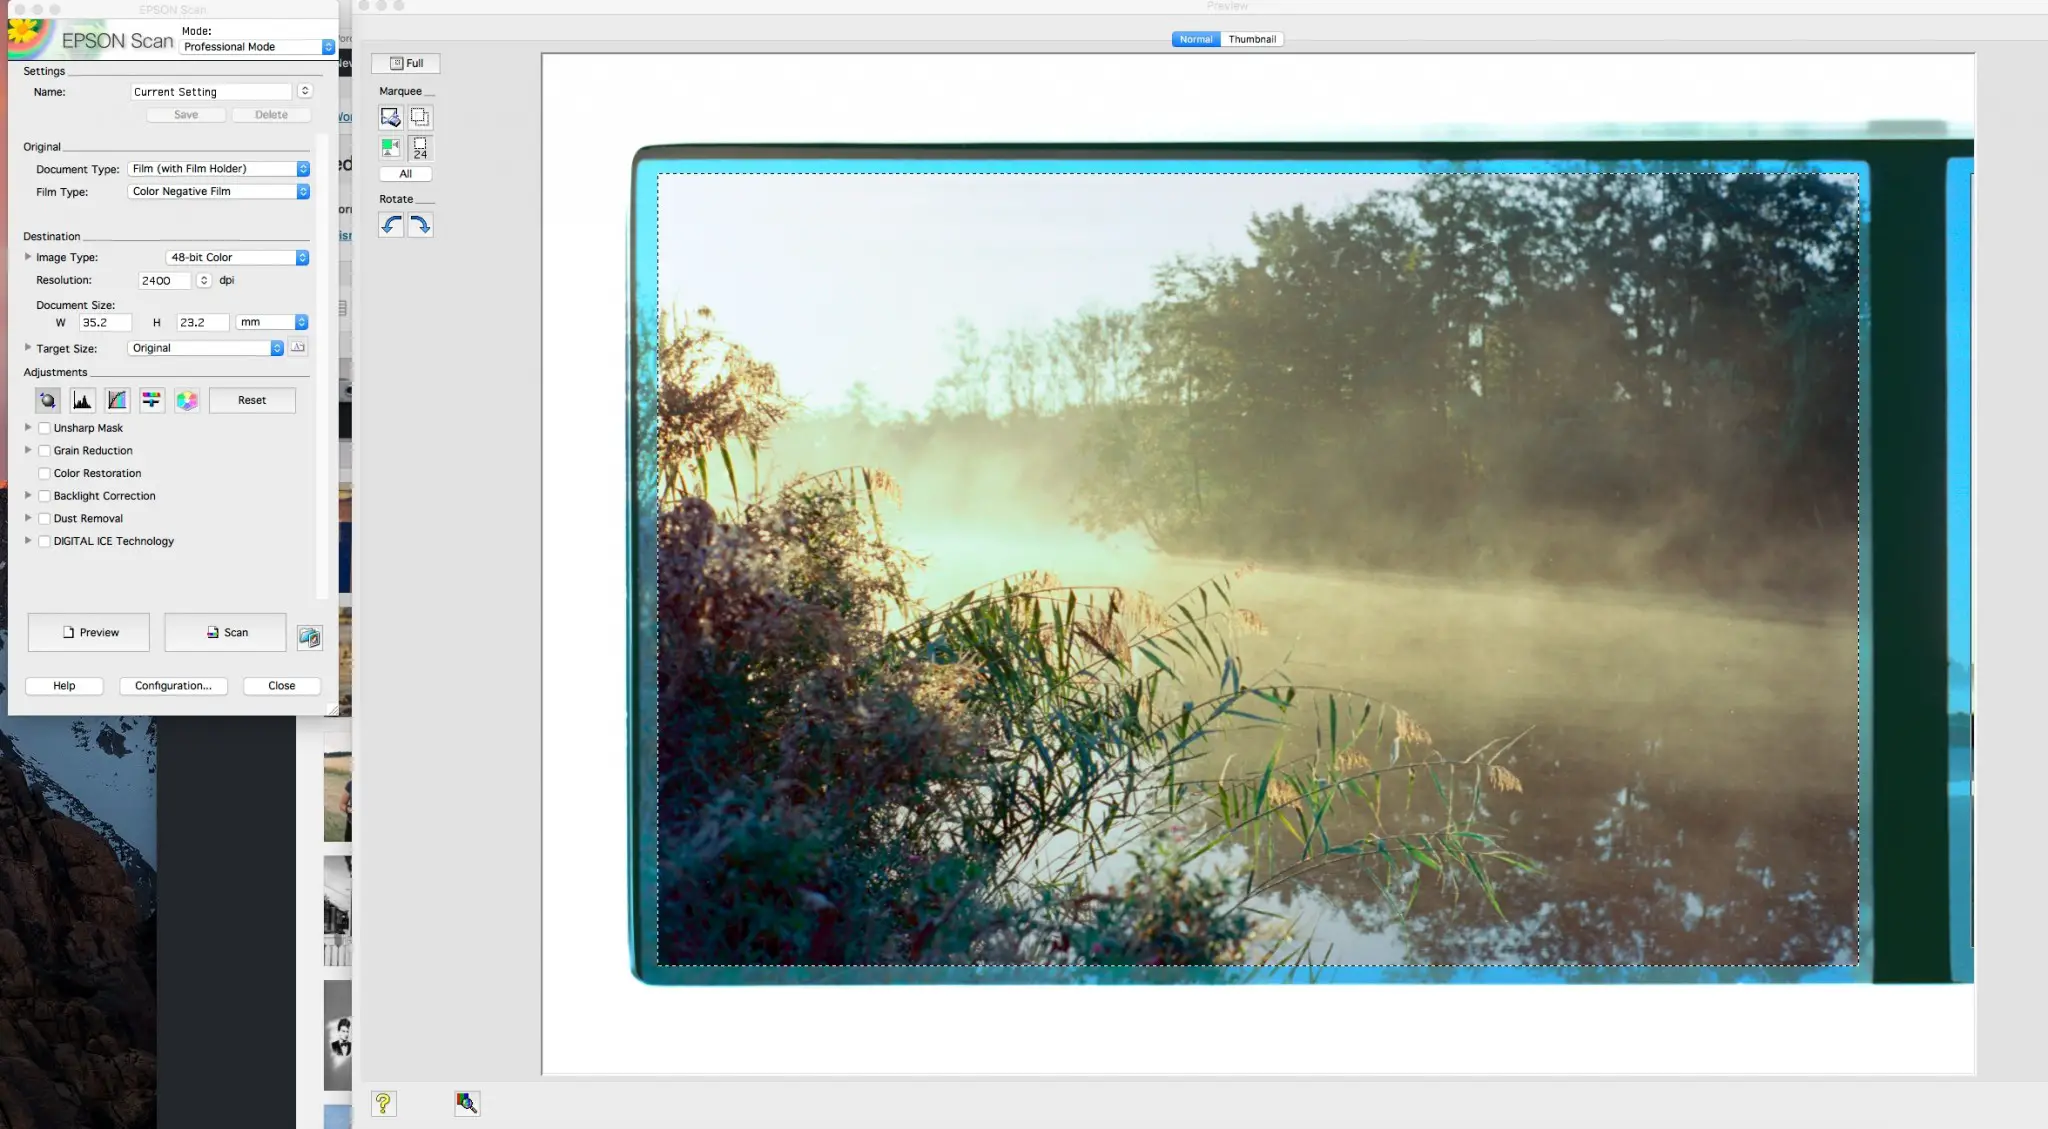
exampleepson
Scan with Epson Scan software on auto exposure and auto colour correct.
Scan with Silverfast Ai Studio with auto exposure and auto colour correct (Kodak Ektar)
Scan with Silverfast Ai Studio with auto exposure and auto colour correct (Kodak Ektar 100)

Not all results with Epson scan were as bad as this example, but for me it was enough reason to go for Silverfast. One of the features in Silverfast that I really like is negafix. It is the only filter that I use with every scan: it consists of presets with colour corrections for a lot of different film types. All scans shown in this post are scanned with this negafix and with the proper film selected. Of course you are free to choose a different film type if you like the result better, it is after all just a software filter. Silverfast claims to have incorporated this feature as an alternative to colour calibration. If you scan a slide you can calibrate the colours of the scanner with a target, and even correct for colour offsets in the lightsource, but with a colour negative that doesn’t work because of the non-clear colour base. Silverfast has circumvented this with the negafix filters.

I try to keep the other settings as basic as possible, as I do post processing if needed in Lightroom. Here is summary of my settings:

  • In preferences / High Resolution Prescan: select a high speed for the pre-scan (I set this at 4x, 8x is the maximum) . This will make the prescan a bit longer, but if you don’t do this the scanner has to re-scan every image that you zoom into, making the tuning process quite annoying.
  • File: save as tiff, to keep as much information as possible.
  • Scan at 2400 dpi, which is about the maximum optical resolution, and leads to files with about 3300 pixels on the long axis.
  • Leave mid tone, contrast and saturation at 0, auto exposure will change the mid tone.
  • In the negafix window select the proper film, set exposure to 0. Auto exposure does not change this exposure setting, so if you know you over- or underexposed the film it might be helpful to correct for that here.
  • Switch off auto-sharpening (I like to do that if necessary in Lightroom).
  • Switch off other filters, such as iSRD (infrared dust removal). I change this setting sometimes when I am lazy. I think doing dust removal in post is better because you have more control, and this filter slightly softens the image.

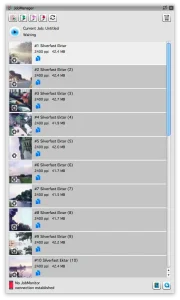
Below you see a prescan with 24 images and the settings as above. People who have experience with the V800 may notice that I have indeed four rows of negatives, where the supplied negative holder only holds three. I will come back to that in the ‘Dust’ paragraph. What I do like to share here is a feature of the Ai Studio version of Silverafst, which is the Jobmanager. This allows you to prepare all the images, and arrange them in a scanning order you like, before scanning the lot. In the example below the top two rows are negatives from a roll of Ektar, and the bottom two are from a roll of Portra 400. I prepared all images, corrected exposure where necessary, and then scan all 24 images at once. I press start, and go doing something else. I can keep track of the progress on my iPhone or iPad via the app, which is kind of neat. Another advantage is that you can save and load jobs, for example a job where I scanned 24 images of Ektar.
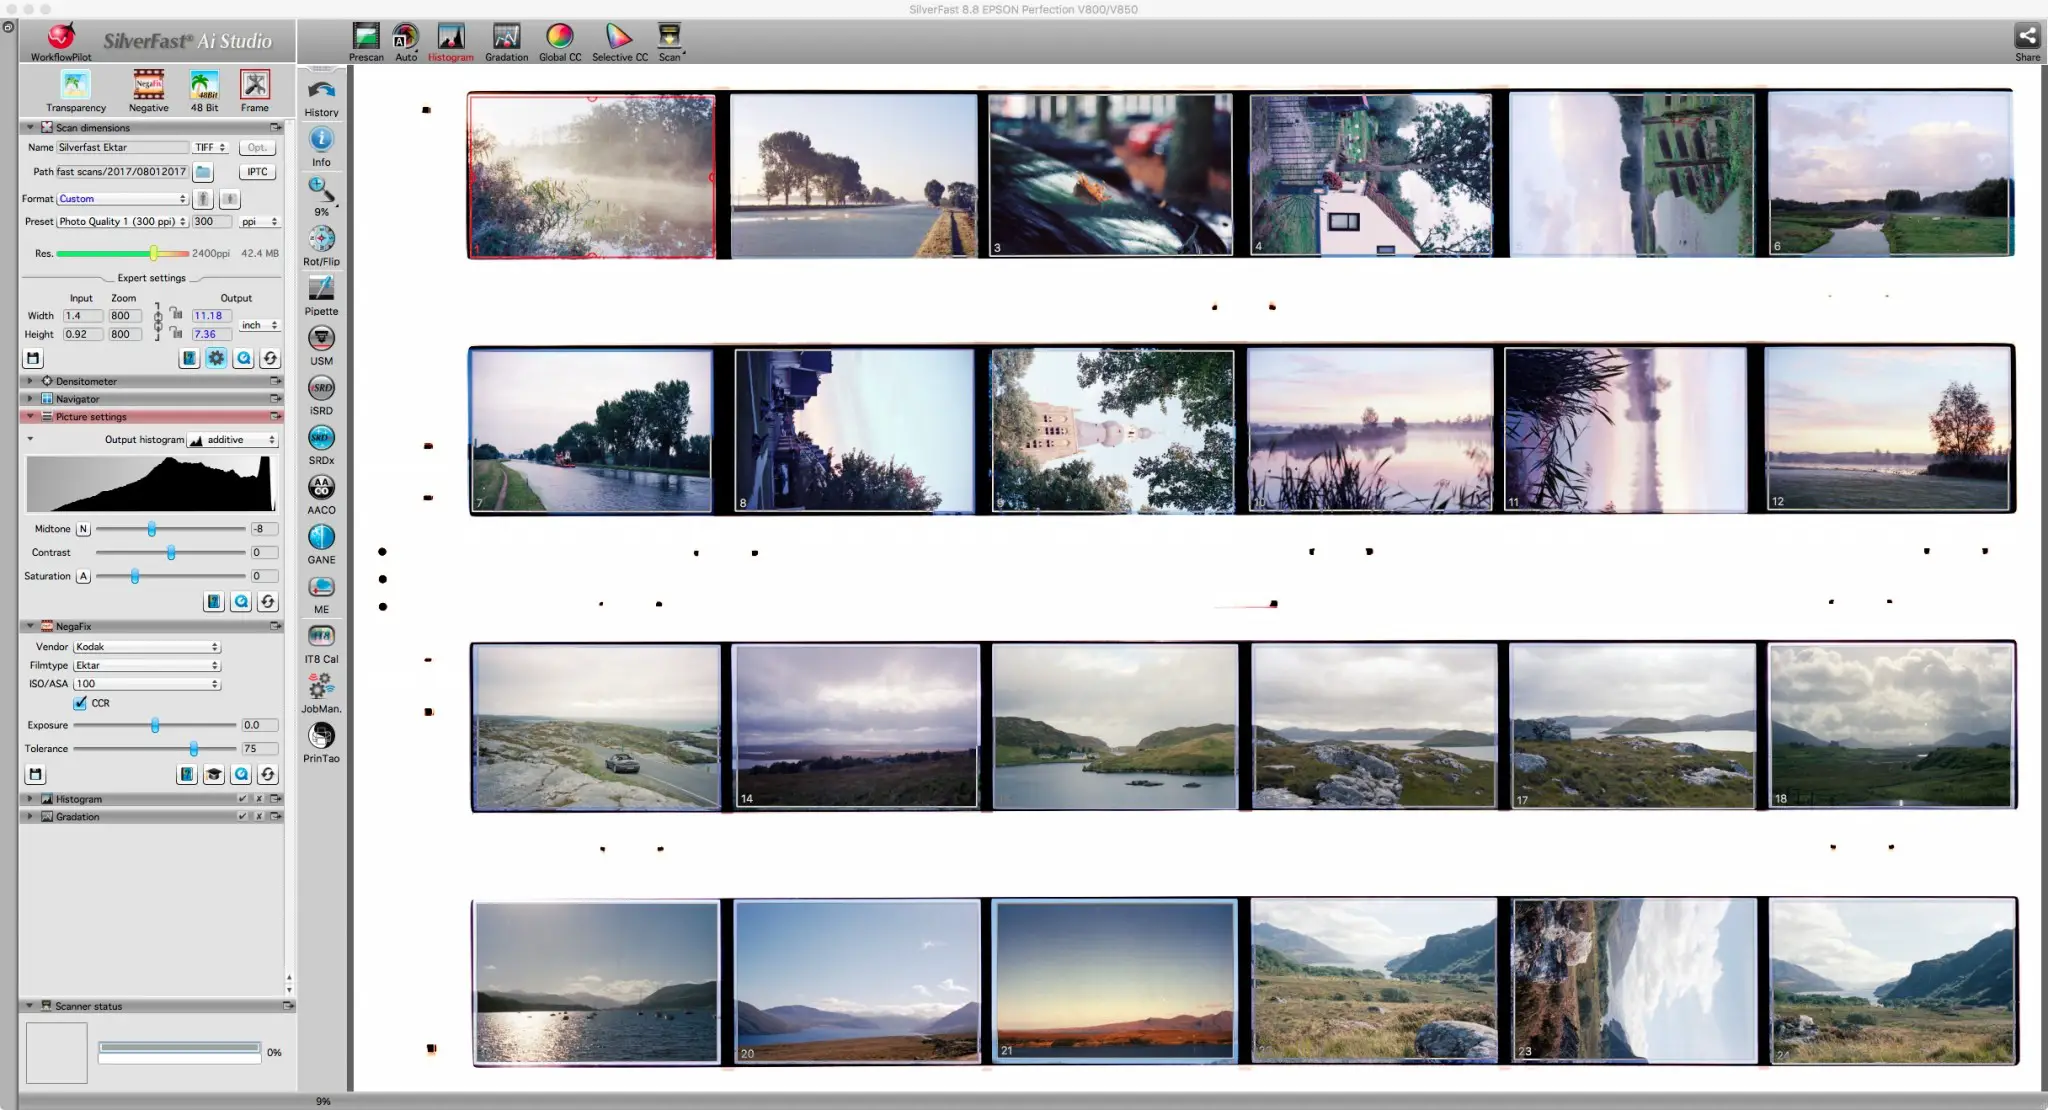
scanneroverview2
Example of scanning with Silverfast AI Studio.
Example of the job manager window.

I suggested to keep the filters in Silverfast to a minimum, as I prefer to do the editing in lightroom where I can alter them if I change my mind (not unlikely!). To demonstrate the effect of the most obvious filters I scanned an image three times with different settings.

First: scan (crop) with auto-exposure and no other filters.

Scan with automatic exposure and negafix, but no other features.

Second: a scan with auto exposure and added sharpening. You can see some added texture overall, which I find quite harsh.

Silverfast scan with automatic exposure and sharpening.

Third: auto exposure with iSRD (infrared dust removal). You can see that the image is slightly softer.

Silverfast scan with automatic exposure and dust removal.

Final: scanned as the first one, but with sharpening added in Lightroom. As I don’t like the added grainy texture you get from sharpening I apply a mask (about 80) to avoid sharpening in the background.

Silverfast scan with automatic exposure and some sharpening added in Lightroom, with the aid of a mask to keep the texture in the background smooth.

And finally, the complete image processed to my own taste:
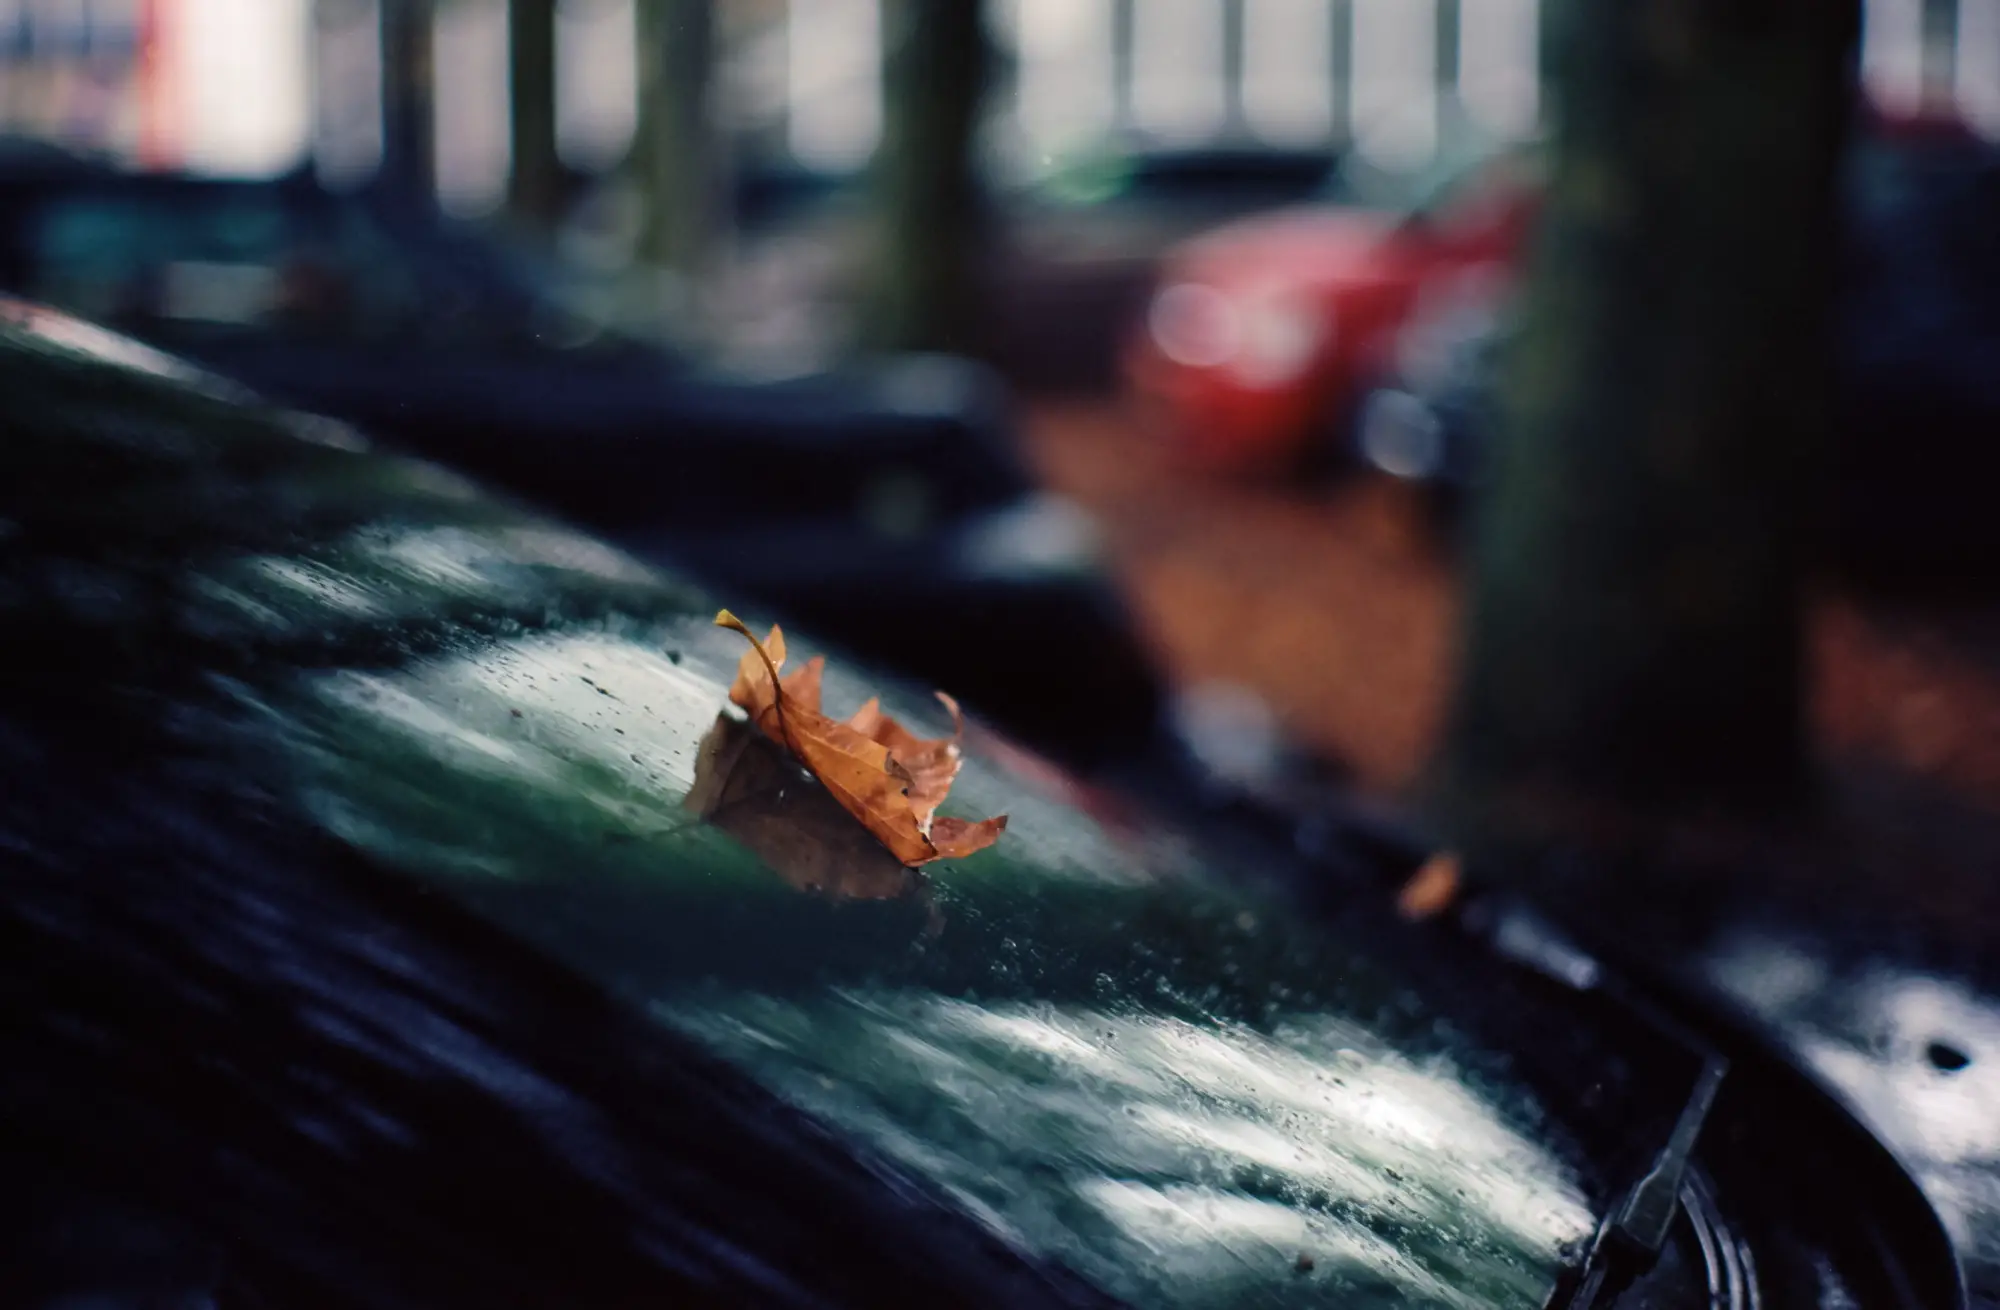
Kodak Ektar, scanned on the V800 with minimal post processing in Lightroom
Kodak Ektar 100, scanned on the V800 with minimal post processing in Lightroom

Dust

When talking about scanning, you also have to talk about dust. I really like scanning, I like seeing my images in positive colour, I like tweaking them to make them more beautiful, but I don’t think anyone in the world enjoys removing dust spots. And yes, the infra-red dust removal tool helps, but it doesn’t always remove everything, and as I have shown above, it can soften the image. So the best strategy is to prevent it in the first place. I have noticed a few things since I started scanning at home:

  • There is a difference between labs, the negatives I got back from AG photo lab are almost spotless. I take them in the sleeve to the scanner, put them in the holder, and there are almost no dust particles present. However the scans from filmdev and from my local lab seem to have more dust.
  • I haven’t found the perfect flow for my home-developed film yet. I found my own film has more dust than the ones from AG photo lab. I hang the film to dry in the bathroom, and mounted them in the holder in the bathroom too, and then I have to walk about 20 meter to the scanner. My new process is sleeving them in the bathroom, and walk with them to the scanner. That might improve things.
  • I have worked in a professional cleanroom years ago, and from that I have learned that a clean space depends largely on the discipline of the people using that space. So I try to practise that at home too: I don’t wear fluffy sweaters while dealing with negatives.
  • Film holders matter! The V800 comes with a film holder that has glass plate to flatten the film. However I find this glass to be a real dust magnet, so I bought V700 holders to use instead. Most of the film is flat enough, so they work perfectly fine. Except from the dust, the glass plates add two transitions to the optical path of the scanner, which can have a negative effect on the image.
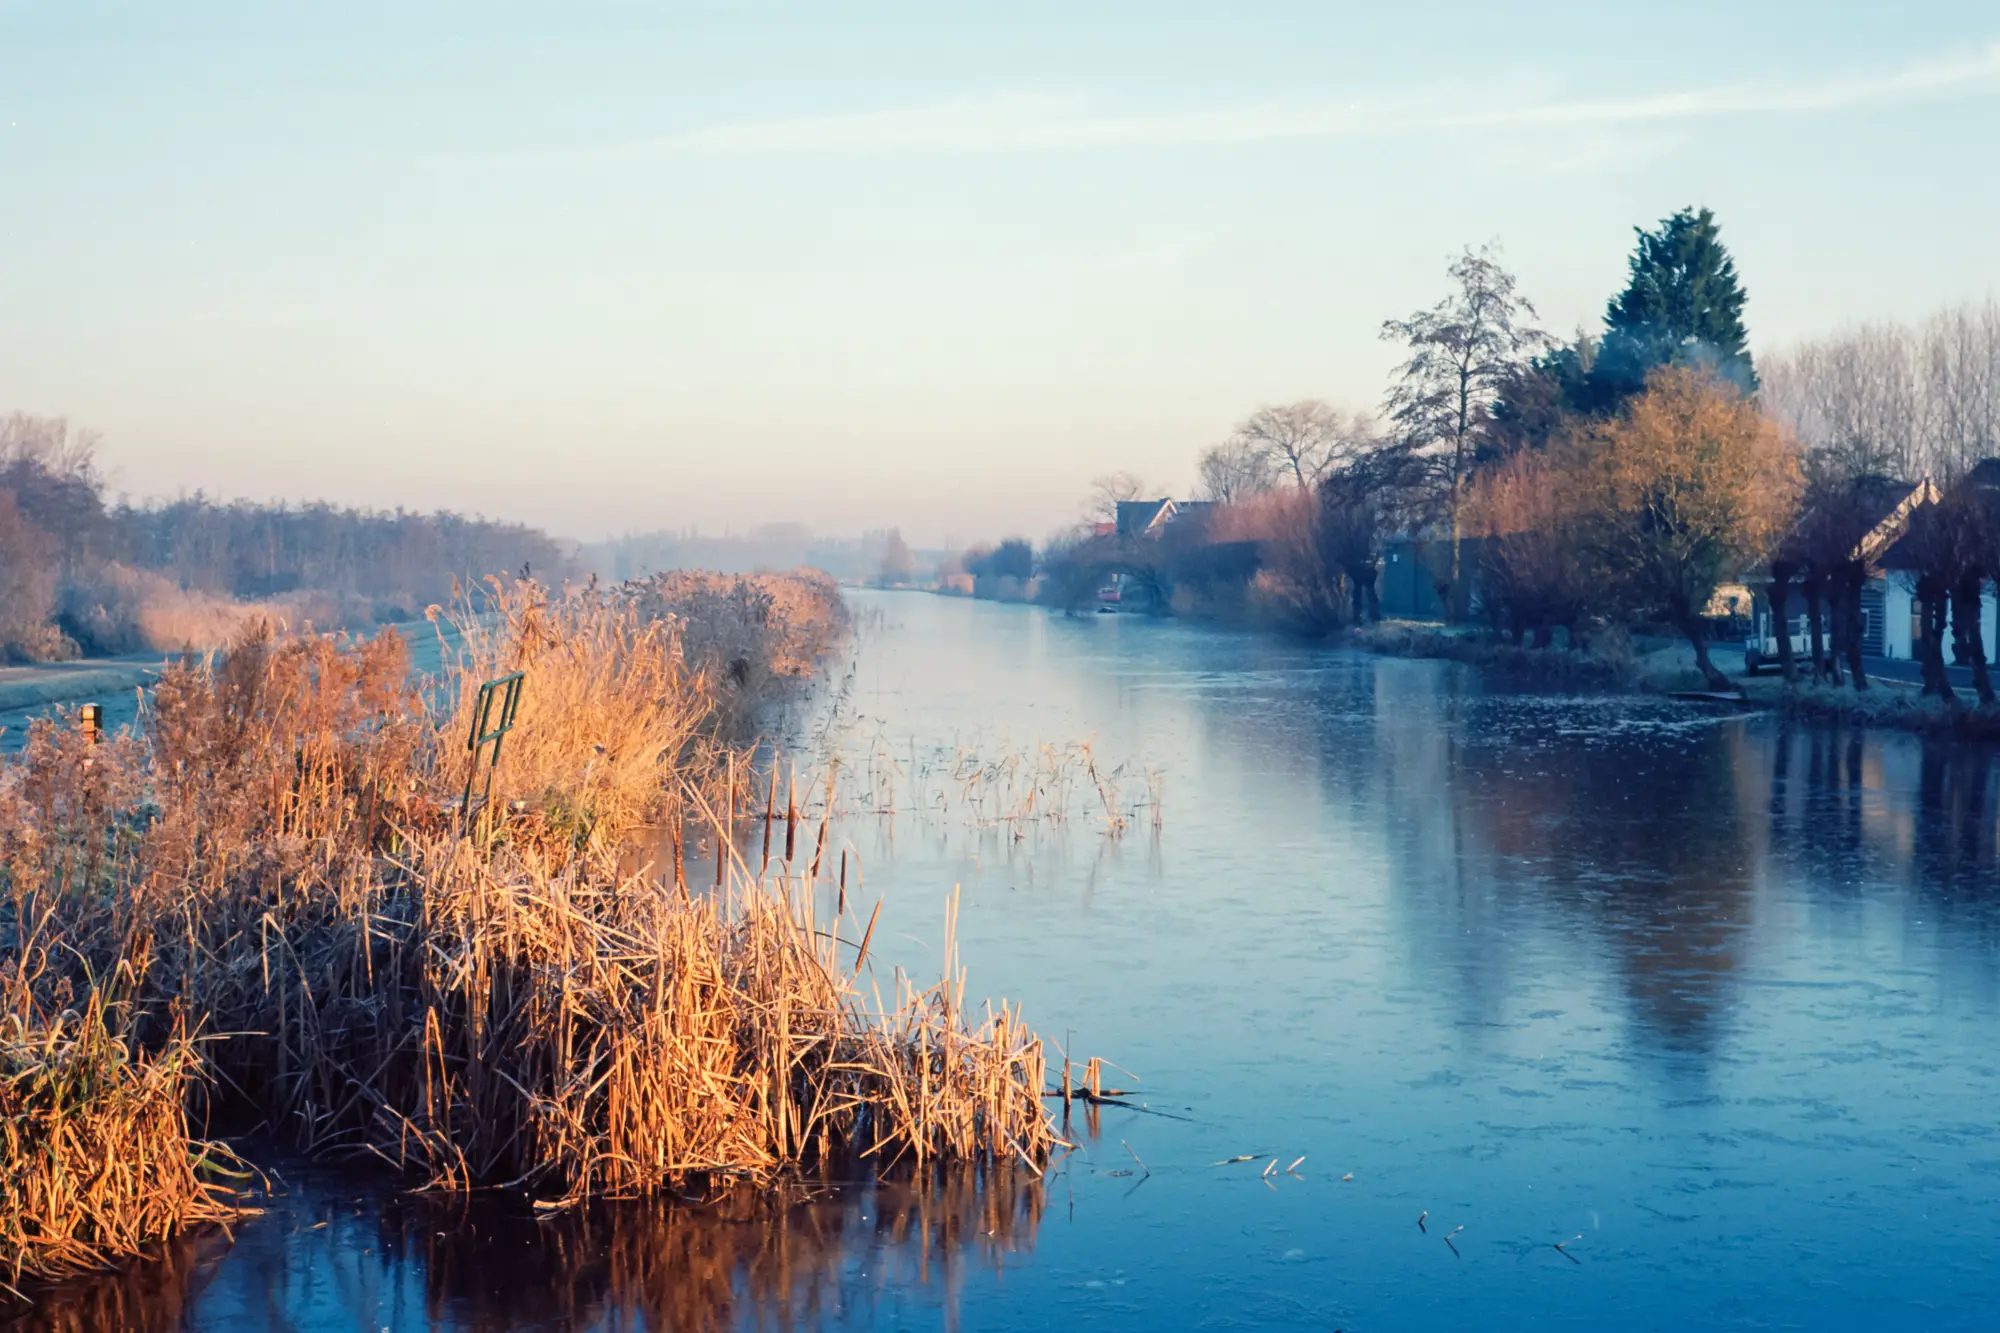
M2 with Summilux 50mm on Ektar 100
Kodak Ektar 100

Quality of the negatives

One big advantage from scanning the film myself is that I learn a lot more about the quality of my negatives. Before I had a quick glance at the negatives, and I could definitely pick the badly over or under exposed photos, but I was fairly happy with how I exposed the film. When scanning myself I find that difference in exposure has an effect on scanning: well exposed film is easy and fast to scan, with colours that look good with auto exposure scanning. Overexposed film with dark dense negatives are more difficult to get right with respect to colour, and can lead to sensor noise in the scan. It shouldn’t be a surprise though, with the scanner you are in fact making a digital image of the negative, and the dark parts are more difficult.

This can also become visible in contrasty images with dark (over-exposed) skies and lighter foreground. For this Silverfast has the added option of Multi Exposure. With this option the scanner scans the image twice with different exposure to create a sort of HDR image. It doesn’t look like the typical HDR photos you see on social media, but it increases the colour depth in the sky and reduces the noise in the image. It does take twice as long to scan though… Since I tune all images ahead and scan the lot while doing something else, I don’t mind the time so I always put this option on.

High contrast, but low noise and large depth of colour in the sky. Kodak Ektar 100.

To demonstrate the effect of the Multi Exposure setting, below you see a crop of this photo, one with a single exposure (top), and one with the double exposure (bottom). To make the difference more clear, I reduced the exposure and highlights. You can see that the double exposure file shows less noise. The transition between the coulors is also smoother with the double exposed file. In case you were wondering: it will not reduce film grain, as the grain is exactly the same for every exposure (given that the negative doesn’t move in between), and will therefore remain in tact.


CropEktaNoME2
Crop of the photo above from a scan with single exposure.
CropEktaWithME2
Crop from the photo above from a scan with double exposure.

Something weird

So far everything went pretty smooth. But last week I shot a roll of Ektar on a cold winter morning, with everything covered in a thin layer of snow. Later that day I developed the film at home, and started the scan. Because of ease I decided to let Silverfast do the work, and went full out with infrared dust removal and sharpening. To my surprise, this is what I got:
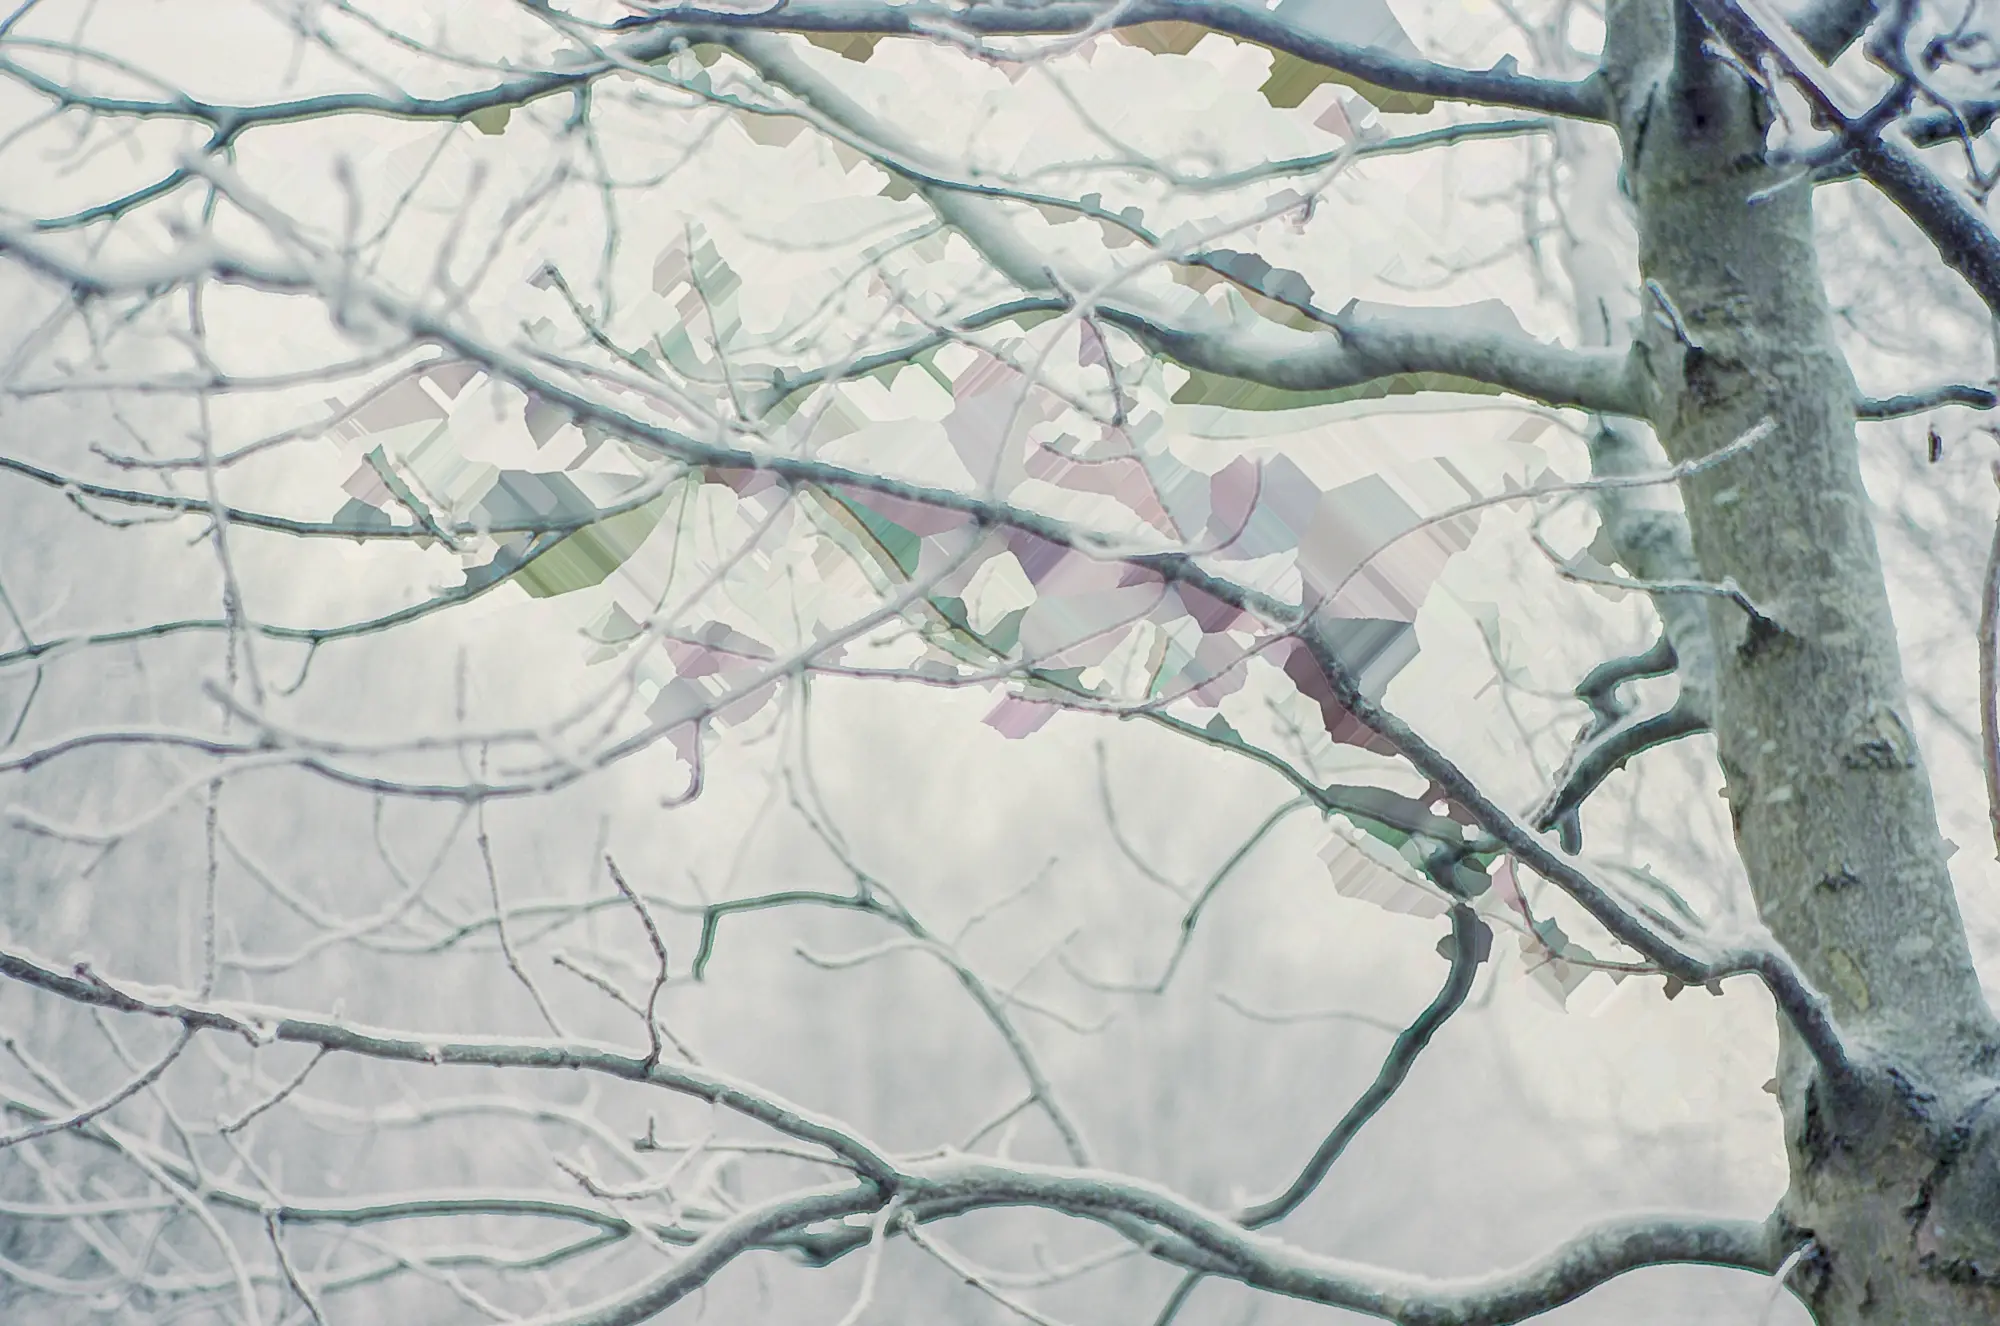
Kodak Ektar, developed by me and scanned on the V800 with infrared dust removal.

At first I thought that I must have something to damage the film while loading it in the tank in a changing bag. I only started developing film recently, and I encounter some resistance in the film every now and then, which requires some wiggling from my part to get the film onto the reel. But it felt odd to me that the artefacts seem to follow the branches of the tree. However I remembered that I didn’t see anything odd in the preview of the scanner, so I decided to have another look. I first removed the sharpening filter, without any effect, and then switched the infrared dust removal option off. This turned out to be the cure, as the scanned image now looks quite normal:

Kodak Ektar, developed by me and scanned with Silverfast without any filters or options.

I contacted Silverfast to see if they have experience with this and might be able to come up with some explanation. Here is a screen grab of the conversation, as you can see they really don’t have a clue. They suggest the chemicals might be off, but I developed this roll myself with chemicals that were 2 weeks old and had been used for three rolls only.
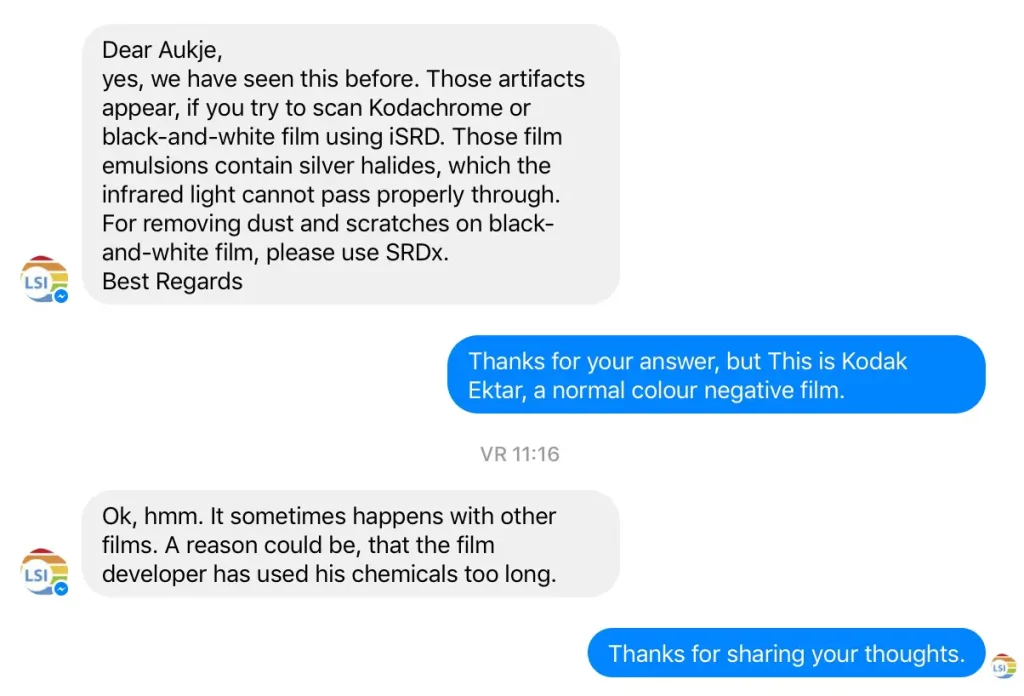
Silverfast

If any of you has an idea of what happens here, let me know. In the mean time, the effect can actually be kind of cool and interesting. Here is another example from the same roll, but with more subtle artifacts:

Kodak Ektar, developed by me and scanned on an Epson V800. The artefacts in the image disappear when turning off the infrared dust removal function.

More results

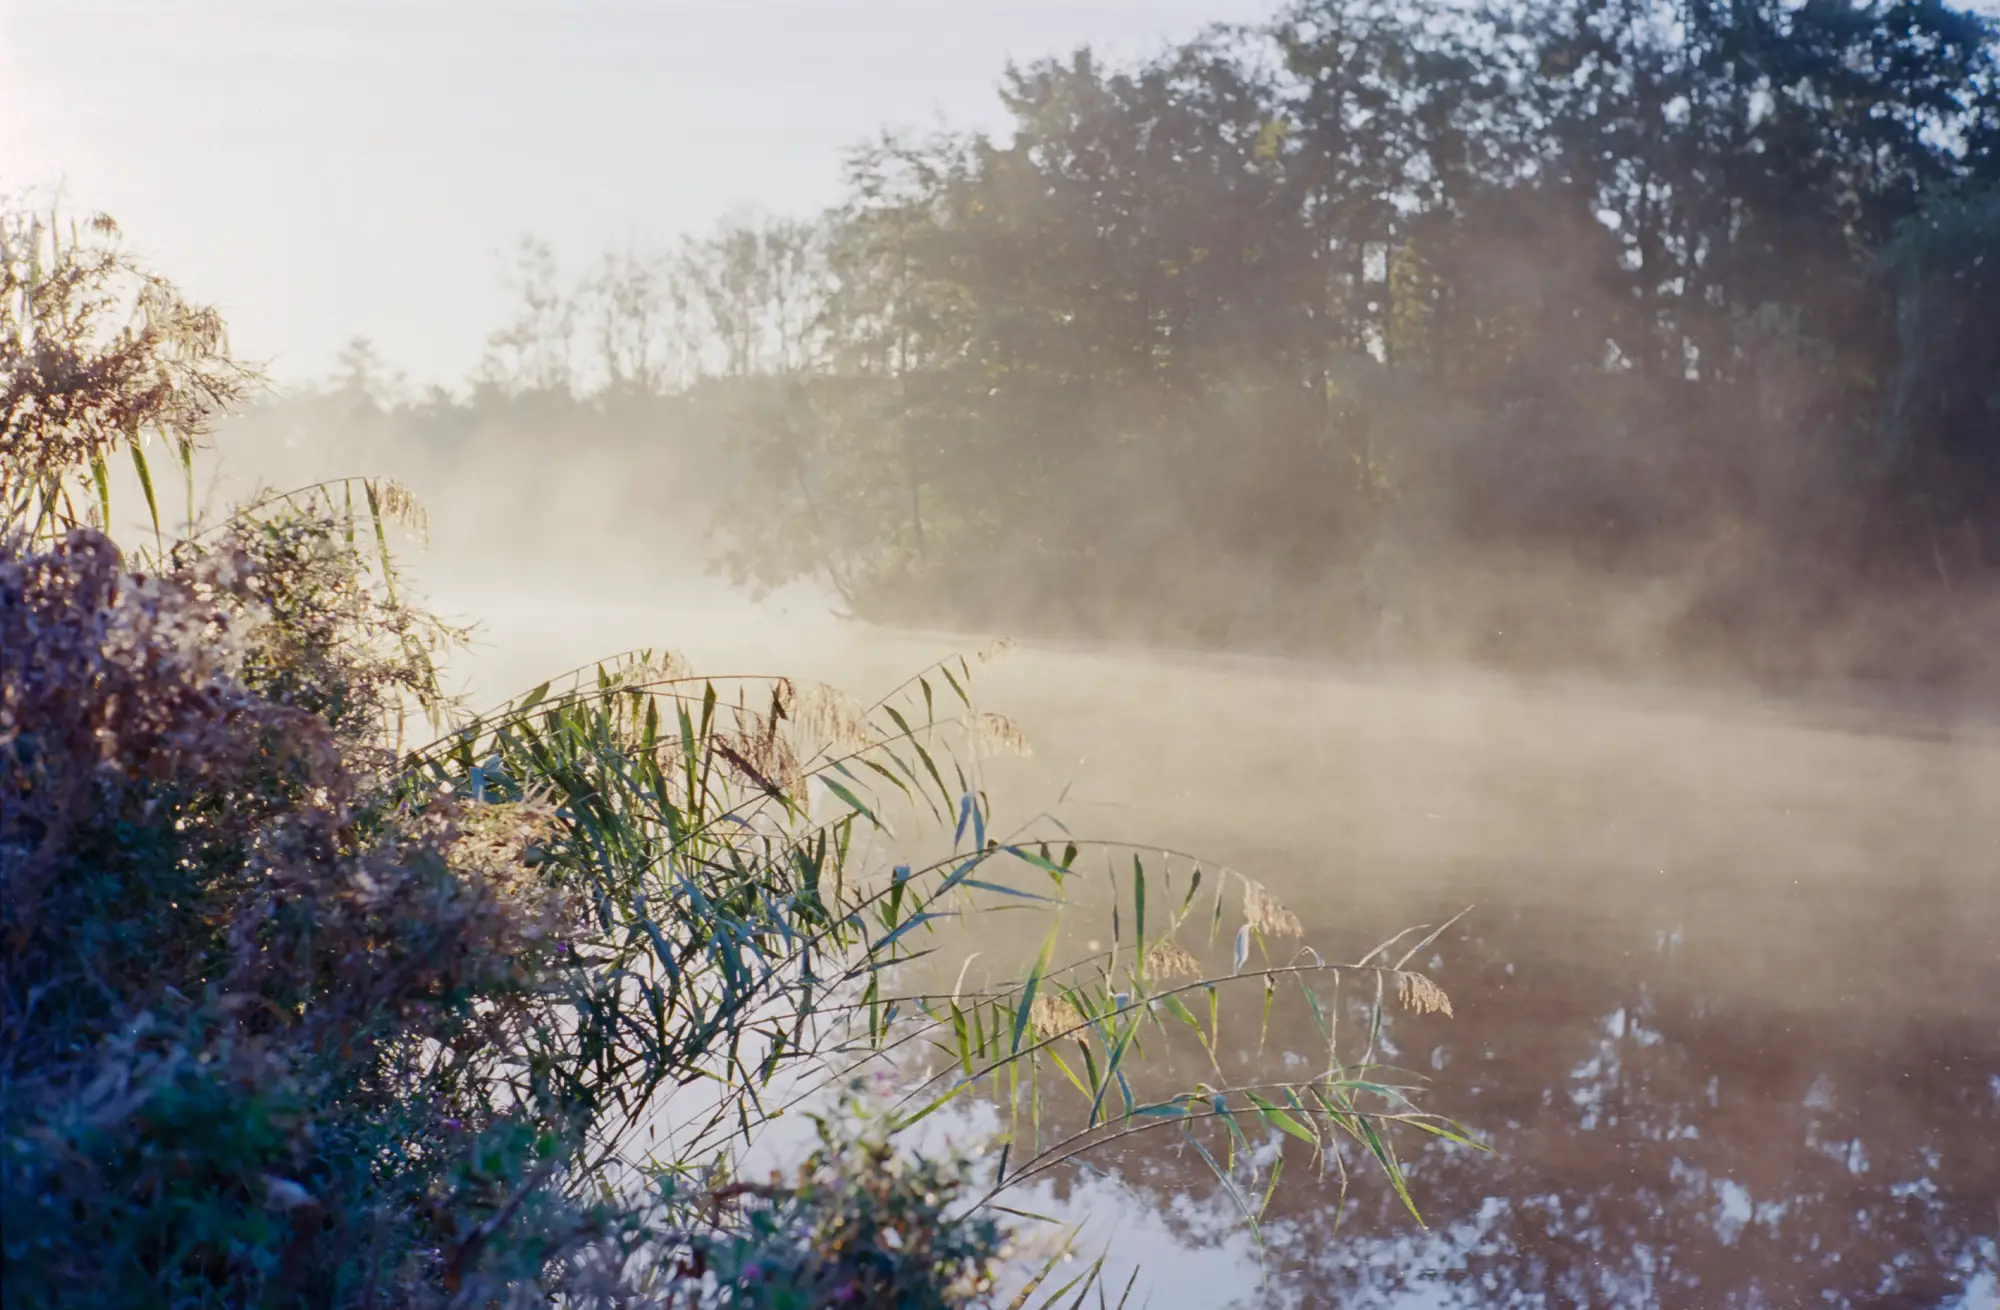
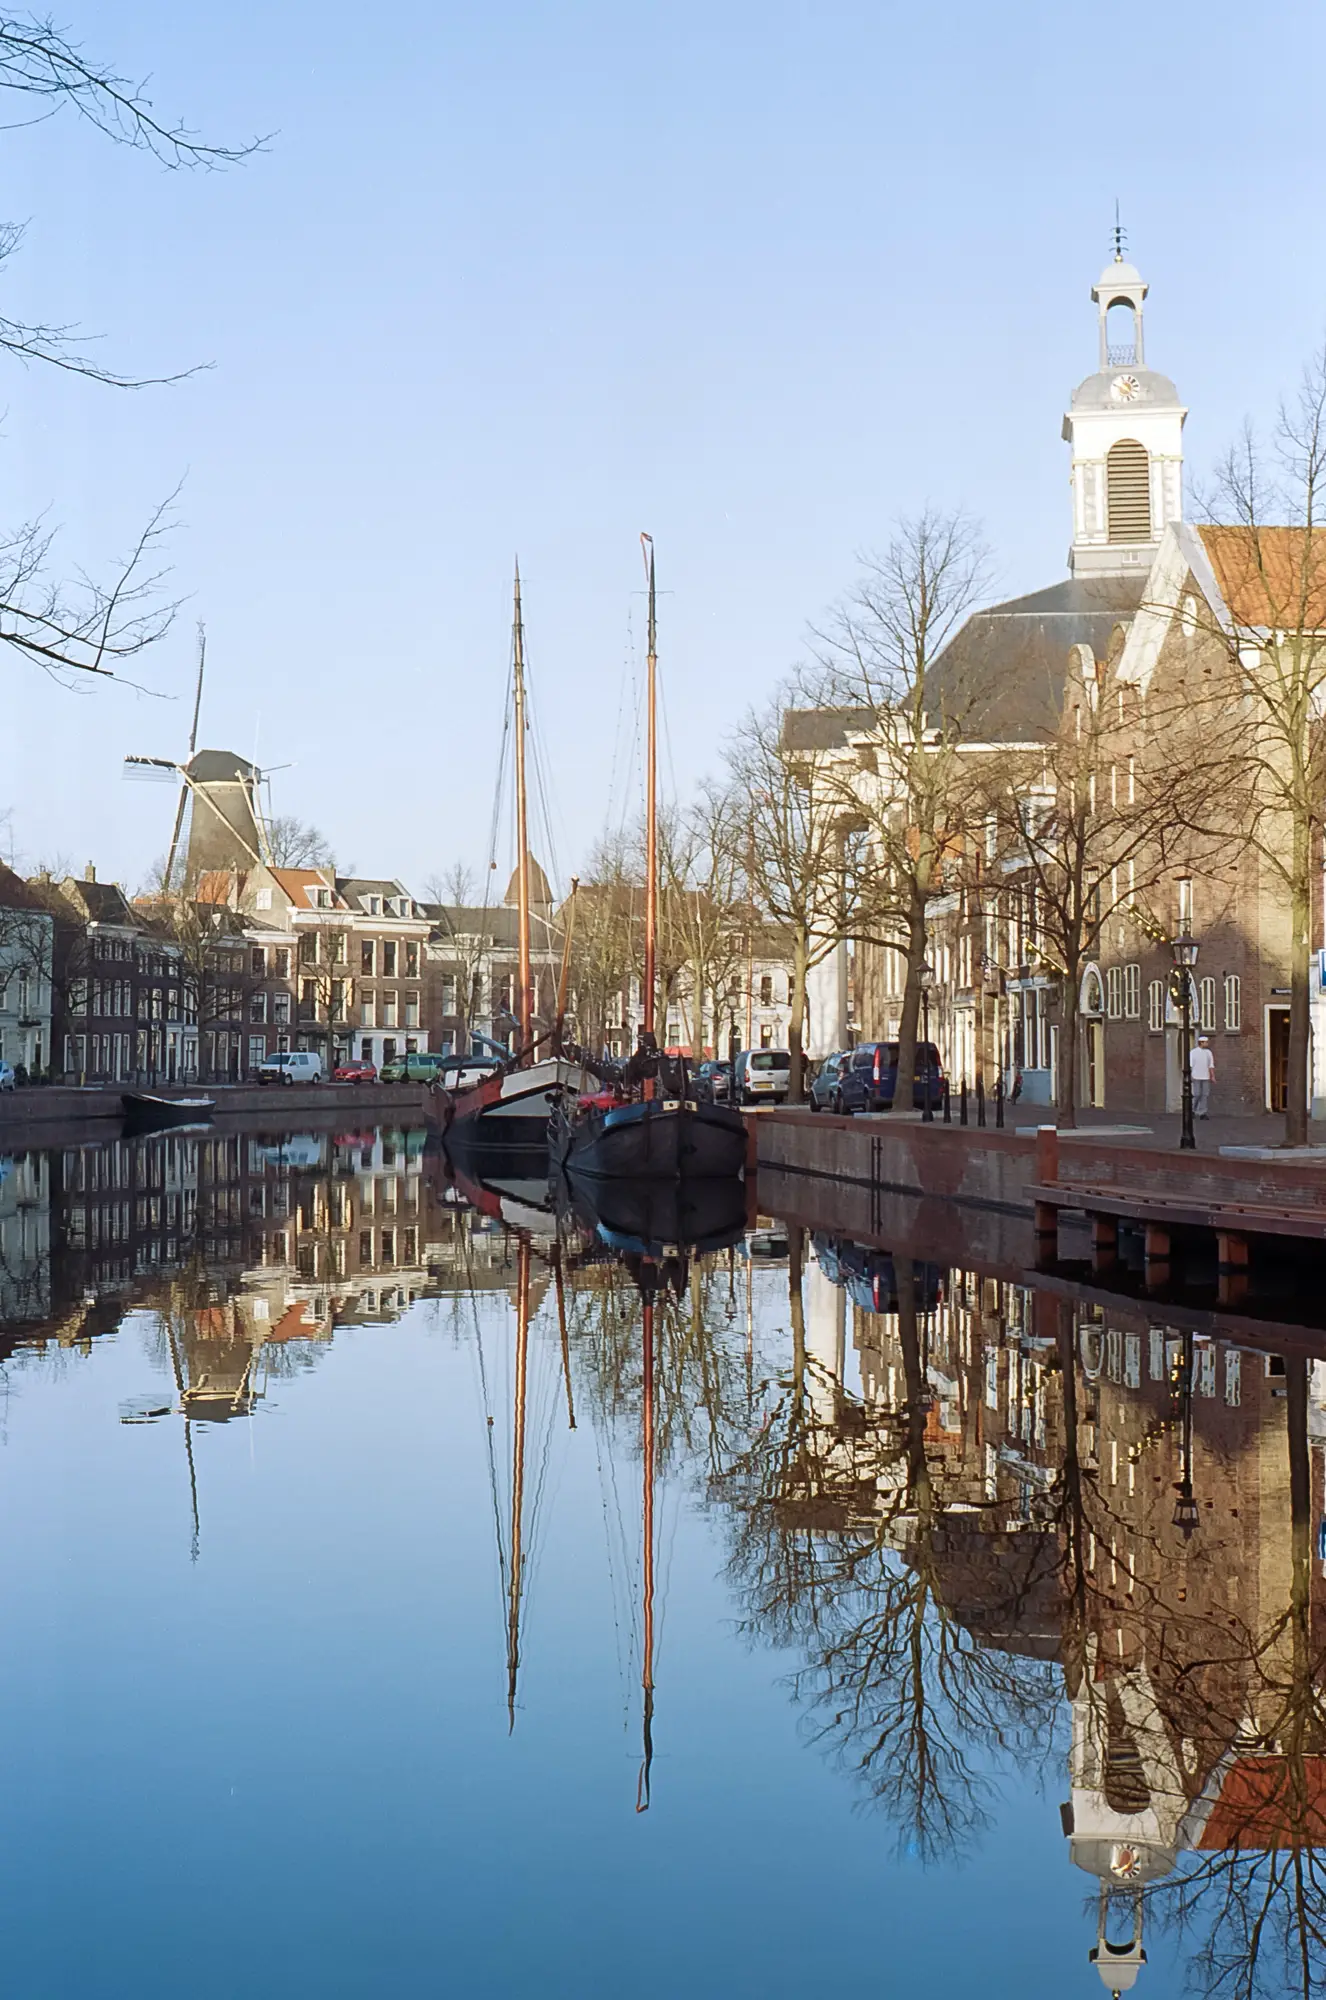
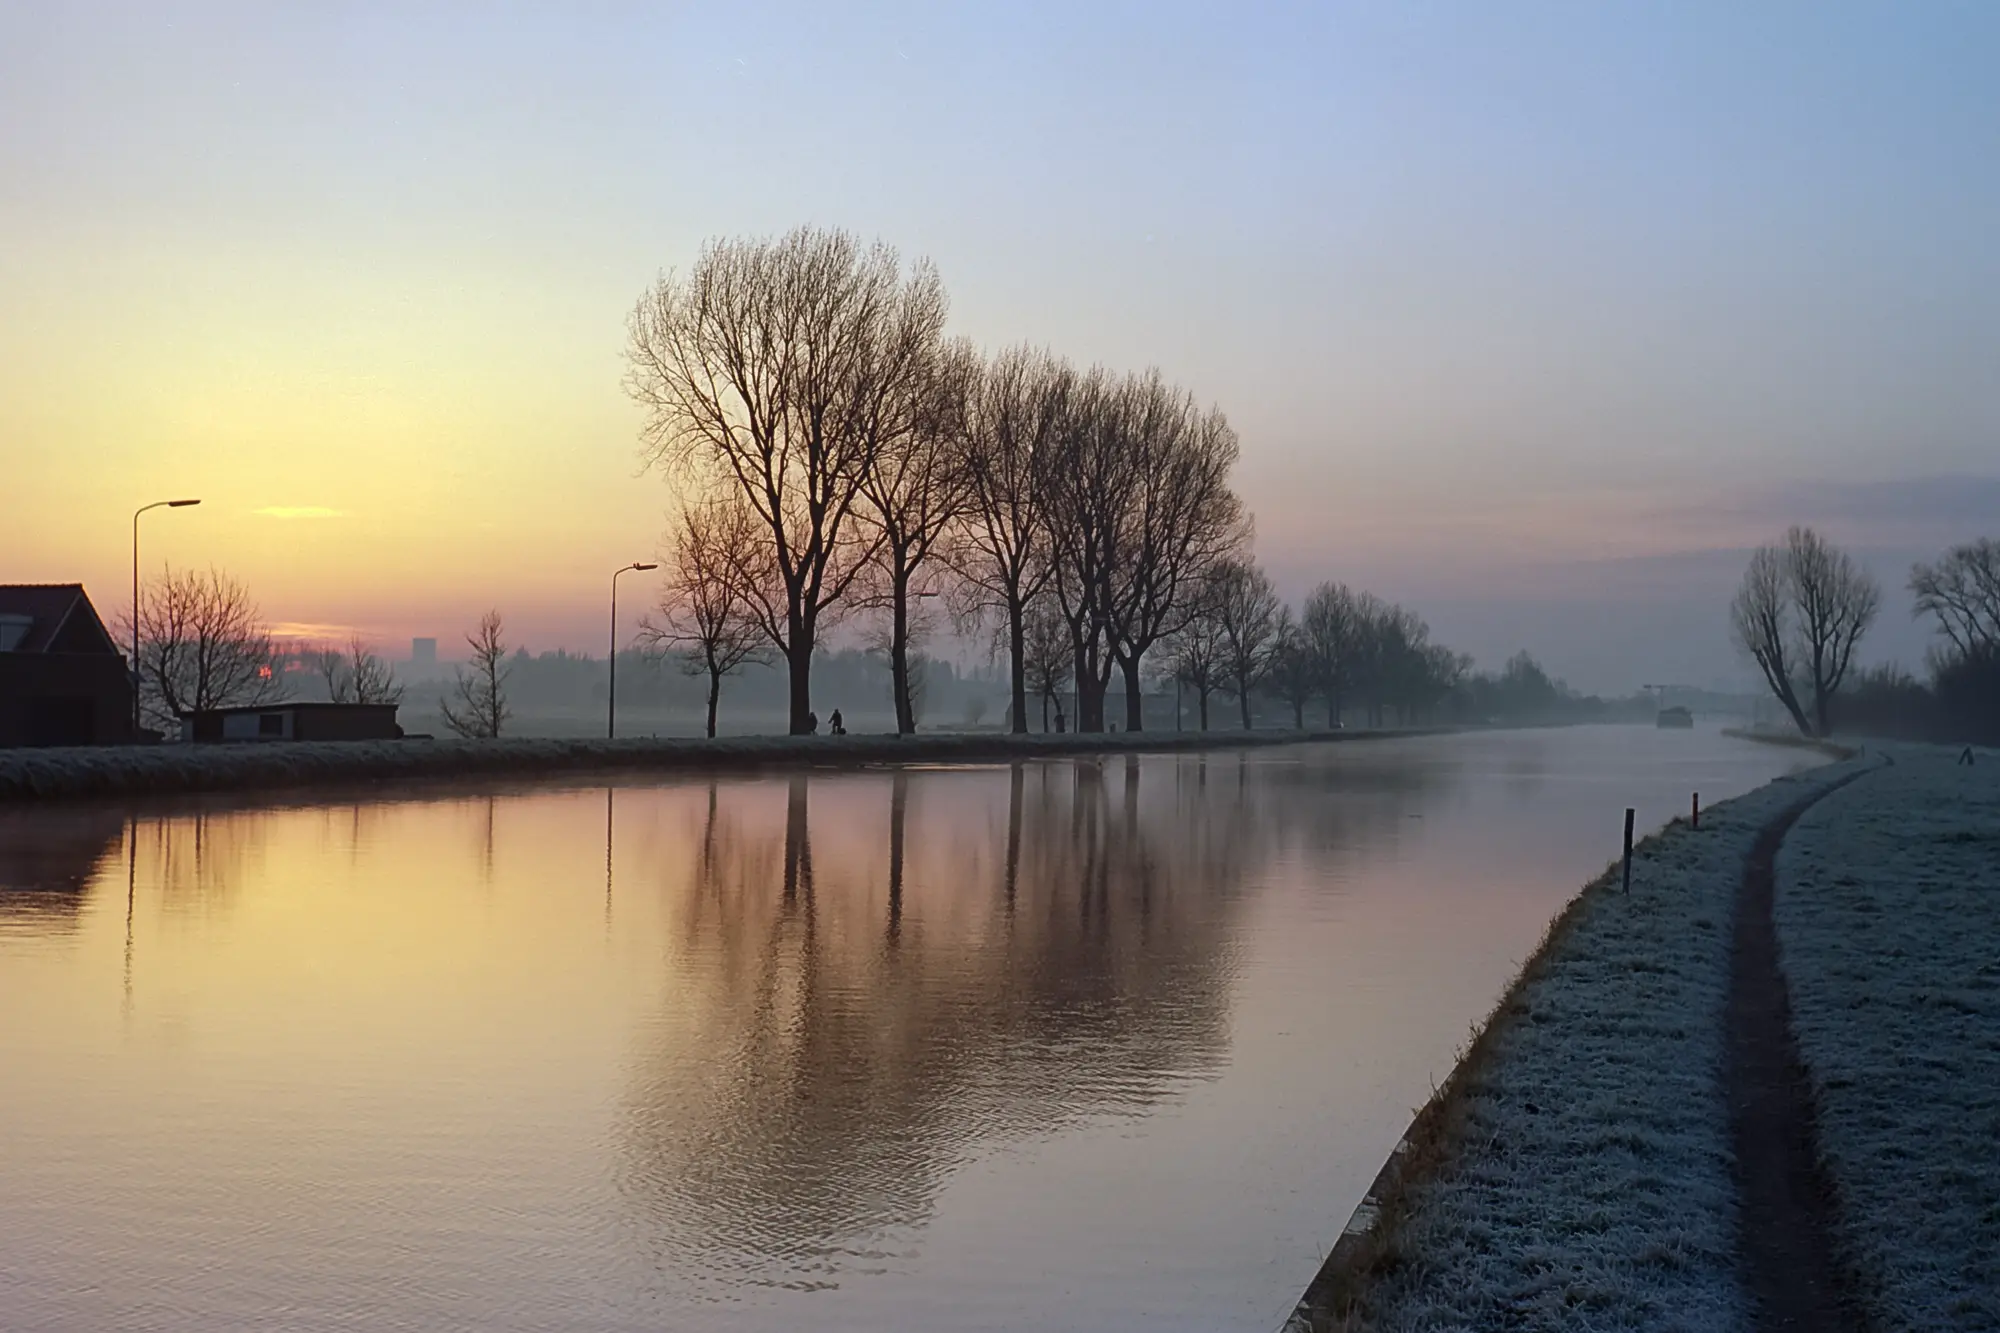
Here are a few more results, all obtained with Silverfast Ai studio 8 with negafix, auto-exposure and some minor adjustments in Lightroom.

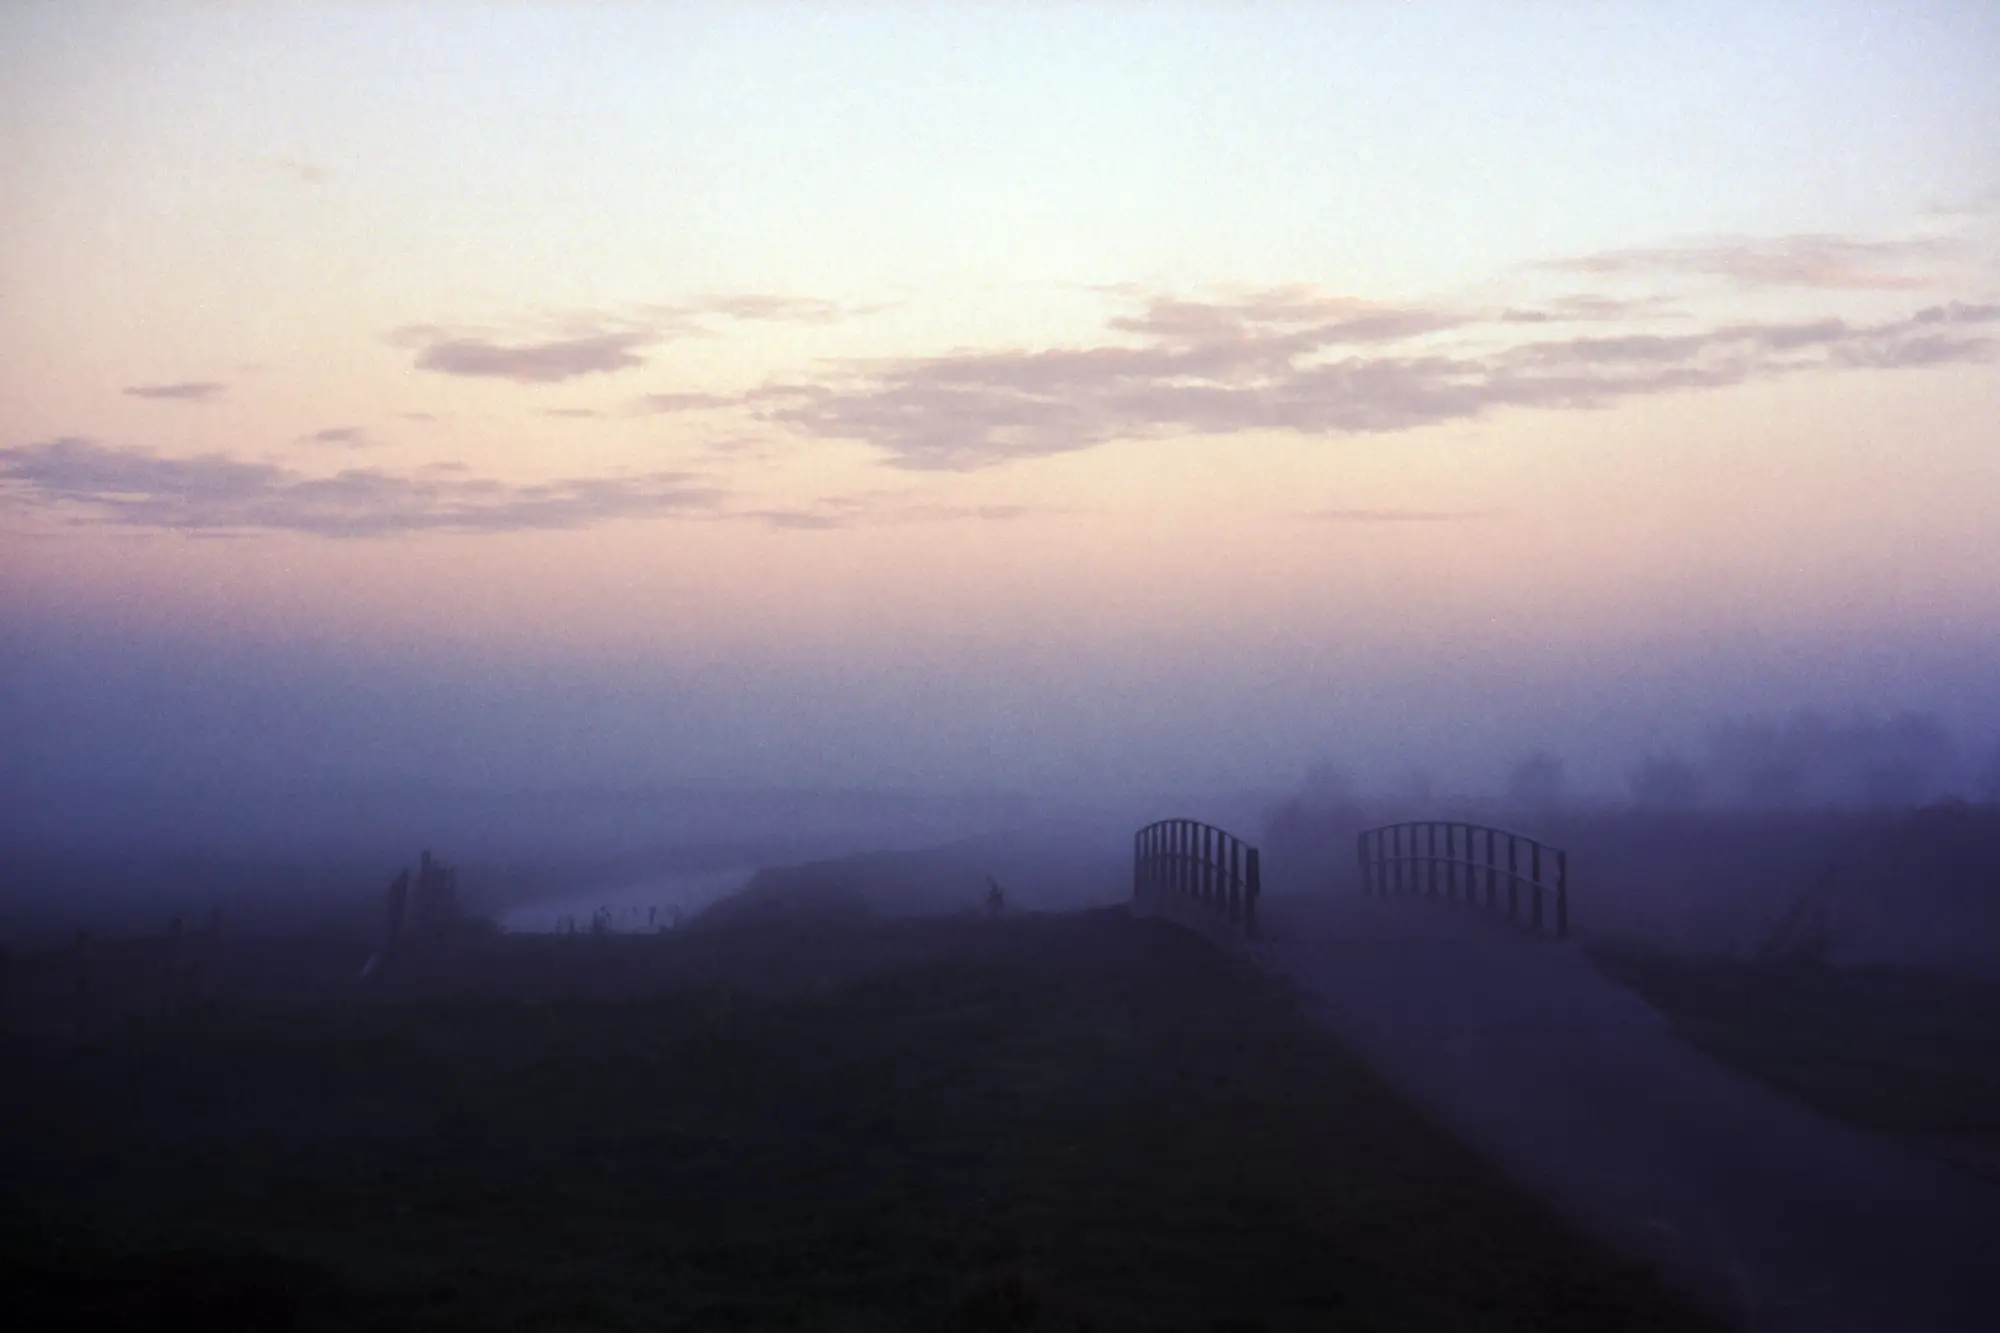
M2 with Summilux 50mm on Ektar 100
Kodak Ektar 100
M2 with Summilux 50mm on Portra 160
Kodak Portra 160
Ektar 100
Kodak Ektar 100

Resources

Although this has become quite a lengthy post this is not close to being complete. There are a lot of things I haven’t even tried, and there are a lot of things I don’t understand yet. However, since I am already quite happy with my scans I miss the incentive to dig deeper. If you like to find out more about scanning I can recommend the following pages, they were at least very helpful to me:

Kodak Ektar 100
Kodak Ektar 100

If you are interested you can find more of my photos, both digital and film, on my website: whataukjesees.com. I am doing a 366 project on film, which I record daily on tumblr, and I post film photos regularly on instagram.

Thanks a lot for reading, and Hamish, thanks for having me!

Read Part 15 of journey into film here.

Share this post:

Find more similar content on 35mmc

Use the tags below to search for more posts on related topics:

Contribute to 35mmc for an ad-free experience.

There are two ways to contribute to 35mmc and experience it without the adverts:

Paid Subscription – £2.99 per month and you’ll never see an advert again! (Free 3-day trial).

Subscribe here.

Content contributor – become a part of the world’s biggest film and alternative photography community blog. All our Contributors have an ad-free experience for life.

Sign up here.

About The Author

By Aukje
Amateur photographer from the Netherlands, trying to figure it all out. I mainly shoot landscapes, but as I love taking photos I shoot other things when there is no landscape available.
View Profile

Comments

stefano giovannini on Epson V800 – Home Scanning Colour Negatives – by Aukje

Comment posted: 08/02/2017

Thanks for your thoughts and sharing them.

I maybe have missed it. But how long does scanning a 36 exposure film take you? I purchased an Epson V550 and it is slow, and I get better results in BW by photographing the negs with my Sony A6000 with a Minolta 50mm macro, a Poloaroid slide duplicator attachment and a negative carrier for it. I use a LED video light as a light source. Then invert the curve in Lightroom. But this method does not produce good color results, but seems very good for BW. Takes me about 15 min to photograph 36 negatives.
Reply

Leave a Reply

Your email address will not be published. Required fields are marked *

Aukje replied:

Comment posted: 08/02/2017

Good point, I think I forgot that. It's not fast, it takes me about 30-45 min to prepare the 24 negatives I can scan in one go. I am not sure if this could be faster with a different computer, i have to wait for the software quite a bit. The scanning itself depends on whether you choose single exposure, double exposure and/or dust removal, and it varies between 45-100 minutes. But I don't have to sit and wait for that, and post processing is really fast as I don't have to do much to do in post.

Reply

Leave a Reply

Your email address will not be published. Required fields are marked *

Hamish Gill replied:

Comment posted: 08/02/2017

Would you consider writing a post for 35mmc to show your setup and the sort of results you get?

Reply

Leave a Reply

Your email address will not be published. Required fields are marked *

stefano giovannini replied:

Comment posted: 08/02/2017

Yes, 100 min is not bad if you do not need to attend. But what about a 36 exposure roll? Do you get anyway 24 separate scans neatly cropped? Are the negatives cut is 6 frames strips? I like to shoot 36 frame rolls. Time is actually important. If you have to feed one strip one by one it is a pain, that is the case with the V550 (which also does not produce scans as sharp as my repro method.) What made you decide on the V800 if you ended up buying the V700's negative carrier? thank you.

Reply

Leave a Reply

Your email address will not be published. Required fields are marked *

stefano giovannini replied:

Comment posted: 08/02/2017

Yes I can do that you can see some of my results on my instagram stefpix2 All the BW photos are BW negatives that i processed in a tank and reproduced with this method. Before the LED and slide copier (i could use it as I found on Amazon and ebay a plastic negative carrier that would fit in the Polaroid slide copier), I used a copy stand and a tracing tablet as a light source and used a flat negative carrier from an enlarger to keep the negatives flat. But with that method i would get exposures of around 1 second. With video light I get about 1/100 exposures, and I do not need to work in a dark environment. I have been shooting RAW, but i the last time I used some JPG BW settings in camera, and actually may be better, as i get more contrast. But i can write a post. I do not

Reply

Leave a Reply

Your email address will not be published. Required fields are marked *

Aukje replied:

Comment posted: 08/02/2017

I also shoot 36 rolls, but the holder only holds 4 strips of 6 negatives. So after a batch of 24 I have to reload and do the other part. The scans are neatly cropped, as I define the cropping area in the preparation. I decided on the V800 as the V700 is no longer available in store, and I couldn't find a decent used one.

Reply

Leave a Reply

Your email address will not be published. Required fields are marked *

Hamish Gill replied:

Comment posted: 08/02/2017

Great stuff, all sounds very interesting, and the results look good! If you get some words together, then email [email protected], and I'll get you set up as a contributor

Reply

Leave a Reply

Your email address will not be published. Required fields are marked *

karellen replied:

Comment posted: 08/02/2017

Stefano, you use my same method, except the fact that I couldn't find a slide copier that would fit my macro lens (without optics), so I made it, using a thick cardboard tube (coming from plotter paper) and cardboard. I use a full frame camera, and a flash as a light source, with a telephone like cord to be able to throw light behind the cardboard thing, and at the same time maintain ttl. I point it to a white wall. I have a 50 mm and a 100 mm macro, but I use the 100, because the 50 I have as you approach 1:1 reproduction ratio has a slightly curved focus plane, so I don't get a perfectly perfect sharpness accross the whole frame. Usually the longer the focal length, the flatter the focus plane. One thing to add about sharpness is that the best thing is to focus with live view on the grain, but with the depth of field preview (aperture closed to the working value), because there is, at least with my lens, some focus shift. Another trick for color work is to take a picture slightly larger, and use the white balance color picker to a point outside of the image, as that orange/cyan area should be gray.

Reply

Leave a Reply

Your email address will not be published. Required fields are marked *

stefano giovannini replied:

Comment posted: 08/02/2017

Oh too bad that the newer model has a worse negative carrier. Are the negative carriers available? May be worth to buy a spare one, so while you scan 24 frames you can prep the remaining 12.

Reply

Leave a Reply

Your email address will not be published. Required fields are marked *

stefano giovannini replied:

Comment posted: 08/02/2017

Karellen, Someone sells custom negative carriers for scanners and Polaroid slide copiers (also another brand) on Amazon and ebay. I need to maybe post here my method, will do when a will digitize my negatives in a few days. I use AF and f/11 or so to speed up the process. I can not fill up the frame with the 50mm macro lens, but I still get about a 16 megapixel equivalent out of my 24 megapixel A6000 when digitizing this way. I tried your custom white balance method on the orange mask, but I have to say the colors are off, compared to a real scan. In BW no problem. ps I also use AUTO mode to compensate for eventual negative density differences. on some frames I may bracket a little.

Reply

Leave a Reply

Your email address will not be published. Required fields are marked *

karellen replied:

Comment posted: 08/02/2017

Another trick I forgot to mention is that the orange mask is too strong to be compensated with the lightroom sliders (and so also the color picker) so the way to go is set the coolest white balance manual setting you have, 2500 K on my pentax. With the sony it's a little more complicated, but the last white balance setting should do the job, you have to calibrate the white using an orange piece of film with nothing pictured on it. I usually get good results, that I make a little less than perfect with the color picker, and then I fine tweak the sliders to make them perfect. Remember that each film has its unique character in the way it renders color, so if you are used to digital files you will always get slightly off colors in some zones, but anyway that's the weakness but also the strength that makes us choose film over digital! You also mention some lack of contrast. When you take a normal picture, the light meter makes the whole scene look like a 18% middle grey. But when you take a picture of a negative, both color and black and white, once you invert it this 18% becomes 82%, so you get way overexposed files. The solution is simple, I put a -1 stop to the light meter, and still have overexposed raws, which I prefer in a signal/noise perspective.

Reply

Leave a Reply

Your email address will not be published. Required fields are marked *

Mark replied:

Comment posted: 08/02/2017

Hi Karellen, I use a copy-stand macro lens setup, with home-built light box and baffle (with different baffles for different film sizes). I gave up on the V800 because of the dust issues. For colour film, I put a blue filter on the macro lens, which helps compensate for the orange mask. Although it is not perfect, it gives more even exposure in each of the RGB channels, which in turn helps reduce noise and makes it simpler to post process. That said, I am only using this to digitise older film archives at the moment, as all my current film output is in black and white...

Reply

Leave a Reply

Your email address will not be published. Required fields are marked *

karellen replied:

Comment posted: 08/02/2017

Hi Mark, Nice idea of using a filter on the lens! Other ideas I had that may be helpful to someone that I considered were putting something blue on the flash, using my pc monitor as a light source (with the ability to make it as blue as I want) or even exaggeratedly using the blue clear sky as back light source! In the end I didn't even try those options because I found a good method in setting the coldest white balance setting available. I also discovered that I can make the camera measure the white balance directly on the orange mask to make it look grey (and I can even keep the value saved for future acquisitions), I didn't even try this method but it may give the best possible results. Truth be said I just started shooting film, and I only shoot black and white (by now!) that I develop by myself, but I "scanned" in this way some color negatives for a friend who uses a diana mini. Not the best camera in the world to speak about sharpness, but with a properly exposed negative on daylight (about 2-3 per roll lol!) the colors are normal, so I can say that my method works! Speaking about dust I get some too, but it's rather easy to correct with lightroom. More problematic are the spots of wetting agent that I get on my negatives, I keep putting less of it every time, but I can still see some! The next time I won't use it at all! (As I said I am really at the beginning!) My reason to go this route instead of using a scanner as normal people do are 5: - I am not normal, If I can and I have no pressure of being forced to have a perfect result in little time I follow the most difficult route, as it's usually the most rewarding as you learn more! - I get raw files, with more flexibility than the tiff that I would get from a scanner. This point may be simply academic, because most times there's not really a lot more to get from film (compared to digital), highlights excluded: a lot of times playing with the exposure slider you can still see the perfect circle of the sun, whereas on digital you would get a giant blob of burnt highlights with no information! - resolution: with fine grain films like delta 100 on 135 film I can get roughly 24 megapixel of true resolution, so roughly 6000 pixels on the 36 mm side, which translates to roughly 4200 dpi! I said 24 megapixel because to my eyes that's what that film resolves so I don't need more, but I get 32-34 with my 36 megapixel camera, and if I will try something like adox cms 20 I could use extension tubes an merge more than one picture to squeeze more (a lot more) resolution juice! - time: it takes me just a couple of minutes to scan a 36 exposures roll; - money: I already have a pentax k-1, so not spending other money on something else is obviously better, and in some way using it even when I am using another camera makes me justify better its expense!

Reply

Leave a Reply

Your email address will not be published. Required fields are marked *

Mark replied:

Comment posted: 08/02/2017

Actually, the file-size issue is also a good point. Compression in TIFF files is not particularly brilliant - usually a simple ZIP algorithm or similar, rather than an a more image-specific scheme. You also only get the option of 8 bit or 16 bit depth, which may or may not be ideal for your scanner.. In contrast, many RAW file formats use reasonably efficient loss-less compression. For example, Canon's CR2 RAW format uses loss-less compression, similar to that used in conventional JPEGs. It also only encodes the 14 bits data read by the sensor. As a result, the files are much much smaller (20MB vs 60MB) and do not give anything up on quality. FWIW, I find it faster to scan via macro photographs than with the V800, but more work overall (ie the macro images are quicker to take but need your full attention, while the Epson is slower but more automated). However, the price of that automation is a lot more time subsequently patching up dust in photoshop...

Reply

Leave a Reply

Your email address will not be published. Required fields are marked *

karellen replied:

Comment posted: 08/02/2017

Mark, My concerns about tiff files were not about file size efficiency, but rather that a raw file is a lot more pliable than a tiff. A tiff, being 8 or 16 bit color depth, extends this depth only to the "visible" range, whereas a raw file extends a little more in the highlight zone, and a lot more in the shadows. This means that if you have a tiff where a dark zone is pure black, you can increase exposure but that zone will never get detail, at most it will be a blob of solid gray without nothing. With a raw file the same pure black area will surely have some detail recorded. The same could be said for white areas, but the amount you can recover is usually smaller. If you try to take an underexposed picture in raw (especially at low iso), convert straight away in tiff, and then try to add exposure to both tiff and raw you will understand what I say! Oddly enough film is the opposite of digital, on film you have a lot of dynamic range on the highlights, and on digital on the shadows. What's interesting is that you take a picture of a negative, so bright areas on film with a lot of information are dark, meeting digital sensor's capability of taking that detail! That in the real world means that with a scanned picture of a normally exposed ilford hp5 in daylight, you can decrease the exposure of the raw file till you can only see the small circle of the sun! Not something you will need to do any day, but just to say that you have plenty of headroom to adjust your files!

Reply

Leave a Reply

Your email address will not be published. Required fields are marked *

Aukje replied:

Comment posted: 08/02/2017

Yes, I have been thinking about that. Although most prepping time is preparing the scanning software, such as tweaking exposure and crop for each frame. But I suppose I could improve the timing if I would accept non-optimal scanning, and maybe do a rescan for the best photos only.

Reply

Leave a Reply

Your email address will not be published. Required fields are marked *

Mark replied:

Comment posted: 08/02/2017

Hi Karellen, The file format should not not be a problem, providing it has enough bit depth. You can convert just about any RAW file today in to a 16 bit TIFF without loosing anything (but probably gaining a lot in file size). However that does assume an appropriate conversion mechanism (e.g. Something that does not apply any changes to the image data). Most scanner software works with 16 bit TIFFs and should give results every bit as good as from an equivalent camera RAW file. However, because of the file size problem with 16 bit RGB (think hundreds of MBytes per image...) it is often more practical to use use either jpeg or 8 bit files - which obviously loose something over the original scan data. It is a shame that there is not a widely adopted and efficient loss-loss image compression scheme for TIFF, as otherwise the format is excellent.

Reply

Leave a Reply

Your email address will not be published. Required fields are marked *

Eduardo Klein Fichtner on Epson V800 – Home Scanning Colour Negatives – by Aukje

Comment posted: 08/02/2017

Great job. Impressive. Congrats.
Reply

Leave a Reply

Your email address will not be published. Required fields are marked *

Aukje replied:

Comment posted: 08/02/2017

Thanks, Eduardo!

Reply

Leave a Reply

Your email address will not be published. Required fields are marked *

George Appletree on Epson V800 – Home Scanning Colour Negatives – by Aukje

Comment posted: 08/02/2017

Drivers change software too.
For instance I was using epson pefection 2450 which doesn't work with the last window's and had to install the 4990 one, that brings an better version
Reply

Leave a Reply

Your email address will not be published. Required fields are marked *

Aukje replied:

Comment posted: 08/02/2017

I used the latest version from the website, as the one that came with the CD wasn't up to date.

Reply

Leave a Reply

Your email address will not be published. Required fields are marked *

Frank Lehnen on Epson V800 – Home Scanning Colour Negatives – by Aukje

Comment posted: 09/02/2017

You did a great job Aukje. While I have been fussing around and worrying about scanners, you just went and did it right! Great results from that scanner, at least on screen.

As for Silverfast, I'm slowly coming to.... well, not like it, but to accept it. If you spend some time with it you get to know it's ways.....
Reply

Leave a Reply

Your email address will not be published. Required fields are marked *

Aukje replied:

Comment posted: 09/02/2017

Thanks Frank, I feel like I had been fussing about it too, but only for a couple of months. I really felt that I needed it to learn more about the process, and now I actually like it.

Reply

Leave a Reply

Your email address will not be published. Required fields are marked *

Nigel Roberson on Epson V800 – Home Scanning Colour Negatives – by Aukje

Comment posted: 09/02/2017

Great job. I use a v750 with Silverfast Ai and agree with your sentiments on Negafix. It is a gem amongst all the dross of plugins we get bombarded with. I don't do any 35mm on the Epson, preferring a Minolta 5400 but all my MF is scanned through Silverfast, having tried and ruled out Epson scan and Vuescan. Oh yes they work ok but Silverfast, once you've mastered it is miles better. As for dust I agree that being diligent is a must. I hang my negs in the shower, preferably about an hour after using it as the air then is dust free. I wet mount the negs with the Betterscanning holders and that helps as well. For the dust that gets through I don't mind spotting. I come from a wet darkroom background where we had to mix gum Arabic with black and use a tiny brush. Even a clean image needs a once over because I hate to see speculation highlights in areas where they wrongly drag your eye. Thank you once again for bring so clear and precise with your writing. It's a treat to see good work.
Reply

Leave a Reply

Your email address will not be published. Required fields are marked *

Aukje replied:

Comment posted: 09/02/2017

Thanks for your kind words, Nigel. And thanks for adding your thoughts and experiences. I considered wet-mounting, but read in some reviews that the difference is small/neglegible for flat fresh negatives, so I didn't go down that road. I might give it a go in the future.

Reply

Leave a Reply

Your email address will not be published. Required fields are marked *

Alex Yates on Epson V800 – Home Scanning Colour Negatives – by Aukje

Comment posted: 09/02/2017

Great post Aukje, do you use a Mac or PC? I found Silverfast to be impossible to use on my Mac (not sure why) but that was a few years ago.
Reply

Leave a Reply

Your email address will not be published. Required fields are marked *

Aukje replied:

Comment posted: 09/02/2017

Thanks Alex. I use a Mac with Sierra OS. Works both on my MacBook Pro, and on our Hackintosh.

Reply

Leave a Reply

Your email address will not be published. Required fields are marked *

Dustin replied:

Comment posted: 09/02/2017

Nice article and great results! I recently bought a Plustek 8100 and despite installing and reinstalling, silverfast will not open past the welcome screen and abruptly closes. I am running a MacBook Pro retina on not the latest operating system.. maybe a version back. Any ideas? I've been perfectly happy with my combo of vuescan/color perfect but i haven't even been able to try silverfast

Reply

Leave a Reply

Your email address will not be published. Required fields are marked *

Alex Yates replied:

Comment posted: 09/02/2017

Hmmm - Interesting, perhaps I need to try Silverfast again from a clean install. Thanks again for a great article.

Reply

Leave a Reply

Your email address will not be published. Required fields are marked *

Aukje replied:

Comment posted: 09/02/2017

Thanks Dustin! If you are perfectly happy with your current setup than why bother? But if you want to try Silverfast you can get different drivers for each OS version here: http://www.silverfast.com/get_demo/en.html

Reply

Leave a Reply

Your email address will not be published. Required fields are marked *

Dustin replied:

Comment posted: 09/02/2017

thanks! I just would like to compare at some point! Probably won't be for a while as I'm getting good results with my setup! (Or at least good enough for me!)

Reply

Leave a Reply

Your email address will not be published. Required fields are marked *

alex on Epson V800 – Home Scanning Colour Negatives – by Aukje

Comment posted: 10/02/2017

thanks for the article! the V800 is really a nice piece of hardware.
lately i've been looking for a good standalone scanner, has anyone tried some interesting models?
Reply

Leave a Reply

Your email address will not be published. Required fields are marked *

Aukje replied:

Comment posted: 10/02/2017

You're welcome :-)

Reply

Leave a Reply

Your email address will not be published. Required fields are marked *

Dexter on Epson V800 – Home Scanning Colour Negatives – by Aukje

Comment posted: 10/02/2017

Great post. Still unsure whether to conjure up a setup such as Steffano has mentioned or go for a scanner. Will wait for his post and go from there!
Reply

Leave a Reply

Your email address will not be published. Required fields are marked *

Aukje replied:

Comment posted: 10/02/2017

Thanks Dexter. That is one of the great things of this community, sharing experiences.

Reply

Leave a Reply

Your email address will not be published. Required fields are marked *

stefano giovannini replied:

Comment posted: 10/02/2017

Dexter, my method is good for BW, but i do not get accurate colors with color negatives, even if the white balance is right. I compared with lab scans. My set up cost less that $100 and chemicals to process my own BW film is about $0.50 per film. Compare that to my local NYC lab they charge about $19 per 36 exposure roll developed and scanned (color is cheaper I believe $14). It takes about 15 min per roll to reproduce (I do not cut the film until after, to save time). Also I need to slightly adjust the horizontal angle slightly in Lightroom, as each frame has a slightly different angle. Anyway the method gives better results and is faster than the Epson V550 that I bought refurbished (it also allows only a strip at the time which is a deal breaker if you want to set up the scanner and walk away). The Epson V550 was only $129 so I am keeping it (i also have old prints), but V800 seems a great option. Not sure if I want to spend $700 / 800 on a scanner these days. I wonder if 36 frames would fit on a flat bed scanner, but would be great to have a scanner and neg holder that could do 36 frames at once

Reply

Leave a Reply

Your email address will not be published. Required fields are marked *

Nick on Epson V800 – Home Scanning Colour Negatives – by Aukje

Comment posted: 10/02/2017

Hello Aukje! Once again, incredible photos and instruction! Bravo.

I have a technical question though. After detecting each frame individually and opening your Job Manager, how do you apply the same PPI/NegFix/any other settings to each frame?!

I tried in vain to do this for the last hour but had no luck. And also, to Alex's point earlier, I have also been having crashing problems on my brand new version of Silverfast AI Studio on my more than capable iMac...after a couple scans it just freezes and seems to stop communicating with the Epson 750, has anyone else had this problem?

Any further help would be much appreciated!
Reply

Leave a Reply

Your email address will not be published. Required fields are marked *

Aukje replied:

Comment posted: 10/02/2017

Hi Nick, thank you very much! If you click on the blue document icon in a job in job Manager you get a dialog box where you can select which feature to copy, followed by 'Apply to all', or 'Aplly to selected'. You can find a video with instructions here:http://www.silverfast.com/highlights/jobman/en.html I don't know about the crashing, but I recommend using the software from the website instead of the DVD. Further, I had some issues with colourcast which turned out to be caused by a fault in the preferences. How to reset the preferences is described here:https://www.silverfast.com/problemreport/en.html?filter=assistant&sub=delete_prefs8&faq_id=120

Reply

Leave a Reply

Your email address will not be published. Required fields are marked *

Ned on Epson V800 – Home Scanning Colour Negatives – by Aukje

Comment posted: 11/02/2017

Hi Aukje,
An interesting post, which I enjoyed reading very much, thank you.
But it raised a question that has been lurking in the back of my mind for some time, which perhaps you, Hamish or any other wiser than me can perhaps answer.

It is this; why shot film and then digitise? Are there any reasons/benefits apart from utilisation in a social media platform?

I have gone through the tedium of scanning my boxes of firstly Kodachrome, then Agfa then latterly Orwo slides via a Plustek 8200 (?) and the Silverfast software and no matter how diligent I was with the scanning, my "best" scans were always inferior to the slides, especially the Kodachrome ones.
Because if this experience, I have a simple strategy, I only use film when a print or slide is the final product and I only use digital when a digital medium is the intended use.
Am I missing something? With your better knowledge and skills, are you getting scans that are equal to the quality of prints, or is it the enjoyment of using a film camera but still being able to distribute digitally?
Many thanks
Ned
Reply

Leave a Reply

Your email address will not be published. Required fields are marked *

Aukje replied:

Comment posted: 11/02/2017

I wouldn't say that you are missing something, it is a different consideration for everyone. I shoot film because of the joy of using a film camera and because of the learning process involved. I think I only recently got to the point where I feel like I get results I cannot achieve with a digital camera, so that would rationalise it, but frankly it is mostly because of the fun. So now that I have shot film, the question becomes what to do with it. I do like to share results, so digitisation helps. And practically, I don't have a darkroom to make prints (also wouldn't know how to do it), and it doesn't make sense to me to have a lab print all photos for me because of cost and it would end up in a closet. So scanning is necessary to see the result. But it is a fair question, more people have asked me why going through al this trouble while I have a (very nice!) digital camera that produces digital files right away. All I can say is that I just enjoy shooting both film and digital, and am slowly learning the strengths of each so I can use them accordingly.

Reply

Leave a Reply

Your email address will not be published. Required fields are marked *

Dan Emerson on Epson V800 – Home Scanning Colour Negatives – by Aukje

Comment posted: 13/02/2017

Lovely photos Aukje, and fabulous scans. Your instructions are going to be indispensable. Your blog was sent by my daughter's hubby, Joe, an enthusiast who has truckload of cameras including a suite of 120 roll film monsters. We have a great day drinking coffee and doing the best second hand camera places when we visit UK. Have just bought a v800 and looking forward to getting on to a lifetime of negatives, including 6*7 from the old Box Brownie, 120 6*6 and 645 from a Mamiya 330 and Bronica ETRSi from both old and a new one recently. Took a roll on an old wooden tripod (Miller Senior) with the mirror up. Can't wait to see the results. Plus there is a huge collection of 35mm from my Pentax K1000, some taken in B&W fine grain on the Miller. I see that the V800 has no trouble with 4*5 .. mmmmm
Thanks for the inspiration,
Cheers,
Daniel
Reply

Leave a Reply

Your email address will not be published. Required fields are marked *

Aukje replied:

Comment posted: 13/02/2017

Thanks Daniel! Seems like you have a lot of work ahead of you. I hope you get along with the V800 and enjoy the process.

Reply

Leave a Reply

Your email address will not be published. Required fields are marked *

Victor on Epson V800 – Home Scanning Colour Negatives – by Aukje

Comment posted: 16/02/2017

Hi Aukje!

Thanks for your post, very clarifying.
I'm "glad" to see I'm not the only one suffering with this "artifacts" while using the infrared dust reomval. In my case they appear all along the photo but only when I scan B/W film , it doesn't happen with colour film... (but it happens scanning B/W film in colour mode..)

Cheers!
Reply

Leave a Reply

Your email address will not be published. Required fields are marked *

Aukje replied:

Comment posted: 16/02/2017

Thanks Victor! Apparently it is common for black and white film. B/w film is not (or less) transparent for infrared, which causes the problems.

Reply

Leave a Reply

Your email address will not be published. Required fields are marked *

Dmitry on Epson V800 – Home Scanning Colour Negatives – by Aukje

Comment posted: 11/04/2017

Great post. Lovely pictures.
Where they all done with the M2? What lens /lenses did you use most tto capture these.
Reply

Leave a Reply

Your email address will not be published. Required fields are marked *

Aukje replied:

Comment posted: 11/04/2017

Thanks Dmitry! They were all made with the M2 and my 1970 Summilux 50mm lens.

Reply

Leave a Reply

Your email address will not be published. Required fields are marked *

Rolf Sol on Epson V800 – Home Scanning Colour Negatives – by Aukje

Comment posted: 18/06/2017

Hi
I have bought the Epson V700 filmholder, but my Epson v800 does not recognise the four strips. Where/how can I tell the scanner I have changed the filmholder?
Reply

Leave a Reply

Your email address will not be published. Required fields are marked *

Aukje replied:

Comment posted: 18/06/2017

Hi, I draw frames manually, and save this setup in job manager. Hope this helps.

Reply

Leave a Reply

Your email address will not be published. Required fields are marked *

viktor sloth on Epson V800 – Home Scanning Colour Negatives – by Aukje

Comment posted: 25/07/2018

thanks a lot for this lengthy and very informative post.
it really helped me make a decision!
for a while i've been thinking about doing my scans for my self, but after digging into the actual work of scanning and the need to tweak and do adjustments i decided to let the lab do all the work. for me shooting film, is actually to not do any adjustments whatsoever - only let the film and lens do the work - the adjustments i do in my digital work.
so many thanks for clarifying the whole process <3
Reply

Leave a Reply

Your email address will not be published. Required fields are marked *

Aukje replied:

Comment posted: 25/07/2018

You're welcome. Glad it helped.

Reply

Leave a Reply

Your email address will not be published. Required fields are marked *

Henri Toivonen on Epson V800 – Home Scanning Colour Negatives – by Aukje

Comment posted: 12/10/2018

Regarding problems with the IR dust removal and your ektar - increase your blix time (or bleach/fix if you dont use combined blix). You can't overdo it with neither bleach nor fix. What has happened here is that you have not managed to remove all the silver from the neg, in the dense areas (dark bits of the branch) there's some left which will confuse the dust removal and give weird artifacts like that.

I've seen the same problem, I added ~30s to my bleach/fix times and after the tenth roll per liter I add another 30s. If you have separated bleach and fix baths, give the bleach a violent shake before using, to get some oxygen into it, this will freshen it up.
Reply

Leave a Reply

Your email address will not be published. Required fields are marked *

Aukje replied:

Comment posted: 12/10/2018

Thanks for the tip!

Reply

Leave a Reply

Your email address will not be published. Required fields are marked *

Max replied:

Comment posted: 12/10/2018

I know this is quite an old post but I'll second this. Silver is bleached of color negatives and I've seen the exact same issues quite a lot when the blix (never when using bleach and fix separately) have started to gone bad. As stated above you can't really overdo it so when I've had problems I've "reblixed" the film for 10-60 minutes which has always fixed the problems without ruining the film, and after that I've discarded the blix.

Reply

Leave a Reply

Your email address will not be published. Required fields are marked *

Steve Boykin on Epson V800 – Home Scanning Colour Negatives – by Aukje

Comment posted: 04/03/2019

Hi,

This article is old so I hope I get a response. I am about to buy a scanner. I will only be scanning B/W 120. Can you elaborate on why you would go with a V600 if you were only scanning B/W?

"I think if I would have shot mainly medium format film in black and white I would have kept the V600, "

I will be shooting a C330 and Press Super 23.

Thanks so much!!!

Steve Boykin
Reply

Leave a Reply

Your email address will not be published. Required fields are marked *

Aukje replied:

Comment posted: 04/03/2019

Hi Steve, Indeed it has been a while, so I have to dig deep. There were two reasons for me to go for the higher spec of the V800: resolution and colour. Resolution is easy: with the smaller 35mm frames I shoot I need good resolution from the scanner to get a decent file in order to get larger prints. Wrt colour, I cannot remember where I read that the performance of the V800 would be better, but I imagine it could be so that the quality (and colour profile) of the lamp is better. When shooting a larger format in black and white those two specs are not of the highest priority, and then money would become the decision maker. I hope this helps.

Reply

Leave a Reply

Your email address will not be published. Required fields are marked *

Underwater Film Photography With The Nikonos V - Guest Post by Aukje - 35mmc on Epson V800 – Home Scanning Colour Negatives – by Aukje

Comment posted: 07/03/2019

[…] (Read Part 14 here) […]
Reply

Leave a Reply

Your email address will not be published. Required fields are marked *

Michael on Epson V800 – Home Scanning Colour Negatives – by Aukje

Comment posted: 26/07/2019

Hi Aukje,

the artifacts you are seeing in the scan of the winter tree are from iSRD being set at a too high value.
In SilverFast AI Studio, you can adjust the amount of scratch and dust removal, when you switch to the Expert Mode.
By default, SilverFast applies way too much; their value is usually around 17 or 18 (out of 20). I typically set it to 11 and haven't seen any artifacts since.
The same is true for sharpening. The default is too much; I typically set it to "Less Auto-sharpening". The advantage of the auto sharpening feature in SilverFast is the fact that it takes the hardware used into consideration (they provide their own scanner driver for each scanner with the software--that is why you have to purchase a new license, if you change your scanner model).

One note about NegaFix: Yes, the guys at SilverFast want you to believe that no color calibration is necessary when scanning color negatives, by applying the NegaFix filter for the film you are scanning. This, however, would mean that the NegaFix filter would dynamically adjust itself to any color shifts produced by the hardware (the scanner). This does not happen, the NegaFix values for a specific film stock are fixed.
What happens when you calibrate your scanner (you are calibrating the scanner, nothing else)?
You have a defined color target, for which the digital representations of each color blob are known. When you scan the target, the scanner records these colors with its own values. And by comparing the scanned values with the known values, an adjustment curve (scanner profile) can be calculated and stored--and applied to your scans.
So while NegaFix does an excellent job on removing the color cast due to the film masking, it does benefit from a well calibrated scanner.
Unfortunately, you cannot directly set the calibrated scanner profile; you'll first have to perform a scan in positive mode (you can use a b&w frame, slide or color negative), change the scanner profile in the settings and close SilverFast. When you reopen SilverFast and then scan in negative mode, it will apply the previously set color profile to your scans--and the colors of your negatives will be even better.
Reply

Leave a Reply

Your email address will not be published. Required fields are marked *

Aukje replied:

Comment posted: 26/07/2019

Hi Michael, thanks for your elaborate response, a lot of useful tips in here!

Reply

Leave a Reply

Your email address will not be published. Required fields are marked *

Leave a Comment

Leave a Reply

Your email address will not be published. Required fields are marked *