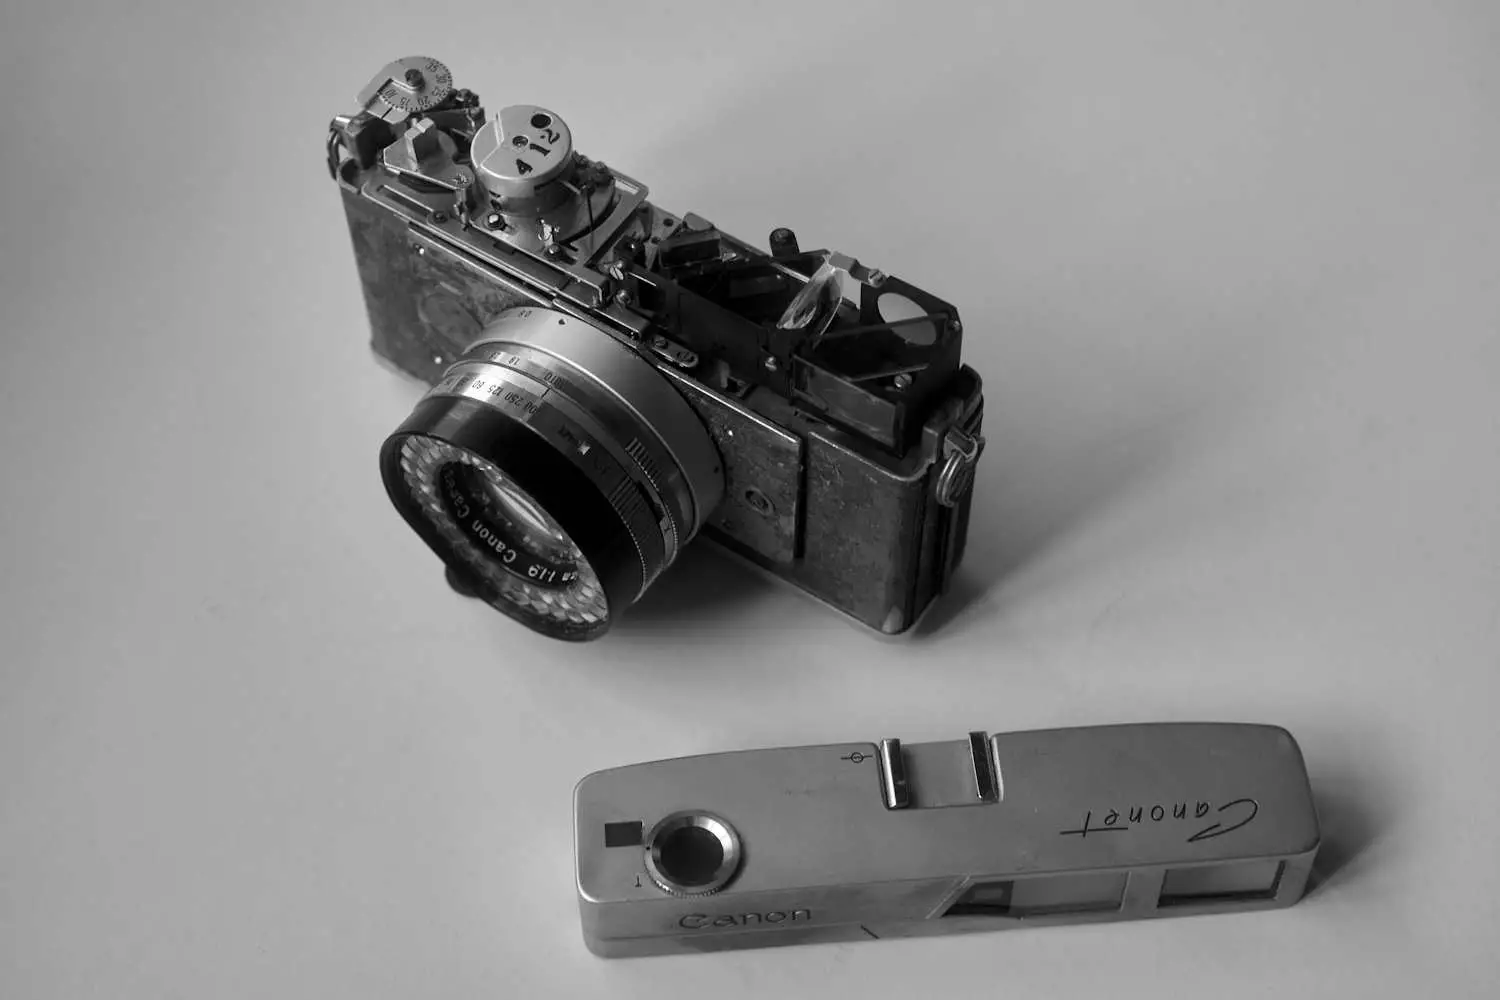
This article is a little different. It is very much focussed on a camera, but I’m hoping it will be of interest to photographers to give some background and understanding to the equipment they are using. This is a camera dissection of an old Canonet rangefinder.
My father was an instrument maker by profession. I grew up in a house that was filled with bits of precision devices in various states of assembly/repair. Dad would raid the bargain buckets of local camera shops and attempt to resurrect ‘dead’ cameras. His success rate was pretty good and he ended up with some nice cameras.
Camera shop bargain bins are largely gone, but we have ebay in its place. I’m not an instrument maker – software was my thing, but I’ve had some success in buying crocked cameras, sometimes managing a fix, or in other cases managing to cobble together the parts of two cameras to make one working example (IT LIVES!) At other times I’ve just been informed by the process – and amazed at the precision involved in making something as simple as a camera.
I should say, this is not the tale of a camera that makes it. Many years ago I bought a broken Canonet 1.9 for nostalgic reasons and was reminded of this recently by a ‘5 frames’ post with images taken with a later Canonet. My Canonet 1.9 is about as old as I am, and while the film transport and rangefinder work fine, the shutter doesn’t fire.
I decided to conduct an autopsy on the Canonet to see if I could get an idea of what was crocked and also because I thought it would be interesting to see how it works (the bits that do work). My apologies that I only thought of documenting with photographs once the bulk of the camera was apart. If I do any more of these I will try to document from the start.
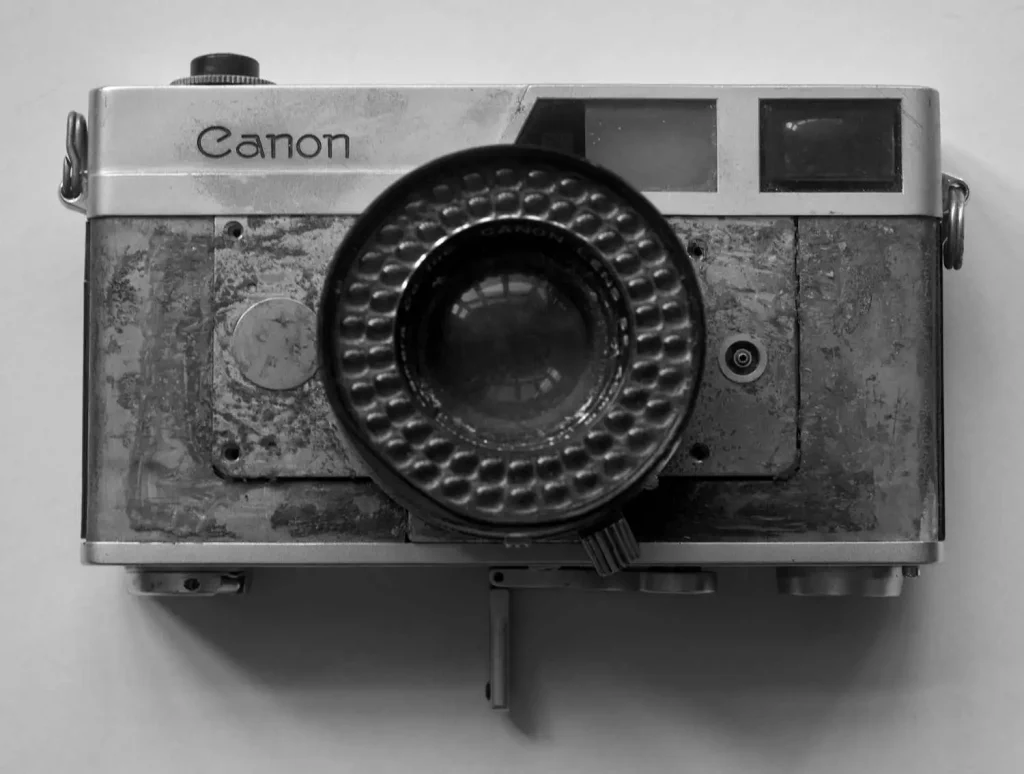
The Canonet range
Canon introduced this first model of Canonet in 1961 – it was an attempt to produce an easy to use camera that still had a good specification. It had a fixed 45mm f/1.9 lens with shutter speeds up to 1/500 and a full range of manual apertures, together with an ‘auto’ setting that picked an appropriate aperture based on a selected shutter speed (shutter priority). The light meter was powered by a selenium cell. This first Canonet was unusual in having the wind-on lever on the base of the camera, for operation by the left hand. By the mid 60s Canon had replaced this model with one that had a slightly faster lens, a cds meter and a conventional top-plate film transport.
Being from the time before the Japanese camera industry adopted the new international standards, the screws are slot-heads. The image at the top is the Canonet with the top off – I’m going to concentrate on the viewfinder, the metering and the connections between the body and the lens.
The viewfinder
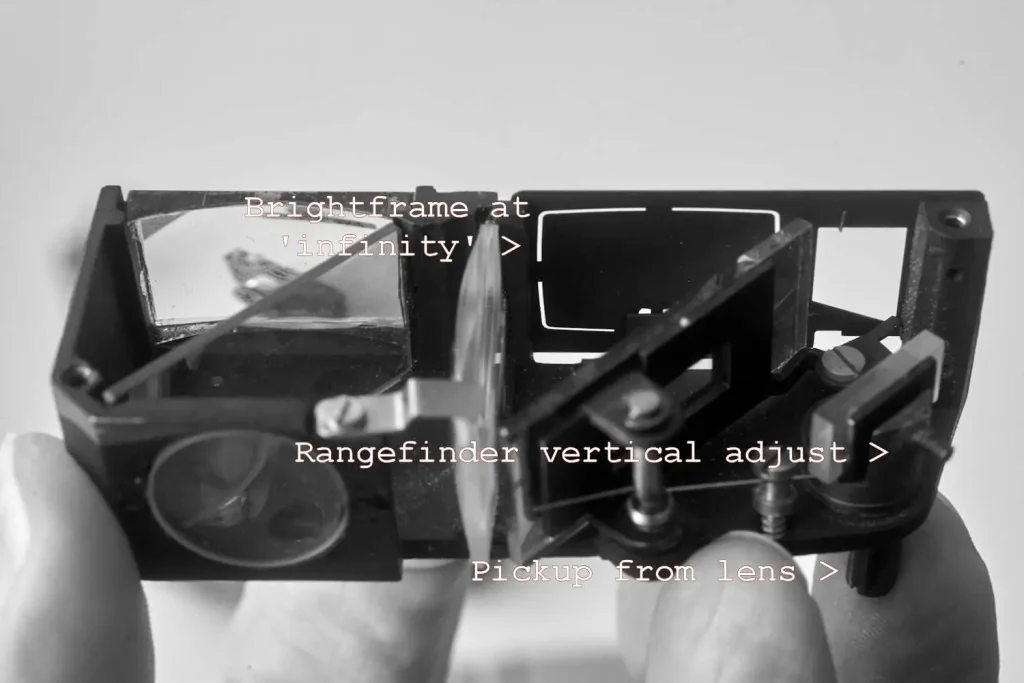
The Canonet viewfinder is reasonably long-base, it has a small cam underneath that picks up the position of the lens. It incorporates parallax correction – so as you focus closer, the brightframe in the viewfinder seems to move diagonally down to the bottom right of the viewfinder.
If you have ever picked up a rangefinder camera and noted that the rangefinder will converge horizontally to show focus but never completely overlaps in the vertical plane, the adjustment is likely to be similar to the little threaded grub-screw at the back of the rangefinder mirror on the right.
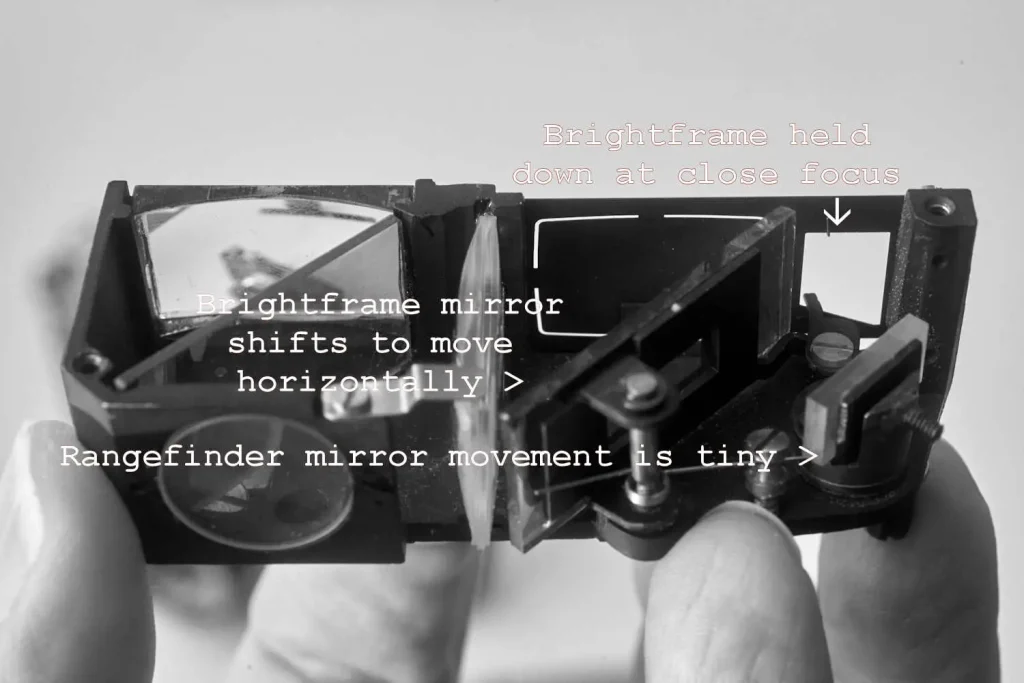
When the camera is focused close the little tab over on the right pushes the brightframe mask down against a spring, while the brightframe mirror pivots slightly left – these two separate movements do the parallax compensation. This was a complication that tended to get dropped over time, and even on high-end models shorter base rangefinders were found to be perfectly acceptable for the focal length of the fixed lenses. The movement in the rangefinder mirror is tiny and gives some idea of the levels of precision involved.
The metering
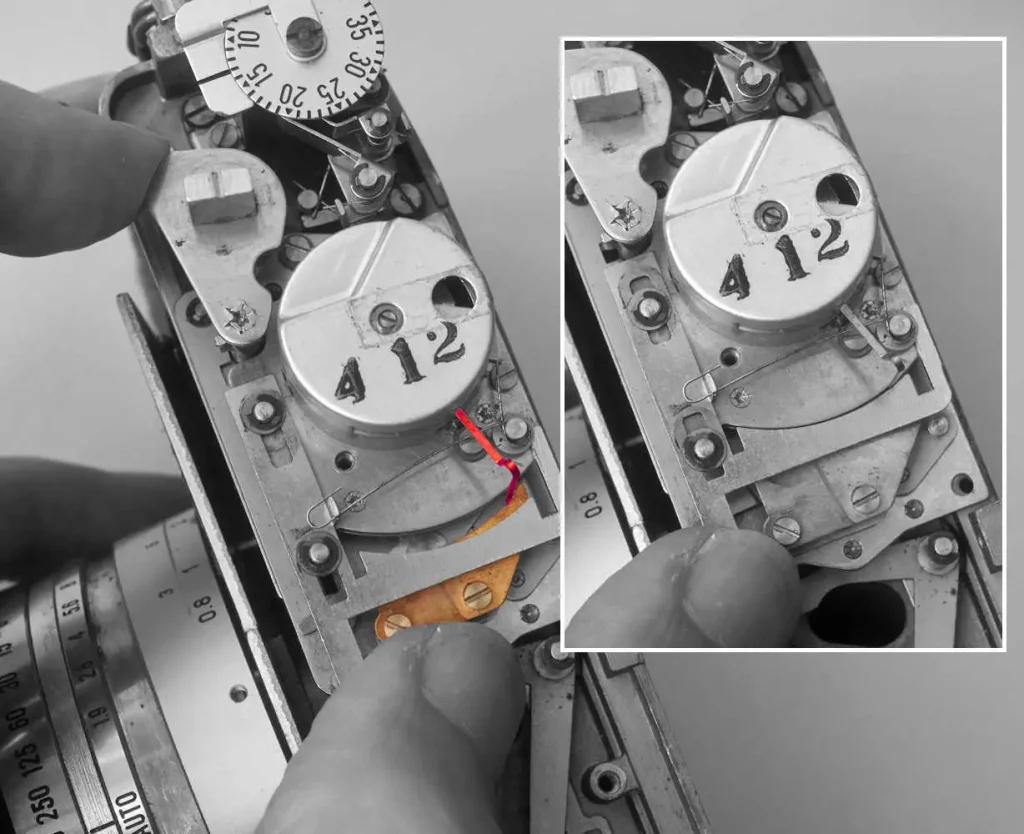
Amazingly, after almost 60 years, the meter is still working. On pressing the shutter release the meter needle is held in place by a curved bar (inset) while the position of the needle (red in the main picture) is ascertained by the curved copper-coloured blade that follows up just behind the bar. Again the differences between extremes of exposure are measured in tiny fractions.
Lens to body connections
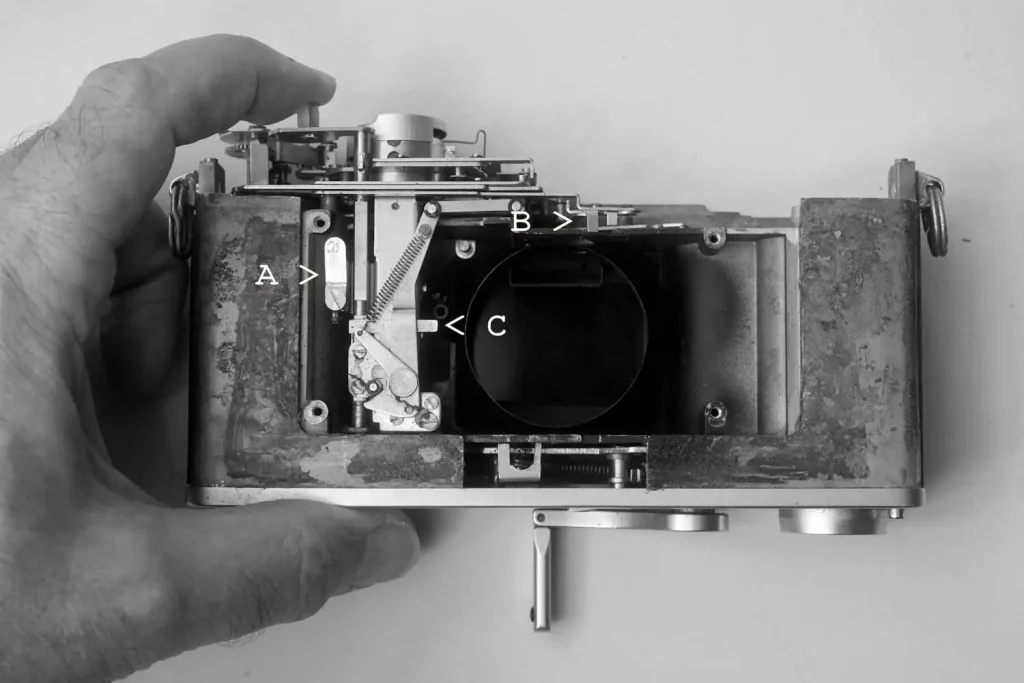
The camera with the lens panel removed. A is the electrical pickup from the selenium cell meter. The lever B moves to our right to set an appropriate aperture based on info from the trapped meter needle, while C moves down as the shutter release is depressed.
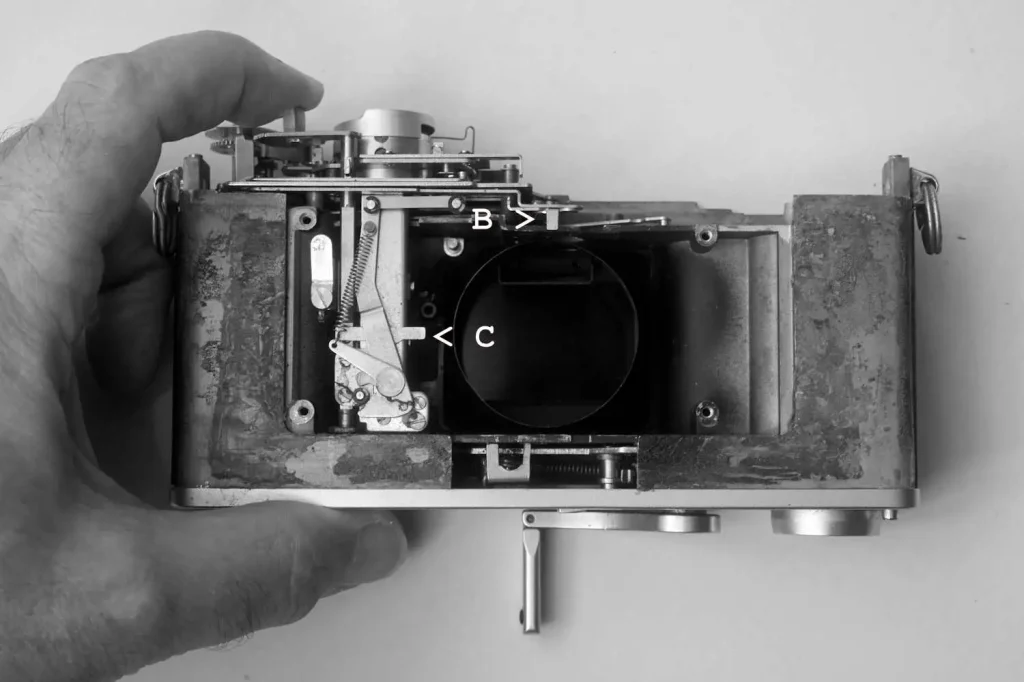
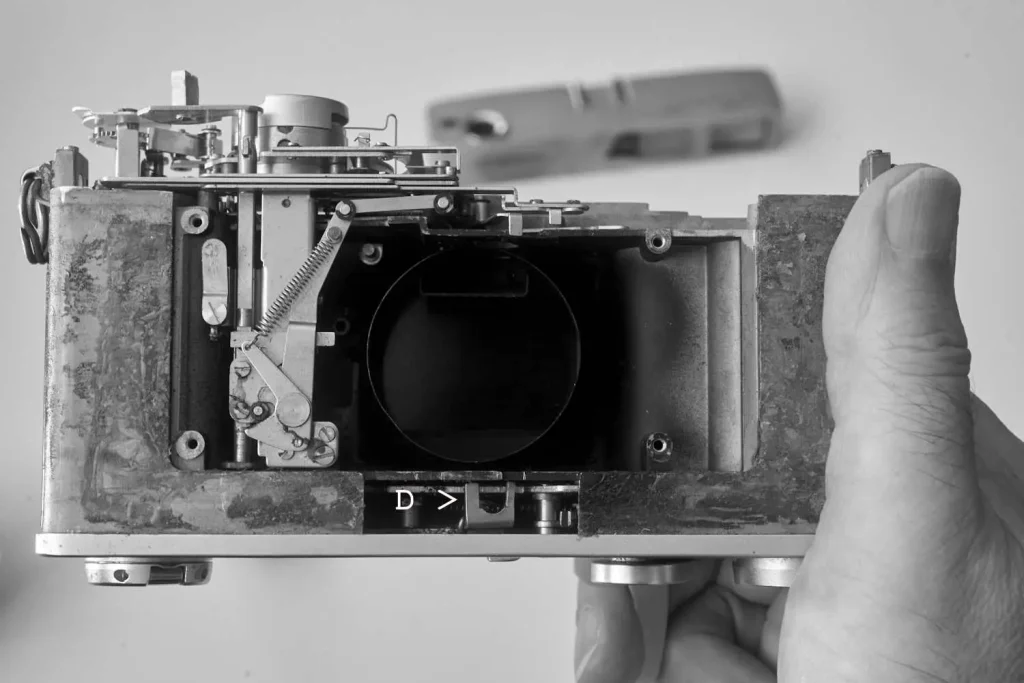
As the film is wound on a fork in the bottom of the camera (D) moves across – so I’m guessing this cocks the leaf shutter.
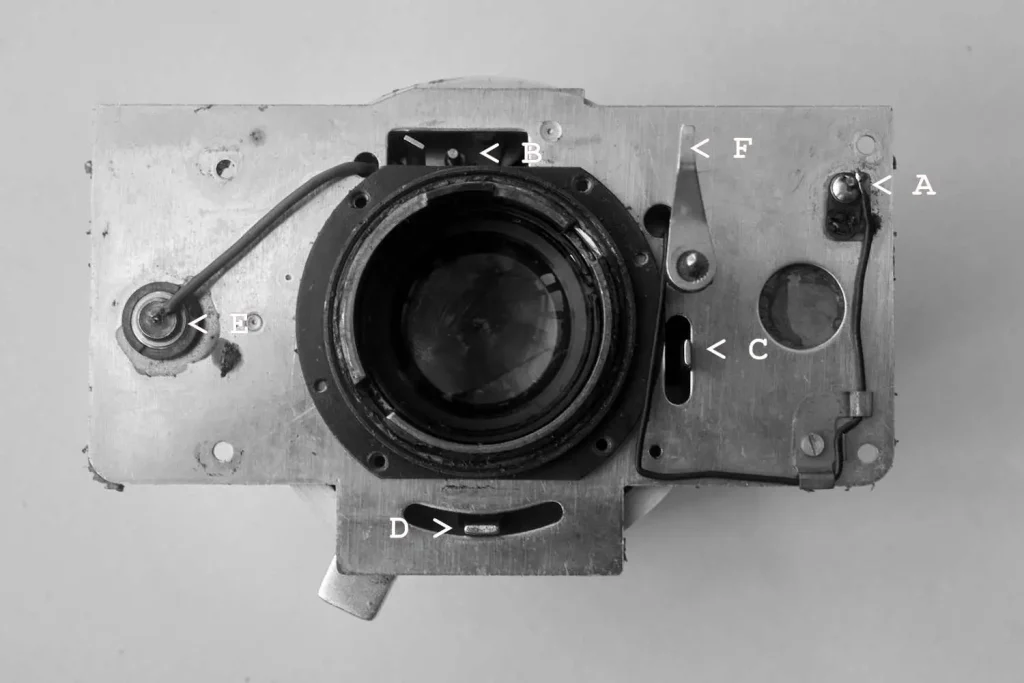
Finally, the rear of the lens panel – with A being the electrical contact for the meter, B is what I’m guessing sets the diaphragm when set to auto (the tab next to it changes orientation when the control on the lens is set to manual). I think that C probably should trip the shutter, while D should cock it. E is the flash synch socket, which only needs to connect to the shutter with no other connection to the camera body.
It is difficult to confirm guesses about the function of B, C and D, as the diaphragm is totally shot and the shutter refuses to cock or fire on any speed. There is also a strange ‘semaphore’ lever on the end of a long pin which seems to link to something in the back of the camera, but I’ve not been able to work out what its function is. It seems quite appropriate therefore to label it ‘F’..
I hope you have found this rather experimental posting informative (and if anyone knows what the ‘F’ is, please leave a comment).
Share this post:


Comments
Trevor on It’s Dead Jim – A Dissection of an Old Rangefinder Camera – By Bob Janes
Comment posted: 08/10/2020
Geoff Radnor on It’s Dead Jim – A Dissection of an Old Rangefinder Camera – By Bob Janes
Comment posted: 08/10/2020
Kodachromeguy on It’s Dead Jim – A Dissection of an Old Rangefinder Camera – By Bob Janes
Comment posted: 08/10/2020
Eric Norris on It’s Dead Jim – A Dissection of an Old Rangefinder Camera – By Bob Janes
Comment posted: 08/10/2020
I've taken apart some cameras in my time, but never to this degree! Are you planning to put yours back together?
Comment posted: 08/10/2020
Alexandre Pontes on It’s Dead Jim – A Dissection of an Old Rangefinder Camera – By Bob Janes
Comment posted: 08/10/2020
Kurt Ingham on It’s Dead Jim – A Dissection of an Old Rangefinder Camera – By Bob Janes
Comment posted: 08/10/2020
Peter on It’s Dead Jim – A Dissection of an Old Rangefinder Camera – By Bob Janes
Comment posted: 08/10/2020