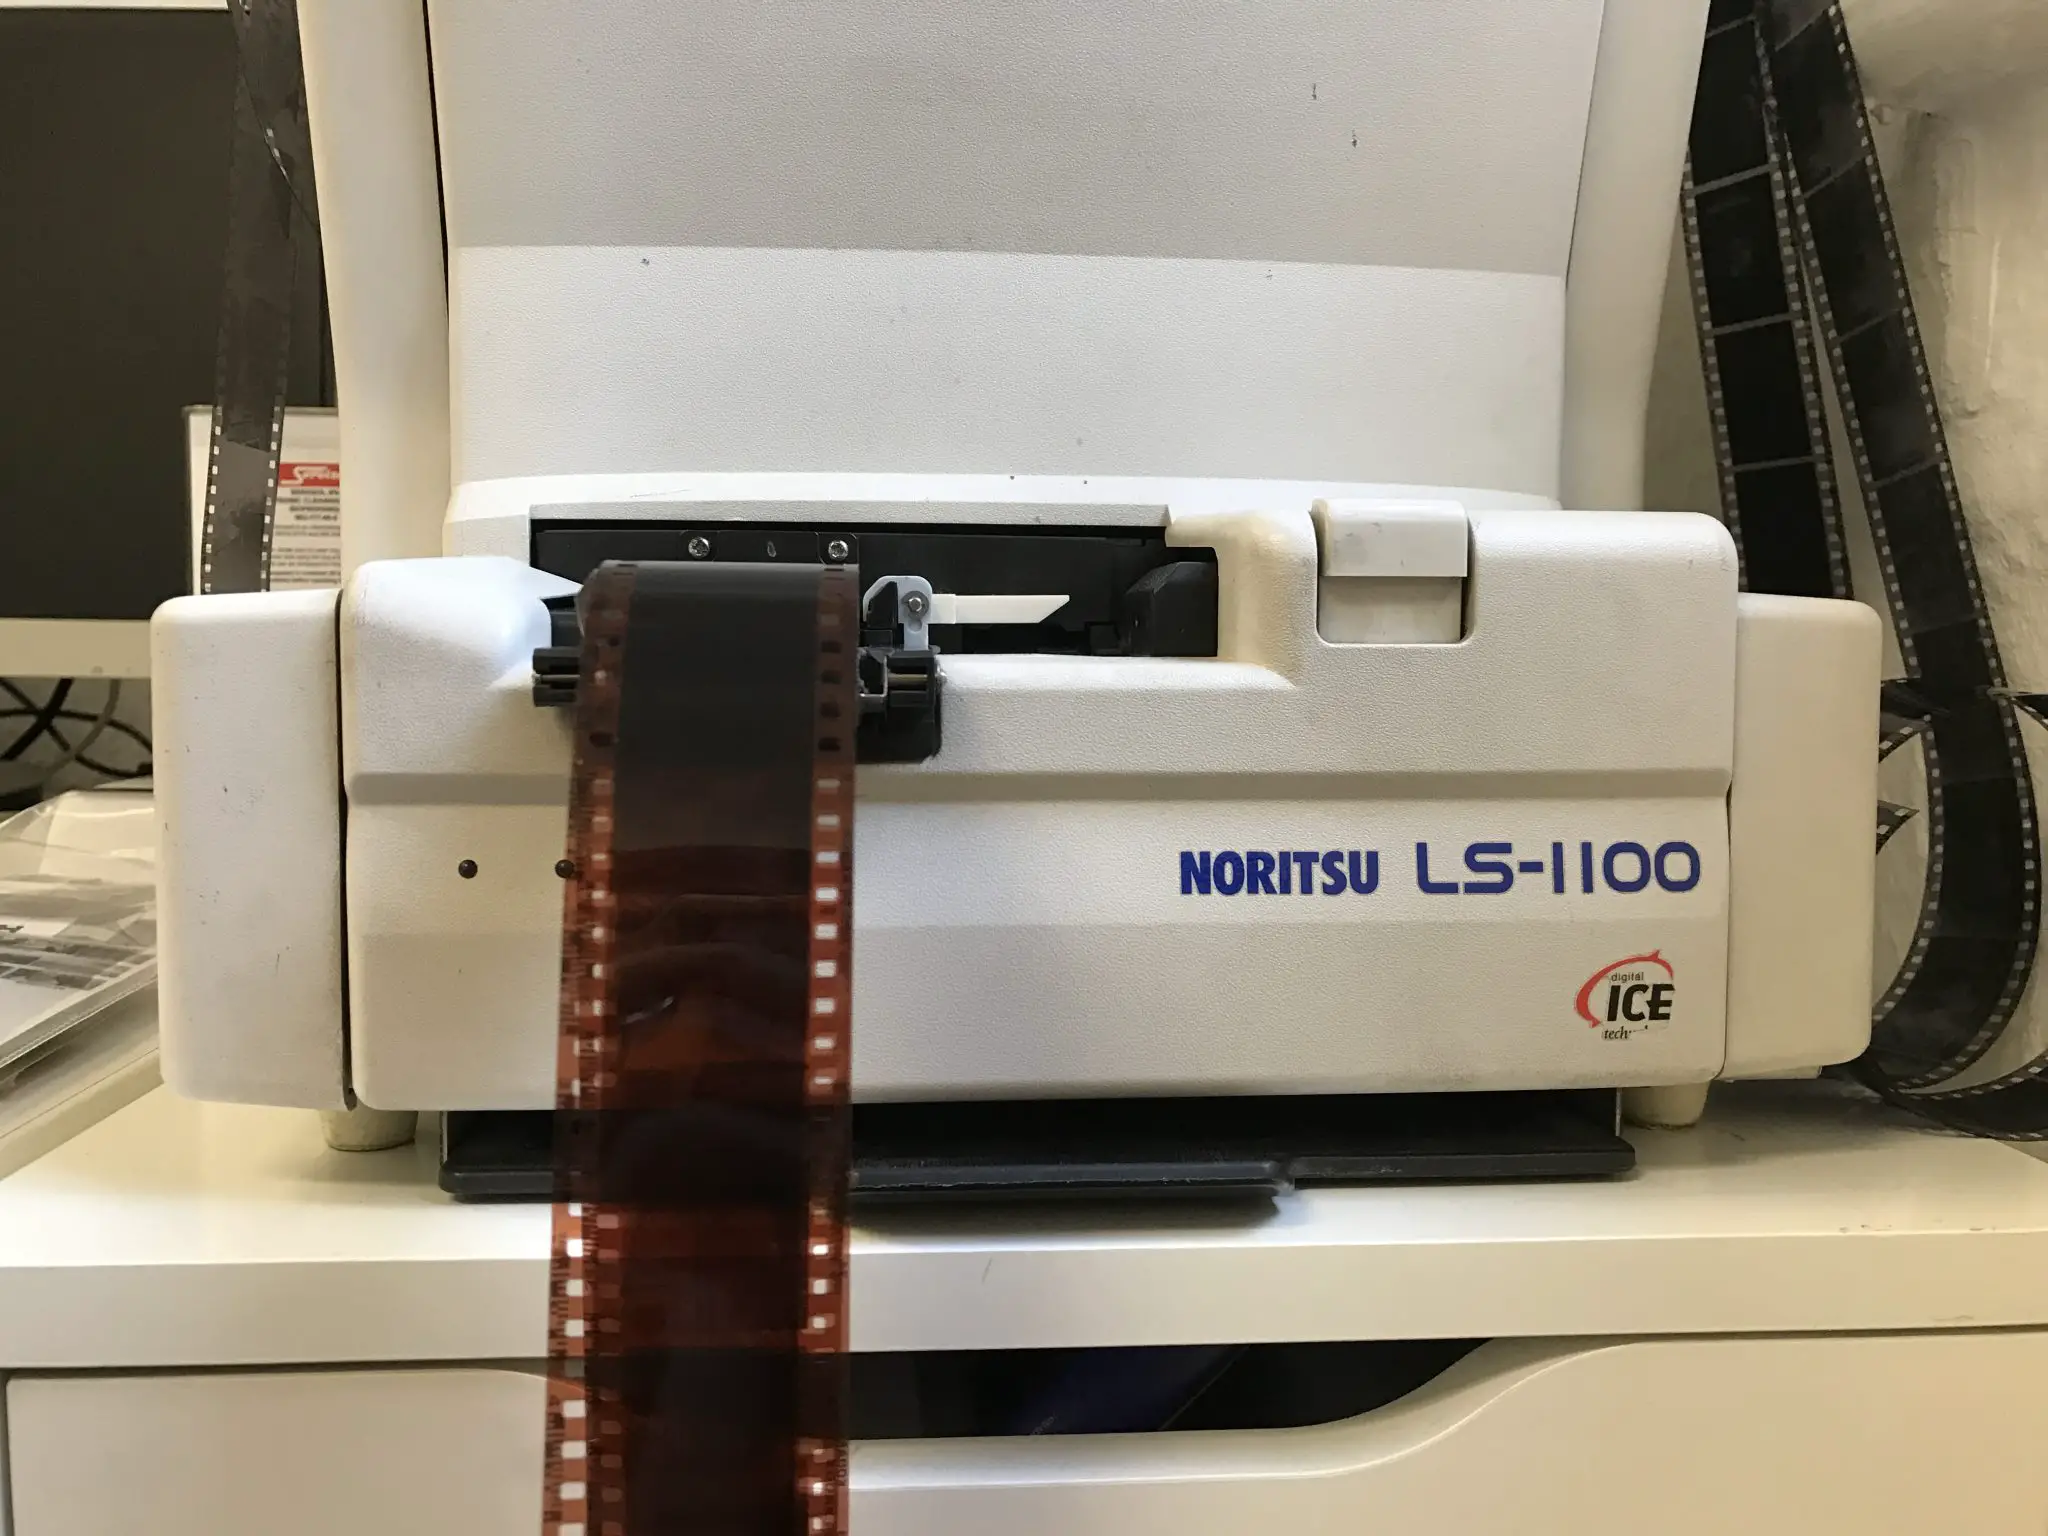
I’ve had my Noritsu LS-1100 for nearly a year, yet after all this time I’m only just beginning to scan with it. To say it’s been a bit of a rocky road would be an understatement! But, now I have it working, and I’m just beginning to get an idea of the potential this thing has… well, it’s safe to say, I think it’s been worth it!
The move to home scanning
I’ve been happy with the results I’ve been getting from AG photo lab for a long time. I’ve flirted with other labs, and been quite satisfied with them too, but AG have always given me the closest to what I’ve wanted from a 35mm scan. I like my scans to be well colour corrected for skin tones, but beyond that, I’d rather have a sense that I’m seeing a fairly neutral image that hasn’t has had too much of someone else’s taste written into it.
Quite often when I look at images from some labs – and of course the photographers that use them – I feel like I’m looking at as much of that lab’s house style as I’m looking at the photographer’s style. This is born out in what I think are trends in the way some photography – especially colour film – has been scanned. There’s nothing wrong with this really, but for my tastes, it feels like there is a bit too much of a sense of putting my work into the hands of someone else.
Of course, I know that some of these labs offer a custom service to help you work with them to define the look you after, but having dabbled in the idea and discussed it with one of these labs, the process felt a little too outside of my control. And besides, I like to feel like my process is as much about learning and further developing as it is about creating a final image. I want to be in control of both my own successes and failures and more importantly learn and develop my skills from both… if that makes sense? This is why I’ve preferred as neutral scan as I can get. Once I have my scans, from AG or whoever, I see it as my job to apply my taste to them to make them my own etc.
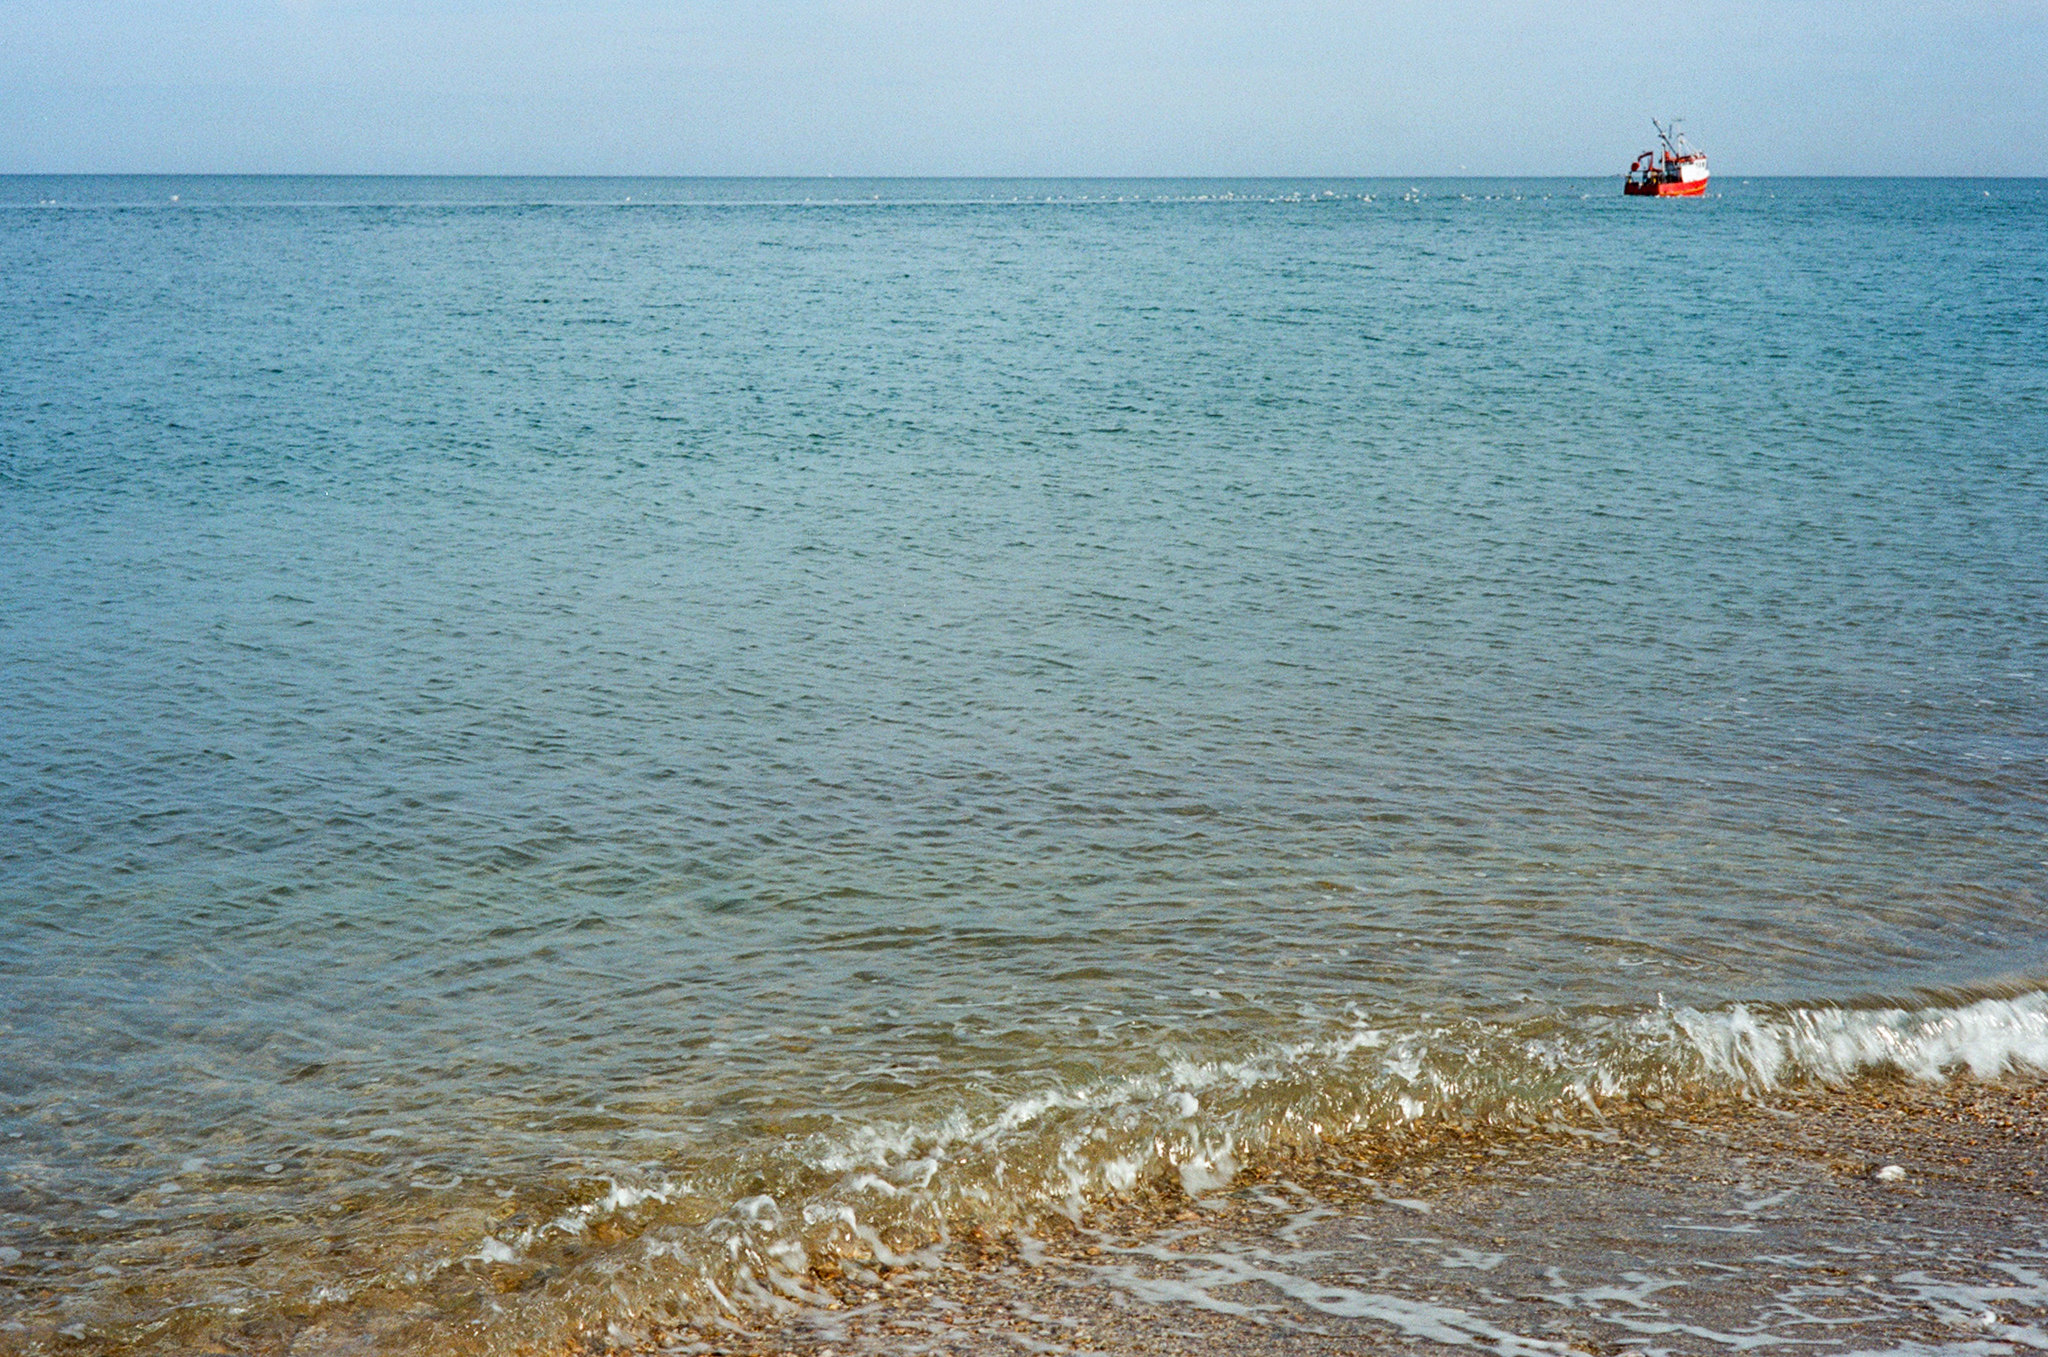
This is all well and good, but sometimes the scans I receive back are just slightly too far outside of where I need them be to apply the look I like without degrading the image quality. Especially, in fact, with colour. I find AG scan colour images very close to my desired end product. This end product is what I see is quite neutral in terms of colour, but is also largely quite high in contrast. The issue with receiving a higher contrast image is that it’s harder to work with in post process – contrast is harder to take away that it is to add.
This can be largely remedied by choosing to receive high resolution TIFF files. These files have more room for manoeuvre in post, but then the scans cost so much more than JPEGs it becomes hard to justify for every roll. The issue is, I don’t always know when I will need the extra room for manoeuvre the TIFF files bring, so tend to always opt for the cheaper smaller jpeg files. 9 in 10 times these come back fine, and I’m perfectly happy able to make any minor adjustments I need to. Unfortunately though, there remains that 1 in 10 time I wish I’d opted for the bigger TIFF file. I get he file back, it’s not how I wanted it, but there isn’t enough room in the file to get it there either. By that time – short of a lot of faff sending them back – it’s too late! It’s this 1 in 10 result that’s made me decide to bring my scanning home.
The problem I faced with this decision basically came down to my previous experience of home scanning. I used to scan all my photos at home. In fact about 10-12 years back I used to develop everything at home too. I stopped because I found it laborious, especially the scanning process which back then was done with an Epson v500 flatbed. The idea of going back to that horrified me. What I needed was a scanner that needed as little faffing around with as possible. What I needed was a commercial scanner.
Why go for a commercial scanner
If you run a business as a dev/scan/print lab there is one key ingredient to its success, and that’s efficiency. It would be simply impossible to run a commercial operation scanning negatives with anything even remotely slow. You need something that can suck the negs in, give you a preview to tweak, then poke them back out again asap scanning them in the process. Whilst doing this, you also need good quality images that are going to make your customers happy, and therefore keep coming back.
I’m not a commercial operation, and have no desire to be one, but that sort of efficiency appeals to me enormously. I don’t feel like I have hours in my days to dedicate to scanning my negs – this is exactly the reason I started outsourcing the process in the first place. As such, when I decided to look for a scanner I decided the only real option was going to have to be something pretty serious. I wanted the same efficiency and quality achieved by a lab, but in my office instead. In fact, what I decided I wanted was the sort of images I was getting back from AG.
Choosing and sourcing a Noritsu
At the time, I knew little more about the kit that AG used than knowing it was Noritsu based. I was also aware of the Noritsu vs. Fuji Frontier conversation that seemed to emanate from the general direction of Richard photo lab, and found myself on the Noritsu side of the fence. I just find the colours and tonality from the Noritsu scanner to look more natural, and often find Frontier scans – at least those that come out of some labs – to look a bit insipid… though this is more down to the aforementioned trends around the use of the Frontier look, rather than the look itself… if you follow??
So, I decided I wanted a Noritsu. In fact, I decided nothing else would do. Either I was going to carry on getting the scans I liked from AG, or if I could find a Noritsu scanner that was going to give me scans like the ones I got from AG, I would try to buy it. So what next? Well, a bloody long wait was what came next!
Finding a Noritsu
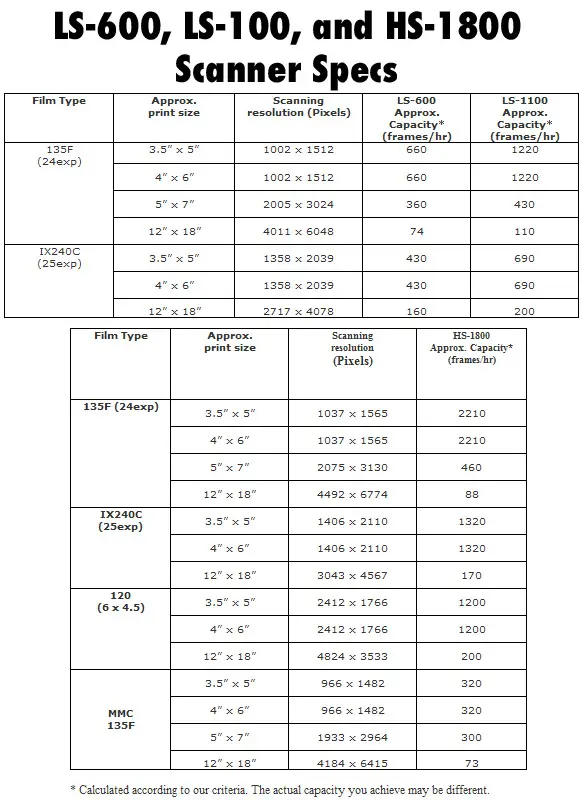
I did my research and discovered there were basically three Noritsu scanners that can be used relatively easily outside of a mini-lab set up. The LS-600 and LS-1100, and then the big daddy the HS-1800. The 600 and 1100 are basically the same, they scan 35mm and APS film and entire roll at a time, quickly, up to 24mp equivalent files size. The 1800 does medium format too, but you’ll need to remortgage, and of course have some desire to scan 120, which I don’t. An LS-600/1100 it was.
At the time these scanners were sparingly being sold on eBay, but rarely, or in fact seemingly never in the UK. Still, I didn’t give up hope and put a couple of followed searches on eBay.
Low and behold, after fair old wait one came up. A Noritsu LS-1100 was being sold on by a high street D&P somewhere in East Anglia. The listing on eBay had no photos, a sparse description, and a buy it now button. Being slightly less than crazy, rather than ‘buy it now’, I got the chaps number and we did a deal over the phone. From memory, it cost me a flat £1000 shipped.
Getting the Noritsu LS-1100 working
Then came the hard bit. At the time – unlike the Pakon scanner that has a facebook support group, the Noritsu didn’t have much of an online community of users at all. In fact, finding info online about how to set one up as a standalone scanner was nigh on impossible. The most I could find was some references to the fact it could be done, and the email address of some Russian chap who was very happy to sell me some software for below retail value… … …
Eventually, I stumbled across the help of a chap called Tom who was successfully using an LS-600 scanner out in the states. With his advice about what software I needed in mind, I then stumbled across the U.K. importer of Noritsu gear; a nice chap called Derek at PhotoXport. He was able to supply me with the software I needed. Though it had to be ordered specifically from Noritsu in Japan.
Unfortunately for me, the software only runs on Windows, so I then had to endure the learning curve of installing parallels on my Mac and poisoning it with an installation of windows XP. Combining the software from Noritsu which included something called “twain drivers” with windows XP, photoshop CS5 and some sort of plugin, the bloody thing only went and spluttered to life. Bear in mind by this time we are in the region of 6 months into me owning the thing by this time.
Discovering the fault
It was at this time that I discovered my LS-1100 had a fault. I had my first scans out of it and they were blurred. Not just a little unsharp either. Blurred.
By this time me and Tom had set up a Noritsu users facebook group, and whilst it was growing, there wasn’t anyone on there who could help me. There was plenty of discussion around how to fine tune the sharpness, but no one had experience of completely blurred results. At this point, I got back on the phone to Derek. He sent my blurred image to Noritsu in Japan, who in turn sent back a very complicated document that detailed how to adjust something called the “light axis tilt and swing”. This was outside of my desire to tackle, and apparently outside of Derek’s too.
Running out of options I returned to google and found a company called Veritek who claimed to offer a repair service for such things. Vertiek are a company that’s mainly geared up for dealing with bigger companies that have maintenance requirements for all sorts of machines; photo lab equipment being within their remit. A quick phone call to them revealed that yes, they did have Noritsu specialists on their team, yes they probably could fix it, but the call out charge was to be over £500! Gulp!!
I then had the brainwave to talk to Matt from AG – he uses Noritsu gear, so who does he use to service them? The short answer was of course, Veritek. He did also give me the name and number of another repair chap, but warned me that unless he said “I know how to fix that” straight away, he was probably a dead end. As it turns out, when I explained the problem to this guy I was met with a short period of silence, some concerned noises, then a “yeah, that doesn’t sound right”. Veritek was to be my only option.
The repair
The Veritek experience first involved a telephone consultation with a nice man named Andy. Again I explained the fault and was again met with a “hmmm, that doesn’t sound right”. At this point I sent him my very blurred image by email which in turn was met with a “that doesn’t look right either”. As it turned out, Andy used to be high up in the team of repair folks for Noritsu when they had an operation based in the U.K. As such, I figured if anyone was going to know his onions, it would probably be Andy. “Can you fix it?” I ask. “I don’t know; not without looking at it” he tells me. The problem is, looking at it was going to cost me that aforementioned £500+.
This felt like a dead end – I could spend the £500 only to find out it wasn’t repairable. This would leave me with what amounted to a £1500 paperweight! Not ideal, and quite a big gamble. That was until I had the idea to ask my company insurance broker if it was covered. Amazingly, the answer was yes. (I have a very good insurance broker, if anyone in the U.K. wants their details, let me know!)
This need to stump up the cash did add further delay, but just after Christmas, having raised some funds by selling my Contax T3, I got back in touch with Veritek and arranged the repair. Andy arrived a week or so later, I explained the fault again, he looked concerned again, but went head on into tackling fixing it. It was quite amazing how quickly he identified the fault. All he needed to do was take the top off.
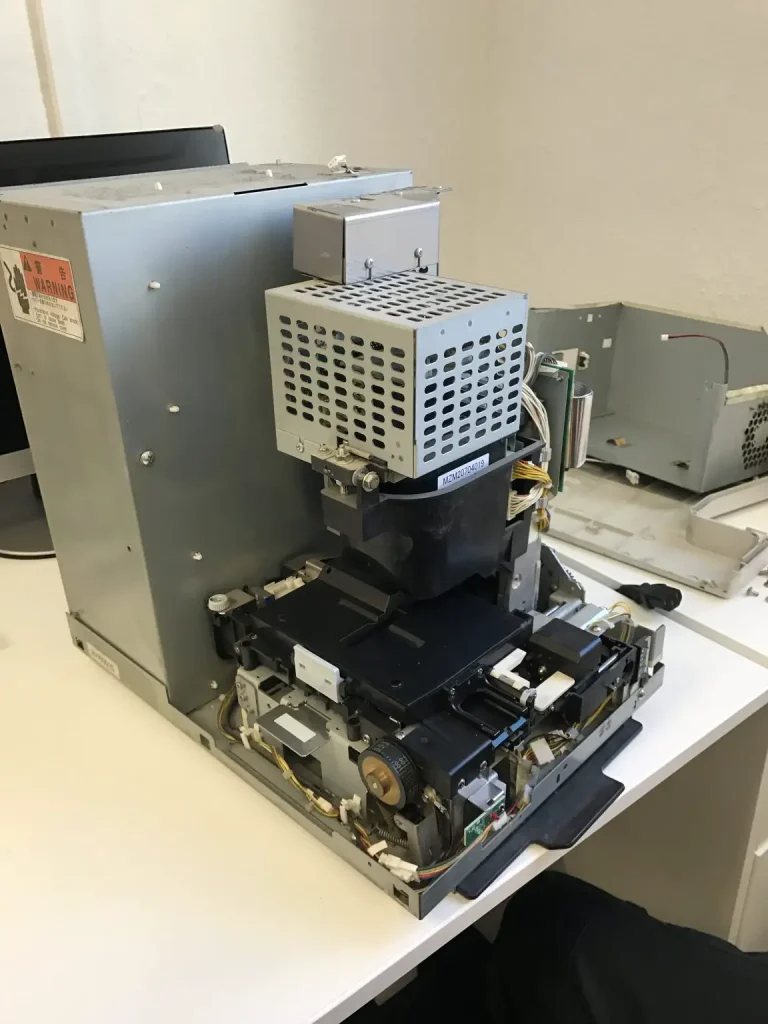
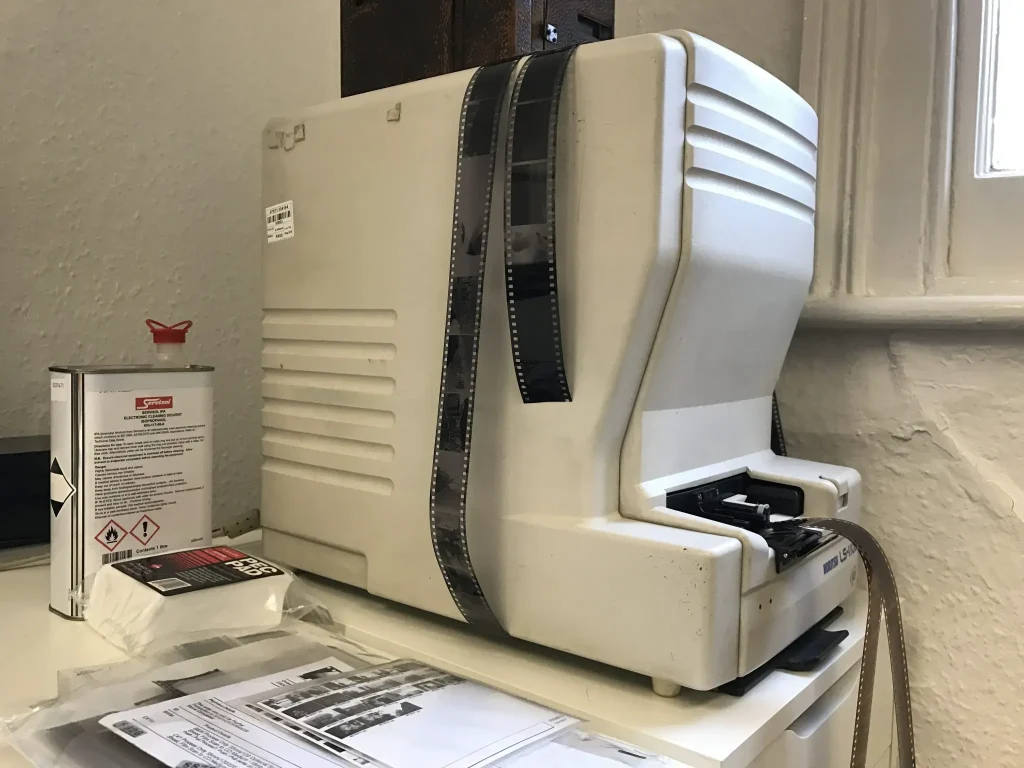
Straight away he noticed that there was quite a good deal of sag/play in the scanning assembly that hangs above the film when it’s scanning. As it turned out, it was just these two little nylon bushings that had snapped.
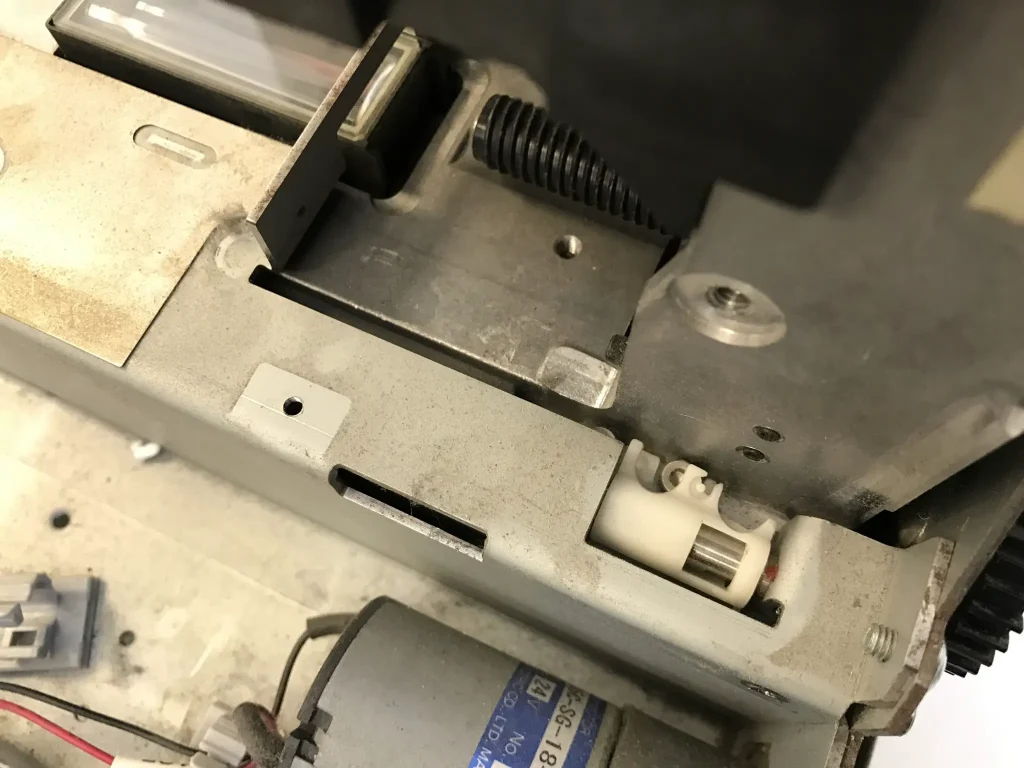
These nylon bushing run along two rails and are what keep the scanning assembly at its calibrated height above the film. Two at the back, two at the front. The front two were snapped on my scanner meaning that whilst it could still operate on the back ones, without the front two in place, it was sagging lower than it should be and couldn’t be calibrated to be in focus. The craziest thing about the whole process was just how much of the scanner had to be dismantled to get to the damned things. Andy basically had to strip the whole of the front of the unit down to its component parts to access the bits to extract them.
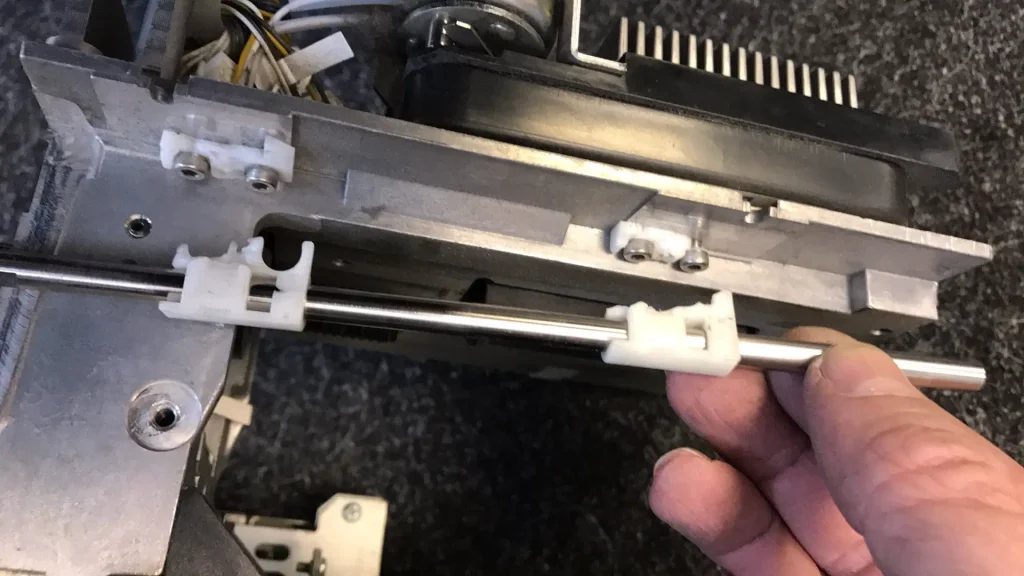
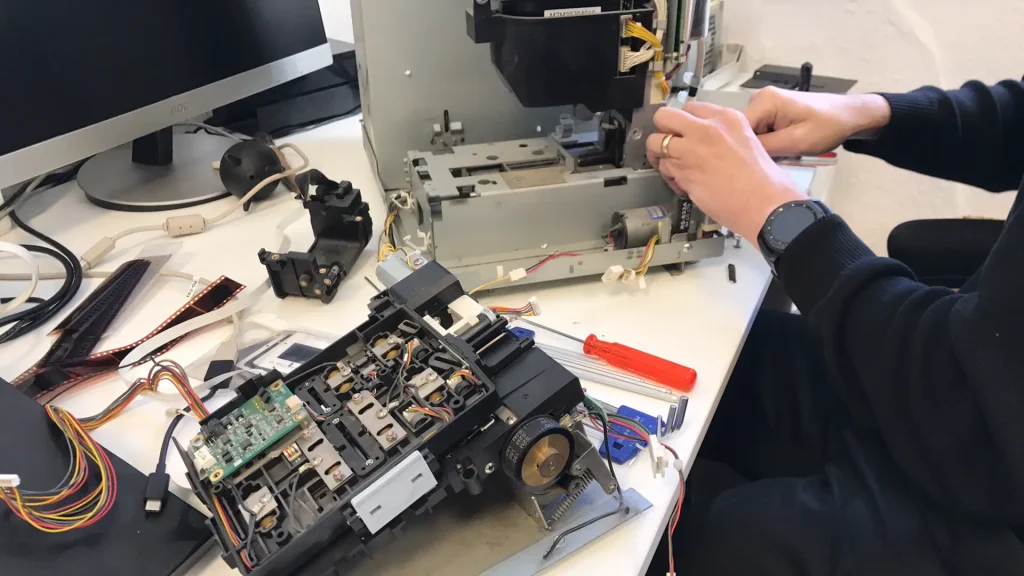
Once extracted, Andy was able to confirm that there didn’t appear to be anything else awry, so put in an email to his head office to see if they had the parts in stock. As if by miracle they had some in their German office. Of course, this meant that Andy couldn’t fix it there and then, but it did mean there was a very bright light at the end of the tunnel.
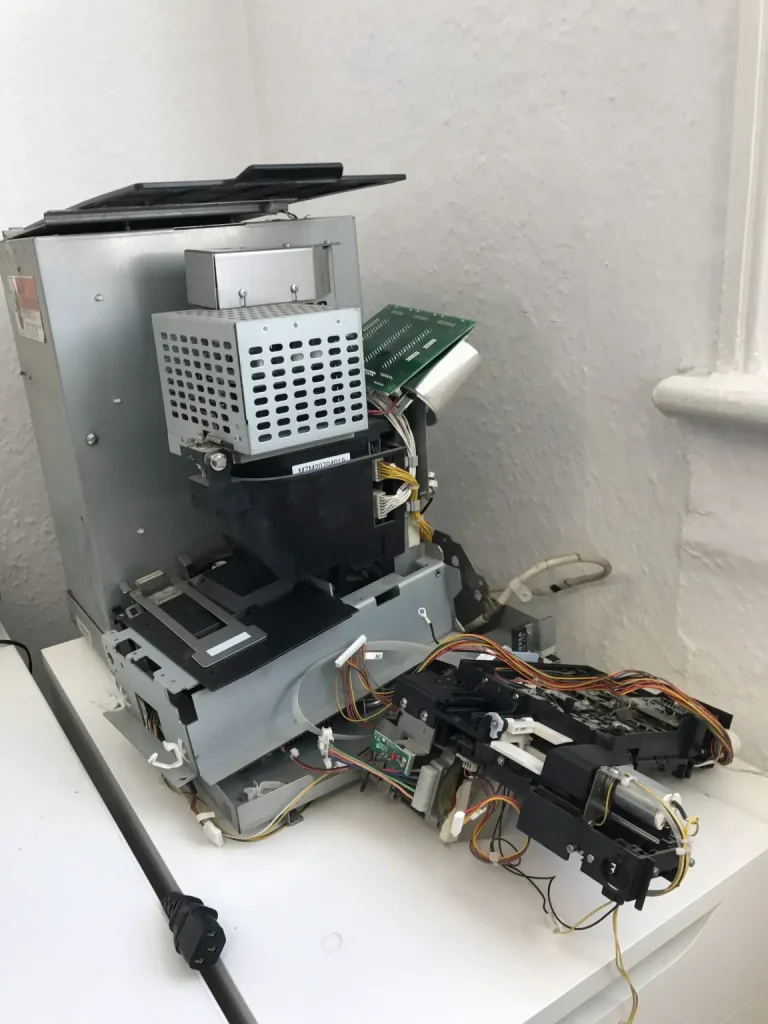
A few days later the parts arrived. A few days after that, Andy returned to fit them. A further £20 for the bits, and an extra £90 for the additional time it took over the original call out, and low and behold the damn thing worked! Not only did it work, but whilst Andy was there he gave it a bit of a clean and service, leaving me in a very positive position to start scanning!
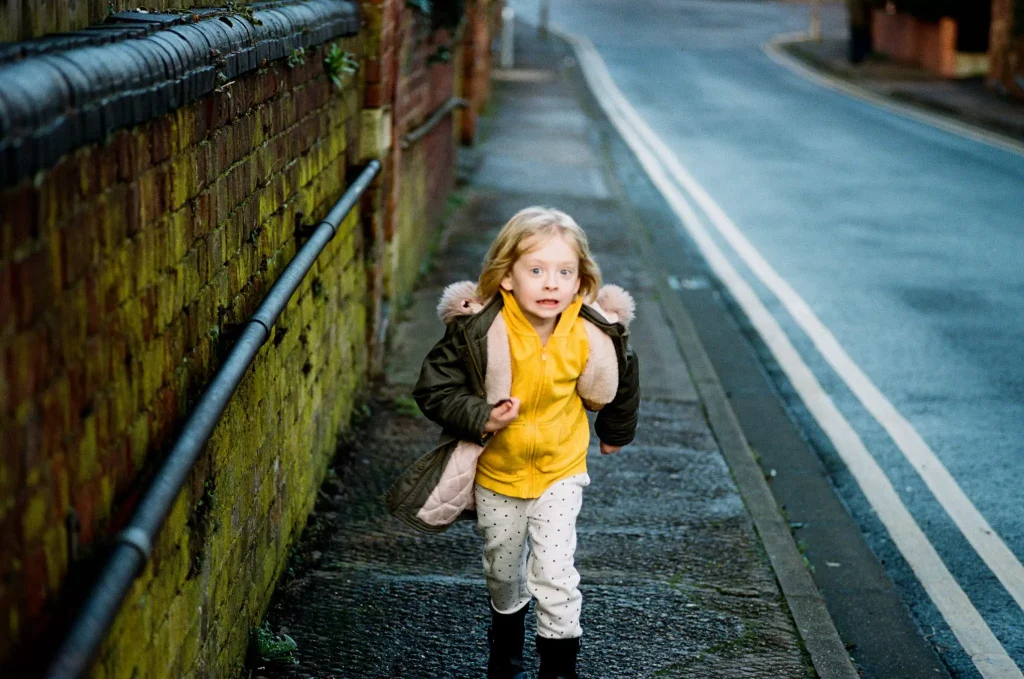
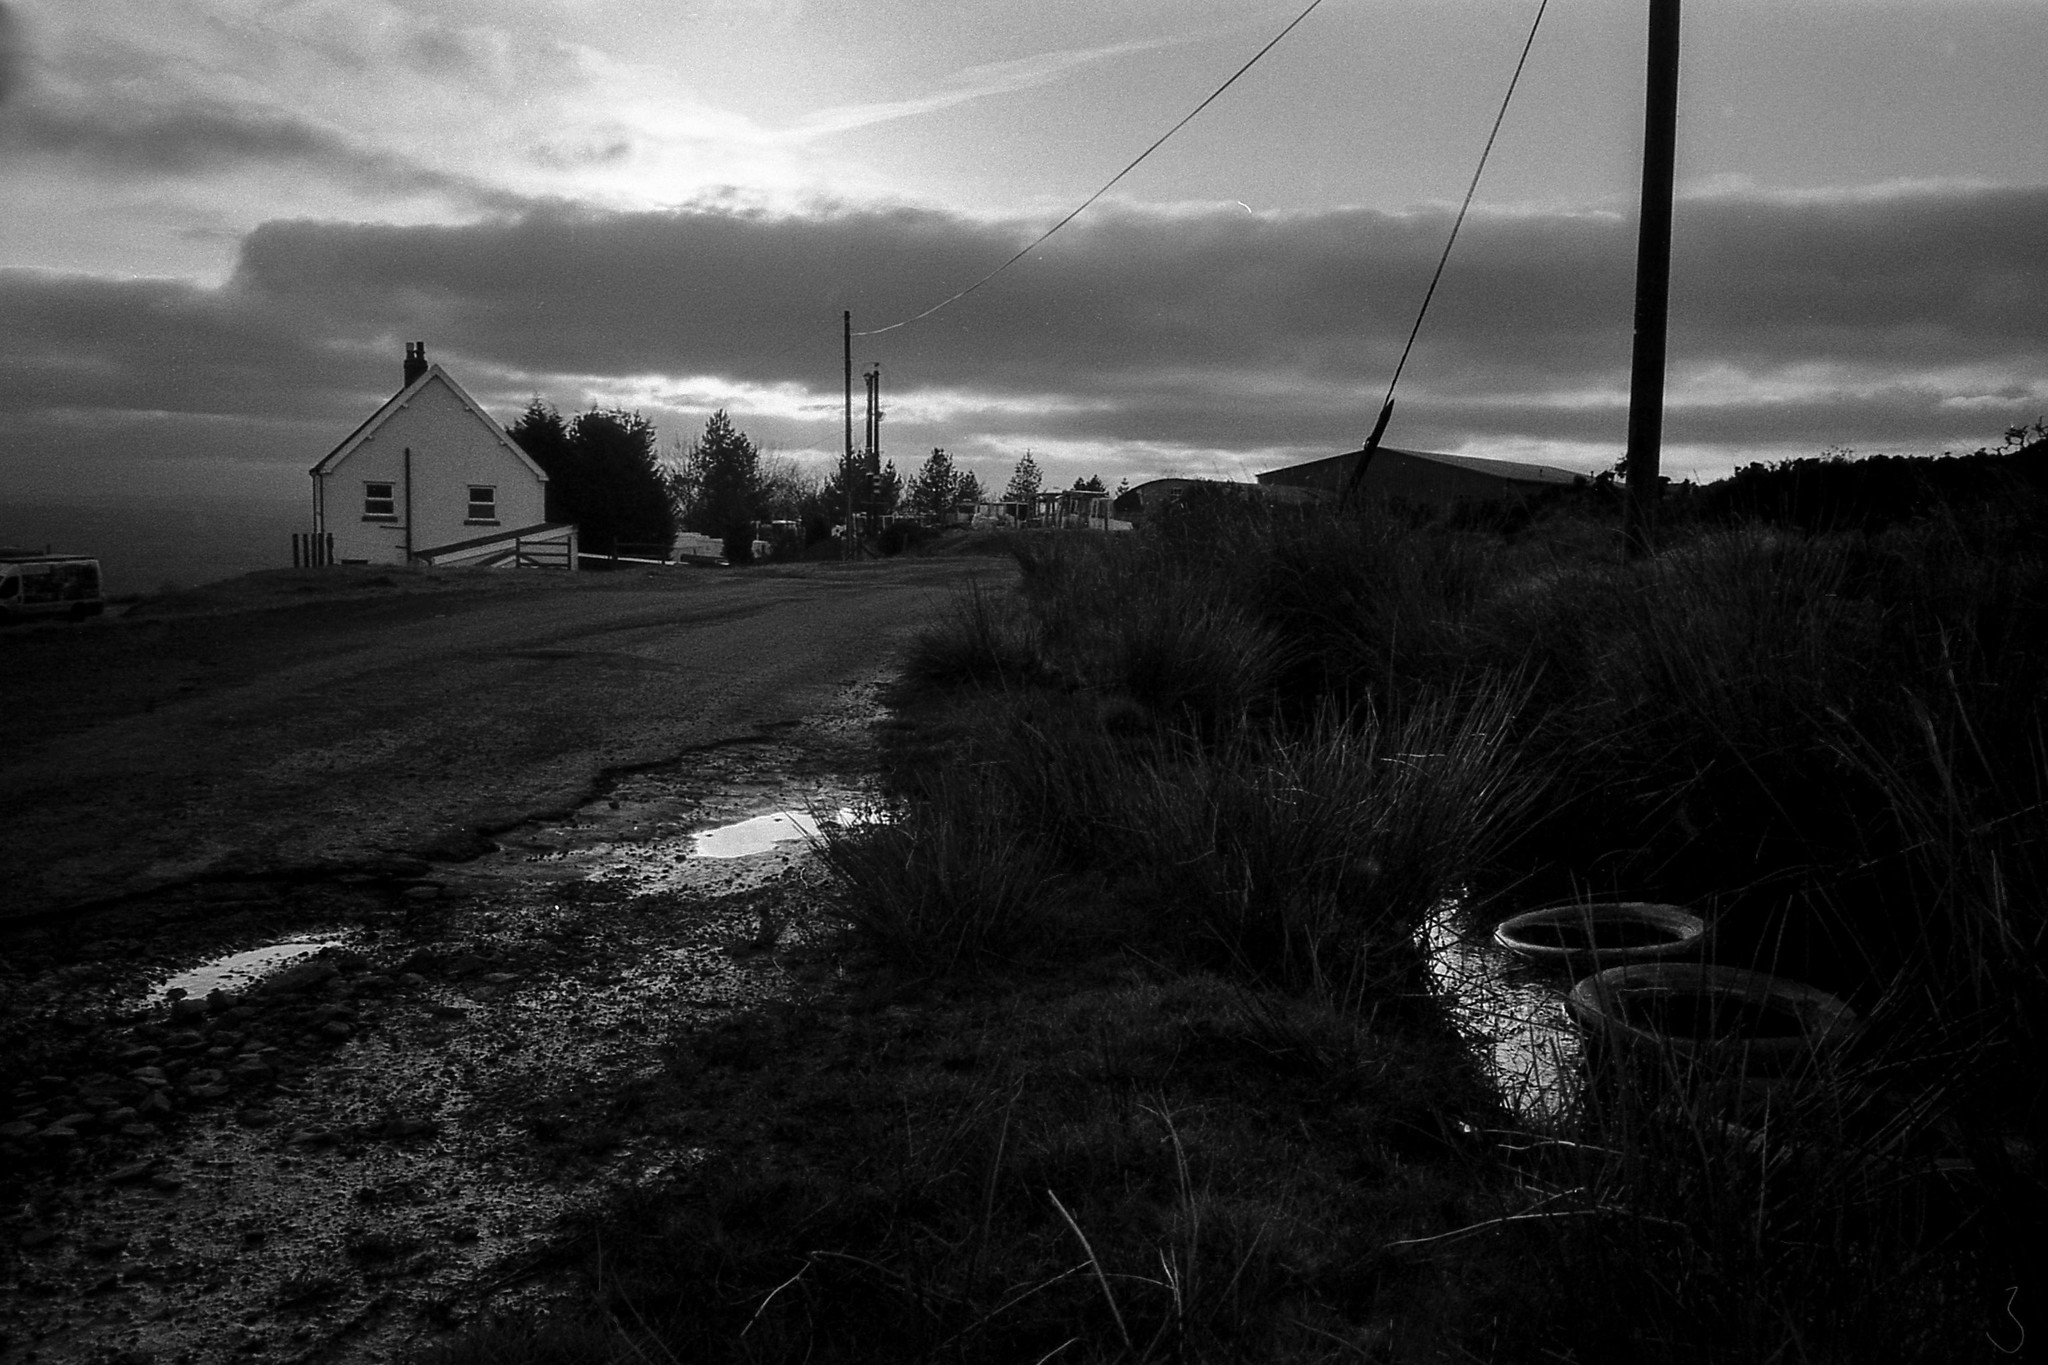
You can see my first black and white scans here, and the rest of my first colour scans here
The final part of the puzzle
Just for the sake of a complete story, I just want to quickly mention one thing that I’ve missed out of this story – mostly because I can’t quite remember when in the above timeline that it happened – but happen it did, and the outcome was positive.
At some point in all this, my old 2012 MacBook was replaced with a 2016 MacBook. When I did this forgot about the faff I’d had setting up the scanner with XP and started afresh instead of restoring my new computer from a time-machine backup of the old one. For the most part, this didn’t cause me any real issues (I live in the cloud), but it did mean I’d lost all the configuration of XP and photoshop within parallels. Try as I might, I couldn’t get it all working again with the same combination of software.
All was not lost, as by this time mine and Tom’s facebook Noritsu FB group had bloomed, and with it, we found a couple of folks with good knowledge of all this lark, one of whom had found the way to get it all working in Windows 10.
As such, I installed windows 10 into Parallels on my Mac switched off something called “driver signing” (whatever that is), and it all installed fine.
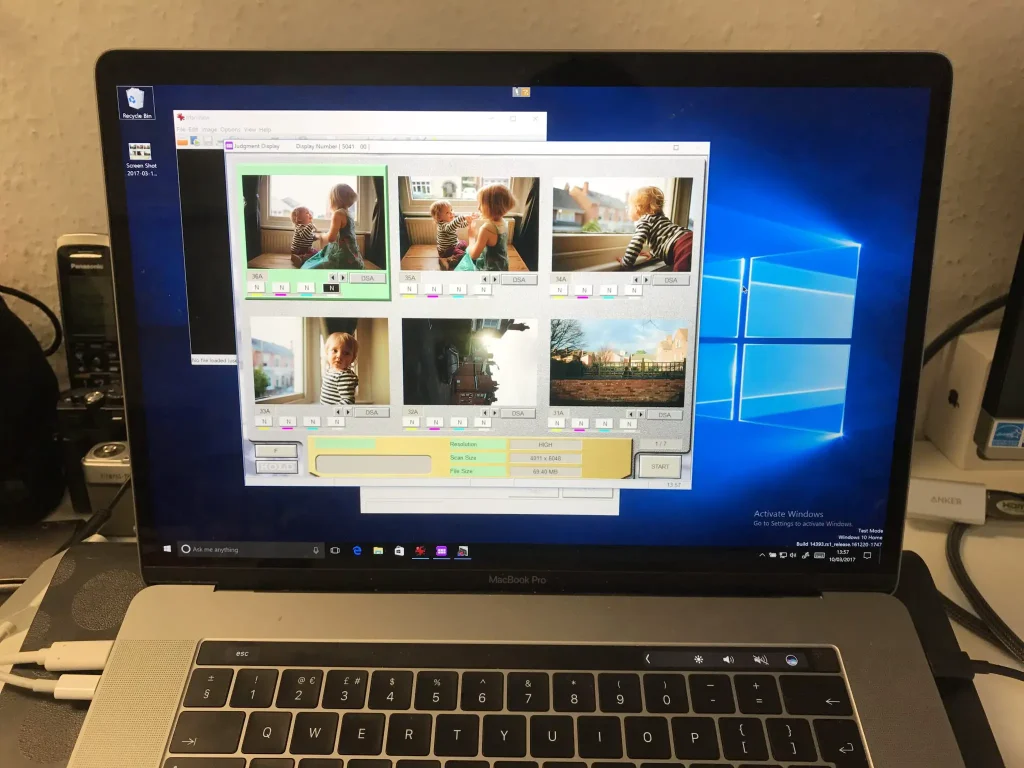
What’s really exciting for anyone looking to follow my path, apparently, Noritsu have just released specific Windows 10 drivers too. So it’s now even easier to get these things up and running as standalone units.
So that’s the story so far… Give me a few months and I shall be back with some thoughts on getting the best out of it!
Share this post:




Comments
Stephen on Noritsu LS-1100 – The Move to Home Scanning / Early experiences with a 35mm Film Lab Scanner
Comment posted: 11/03/2017
But it really shouldn't be this difficult... What I really don't get Hamish, is why there aren't more players in the pro/enthusiast market for film... It is pretty clear that the traditional darkroom has remained a legacy of the film era with no appreciable future.
Film itself though, is going from strength to strength but back-end processing is usually preferred, even though the resulting computer image is in reality a digital image of a piece of exposed film.
One thing that I got from your piece today is that the Noritsu scanners do not seem to produce raw files, but rather jpeg or tiff files. This is not the case with the Nikon 4000ED that I have here which produces Nikon raw files... These can either be run through the Adobe Raw program, or processed in their native form with Iridient Developer... Brian Griffiths who is in charge of this program added the Coolscans to his list of accepted digital cameras and their resulting '.nef' files are manipulated natively by the package.
The Iridient Developer program is very mild mannered, small and fast and has made a speciality of handling the recent Fuji sensor output better than other similar applications. I don't have a Fuji, but I really like that I sent this company an email and the owner got back to me by return, and within three weeks had added my Nikon to the list of supported cameras.
Having said that, I run my Nikon on a PowerMac that is around 15 years old, the Nikon software only runs on a Mac of this age, or Windows XP. This is an obscenity really, last night I had to scan a strip of five negatives three times, because the Nikon software (or the Mac) crashed before I could save the output.
There seems to be only one reasonably priced machine out there from Plustek, the OpticFilm which seems to evoke various responses from user/reviewers, all of the others are from the 1990's?
Where are Nikon, Sony, Leica?
Comment posted: 11/03/2017
Comment posted: 11/03/2017
Christos Theofilogiannakos on Noritsu LS-1100 – The Move to Home Scanning / Early experiences with a 35mm Film Lab Scanner
Comment posted: 11/03/2017
Comment posted: 11/03/2017
Comment posted: 11/03/2017
Ronnie Thain on Noritsu LS-1100 – The Move to Home Scanning / Early experiences with a 35mm Film Lab Scanner
Comment posted: 12/03/2017
I could never go back to using a scanner – even the Crosfield drum scanner that I used to almost worship – when I see the results I can get from the RAW output of a cheap Sony mirrorless. That's not to say I'm finding it easy: there are a few things I do to achieve colour balance that I would find it difficult to explain. For instance some workers suggest using autobalance, but I find this doesn't work at all and I am having to set the end densities from scratch in curves. However, it all seems worthwhile when I get a result – https://www.flickr.com/gp/ronaldthain/j9t5V6
Ori on Noritsu LS-1100 – The Move to Home Scanning / Early experiences with a 35mm Film Lab Scanner
Comment posted: 12/03/2017
Comment posted: 12/03/2017
Kodachromeguy on Noritsu LS-1100 – The Move to Home Scanning / Early experiences with a 35mm Film Lab Scanner
Comment posted: 13/03/2017
As for the troublesome software, I went through a similar adventure trying to get a Minolta ScanMulti medium format scanner to run. I wanted to run it off my Mac, but it would be almost hopeless getting an adapter to the SCSI input on the scanner. Fortunately, I still had an old Dell Windows 7 computer at home that I was about to surplus. I found abandoned SCSI cards at work, installed them and various drivers, installed the 1999 or 2000-vintage Minolta scanning software, and lo and behold, the thing worked. Since then, I bought SilverFast in a version that had been made for the ScanMulti. Moral, keep an old computer around for the just-in-case. Cheers
Comment posted: 13/03/2017
Comment posted: 13/03/2017
Comment posted: 13/03/2017
Comment posted: 13/03/2017
Comment posted: 13/03/2017
Comment posted: 13/03/2017
Comment posted: 13/03/2017
Comment posted: 13/03/2017
Cool Film on Noritsu LS-1100 – The Move to Home Scanning / Early experiences with a 35mm Film Lab Scanner
Comment posted: 19/03/2017
David Clark on Noritsu LS-1100 – The Move to Home Scanning / Early experiences with a 35mm Film Lab Scanner
Comment posted: 14/04/2017
Comment posted: 14/04/2017
Comment posted: 14/04/2017
Comment posted: 14/04/2017
Comment posted: 14/04/2017
OLiver Lison on Noritsu LS-1100 – The Move to Home Scanning / Early experiences with a 35mm Film Lab Scanner
Comment posted: 02/05/2017
With my Minolta scanner, I set the samlple at 8 times to get a noise free black and white image and this takes a lot of time. At some point I really need to upgrade..... to some thing better and quicker...
Thank you for your insight post,
Davud Dadar on Noritsu LS-1100 – The Move to Home Scanning / Early experiences with a 35mm Film Lab Scanner
Comment posted: 15/07/2017
Comment posted: 15/07/2017
Michał Czajkowski on Noritsu LS-1100 – The Move to Home Scanning / Early experiences with a 35mm Film Lab Scanner
Comment posted: 07/09/2017
Comment posted: 07/09/2017
Mark F on Noritsu LS-1100 – The Move to Home Scanning / Early experiences with a 35mm Film Lab Scanner
Comment posted: 29/10/2017
Learning about the Noritsu scanners now for the first time. Will join the FB group. Thanks, Mark
Comment posted: 29/10/2017
Damien Derouene on Noritsu LS-1100 – The Move to Home Scanning / Early experiences with a 35mm Film Lab Scanner
Comment posted: 27/01/2018
For the ones who are interested, I posted a detailled article about the Noritsu on my blog.
Balazs I. Horvath on Noritsu LS-1100 – The Move to Home Scanning / Early experiences with a 35mm Film Lab Scanner
Comment posted: 24/04/2018
Comment posted: 24/04/2018
WAQAS SHAFI on Noritsu LS-1100 – The Move to Home Scanning / Early experiences with a 35mm Film Lab Scanner
Comment posted: 18/05/2018
Damien Derouene on Noritsu LS-1100 – The Move to Home Scanning / Early experiences with a 35mm Film Lab Scanner
Comment posted: 07/07/2018
Comment posted: 07/07/2018
Mark Davidson on Noritsu LS-1100 – The Move to Home Scanning / Early experiences with a 35mm Film Lab Scanner
Comment posted: 13/08/2018
I closed my photo lab in 2009 and we had been scanning film since 1995 so I was feeling a lot of your same emotions.
Of course the software issues were not one of obtaining them but actually having them run in a stable manner.
I have a ton of negatives that I want to scan and think of getting a commercial scanner just because I know how much better they are than any of the consumer scanners.
The last consumer scanner we tested was a Nikon LS 1000 that was widely praised as a superb scanner. After setting it up we found the scans were woefully inadequate unless one set the scanner for multi-pass scanning and that took forever. Negative scans were useless as Nikon was entirely clueless about color conversions for negatives.
We did have a Kodak 3570 as our first scanner and it was superb for negatives. The only shortcoming was its max of 18MB files that, in truth, were not a huge penalty.
Kodak Portra 800 Review - and some Thoughts on Shooting it Within my Workflow - 35mmc on Noritsu LS-1100 – The Move to Home Scanning / Early experiences with a 35mm Film Lab Scanner
Comment posted: 02/07/2020
Ryan on Noritsu LS-1100 – The Move to Home Scanning / Early experiences with a 35mm Film Lab Scanner
Comment posted: 08/01/2024
Thanks!