This is a review of the Keks KF-01 Flash written by someone who isn’t a flash photographer. It is also a review that’s written by someone who already likes Keks products too. I suppose both of these statements do somewhat put the validity of what I have to say here into question. With that said though, I do hope this is still useful, as despite my lack of experience using this sort of flash – and potentially a little bias – I do think my overall positive impressions still stand for something!
I’m not a flash photographer. I said that already, but for the sake of clarity, I really am not a flash photographer. That’s not to say I don’t use lights; I do, but all the lights I use are constant lights. These are either in the form of my big Paterson work horse kit that I use for corporate portraits in a basic clamshell configuration, or the LED panels and big powerful Godox we use for video. Direct, on camera flash is pretty alien to me – it’s not that I don’t think it has a place, I just don’t often find that place within my photography. Some people out there in internet-land will tell you that mastering flash photography in its various forms is a core photography skill. Well, to some that might be the case, for me I just prefer constant lights where I can see the impact they have as I move them around. It’s just easier. Though really, given the choice, I just prefer working with the natural light I have to hand. For me a shot that well-harnesses natural light will often trump one where I can see lighting was used. It’s a personal preference, but it is one that means the results I’ve had using this flash might not be as good as you might find in other flash reviews. I say this to excuse my photography to a degree, but also to point out that you should probably not judge this flash on my results, and more on what I have to say about how it works.
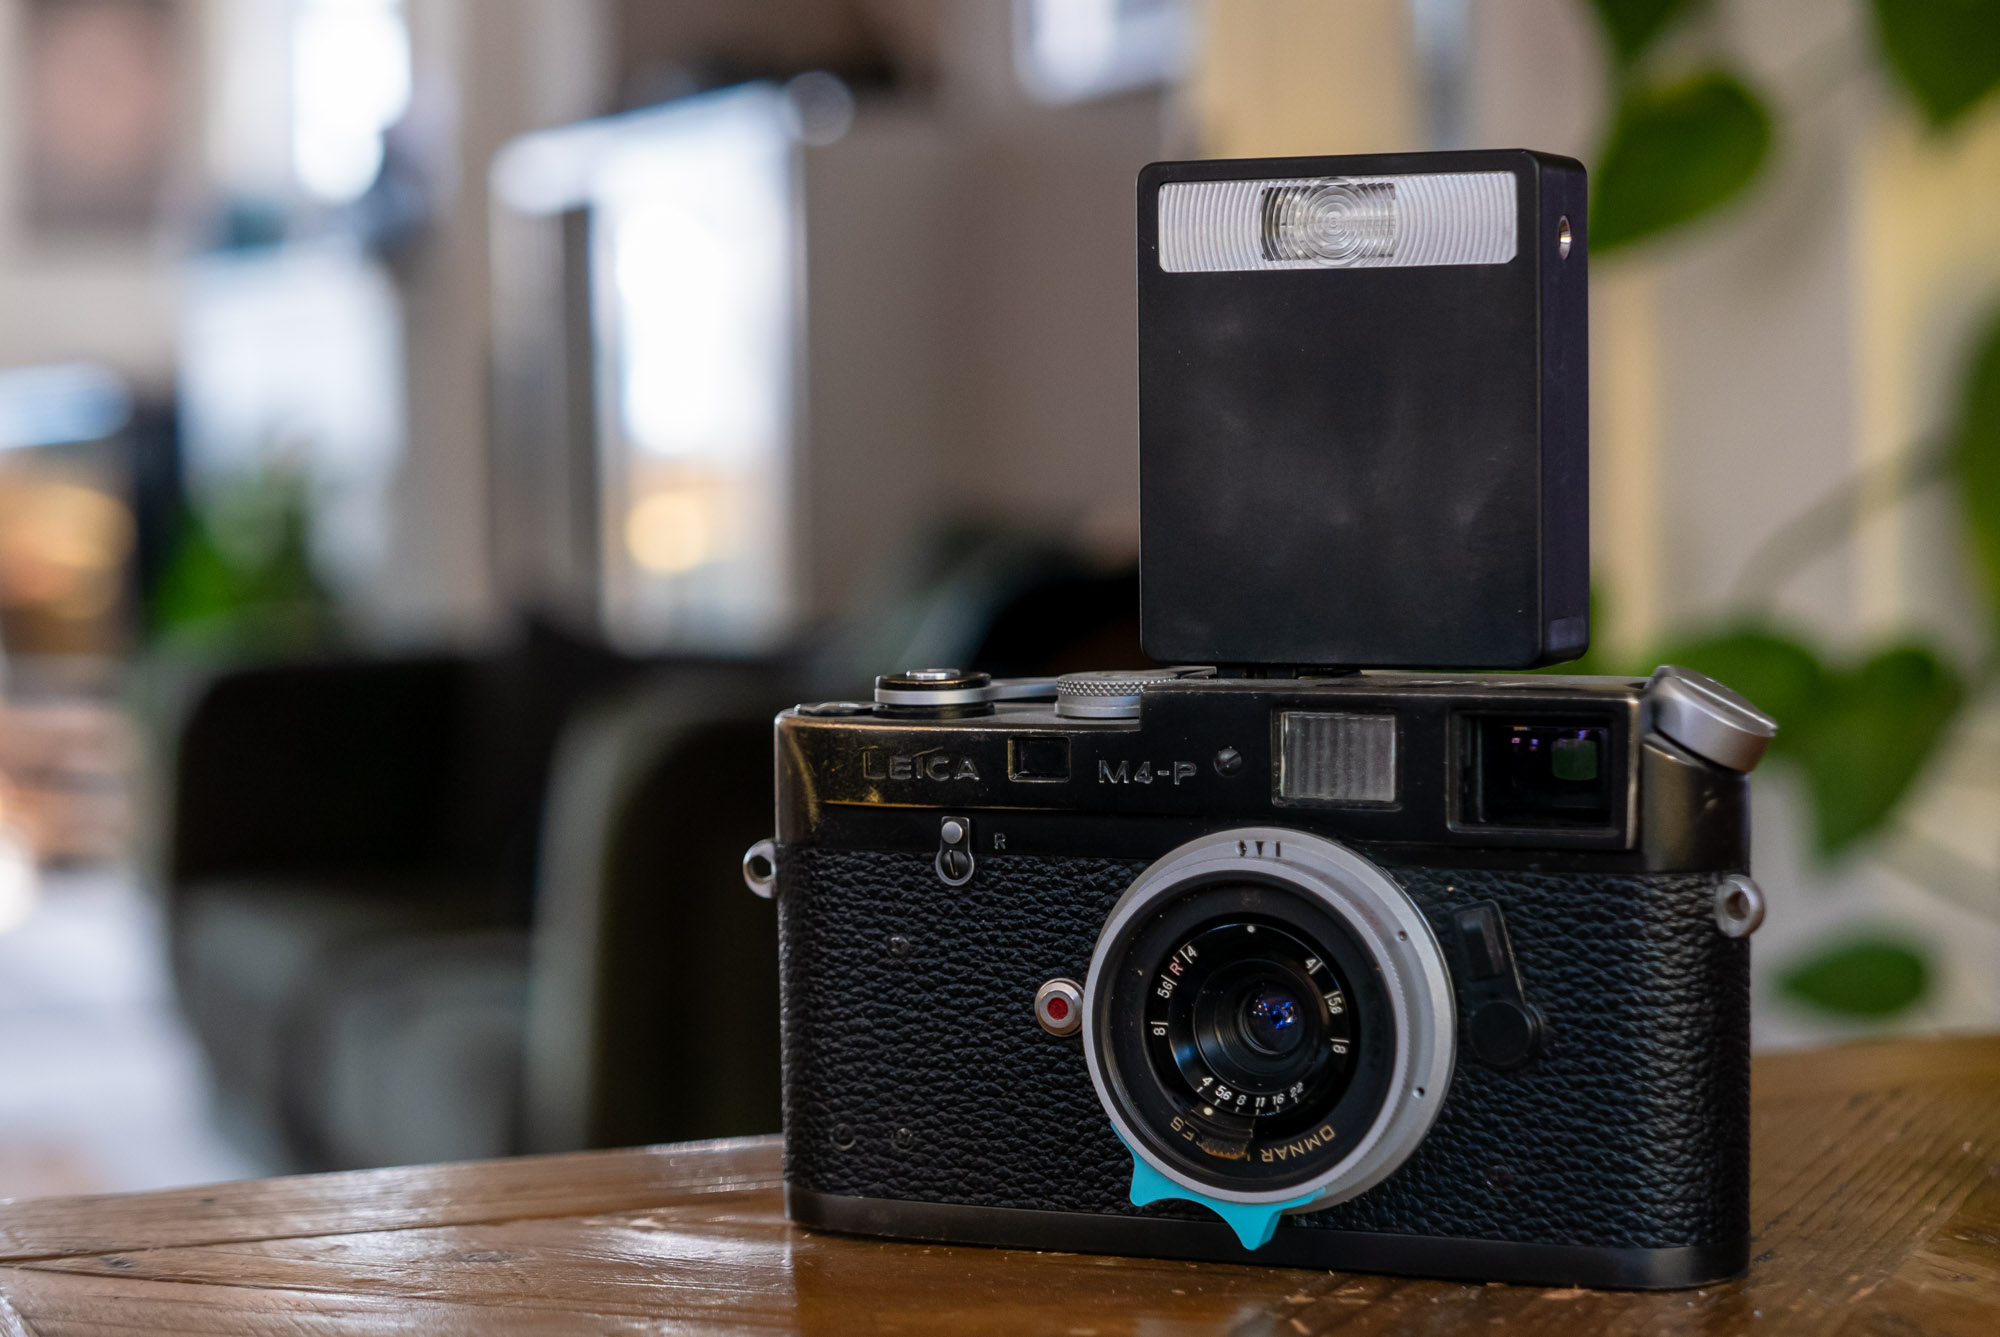
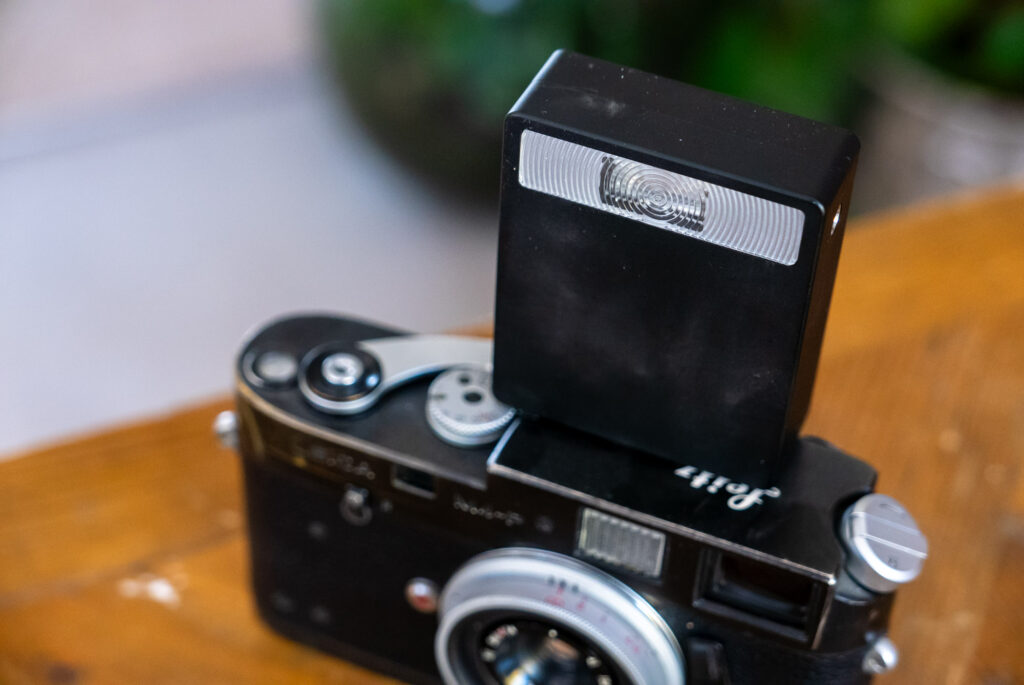
I should probably also mention that despite showing it off on my Leica M4-P, I have only shot it on digital cameras… it just looks cooler on the M4-P and I suspect more readers here would use it on a film camera anyway.
The Keks KF-01
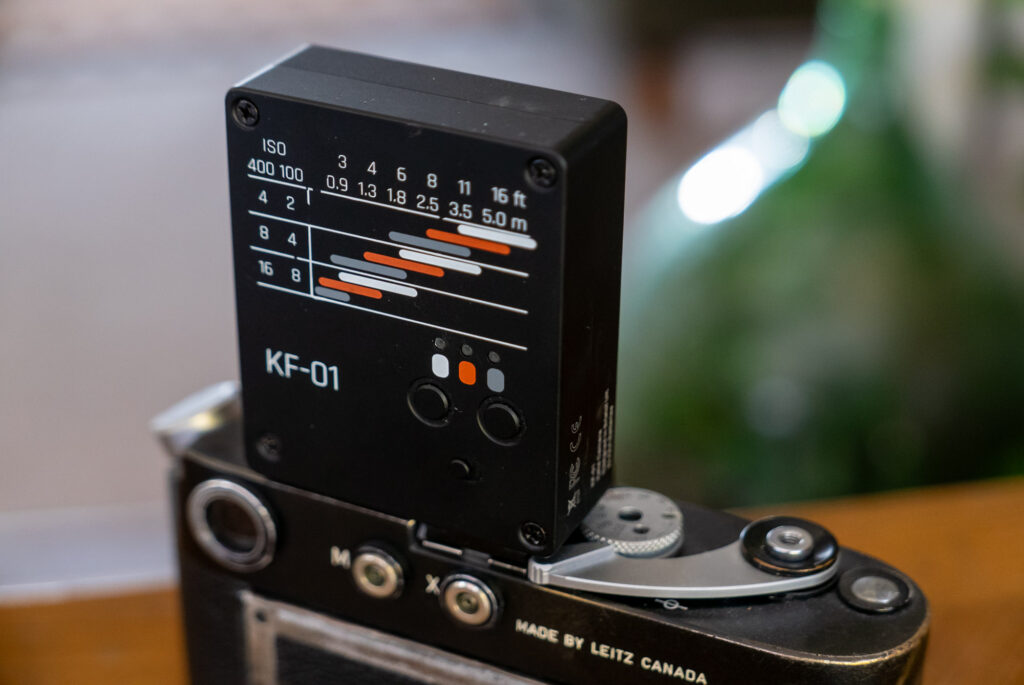
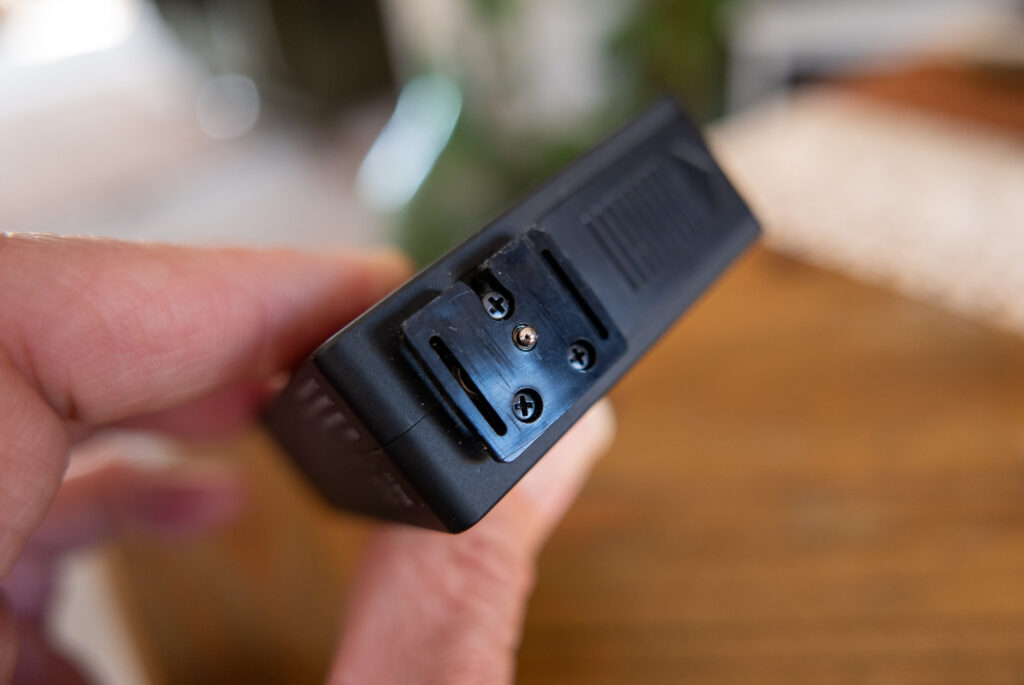
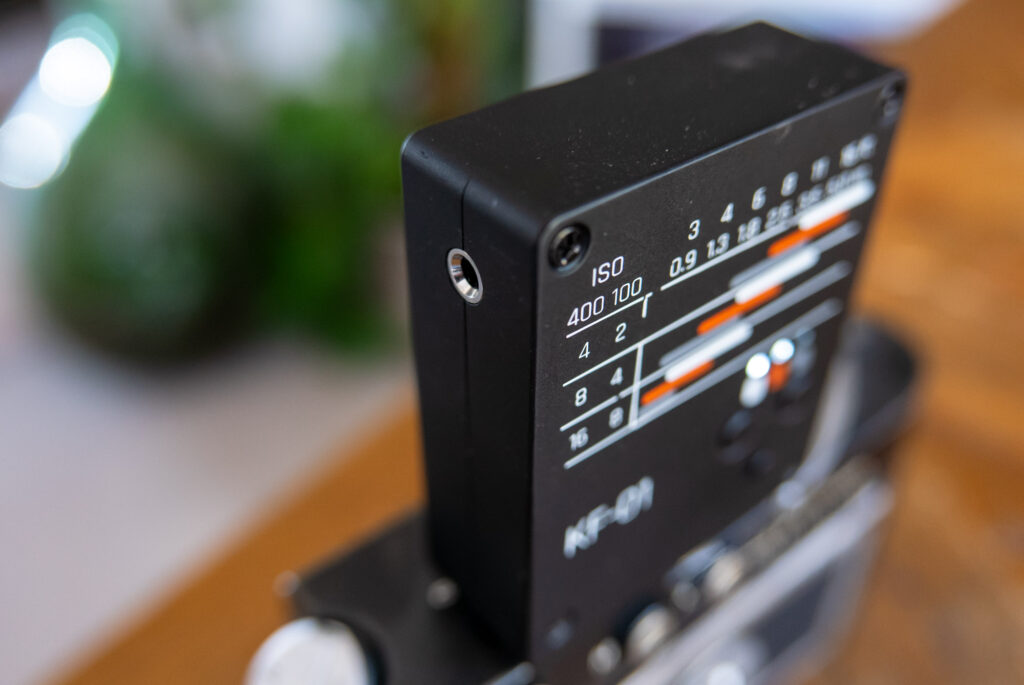
The Keks KF-01 is a very simple, totally manual single pin flash with a PC sync port on the side. Its outer casing is made of aluminium with a plastic foot and battery cover. It takes two AAA batteries. The body of the flash is a simple rectangular design with rounded corners. On the back it has a power switch, flash test button and a button for selecting the flash power. There’s also a diagram to illustrate flash power vs. subject distance against aperture/ISO.
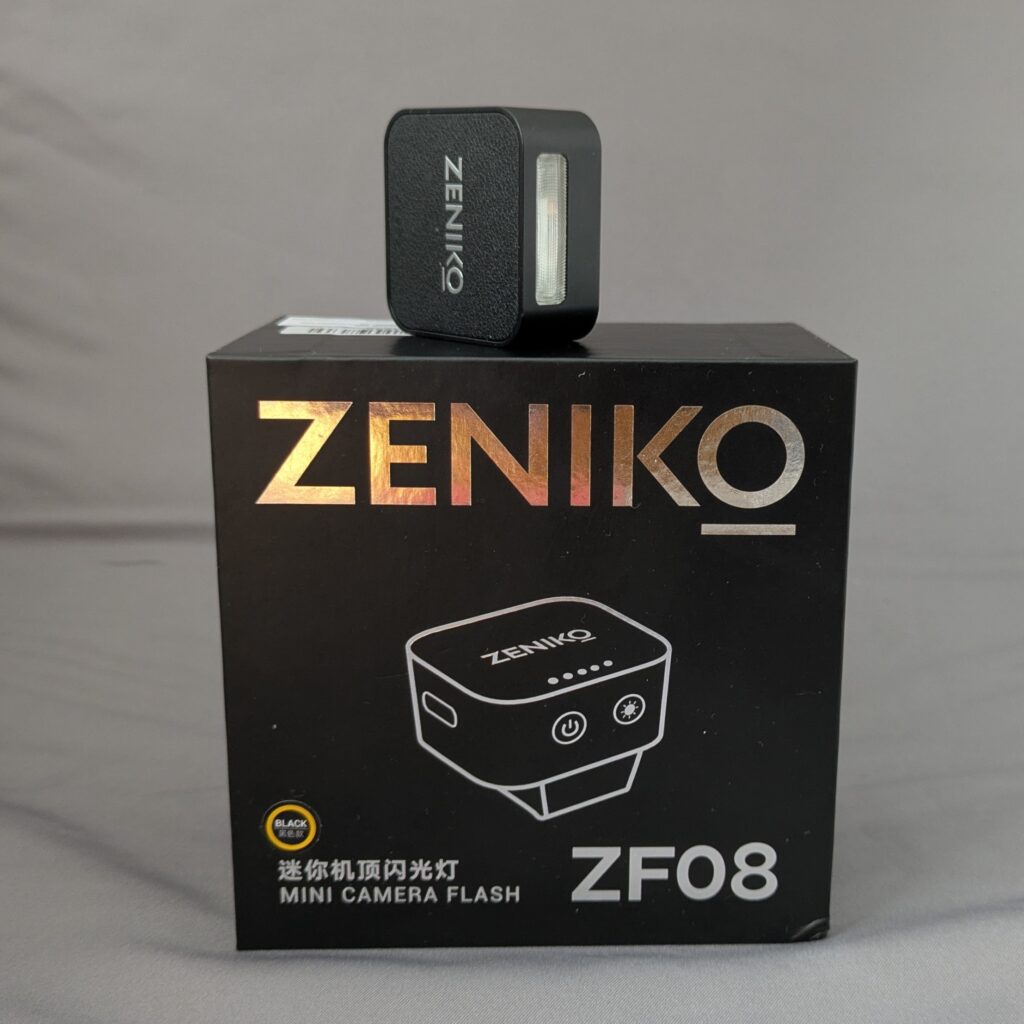
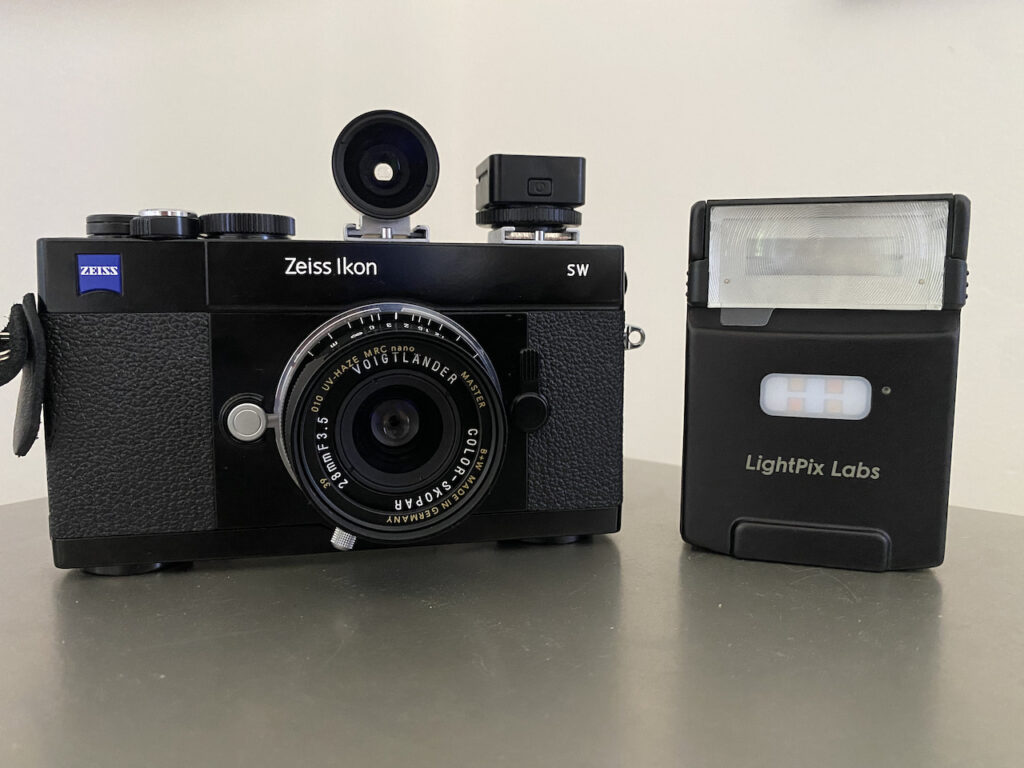
It’s not a big flash, and has no options for directing the flash output for bouncing it off the ceiling etc, nor does it have any adjustment for the spread of the light to match wide or telephoto lenses. The flash window sits at the top of the flash unit though, so whilst bigger-lenses will still create a shadow, it should be more useful in this regard than the Zeniko ZF08 Mini George reviewed not so long ago. With that said, it isn’t a massively powerful flash with a guide number of only 12, though that should be enough for a lot of the sorts of snaps on-camera flashes are often used for. It also has 3 power settings; full, 1/2 and 1/3 illustrated by white, red and grey lines respectively.
In case the single pin bit escapes you, what this means is that there is no interaction between the flash and the camera beyond the single centre pin which does nothing more than allow a camera to trigger the flash. The brightness of the flash in your results is determined only by the settings on the camera the power of the flash which have to be chosen appropriately based on the subject distance.
This might sound like it makes this flash more complicated than an auto or or brand-dedicated TTL flash, but the beauty of it is that since there’s only one pin on the bottom, the flash can be used on pretty much any camera with a hot shoe (aside from those weird Sony/Minolta ones…). In fact, thanks to the fact that it has a PC sync port, it can be used with even older cameras that have a cold shoe and a shutter with a flash socket on the side. Furthermore, thanks to it being a modern flash, it’s also been designed to have a low trigger voltage so it won’t fry a modern camera in the way some old manual flashes can. In short, it’s pretty universally useful across brands of cameras, provided you can get the hang of manual flash control.
In use
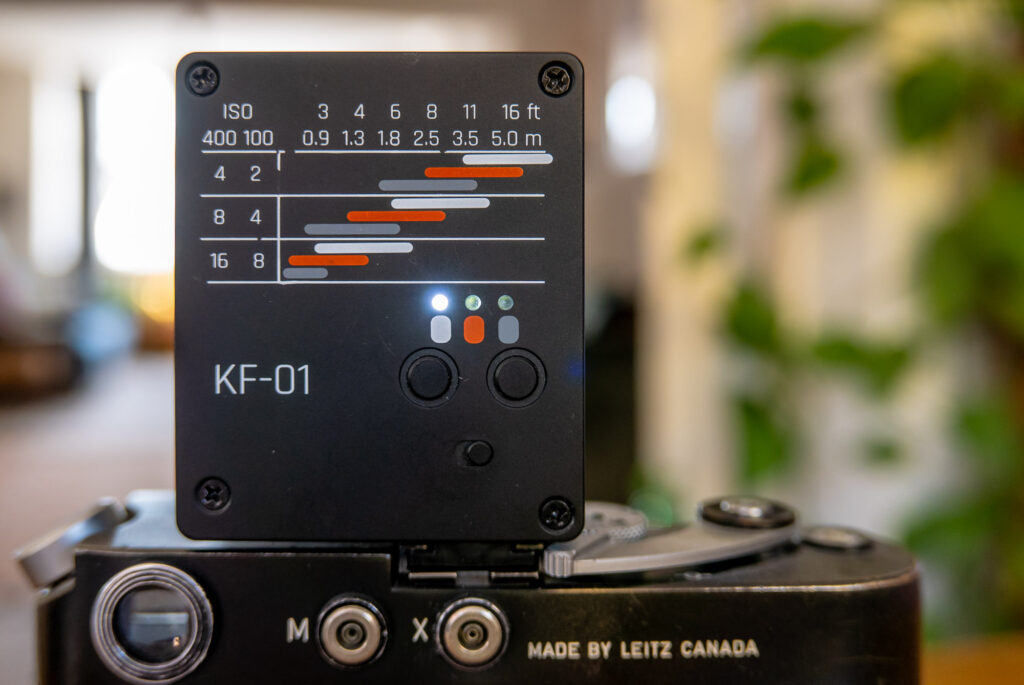
Being a manual flash with only 3 power settings the Keks KF-01 is very simple to use. If you have a hot shoe on your camera, mount it on the camera and you’re ready to go. If just a cold shoe, you will need a sync cable. Either way, once mounted, flick the switch to turn on the power. As it powers up, a white LED on the back will blink until it is ready to fire. Looking at the back of the flash the left button triggers the flash to test it, the right button selects the power. There are 3 LEDs, one for each power setting; white for full, red for 1/2, and grey for 1/3. Once the flash is switched on, it stays ready to shoot for a few minutes before it eventually goes to sleep. Pressing the test button wakes it up without triggering the flash.
Above the buttons you will see the graphic that illustrates how far away from the camera the flash will illuminate depending on the power setting and the chosen ISO and aperture. In case you aren’t familiar with how flashes work, the camera should be set to its sync speed, or slower if you want a slow sync (streaky light) effect. For argument’s sake here though, only the ISO, aperture and flash power matter. If shooting film, of course, only the aperture matters as the ISO is set by the film. The graphic on the back of the flash has indicative illustrations for just 100 and 400ISO – this is pretty standard when comparing it to flashes from the film era.
Using the graphic on the back should be pretty self explanatory really, though if you aren’t familiar with these sorts of guides, it might take a moment to get your head around it. I will give an example to hopefully send you down the right path, in case it makes no sense. Here is the graphic:

So, first set the ISO on the camera; for ease, to either 100 or 400 ISO. For the sake of this example, let’s say 400. If your camera has a light meter, you don’t need to worry about what it says when shooting a manual flash like this. This is a totally manual exercise that rely’s on the light from the flash. Next you need to know how far away your subject is. For argument’s sake, let’s say 2.5m. So first, find 2.5m across the top.

Then look down at the bars that correspond to the flash power. You’ll see that there are 4 bars that overlap 2.5m; a red one and a grey one in the top row and a white one and red one in the middle row.
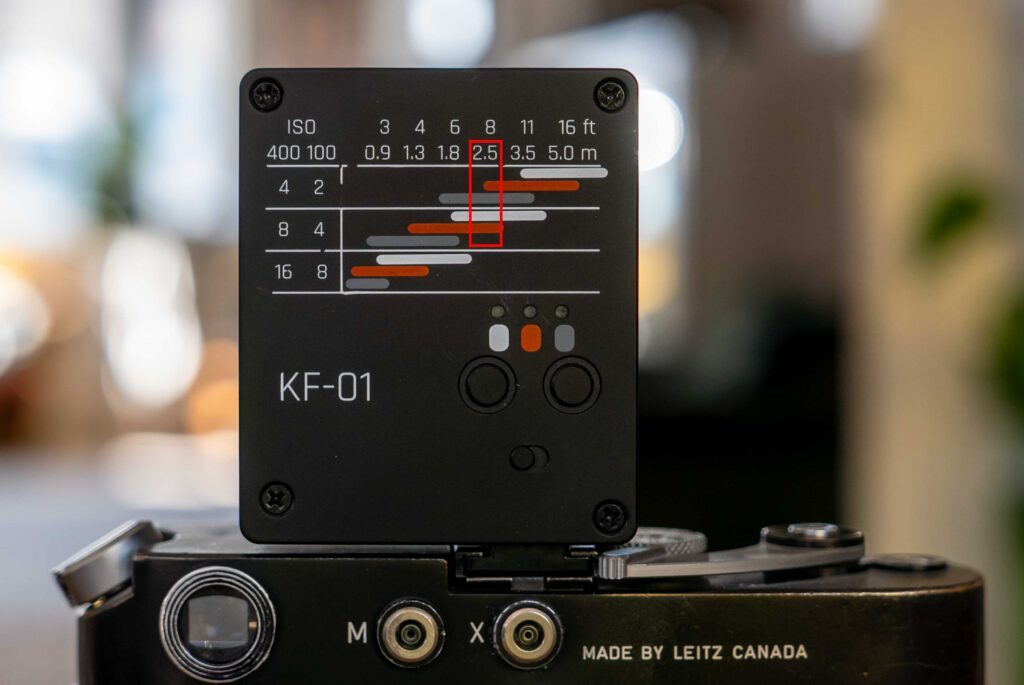
Read across to the left hand column, and at the top you will see ISO numbers 400 and 100. Below are a list of apertures.

We are shooting at 400 ISO, so we have the choice to set the camera aperture to f/4 and use the flash on 1/2 (red) or 1/3rd (grey) power.

Or we can set the aperture to f/8 and use the flash on full (white) or 1/2 (red).

All of these settings will give a good exposure for something at exactly 2.5m, but obviously the higher powers per aperture will give a higher exposure, and the lower powers will give a lower exposure. The important thing to realise is that those bars are essentially your zones of correct exposure. So for eg, if you go for f/4 and 1/3rd power (the grey line in the top row) your zone of correct exposure is from around 1.8m to a little over 3.5m. Closer things will be overexposed, further away things will be underexposed.

So for eg, if you have a group of people to take a photo of, see how close the closest person is, and how far away the furthest away person is, and make sure you set your settings to achieve good exposure for the depth of the group of people.
Looking at the picture above, you’ll possible also realise, that this is similar to the exposure triangle inasmuch as you don’t necessarily have to start with the set ISO either – especially on digital cameras where it can be changed. So, you might begin your settings process with the subject distance and then choose your aperture and ISO for depth of field reasons of for keeping noise low. You might also start with the idea of using the lowest flash power possible and then set your aperture and ISO to appropriate settings from there. This is pretty much the beauty of a manual flash – once you get your head around the settings, it’s a creative process to get the exact result you want. And once you have got your head around using the sync speed on your camera, you can try slow sync like I did when I reviewed the (failed) moon flash (see here).
Quibbles
Aside from the simplicity of the flash (lack of bouce/zoom etc features) I don’t have too much negative to say about the Keks KF-01. That said, I do have some concerns about the longevity of it. To kick off, since I have had it, I have carried it around in my work bag and despite it not being in there very long really, the anodised finish has started to rub, and the graphic has worn a little on the back. I think it would be better kept in it’s only little bag rather than just rattling around in a bigger bag with other junk as I have kept it. I also have some concerns about the plastic foot and how well it will fit on different sized hot shoes – though I must admit, I haven’t had any issue in this way.
Finally, I also find the LEDs on the back to be a little bright. They are fine in the day time, but at night/low light they are so bright that they make seeing the diagram on the back of the flash impossible. Not a major beef, but something I thought worth pointing out.
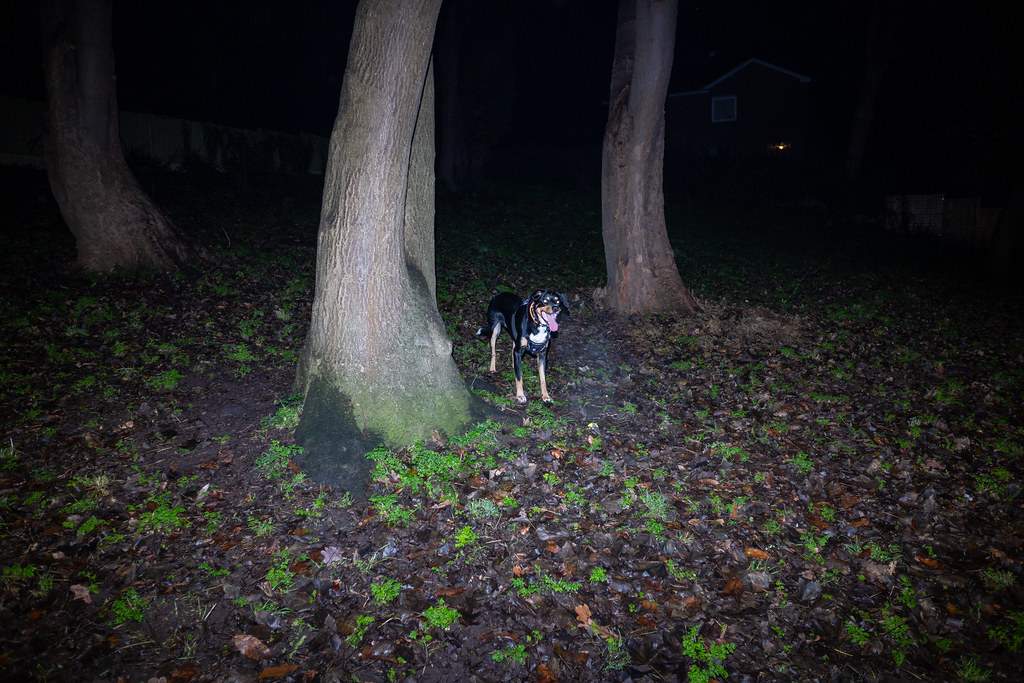
Photos
As I said at the beginning, I am no direct flash user, but here’s a few test shot I have taken:


 Final thoughts
I must admit, I have quite enjoyed getting my head around a manual flash again – I’m not convinced I will ever likely be a dedicated on-camera flash photographer, but shooting a manual flash with the little extra thought that goes into it is enjoyable and quite satisfying.
As for the Keks KF-01 specifically, as I’ve said, I might be a little biased through liking the brand, but I do think it is a nice little flash. It’s not massively powerful, and doesn’t have some of the features of bigger flashes. But, it’s fully manual nature, modern design, single pin, sync socket and illustration of power settings on the back make it near-universally compatible with pretty much any camera with a hot or cold shoe.
Despite the fact that the one I have here has worn a little rattling around in my bag, I also like the build and feel of it too. The shoe mount is plastic, but with the rest of it being made of metal, it does have a nice feel to it. In short, overall, a nice little manual flash with a good simple feature set. I think it would also make a great flash for anyone looking to get into flash photography who has a desire to learn the manual way of doing it first. For me, mine will go back into my bag (maybe in a little bag of its own of some sort), and will get grabbed on the very odd occasion I fancy a bit of slow sync fun!
You can find out more on the Keks website here
Share this post:


Comments
Joshua Alcock on Keks KF-01 Flash Review (Including a little guide to using a manual flash)
Comment posted: 11/04/2025
Gary Smith on Keks KF-01 Flash Review (Including a little guide to using a manual flash)
Comment posted: 11/04/2025
Then I thought: Well, it's a lot smaller than my Sony HVL-58AM.
Like you, I have never been much of a flash user. When I was employed, I had a trigger for external flashes as well as the flashes, umbrellas and all the various stuff needed to run multiple, off-camera units. I guess I still have the trigger somewhere.
If I need a flash, I use the Sony.
That little Zeniko that George wrote about looks pretty powerful in the comparison shots he posted.
Thanks for the review of the Keks unit.
Sasha Tsyrlin on Keks KF-01 Flash Review (Including a little guide to using a manual flash)
Comment posted: 11/04/2025