This is my second more significant article in a series I am intending to write about my experiences with the Fuji X100v, in my first article I talked about why I was initially attracted to it as a camera. In this article I’m going to put together a quite personal guide to my mode and menu customisations.
In actual fact, it’s my plan to come back and update this article as time goes on. My initial plan was to just lay out my first attempts at customising the camera, but a fair bit of time has passed since I’ve bought the Fuji X100v, and I’ve already made a few changes to how I set it up to begin with.
There’s no magic bullet here though – this isn’t how I think everyone should set up this camera, and I’m far from claiming to be an expert on setting up Fuji cameras. This is – after quite a bit of faffing, manual leafing and googling – just how I’ve chosen to configure mine. If anyone has any hints or ideas about better or different ways to get something else/more out of the Fuji X100v, I’d love to hear more in the comments.
Finally, if you’re reading this having not read anything I’ve written before, let me preface everything I’m about to say by highlighting the fact that I like my cameras to be as simple as possible. I find lots of buttons and modes overwhelming and I’m the sort to get quite put off by pretty much all technology that isn’t immediately intuitive to use… And that’s the context within which this article is written. It’s a guide to simplifying the Fuji X100v as much, if not more than it’s a guide for getting the most out of every feature it offers.
(It’s also worth noting that I have a tendency to waffle my way through unnecessary detail – my regular readers are used to this, if you just want to get to the salient points, there’s a table of contents below, so please feel free to use it)
A Bit More Background
Having said that, I do find I’m beginning to eat my own words when it comes to customising the buttons and menus of digital cameras to make them work how I want them to. I’ve long had the view that cameras can and should (for me at least) be so simple in the control layout and what they offer functionally that they shouldn’t need to be configured extensively. Unfortunately for me that’s just not how camera design has progressed in recent years – for the most part at least.
I think I gained this view, or at least had it reinforced, through shooting professionally for a number of years with a Nikon D3. That camera is a good few years old now, and would probably feel it if I shot it now, but back when I had it, I felt invincible. Everything was just to hand, I don’t remember having to set anything up in the menu at all – or if I did, it was very little. I then switched from Nikon to Sony. That was a shock to the system I can tell you. The first gen A7 cameras were awful in terms of their button and menu layout, and the second gen not much better either.
But some time a few years ago I took a little Sony a5100 on holiday with me and whilst there spent a good chunk of time customising it to work better for me. I’m not going to say I “saw the light”, but it did convince me that I needed to spend a bit more time forcing the Sonys I used for work to function better for me. Since then, I have customised them quite a bit – I still can’t use them perfectly fluently, but I’ve fought the good fight and have managed to harness them better. And if I can do that with a Sony, I can surely do that with a Fuji X100v
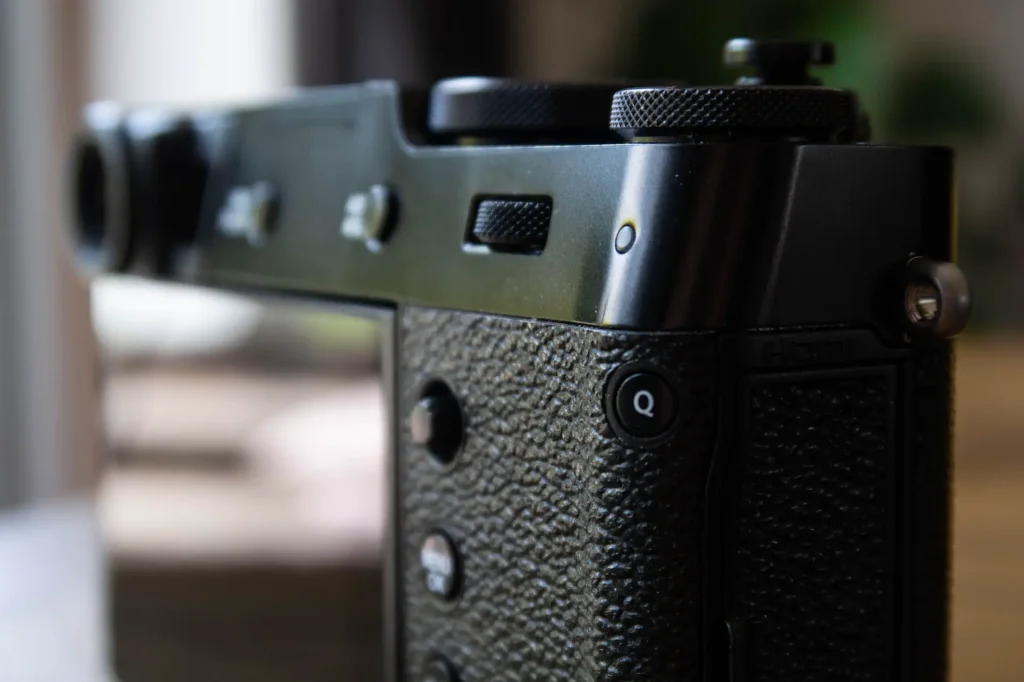
The First Lessons
The process of setting up the Sonys actually taught me quite a bit about the process of setting these sorts of cameras to work how I want them to. The first thing I figured out was that as much as it pained me, I didn’t need to know what everything does from day one. Some of the modes might become apparent through need, but if they don’t, it doesn’t matter, they’re just there for someone else’s needs.
The second thing I figured out is that it’s impossible to customise most modern digital cameras to work perfectly in one hit. Instead I found it was easier to do it bit by bit. That is to say, the plan was to shoot some photos, see where I felt it was falling short, then make adjustments to the set up if needed, and then repeat the process if needed. I appreciate this probably sounds obvious, but to the way my brain works, it wasn’t.
My Customisation Guide
Having a better understanding of these two factors, combined with the Fuji X100V being a little more simple in its button layout is what made me feel like I could tackle it as a camera. First I felt that I needed to shoot some photos with it straight out the box, and that would help me work out what I wanted the camera to do first. The funny thing is, in practice I still found it to be more complicated than I expected. In fact, perhaps in part because of how my brain works, I’ve actually found writing all this down quite valuable in the process of working out what works for me. But anyway, enough of the waffle, in no particular order, here’s how I’ve set up my Fuji X100v so far:
Changing Functions
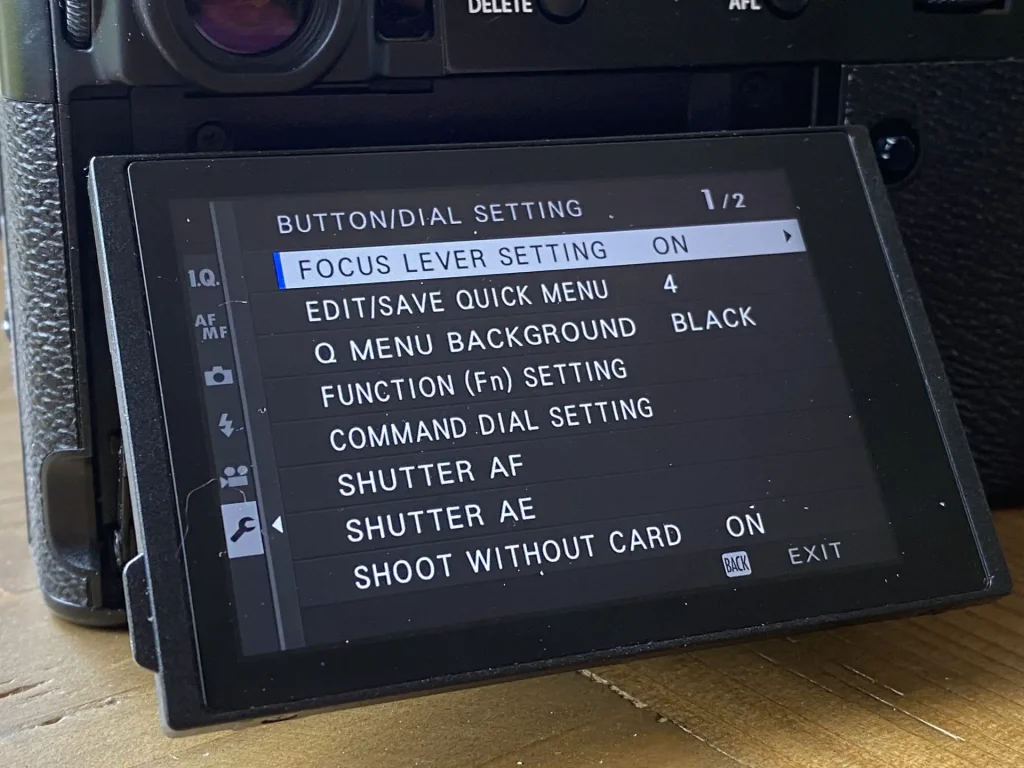
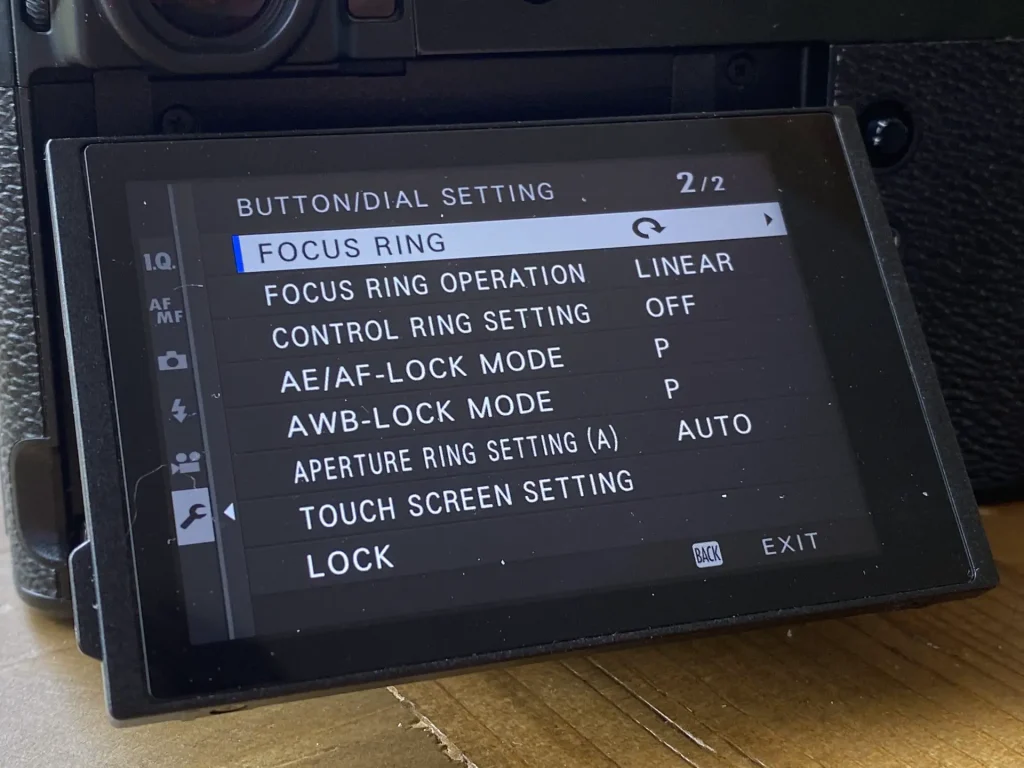
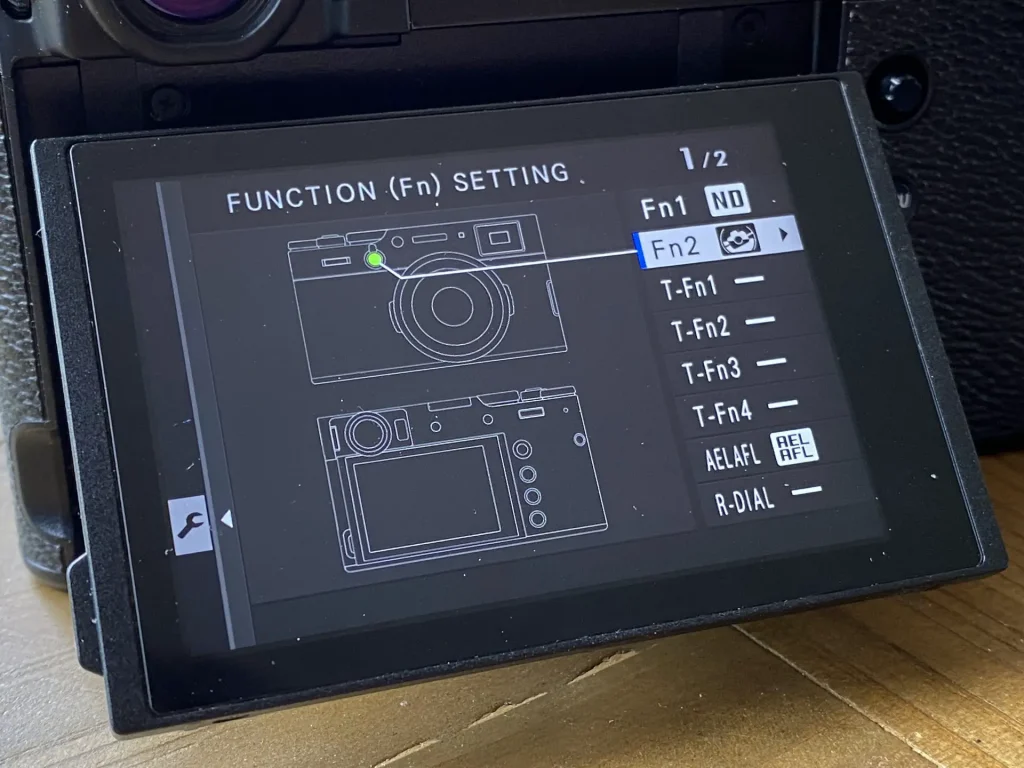
Before I get into this, in case you didn’t already realise, I should probably point out that pretty much all of the buttons on the fuji X100V can have their functionality altered. Not all of them, of course, but if you go into the spanner menu within the menu, then go to ‘Button/Dial Settings’ you’ll find a very large and (at least to me) initially overwhelming volume of options for changing what a lot of the buttons do. Most of what I am about to talk about involves digging around in this menu.
‘Fn1’
The Fuji X100V has a built in ND filter that can be switched on and off. I’m not a big user of ND filters, but actually given the ability to just switch one on at the press of a button, and I’m totally on board with the idea. Out of the box, the ND filter switch is just somewhere deep in the scary menu, so after quickly realising how much creative freedom it could give me I allocated it to the Fn button on the top front of the camera.

‘Fn2’
Another unlabelled button on the Fuji X100V is the centre button on the viewfinder mode lever otherwise known as ‘Fn2’. By default pressing Fn2 opens a mini-menu that changes the function of the focusing dial, as I will get to, I’ve set the focusing dial control to “off’ which means it just controls focus manually when in manual focus, and really that’s all I ever want it to do.
Having a whole other menu for changing the mode of a dial on the fly is a step way too far in terms of customisation for me. I’m sure some people get something out of having access to all that stuff whilst shooting, but it just doesn’t gain me anything. In fact, I found it extremely overwhelming, and quite specifically remember it being one of the things I didn’t like about the X100F.
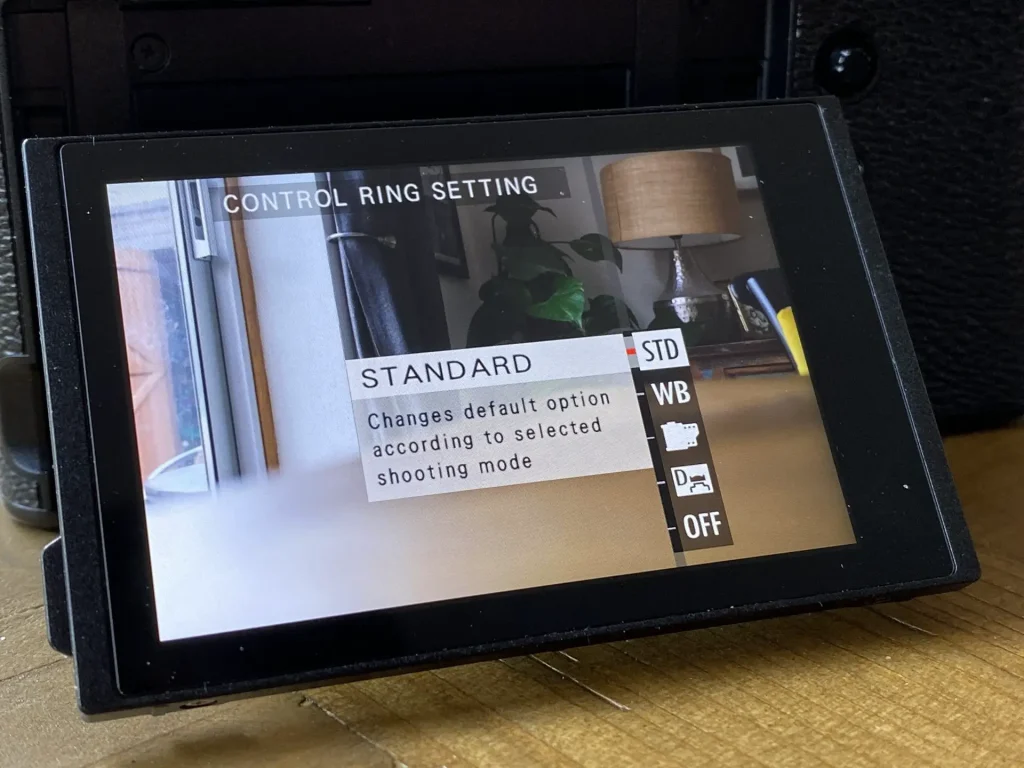
To begin with I just switched this button off out of a strong desire not to get as frustrated with this camera as I did its predecessor. I don’t really like having buttons that don’t do anything on cameras, but couldn’t see anything in the options that appealed to me, and since it’s a fairly hidden button, I felt that I could probably just forget it was there.
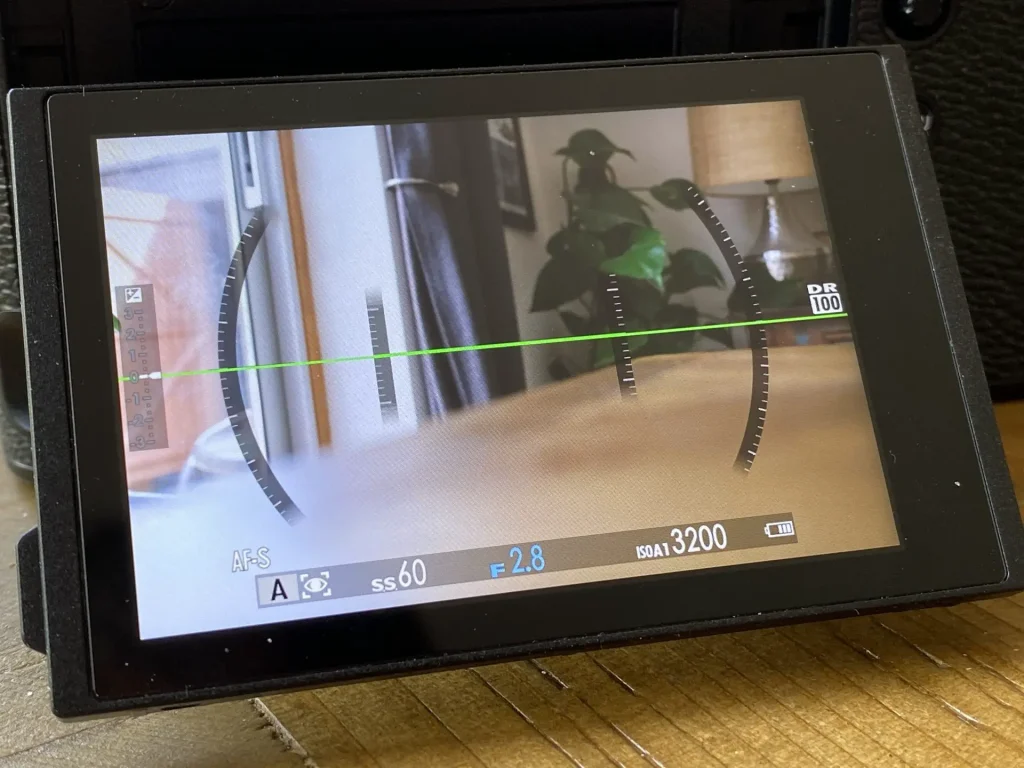
Then, one day I was taking a photo of a different camera (I know, I take too many photos of cameras) and I couldn’t get a sense for natural level. I hadn’t previously noticed the digital level in the options. But this occasion gave me motivation to find out if the camera had one. Low and behold it did, and moreover it was a mode I could set to the Fn2 button. Now it’s set this way, a quick press of that button gives me the below digital level. It disappears again on half press of the shutter.
Viewfinder Mode Switch Sustained Pull
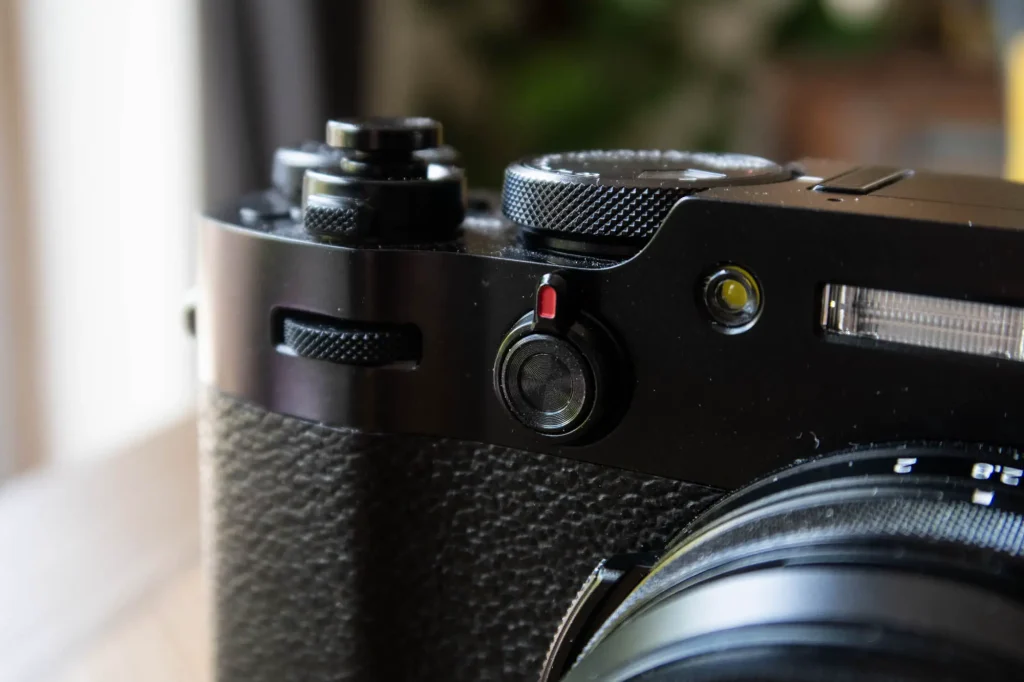
The viewfinder mode switch pictured above (with the bit of red on it) is a little flick switch that switches the hybrid finder between optical and digital. Secondary to this, it can also have a function set to a sustained pull and hold of the lever. I’ve set this to a mode called “Sports Finder”.
This mode feels a little bit superfluous to me – or at least it feels like something jammed in as a bit of a gimmicky way to give a name to a RAW crop mode. The Fuji X100V also has a JPEG crop mode that can be controlled with the focus dial, but this only works in JPEG only shooting modes, and I (at least for now) prefer to shoot in RAW.
The “Sports Finder” mode crops the RAW image by 1.25x (the same as the very high speed electric shutter frame rate modes). When activated it gives you a white rectangle within the digital viewfinders. This is sold on the idea that it lets you frame tighter and see the action as it’s coming into frame in the way the optical viewfinder does.
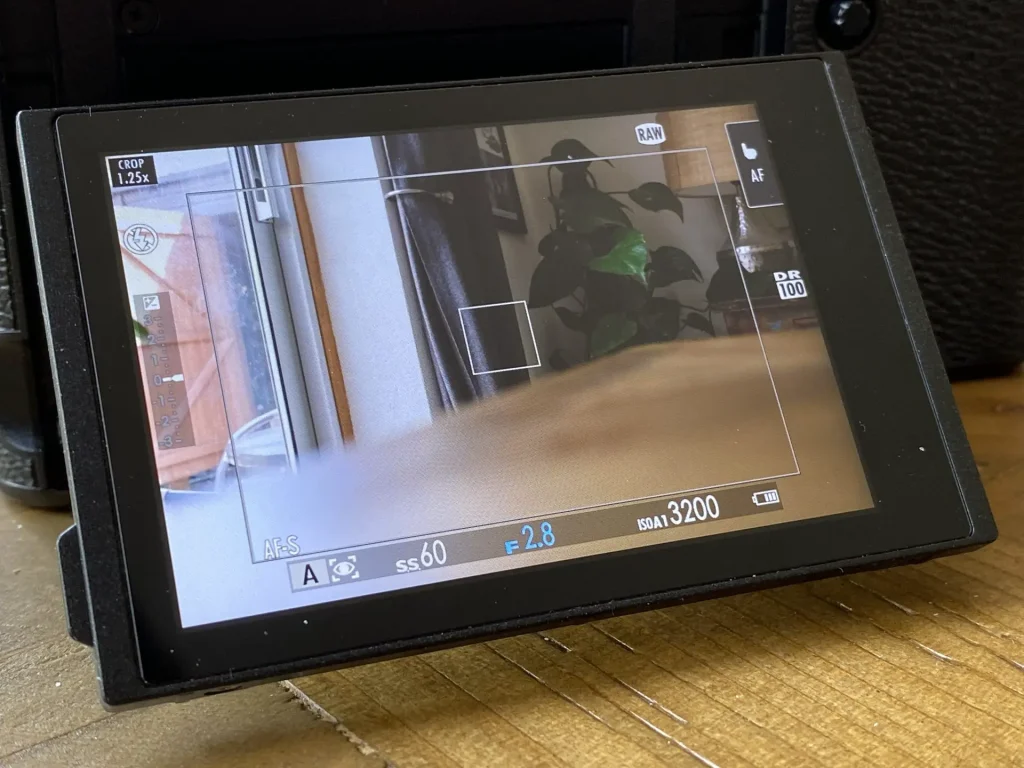
It seems daft to me, but – despite the daft way it’s peddled – I do like the idea of having a crop mode. The 23mm lens is a 35mm equivalent, and 1.25 x 35 is 43.75, which in full frame terms is almost perfectly normal. I’ve found it useful as it means I can take photos of my cameras and have a little guide as to how tightly I can frame before they start looking distorted by the wide angle lens.
Of course, the same could apply to any subject I suppose, but I don’t find it useful at all in any other way I’ve shot it so far. And in fact, I would just prefer that it cropped the view in the finder too. But it doesn’t. At some point I will buy the tele-adapter which will make this feature redundant to me I think.
Dumbing down the Q button
Credit where it’s due, Fuji have done me a solid when it comes to configuring the Q menu. Out of the box, it has no less than 16 options – most of which baffled me at first glance. Apart from anything else, most of them seem to apply to JPEG modes, which I don’t really use at the moment.
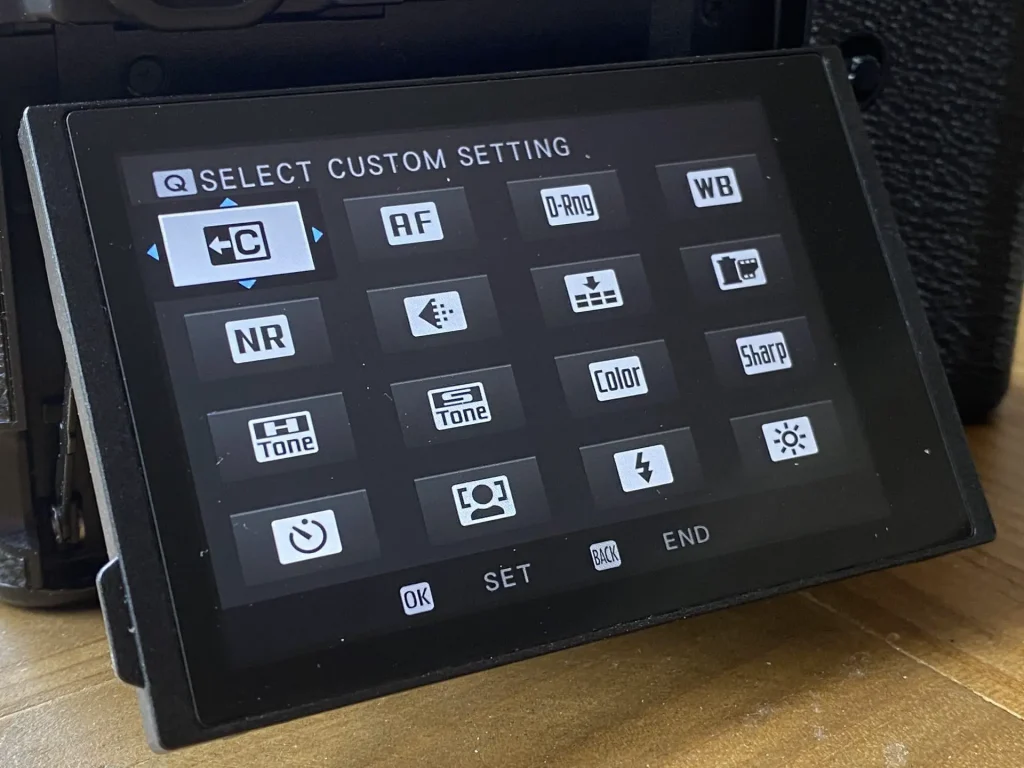
Fortunately, Fuji have made it so you can select the amount of options on that screen…
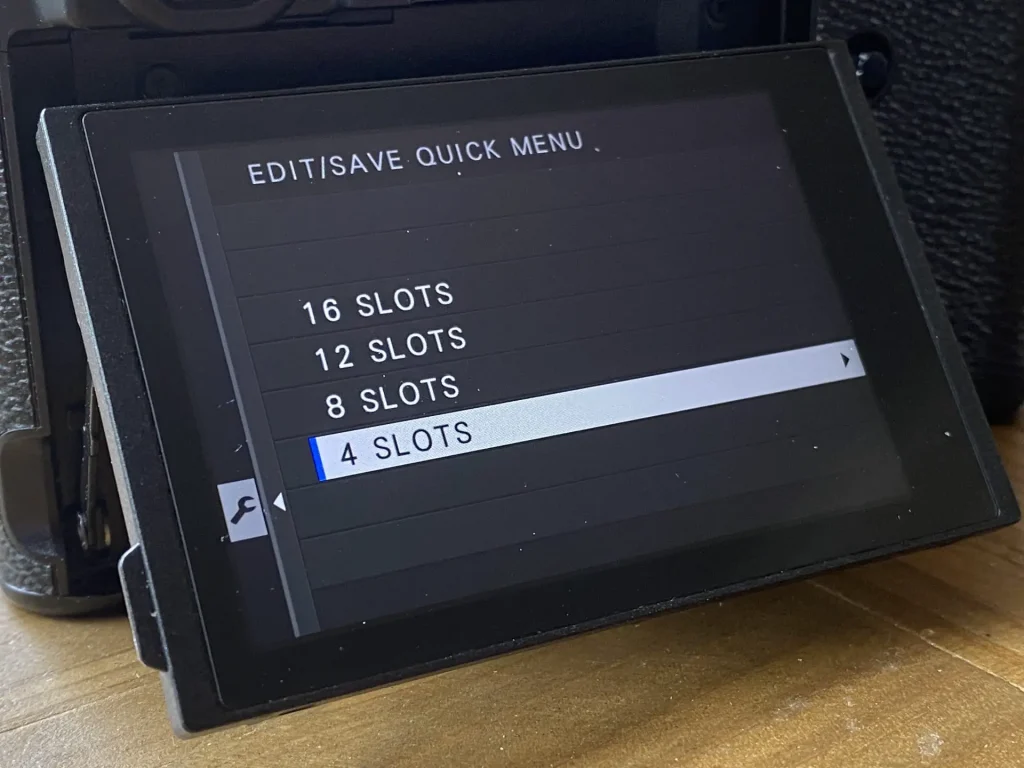
… so I have trimmed it down to 4, as follows:
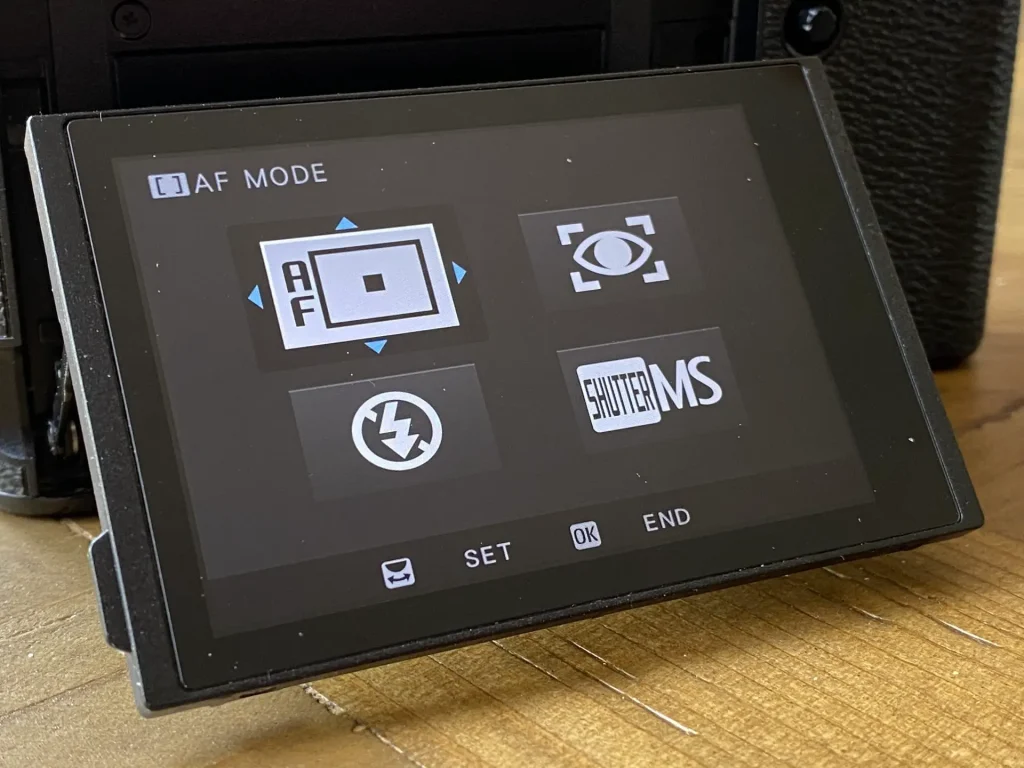
Flash
Because once in a blue moon I might use flash.
AF Mode
Genuinely useful: switching AF mode from single point to multiple point is definitely handy when trying to photograph the kids.
Face/Eye Detection
Definitely useful for focusing on the kids, but sometimes it detects faces in things that aren’t faces, so it’s useful to be able to turn it off quickly.
Shutter Type
The Fuji X100V has a mechanical shutter that goes up to 1/4000th and electronic shutter that goes up to 1/32000th. Certain modes are only available in each though. The flash for example is only available with the mechanical shutter, as are some very high speed shooting modes.
The Wheels and Dials
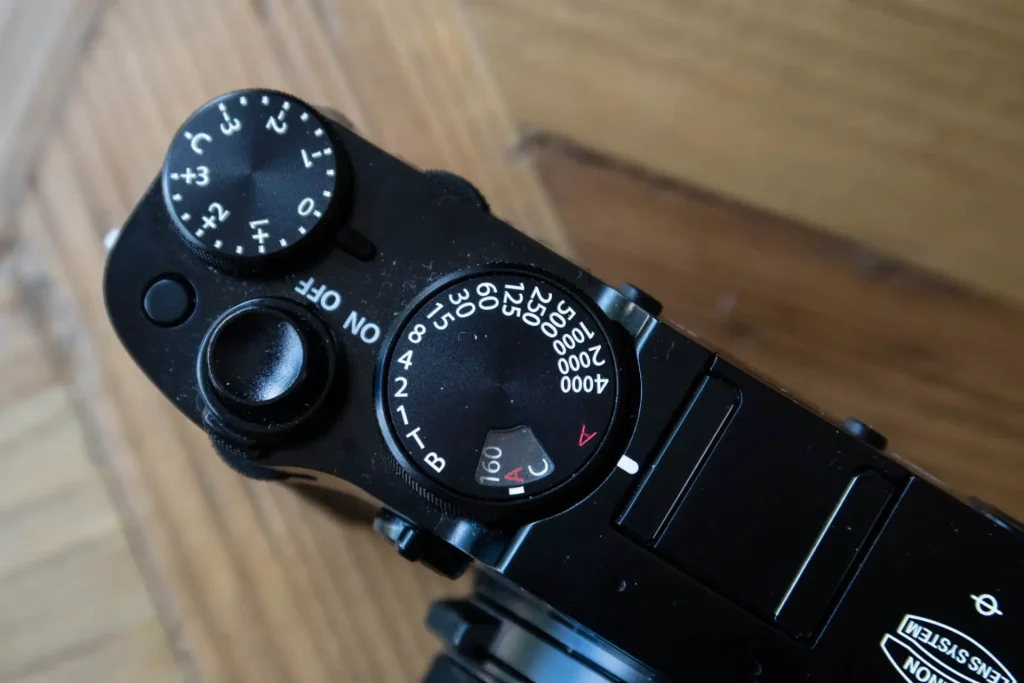
The Fuji X100V has 7 dials. It has a shutter dial, ISO dial (built into the shutter dial), aperture dial, exposure compensation dial, focus wheel (which can be reconfigured to other modes) and two unlabelled command dials, one on the back and one on the front. Just breathe that in for a moment. 7 dials. 7. So… 4 of those I can’t argue with at all. That leaves the focusing dial and 2 more command dials.
The Focusing Dial
As I’ve already mentioned, the focusing can just be a manual focus dial, but it can be much more! Fortunately, as I have already talked about, by allocating the Fn2 button to something else, I removed a micro-menu that allowed for changing the function of the focus wheel on the fly. But the option to choose the allocated function still remains in the menu.
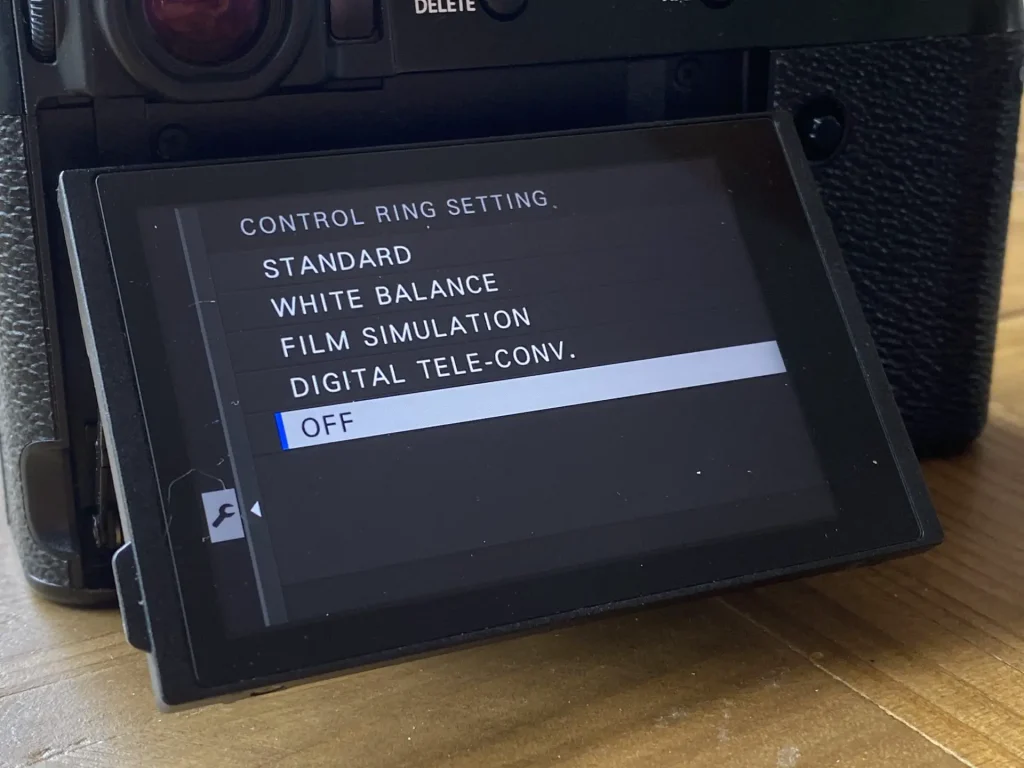
As I’ve already said, I have set this to off. If I shot in JPEG mode, I might find some of this stuff useful, but I don’t so I don’t. Switching it to ‘off’ means it behaves like a normal focus dial on a AF lens/camera. When in MF it manual focuses. Simple.
The Command Dials
I’m going to kick off this section by saying that I feel quite strongly that if this camera didn’t include these dials, I wouldn’t miss them at all. As I’ll get to, that’s not to say I haven’t discovered their uses, but even in the case of the ways I have harnessed them, I feel I could get on just fine without them being there at all. Your mileage might vary here, but for my tastes the default function of these dials is as good as it gets. So yeah I’m mostly including this for the sake of information about what they do… and that’s largely because – at least in the case of the front dial – I had to google it to work out its functionality.
The Rear Command Dial
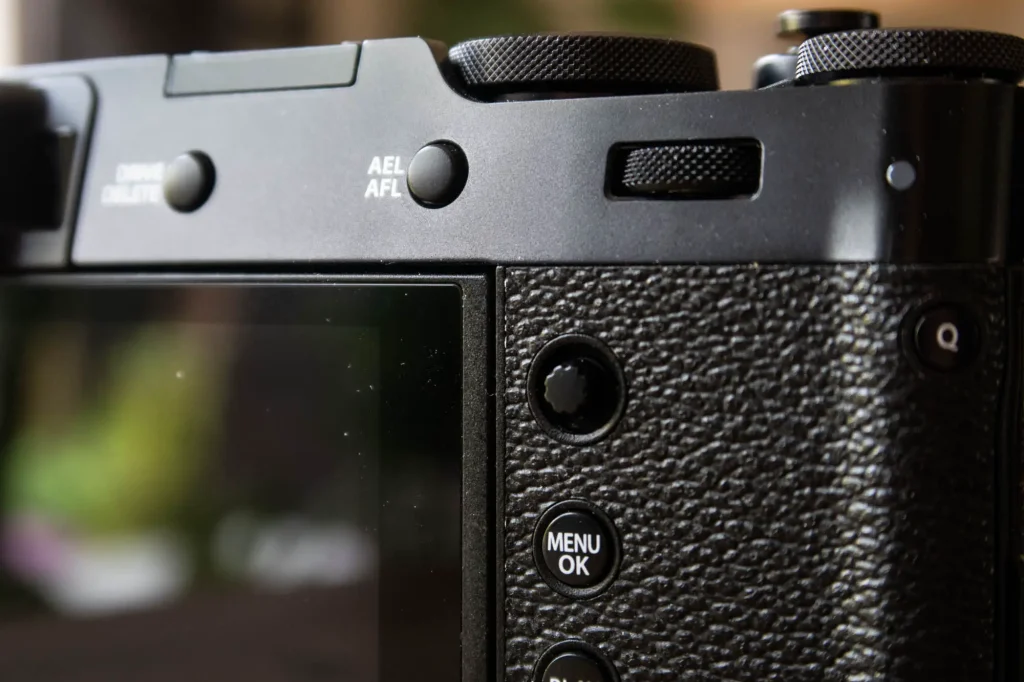
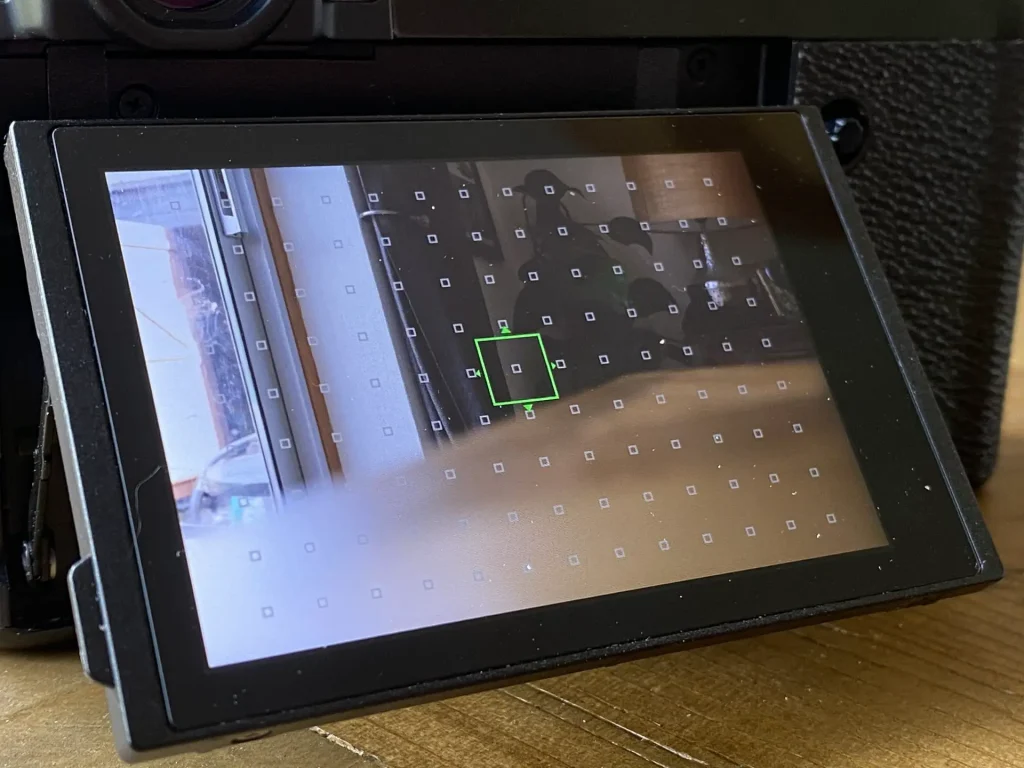
As far as I can work out, the rear command dial has two functions. One of the things it does is change the size of the focusing spot. If you press the little joystick button below it brings up the option to move the focusing spot around the screen. The wheel then changes the size of the focusing point. I haven’t really worked out how the different size points are useful, but I’m hoping to find out through a bit more experimentation – I guess they just make for more precise focusing…?
The other function the rear wheel has is changing the shutter speed. In full auto (both aperture and shutter dial set to ‘A’), it program shifts. In manual, it allows the setting of intermediate shutter speeds.
With a shutter dial that only has full stops on it, in all honesty, I have found this useful when trying to capture a little bit of movement when chasing my kids around the garden. Sometimes 1/60 is too slow and 1/125th is too fast, so being able to choose 1/80th or 1/100th has proved useful with a camera that I want to be able to use in the way I personally have been using the Fuji X100v.

How useful this would be to me in wider use, I’m not entirely sure. I get along just fine with the fixed set of whole shutter speeds on my Leica, so I feel like this is a fairly niche use case… but I suppose I shouldn’t look a gift horse in the mouth. I bought this camera mostly for the benefit of photographing the kids, and it’s helping me do that…
The Front Command Dial
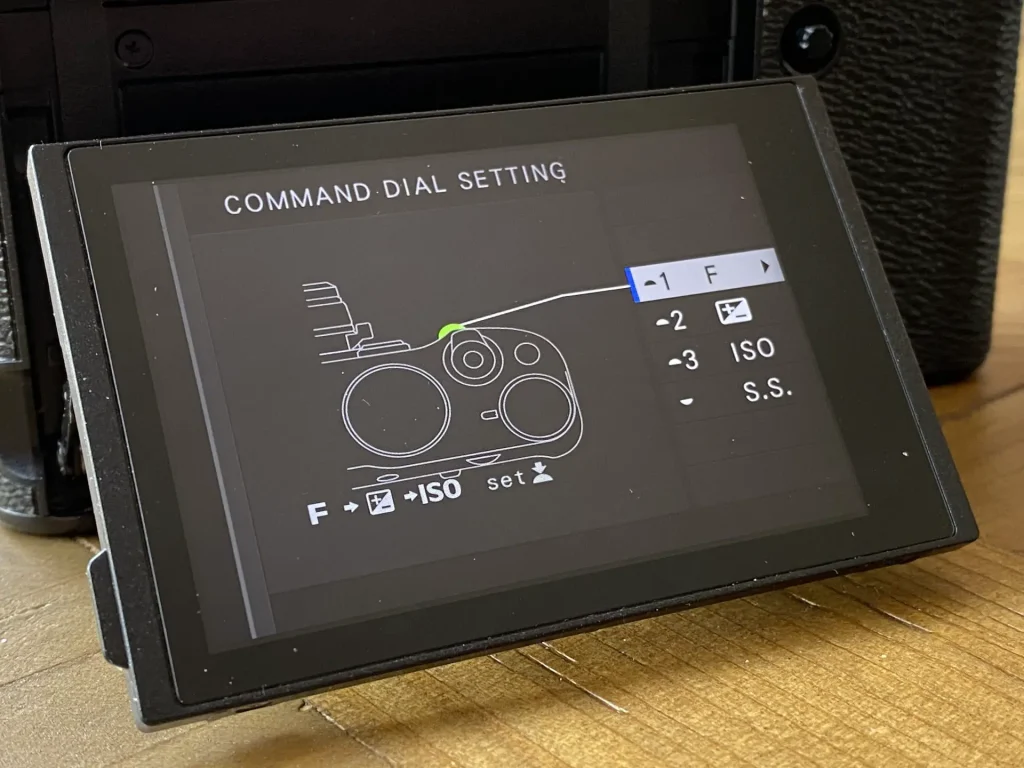
The front command dial (pictured a above in the section above about the Fn2 button) is a clicked dial and push button. I’m not gonna lie, this dial completely confounded me for a good while. At first it didn’t seem to do anything at all, and even reading the manual made it no more clear to me (I’m sure it’s in there somewhere, but I couldn’t find it). In the end, I looked it up on the internet and found this useful video.
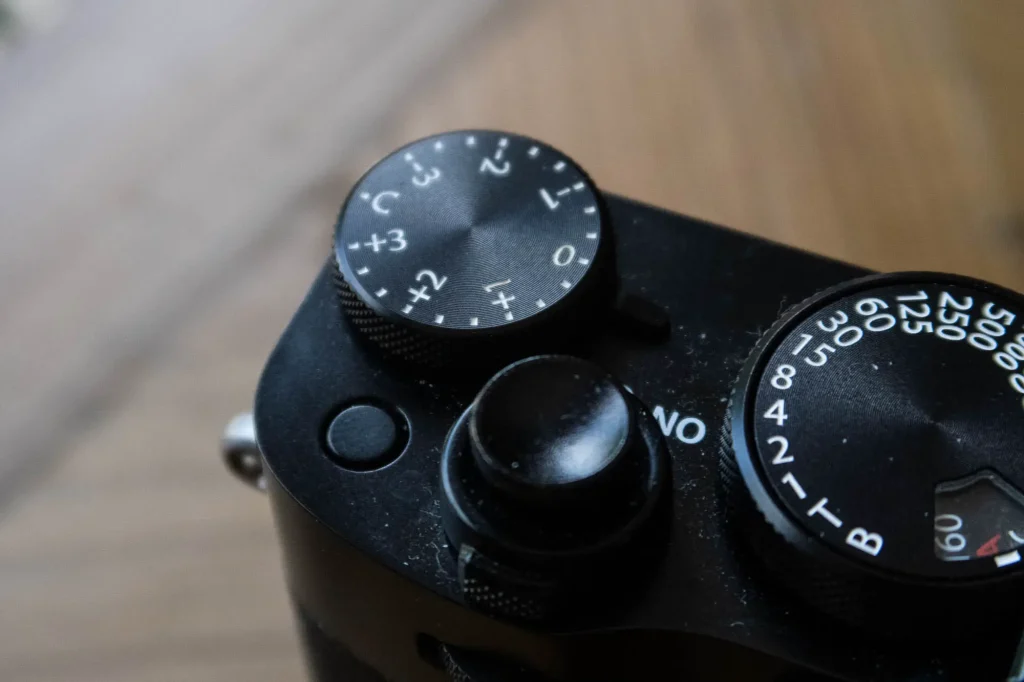
The short version is that (as can be seen in this image above) the ISO dial has a ‘C’ mode, the exposure comp dial has a ‘C’ mode and in one of the menu options the ‘A’ mode on the aperture dial can also be switched to ‘Command’ mode instead of “Automatic’. By switching to any or all of these to ‘C’ (for ‘Command’) the front command dial will control that setting. So for example, if you set the ISO dial to ‘C’ the front command dial becomes a manual ISO dial.
If you then switch them all to ‘C’ mode you can flick between which one it changes by pressing the command dial. As if that wasn’t enough, you can further configure the function of this button/dial to change the shutter speed in the way the rear dial does. Again, this is a level of customisation too far for me – I just don’t need any of these features for the way I use this camera. It just feels like options up options upon options to appease as many potential users as possible… which is exactly what I moaned about in my Fuji X100F article.
The Joy Stick
The joy stick thing is something else I’ve left untouched. As mentioned, if you click it, it brings up the focus point selection screen. This can be switched off, but I use it for moving the focus point enough for it to be worthwhile keeping as default.
Touch screen
The touch screen has a whole world of settings of its own depending on the mode your in. In play mode it can be use to flick through pictures – I’m so used to using my iphone that I quite like this.
The touch screen has also supposedly replaced d-pad found on previous models. The idea being that it can be set up so a swipe of the screen either up, down, left or right activates a mode. This can all be customised to personal taste. I don’t need all that customisation, so I’ve switched it all off.
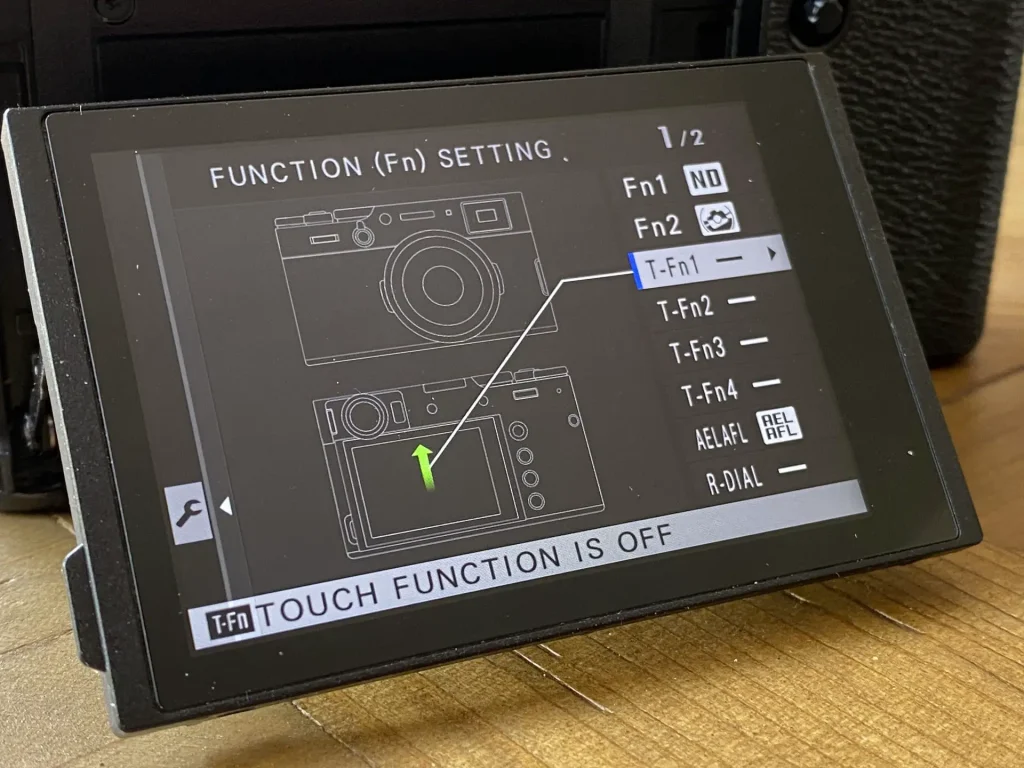
Top right of the screen there is also a little button that you tap to control various autofocus functions. Tap it and it cycles through a couple of different modes. The first of the modes turns the whole screen into a shutter button – I don’t use this. The second mode allows you to use the touch screen to select the focus area and lock focus to it. In this mode, once you tap the screen it locks focus to that area until you tap the little mode button again to unlock it. The next mode called ‘Area’ is the most useful to me – this allows you to tap the screen to select the area you want to focus but keeps it in autofocus. Finally, it has an ‘off’ mode.
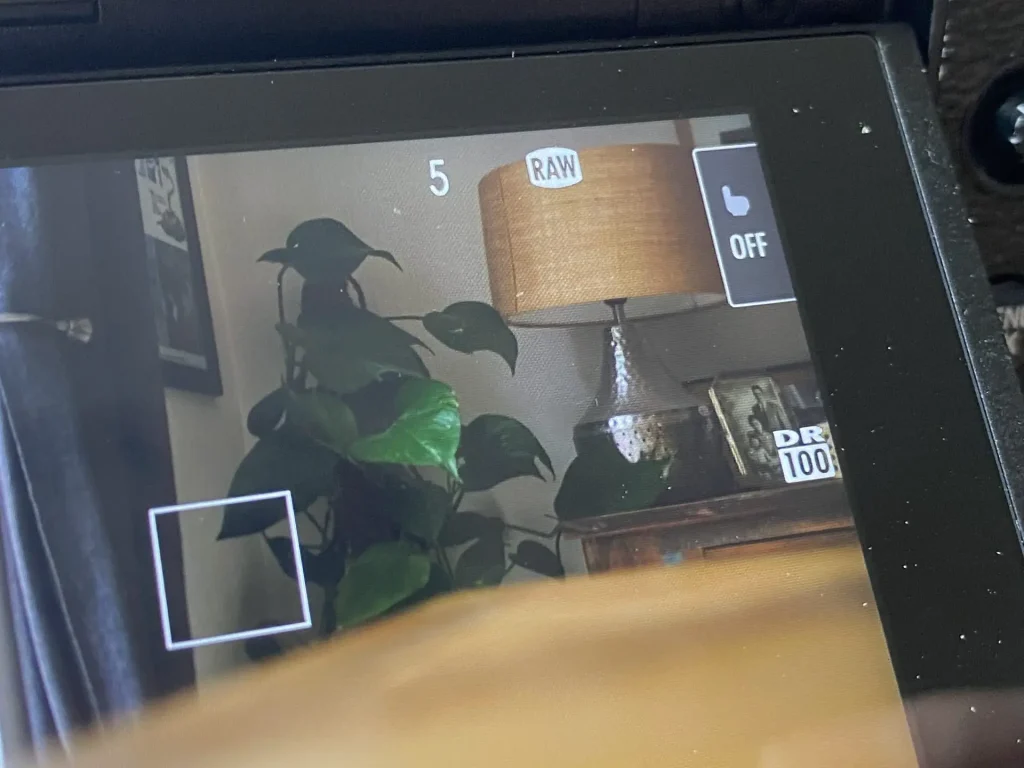
On my Sony cameras I find the ability to tap the screen to choose the area to focus really quite useful – so was quite excited to find this on the X100V. Unfortunately, with the Fuji you either have to leave it on this mode or cycle through the other modes to get to it. I say unfortunately as I have found that I can’t leave it on the ‘Area’ mode as I find that I’m forever changing the focus point by accident. And in fact, because I sometimes use my left eye to frame, I also find my nose interfacing with the screen and moving the focus point. As a result, I just have to remember to switch the focus point selection back off when I’ve used it, and cycle to it when I think it’s going to be useful.
This isn’t perfectly ideal, but I suppose if I like the touch screen in some instances and not others, I’ll just have to put up with the shortcomings.
Autofocus Modes
This leads me to some of the other customisations that I’ve done that sit inside the AF/MF menu. There isn’t much of this that I feel like needs going over in great detail, so I shall just skim through a lot of it.
AF-C Custom Settings
This feels fairly niche, but it might just help me take photos of my speeding kids with a bit of tinkering. In short, this is one I’m going to come back to this.
Orientation settings
In the AF/MF modes there is an option to ‘store AF mode by orientation’ – I switched this to ‘off’. In the screen settings menu elsewhere, I have also switched off ‘Autorotate displays’. I just don’t need the screen changing as I rotate the camera.
Number of Focus Points
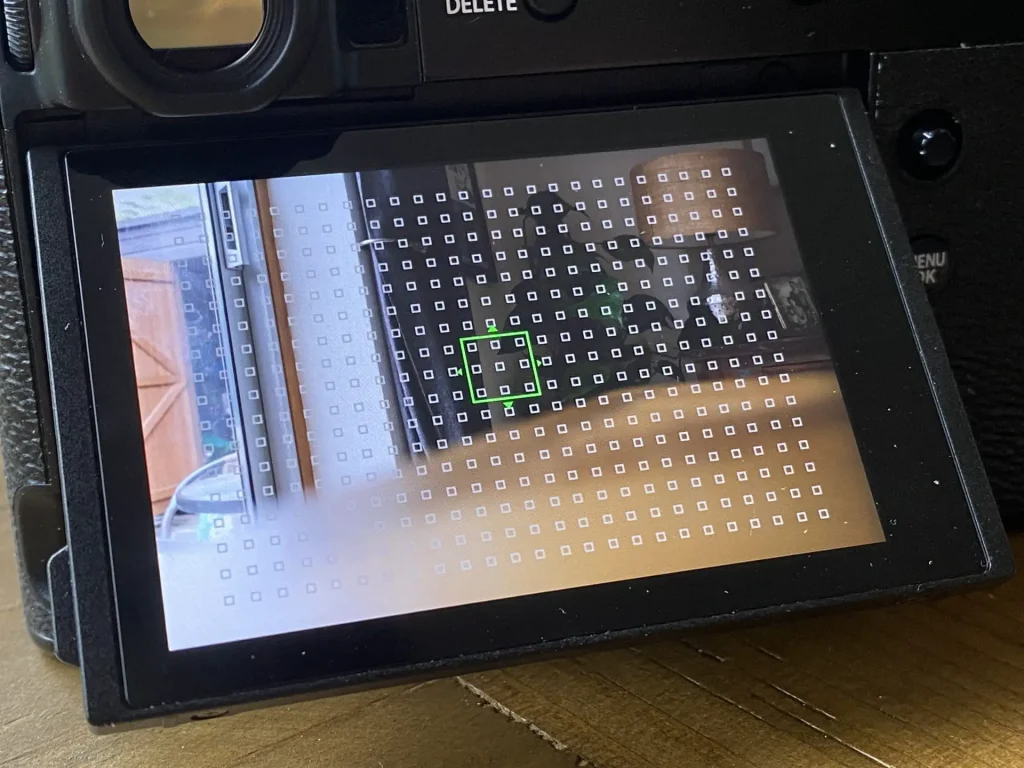
There is an option to select between 117 focus points (as seen in the section about the rear command dial) and 425 points. No one needs 425 focus points, surely…?
Depth of Field Scale
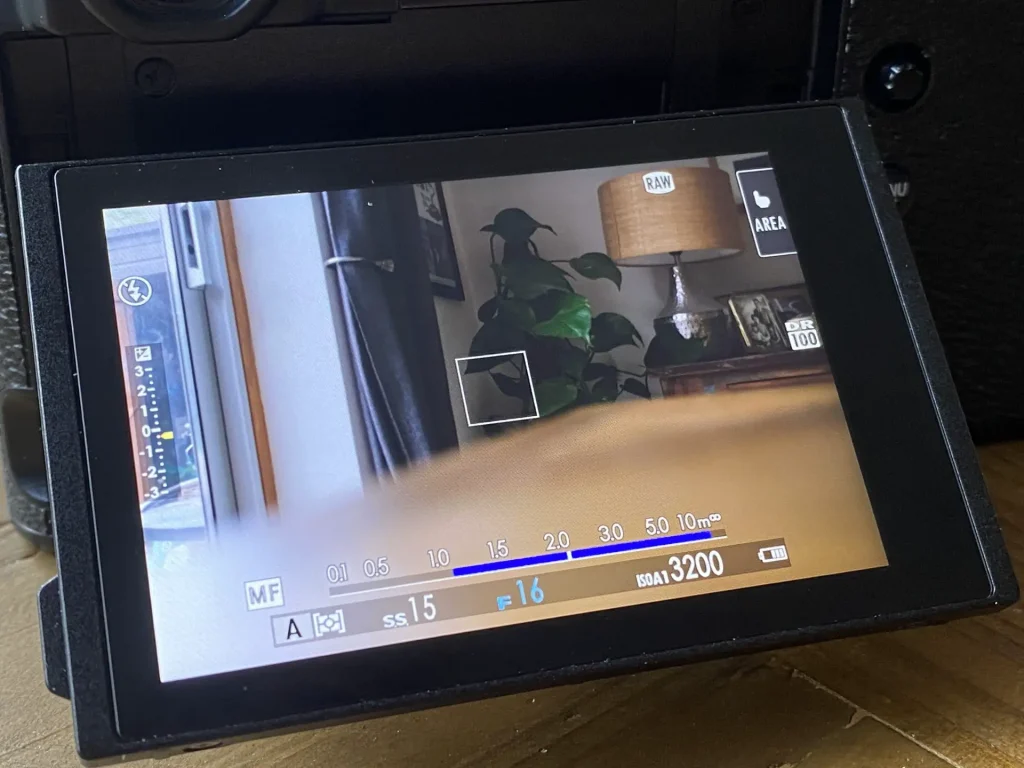
The other tweak I have made in the AF/MF menu is to set the depth of field for zone focusing scale to ‘Film Format Basis’. This is a mode I really like, and something I have also talked about on this website before here.
The short version is that way back when I had my original X100, Fuji changed this scale from being based on a larger circle of confusion to a smaller one. The smaller the circle of confusion the more accurate the scale is for pixel peepers, but some people – myself included – who don’t do so much pixel peeping like the scale to be a little more lose… which is exactly what the ‘Film Format Basis’ does.
If none of that means anything to you, have a read of the article I linked to above and this article I wrote for Ilford photo a few years back where I talk a bit about circle of confusion and what it means when zone focusing.
That’s it… for now…
What feels slightly crazy about this article is that I have only really dug into customising a few of the options. There’s so much more that can be tinkered with on this camera, not least all the JPEG shooting options that Fuji are famous for, and indeed all the video modes and options.
I have so far only shot RAW, and it’s no exaggeration to say that I haven’t even got as far as working out how to put the camera into video recording mode. That said, I must admit, I do have some interest in experimenting with the JPEG modes, or at very least the camera’s internal JPEG conversion engine. Though, I must admit, for the way my brain works when it comes to digital photography, I have a strong feeling I will get more out of using Fuji’s X Raw Studio which allows the harnessing of the camera’s internal JPEG conversion engine (including the film simulations etc)… but that’s a story for another day, I think.
As I said at the beginning of this article, I had no intention of making this some sort of user guide, or even a guide to how you should set up your camera. This really is a very personal setup guide to how I have so far configured my Fuji X100V. That said, to anyone out there who has a mind that works anything close to mine – and therefore craves at least some level of simplicity from their camera – I do hope this has been useful. Writing it all down has certainly helped me get my head around some of the features that were a little less than obvious to me.
I shall be back with more articles about this camera soon, and will – as I have said – endeavor to update this one as I find more features that make the Fuji X100V work better for me – so please check back.
Finally, as I also said at the beginning, please do feel free to comment below with anything you have set up differently!
You can find more of my articles about my journey with the Fuji X100v here, There is also a great article from Steven Bleistien about how he sets up his Fuji X100F to work more like a film rangefinder here.
Share this post:


Comments
Duncan Gruer on Fuji X100V – A (Personal) Guide to Mode/Menu/Button Customisations
Comment posted: 11/05/2020
Comment posted: 11/05/2020
Comment posted: 11/05/2020
thorsten on Fuji X100V – A (Personal) Guide to Mode/Menu/Button Customisations
Comment posted: 11/05/2020
Comment posted: 11/05/2020
Duncan Gruer on Fuji X100V – A (Personal) Guide to Mode/Menu/Button Customisations
Comment posted: 11/05/2020
Comment posted: 11/05/2020
Khürt Louis Williams on Fuji X100V – A (Personal) Guide to Mode/Menu/Button Customisations
Comment posted: 11/05/2020
Loved the article and yes, I have become accustomed to your writing style. ????
When I was considering a move from Nikon DSLR to a mirrorless ILC, I rented a first-generation α7, Olympus OM-D E-M1/M5, and first-generation Fuji X-T/X-E cameras. I thought the menus on the Sony were downright user-hostile. I settled on the Fujifilm X-T2 because all of the essential controls (aperture, exposure, ISO, exposure compensation) were at my fingers tips.
When I first got the X-T2, I read the Fujifilm X-T2 manual and relevant sections of Rico Pfirstinger’s book, “The Fujifilm X-T2: 120 X-Pert Tips to Get the Most Out of Your Camera” to configure some critical features in the menus and set up the Fn buttons. Currently, the only menu items I use regularly are “format SD card” and “select film simulation”.
Also, I was just reading another article about this camera here: https://fujixweekly.com/2020/05/10/my-new-camera-fujifilm-x100v/
Comment posted: 11/05/2020
Comment posted: 11/05/2020
Comment posted: 11/05/2020
Logan on Fuji X100V – A (Personal) Guide to Mode/Menu/Button Customisations
Comment posted: 11/05/2020
Comment posted: 11/05/2020
Marc Wick on Fuji X100V – A (Personal) Guide to Mode/Menu/Button Customisations
Comment posted: 11/05/2020
Comment posted: 11/05/2020
Carlos on Fuji X100V – A (Personal) Guide to Mode/Menu/Button Customisations
Comment posted: 14/05/2020
There is a very simple way of activating the ND filter without having to assign it to a function button. By design, while holding the camera for shooting, if you push and hold the front lever (used for switching between OVF/EVF) to the right, it will activate the ND filter. Just repeat for deactivating. Cheers.
Comment posted: 14/05/2020
Danial on Fuji X100V – A (Personal) Guide to Mode/Menu/Button Customisations
Comment posted: 16/05/2020
- Fn 1 - Face Detection On/Off
- Fn 2 - ND Filter
- T-Fn 1-4 - Touchscreen Turned Off
- AELAFL - Self-Timer
- R-Dial - Focus Check
- Selector - ISO Auto Setting
- Q - Quick Menu: 4 Slots - Photometry; Face/Eye Detection Setting; Touchscreen Mode; Flash Function Setting
Command Dial Settings:
- 1 - S.S.
- 2 - None
- 3 - None
- Back - Exposure Compensation
I use my camera mostly for landscape and travel photography, with the ND Filter and the Self-Timer used for landscape tripod work and the Face Detection used for travel (mostly selfies with my wife... I know). In reality, I don't use the Q Menu, which is great because I had to access it all the time on the X100T that came before this camera.
The Selector for ISO Auto Setting is useful, because unless I'm shooting landscape I let the camera choose the ISO, but I like to set the boundaries depending on the lighting conditions, with Auto 2 being the default:
- Auto 1 - 160-3200; 1/125
- Auto 2 - 160-6400; 1/125
- Auto 3 - 160-12800; 1/125
I did go through every single setting and change it to how I like to use the camera and I was so paranoid that I'd lose those settings at some point that I went through all the settings while recording the screen! Fortunately, I don't use the video or JPEG features, so that kept things bearable.
Comment posted: 16/05/2020
Adam Laws on Fuji X100V – A (Personal) Guide to Mode/Menu/Button Customisations
Comment posted: 18/05/2020
Kenneth on Fuji X100V – A (Personal) Guide to Mode/Menu/Button Customisations
Comment posted: 14/06/2020
I have sett my camera to lowest sharpness no adjustment for colours or anything, doing it on my pad instead. Often shoot in manual focus using AF-L button and recompose. The camera is a bit tiny and fiddly for my fingers and I am not a 28mm eqv lens guy, more 35mm from my OM-4.
I have a very hard decision to chose a replacement camera for my X70. Can´t stand PASM models and that leaves only Fuji or Leica. Time will tell hopefully.
Leica M10-P Review - A Brilliantly Underwhelming Digital Rangefinder on Fuji X100V – A (Personal) Guide to Mode/Menu/Button Customisations
Comment posted: 06/07/2020
Tony Mc on Fuji X100V – A (Personal) Guide to Mode/Menu/Button Customisations
Comment posted: 14/07/2020
Excellent write up btw, really enjoyed... hope my addition helps as your write up helped me.
Barnaby Nutt on Fuji X100V – A (Personal) Guide to Mode/Menu/Button Customisations
Comment posted: 21/08/2020
But how could I take one of these out and leave my digital Leicas on the shelf? They were so expensive that I should be using them every waking hour to justify their purchase, not leaving them to gather dust while I use something that can actually keep up with a five year old.
Just as well that there's nowhere near me in Ireland that stocks them...
Comment posted: 21/08/2020
Comment posted: 21/08/2020
Jonathan on Fuji X100V – A (Personal) Guide to Mode/Menu/Button Customisations
Comment posted: 07/09/2020
With the old Leicas I have to develop my negs and then scan them to be able to interface with the 21st century. That's a time consuming headache... almost as much of a headache as going through the Fuji menu mire.
Finally I realise I'm not alone in the quest for simplicity. It makes photography the more rewarding act of picture making rather than picture taking. Right now I am going to check out that Steve Bleistien article you referenced as it seems I've found some soul mates here.
Stay well and keep keeping it real.
Comment posted: 07/09/2020
Don Springer on Fuji X100V – A (Personal) Guide to Mode/Menu/Button Customisations
Comment posted: 29/09/2020
Thanks, shooter
Comment posted: 29/09/2020
Roy on Fuji X100V – A (Personal) Guide to Mode/Menu/Button Customisations
Comment posted: 14/12/2020
The reality is, a tiny percent of X100 shooters use the OVF. Its one feature is for sports and street shooters to see beyond the frame. The rest is nothing more than added cost, added complexity, lower reliability (how many times have we banged the base plates of our beloved X100's in our palms to get the EVF or OVF curtain to un-jam), and a drag on putting a really serious EVF in both the X-Pro's and X100's.
What you are seeing is a glimpse into the future. The OVF will soon depart, perhaps the X100 before the X-Pro. But I suspect its not long for our world much longer. Hooray!
Comment posted: 14/12/2020
Comment posted: 14/12/2020
Comment posted: 14/12/2020
Charlie Sorrel on Fuji X100V – A (Personal) Guide to Mode/Menu/Button Customisations
Comment posted: 03/01/2021
Also, you might be surprised how good the D3 still is! My digital camera is a D700, and it’s still amazing. Bonus: Raw files around 6MB.
Comment posted: 03/01/2021
Robert on Fuji X100V – A (Personal) Guide to Mode/Menu/Button Customisations
Comment posted: 23/04/2023
I’ve tried this and cannot get it to work. I set the focus dial to linear, and experimented with the dial set to the 1.5 m distance as he suggests, with the taab at 6 o’clock. If I move the dial a little, when I return it to the original position it will again read 1.5 m on the screen. So far, so good. However if I move it a greater amount, then when I return it to the original place it can read 1.3m or 1m. To me, this shows that even when set to linear, the focus ring is NOT linear in its movement.
If Stephen has any advice, I would like to hear from him.