I am still writing my review of the olympus mju-ii, but this modification might give some clue to one of my thoughts regarding it. The camera’s inability to retain it’s flash settings is not an uncommon complaint against this camera, it is in fact often the major point of contention. I wouldn’t say it bothers me a huge amount, but it has caught me out a few times so I thought I would see what could be done.
My first thought was to disable the flash completely by disconnecting it inside. But only a little thought made me realise some of this potential issues in that course of action. Given a low light situation the camera might assume the camera was going to flash and use a shutter speed based on that assumption. This of course would lead to under-exposure when the flash didn’t fire.
The flash settings are lost when the camera is turned off, so my second conclusion was just to not turn the camera off. I found that leaving the lens cover open in the pocket keeps the camera ready for action and retains chosen flash mode. It does come with a few problems though: The lens isn’t protected, the shutter can be pressed by accident in the pocket and if the door closes past a point it switches off and you are back to square one anyway. I was also concerned about the battery useage … This battery worry was put to bed quite quickly though as if you leave the door open/camera on for more than maybe 5 minutes the camera switches itself into standby.
So… it occurred to me that if I could disconnect the on/off switch from the action of opening and closing the door I would be left with the following:
The flash settings would be retained when the door was closed.
The lens would be protected when not in use.
The battery life would be affected, but hopefully not a great deal due to the standby mode.
The only downside would be that the shutter could be pressed, and I had no idea what would happen if it was pressed with the door closed in front of a lens that was trying to extend… Time to find out!
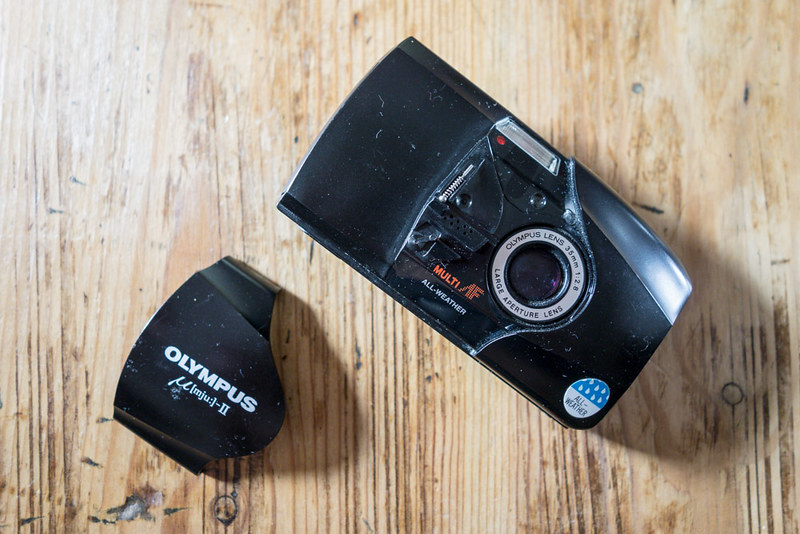
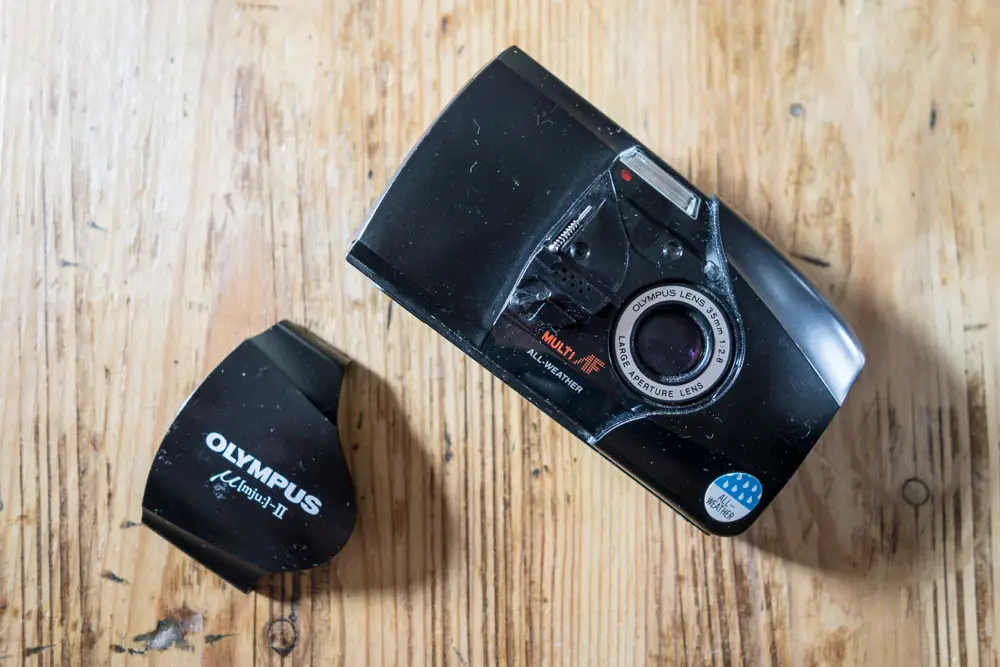
First step was to pry off the lens cover. By putting my finger nails under the top edge with my thumb on the writing on the front and applying a little force it just popped off. Unfortunately, as did a tiny ball bearing… A few minutes of searching in the creases of my clothes and it was found. Here you can see the camera with the front off and the bearing relocated.
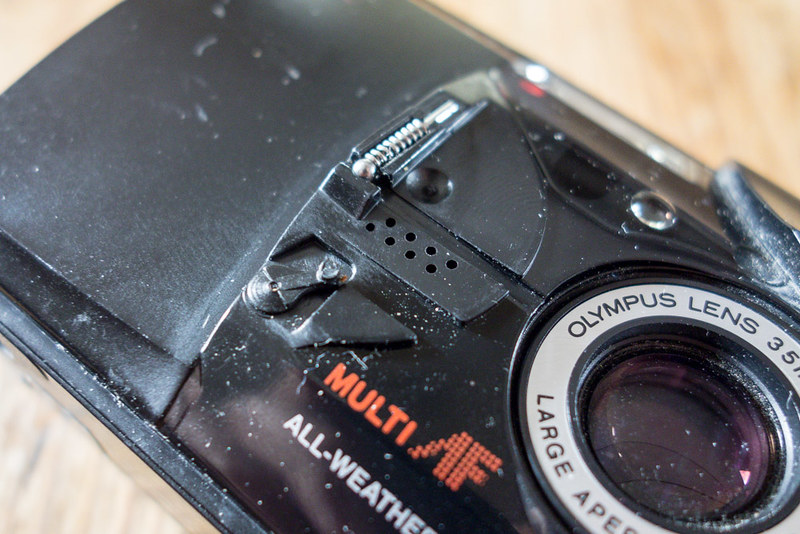
In this picture you can see the bearing more clearly, but also the power switch. It is the bit up and to the left of the red “M” of “Multi”. It looks a bit like a manual winder for a car window.
The bit that projects out of the camera is pushed and pulled by the inside of the lens door. I figured that filing it off with my Dremel would prevent it being switched. So that is what I did …
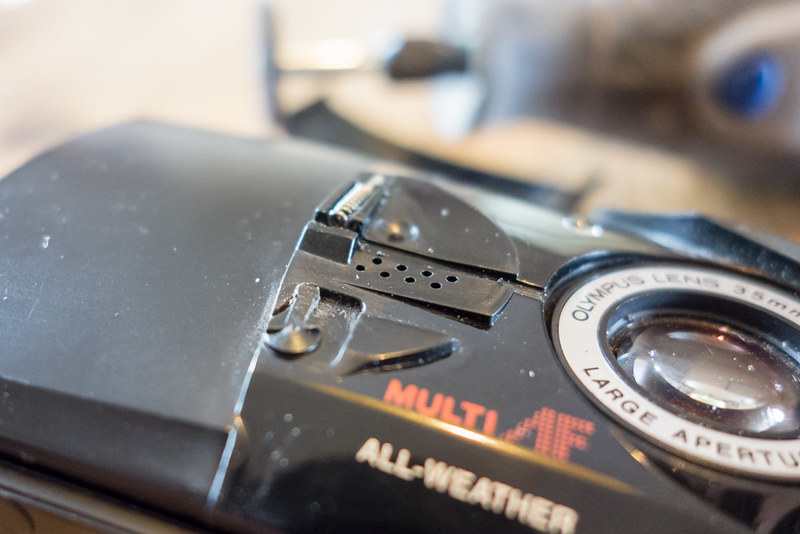
The shot above also shows the switch in the ‘on’ position.
I did have some concern that the tiny switch might move and switch off the camera by itself. A little dab of glue gun glue should fix that.
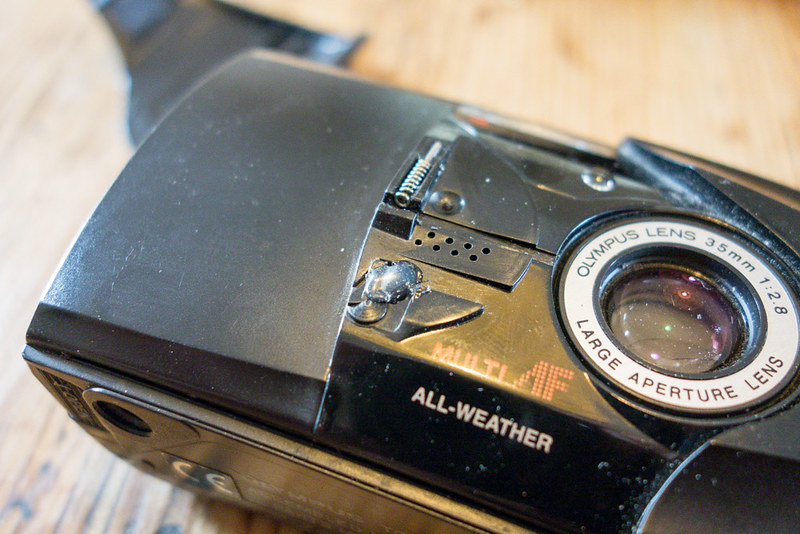
Making sure the ball bearing was in place I then clipped the lens cover back on. A tip if you are going to attempt this yourself, the door is best clipped on and off in the open position!
All back together, and it works a treat! And the outcome is exactly as expected!
So what of the shutter button? Well, it isn’t an ideal result, but one I can live with! If you do press the shutter with the door closed the camera attempts to extend the lens, it hits the lens door and the camera goes into meltdown. It sort of “crashes”, the buttons stop working, and to return the camera to normal function you have to remove the battery and put it back in. No shot is fired though, which is a good thing. I can’t imagine doing this repeatedly would do it much good, but then I never pressed the shutter by accident in my pocket with the door open, so I can’t see me doing it now. It is also worth pointing out that if the camera is in standby it takes two pushes of the shutter before the lens will move (one to wake it from standby, the second to action the process of taking an image), making it all the more unlikely an occurrence I’d have thought!
All in all, I’m pretty pleased with this modification. If you have issue with the flash modes not being retained when you close the lens cover, this might be a better compromise than the standard…?
If you attempt this mod, let me know how you get on, and if you find any more bugbears with doing it, or if indeed you feel it improves function for you, I would be very interested to hear!
UPDATE – 20 / Aug / 2013
I have been having a little trouble with the camera going into what I can best describe as “deep sleep”. When left for a prolonged period of time with the power on it ceases to operate. To return it to normal function, I have to remove the battery for 20 or so seconds and put it back in again. This is of course less than ideal!
I am on the lookout for another one now to test to see if it does the same thing …
UPDATE – 16 / Apr / 2015
After reading the post David (who commented below) submitted a next step in the modification process and added a switch to the bottom of the camera. You can read about it here
Share this post:


Comments
The Olympus mju-ii – is it the Ultimate Point & Shoot? on Modification of Olympus mju-ii to retain flash settings
Comment posted: 30/08/2013
Flash switch hack for the Olympus AF-10 super - 35mmc on Modification of Olympus mju-ii to retain flash settings
Comment posted: 26/10/2014
David on Modification of Olympus mju-ii to retain flash settings
Comment posted: 30/03/2015
Thanks for your contribution to improving this little camera. I modified my mjuII based on your instructions and experienced the same issue you describe above: the camera stalls after being inactive for a long period of time. Constantly having to remove the battery is a bit of a hassel since the battery flap on my camera is broken and consequently held in place with a piece of black tape. I solved this issue by installing a tiny switch (taken from a broken old flash unit) in the little open space beneath the battery compartment. All you need to do is sandwich a piece of insulating tape between the two wires from the switch and place them under the battery so one wire touches the battery and the other touches the metal connection at the bottom of the battery compartment. I cut a small groove into the compartment to let the wires in. Now I can simply switch the camera on and off without taking out the battery. The switch sticks out a couple of mm, but a smaller switch might not have to protrude at all. This mod doesn't solve the standby issue since the camera will still stall if left on for several hours, but it is a bit more elegant than having to take the battery out the whole time. The camera takes four seconds to start up though when first switched on, but reacts normally once in standby. The LCD is slightly dimmer than usual, which made me wonder if other functions might be slightly impaired. I don't know if the metering will be affected, for example. But then again, I did a bit of a sloppy job with the connections, and I'm sure the concept can be executed much more thoroughly.
Comment posted: 30/03/2015
Stephen on Modification of Olympus mju-ii to retain flash settings
Comment posted: 28/02/2018
Thanks!
Comment posted: 28/02/2018
elza on Modification of Olympus mju-ii to retain flash settings
Comment posted: 27/04/2018
Comment posted: 27/04/2018