Kodak Alaris recently sent me a brick of Ektachrome E100 to play with. As someone who hasn’t shot much reversal film before, I promised a bit of a series of posts documenting my early experiences. I had it all planned out – first I was going to shoot a roll in something with a fancy evaluative meter, and then from there I would work my way up to shooting it with something a little more manual. I then got cocky, and just went straight for the Leica M3.
The outcome – partly thanks to me overthinking what I was doing, and on at least one occasion due to me forgetting to set the exposure index on my light meter – was, well, a little mixed. Fortunately, I do feel like I’ve learned a lot, and regardless of a few mistakes, I’ve still managed to achieve a few shots that I’m really happy with… and I guess that’s the main thing!
The Shoot
My first frame was taken out of the bathroom window of my house. I didn’t think I’d wound the film on enough, so wasn’t expecting a full frame to come out and so wasn’t really thinking about what I was doing. It was taken at f/11 and 1/500th of a second – I remember thinking I’d underexposed it after I’d taken the shot.
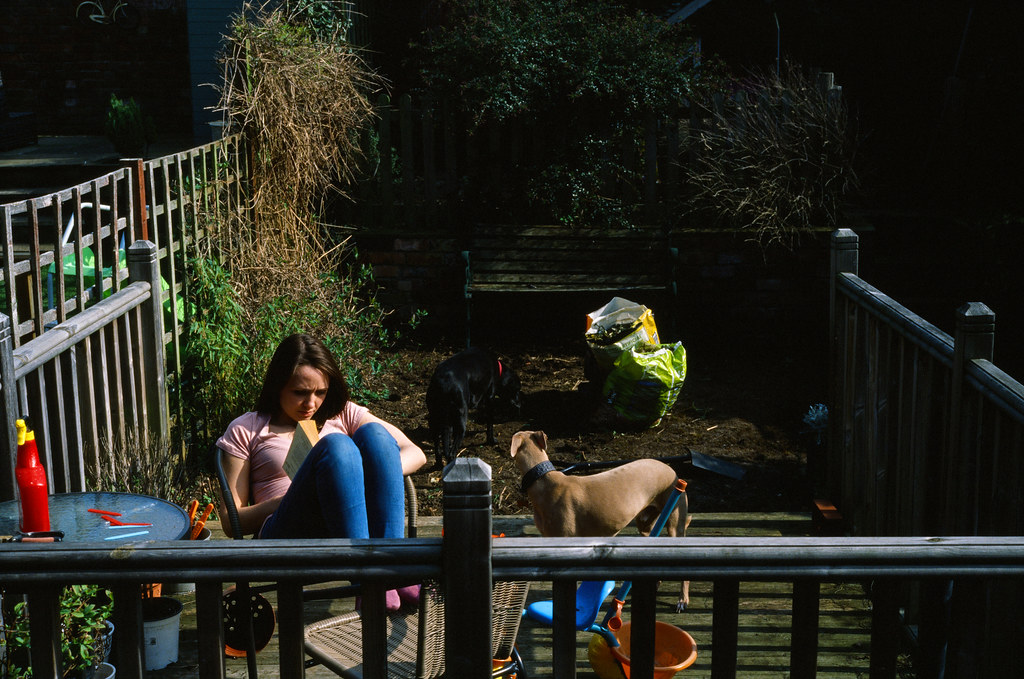
The underexposed shows in the result. I managed to get something out of the frame, but if I pushed it much further than this in the scan or Lightroom it started to look a little bit crappy with some murky colours and more obvious grain. Not the best start, but it’s all useful information as far as the learning curve goes.
Being aware of the fact that I’d underexposed the very first photo I’d taken with this film, I quickly decided to revert to using a light meter. My chosen light meter for this first roll was to be the Lumu app in reflected mode. I use this app a fair bit and am quite comfortable with how it works and how reliable it is. Just prior to the first outing, I opened the app, set the exposure index to 100 ISO. I then took this shot of Connie in the living room.
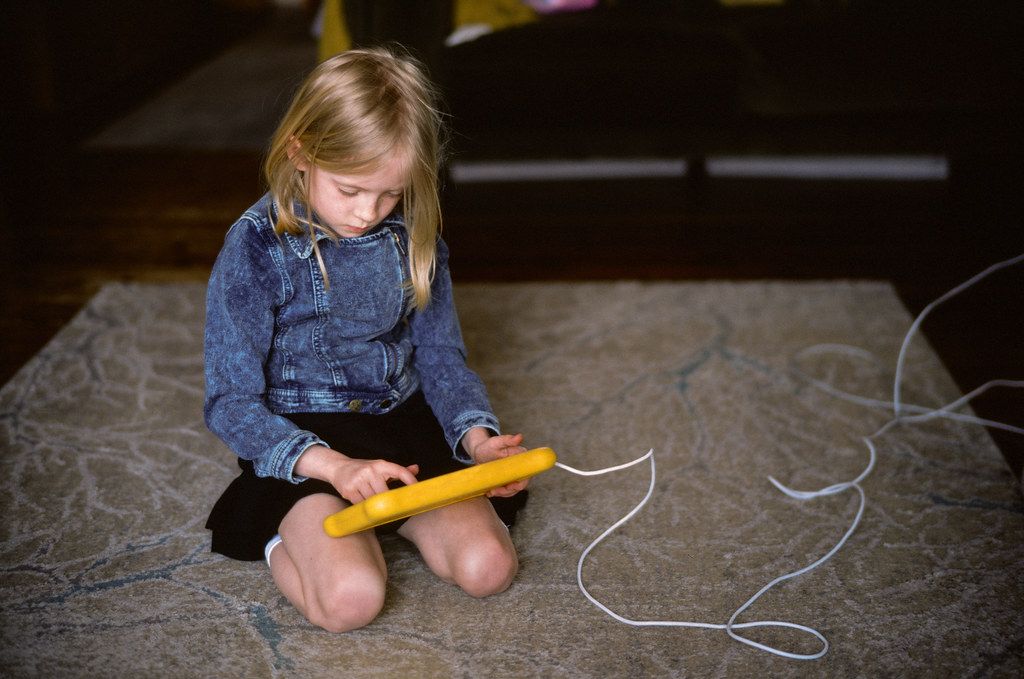
Unfortunately, I can’t quite remember the settings, but I remember thinking that I was probably just about exposing ok for her face, with much of background of the frame likely to be a little dark. Having no experience scanning E100 yet, I just notched the density correction down a little in the scanner interface to ensure the scanner didn’t try to correct for all of the shadow areas. The result was a frame that entered Lightroom looking fairly blue-shifted. Fortunately, it was very easy to correct for this blue-shift. Combine this correction with a scan and post-process that ensured the shadow areas remained in shadow meant that the image came out quite nicely.
I then went out shooting. Somehow, in the time between setting the meter to EI100 in the house and taking the first shots, the meter had reset to 400. The Lumu app does this sometimes – though I suspect user-error is probably at the core of the issue. Regardless, with my concentration being so focused on the fact that I was shooting this new-to-me film, I just didn’t notice. The result of this was a series of photos that were quite underexposed. More frustration!
Well, actually, it sort of turned out ok. When I came to scan these underexposed frames – combined with the shot of Hannah in the garden and Connie in the lounge – it all gave me a bit of appreciation for dealing with underexposure with Kodak E100 within my workflow. Now admittedly, some of the frames where I’d worried a little bit about losing highlights were a write-off. The combination intentional and non-intentional underexposure added up to a couple of frames that there was simply no saving. Here is a perfect example:
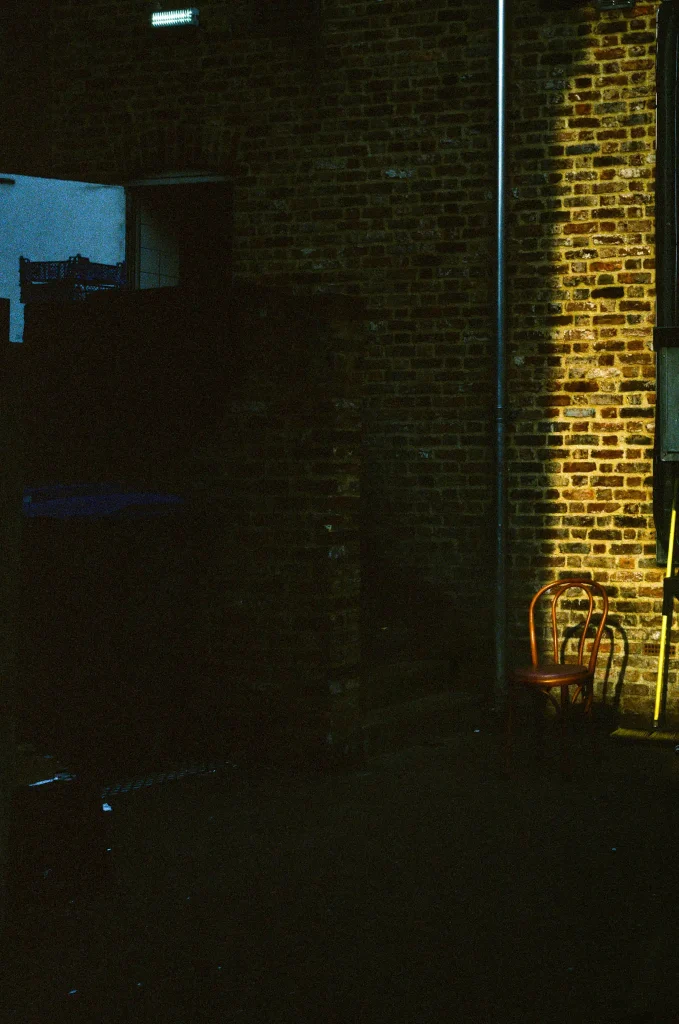
But, there were a couple of the frames where I’d taken a reading at EI400 and then without much further thought just taken the shot. These frames needed a little more care in the scan, and then some gentle nudging in Lightroom to correct for a bit of a colour-shift, but – like the shot of Hannah in the garden – provided I didn’t try and pull too much out of the shadows and tended toward a lower-key look – they actually came out quite nicely.
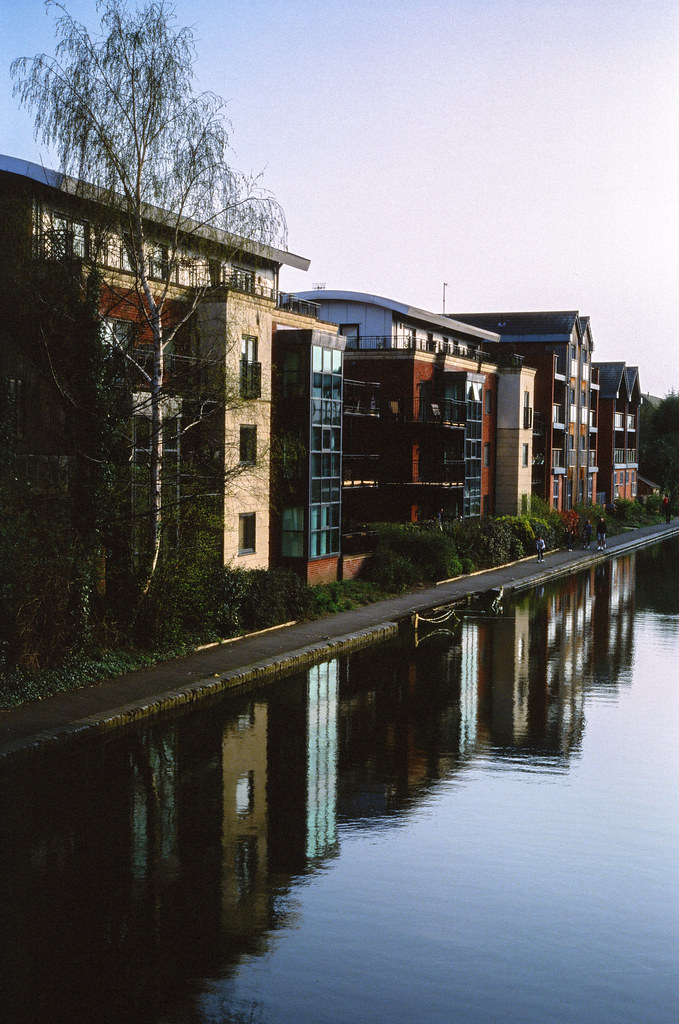
The blue shift actually worked really well with the blue car here too, so I just left it as was – it’s not accurate, but I quite like it nonetheless!
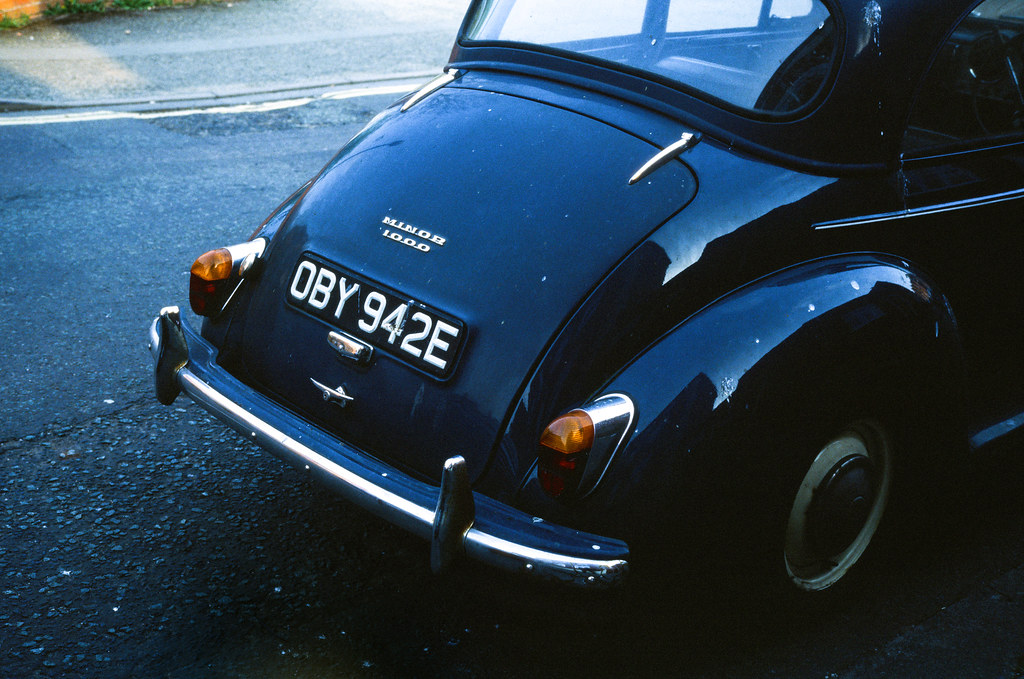
This next frame was the first I took where I had noticed that the light meter was set wrong. I set it to EI100 and then took a reading using the iPhone app with a similar framing to what you see in the photo. I’m quite pleased with how it came out. The exposure is nice and even and tonally its really nice, and importantly there was very little faffing with the colour in Lightroom to correct for anything the scanner did. In terms of colour, this is pretty much how it came out of the scanner and Lightroom.
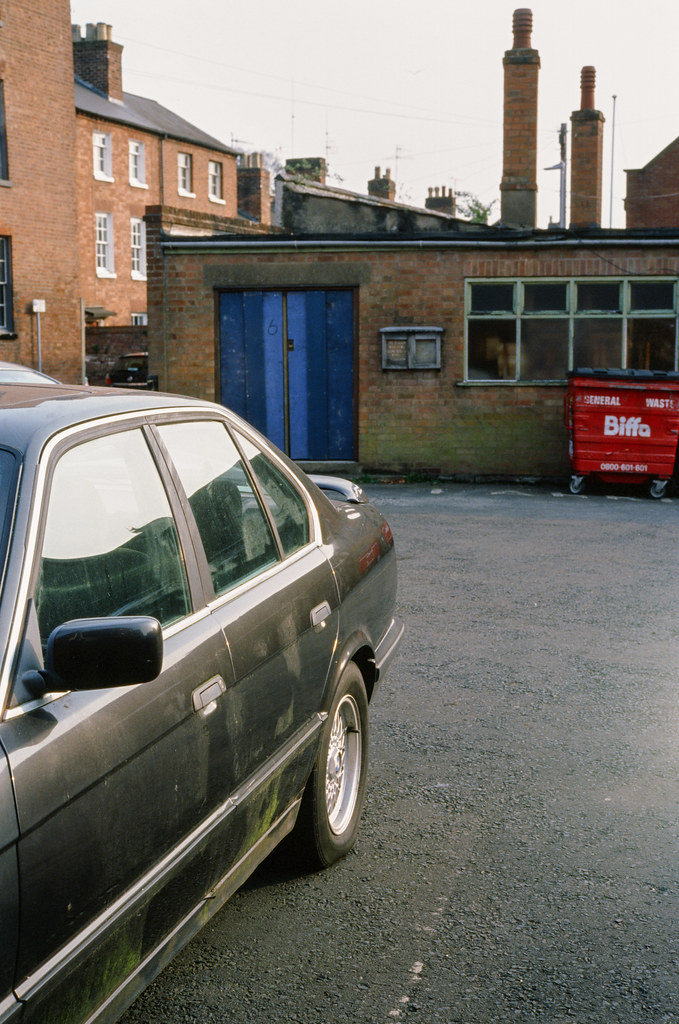
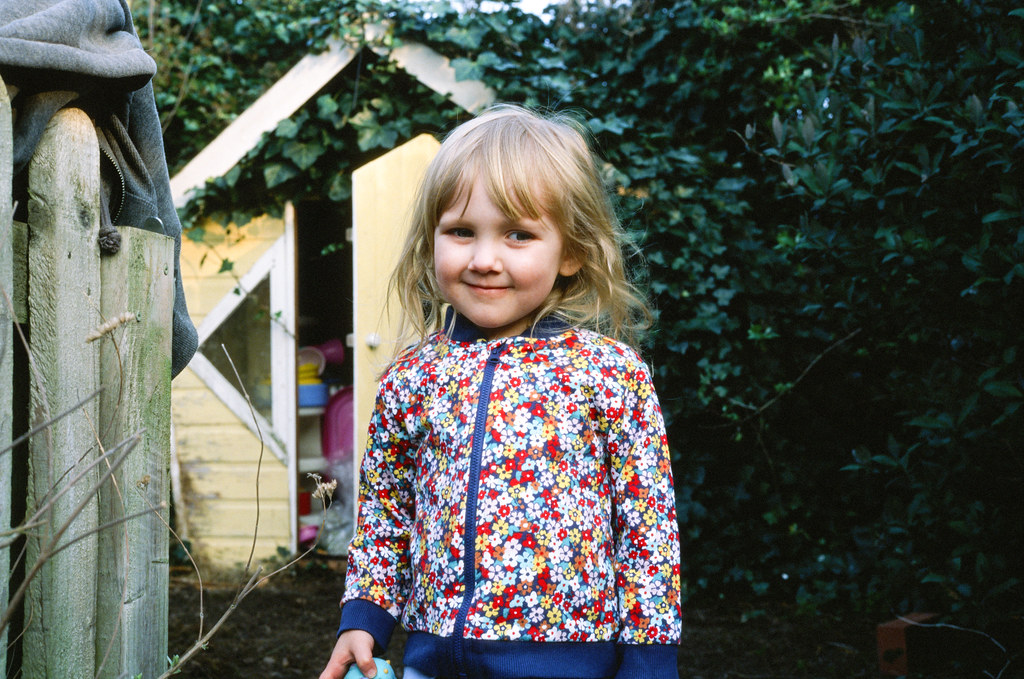
The next two shots are of my youngest. The first I unintentionally underexposed, the second, I intentionally slightly overexposed. I’m not sure what I did in the first image in the garden, I remember I was just aiming for correct exposure, but I think I might have set it based on a part of the garden that had more light. I’m not too sure, but either way the result was an image that was a touch underexposed. Again, I still managed to pull something out in the scan and Lightroom that looks ok.
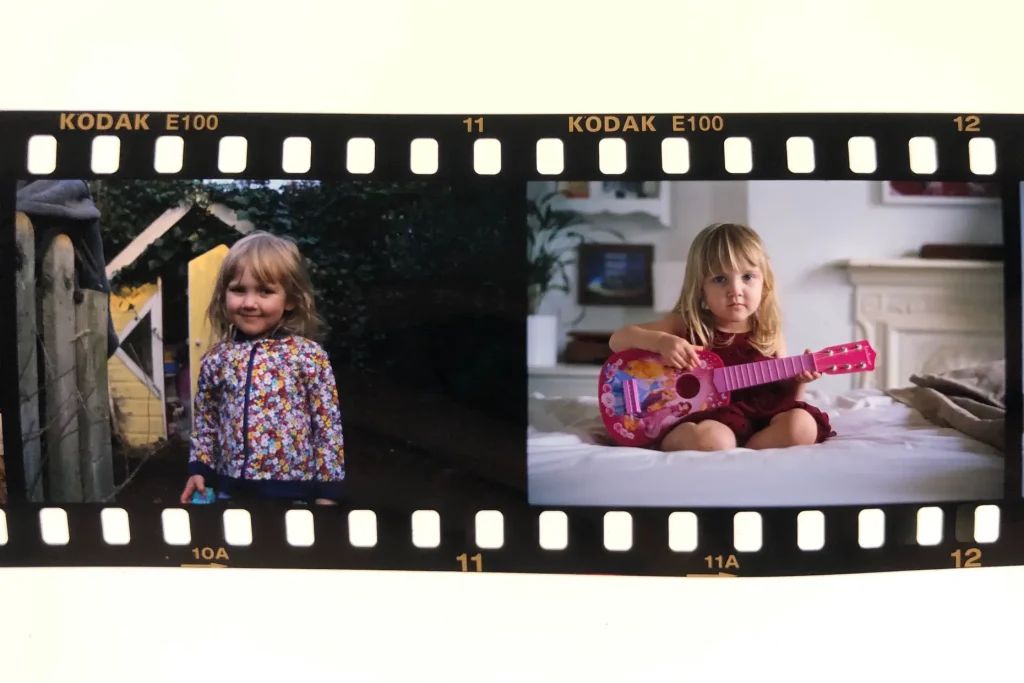
For this next shot of Norah I decided that a bit of overexposure wouldn’t go amis. The Lumu app is quite good at taking an average reading that you can judge by looking at the readout on the screen, but with all the white in the frame I decided to give it a bit more juice. I can’t remember the settings, but I think I was about 2/3rds of a stop over what the light meter told me.
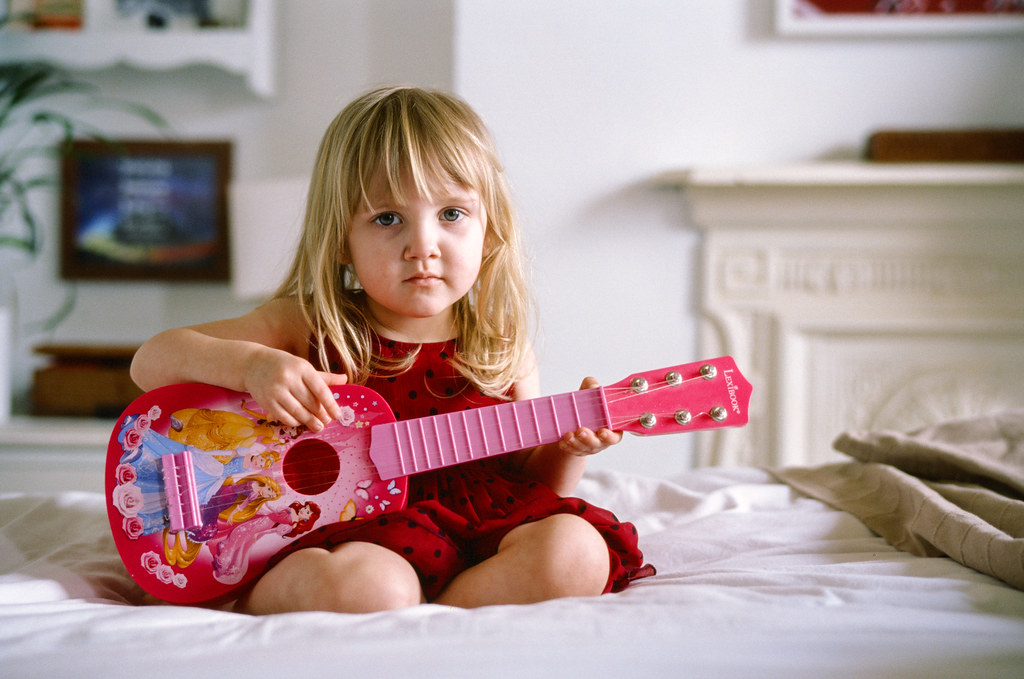
What’s really interesting about this is that when looking at the film, it looked to be the best exposed shot of the lot, and I wasn’t the only person to notice this. I had this roll developed by Duncan at Silverpan Labs. I usually use AG, but on this occasion I decided I wanted a little more feedback on my exposures. Duncan prides himself of giving this level of service, so it struck me that he’d be the right guy for this particular job.
After I started scanning the roll and found this particular frame to be the best, I asked him how the exposures looked generally. He commented specifically on this frame saying that it was the best exposed with a lot of the rest of the better frames looking like they needed a tiny bit more light. When I told him that I’d overexposed this frame, he explained that quite often when he shoots this film he shoots evenly lit scenes at EI50-80 and has heard from a lot of people that do the same. He then went on to say that I shouldn’t be afraid to give Kodak E100 a bit more light in general, that obviously it doesn’t have the latitude of some negative films, but it’s better with a little more light than a little less.
This really rings true in my results. Entering this brave new world of reversal film, I think the main issue I had was with the preconception that highlights are a lot easier to lose. I suspect we’ve all heard the reversal film is harder to shoot than negative film. The reality is, like any media, for best results you just need to expose correctly for your subject. Try as I might to hammer this mantra into my head, I couldn’t help but be worried about, or at least overly conscious of highlights.
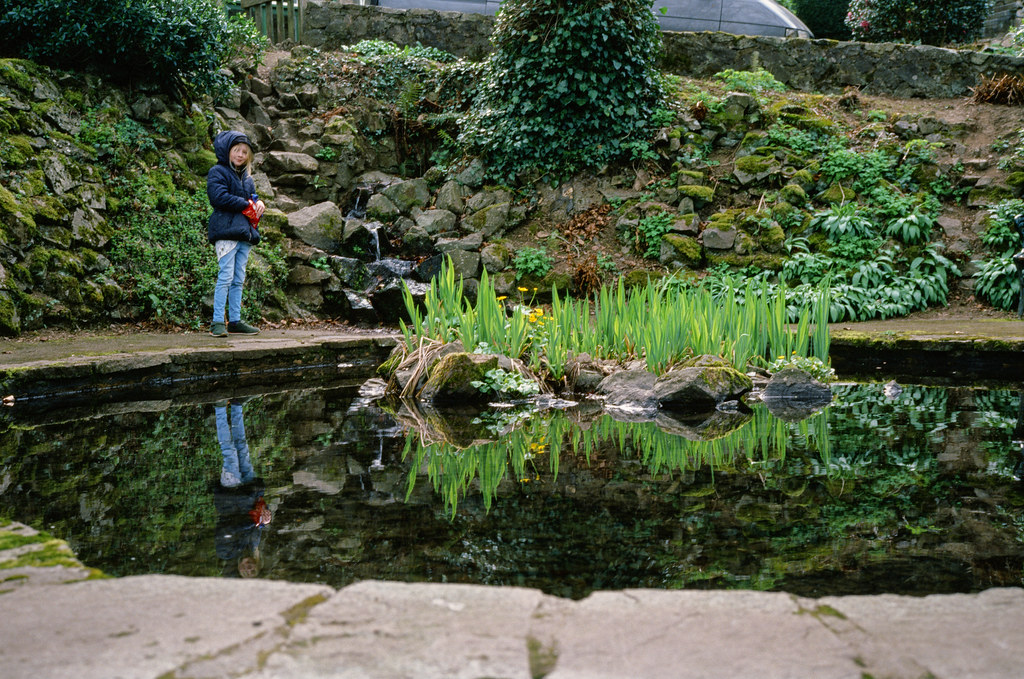
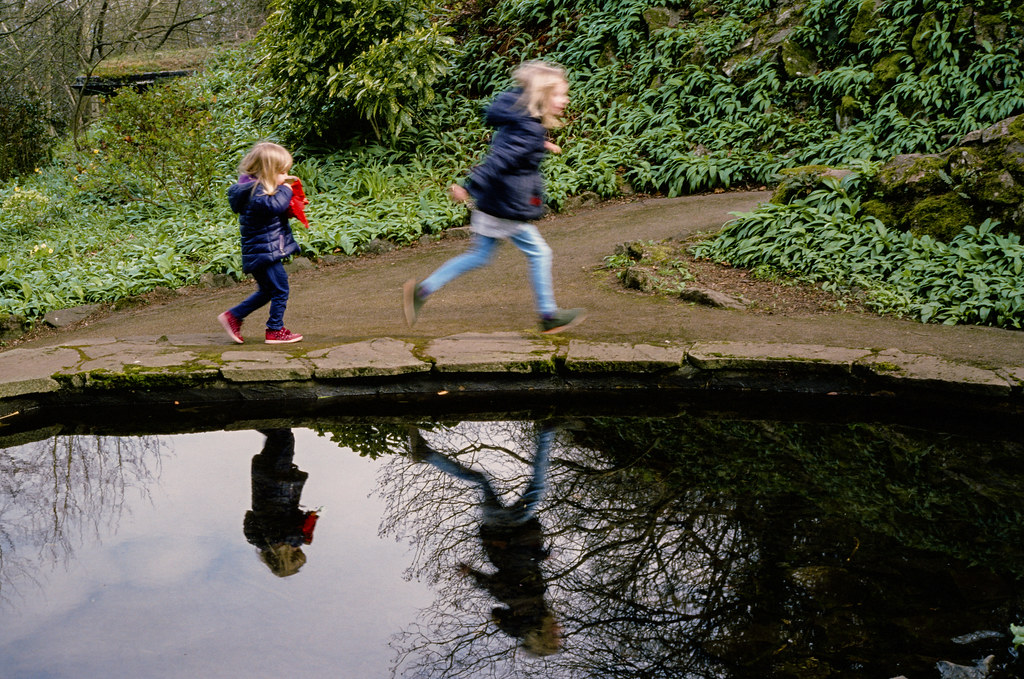
In response to this, my biggest problem – even with shots that I had the light meter set properly – was actually with slight underexposure. This whole next set of shots was taken out on a walk with the family, and in every single one of them I made the same slight mistake. I’d take a meter reading, and then I’d slightly err toward under, rather than over, or even correct exposure.
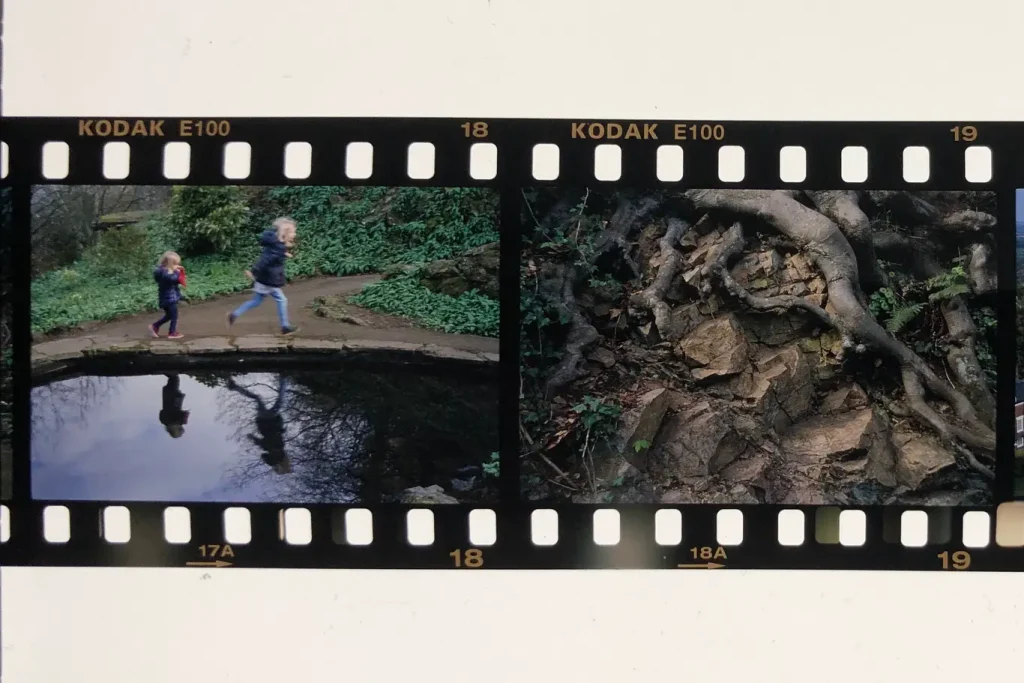
This is what I was talking about when I said at the beginning of the post that I over-thought the whole process. Rather than just do what the light meter said – and in fact what I know to be the right thing to do – I let my preconceptions about how reversal film works get in the way.
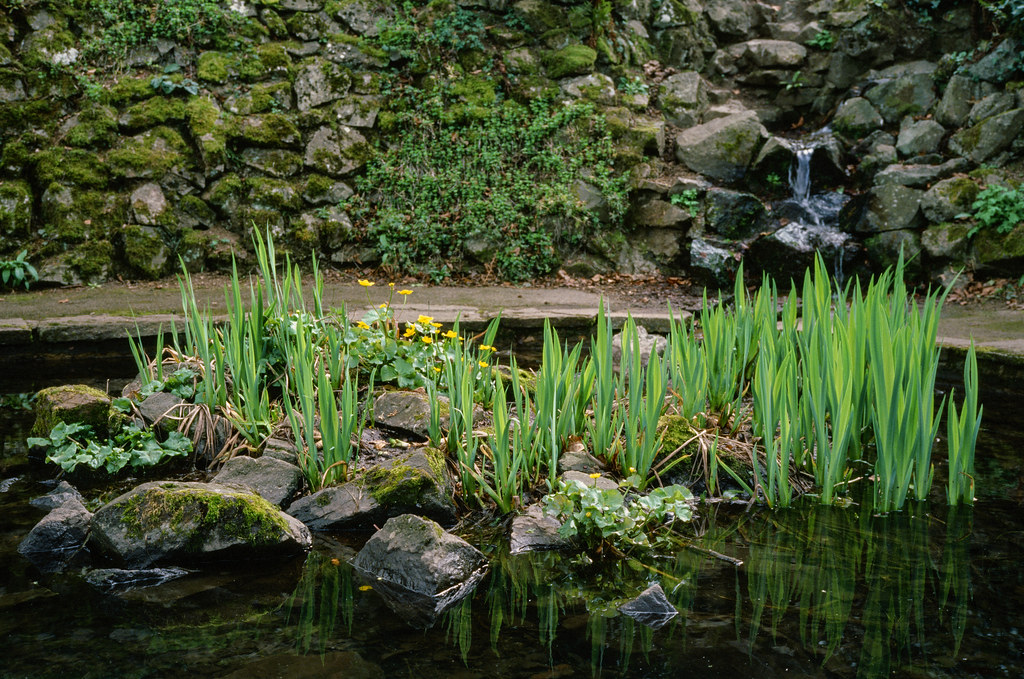
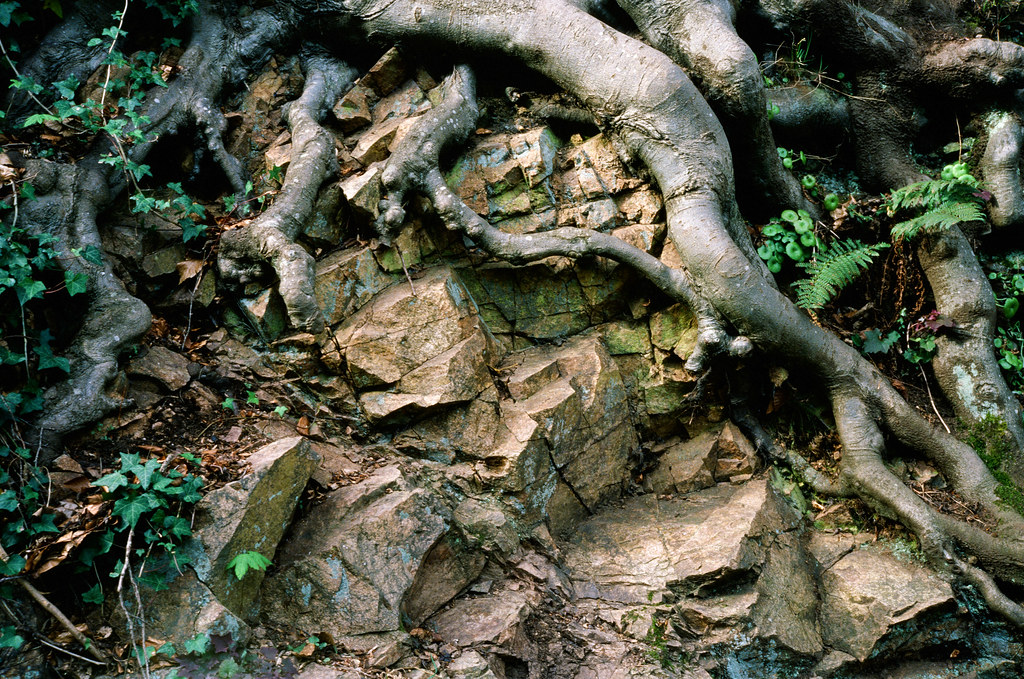
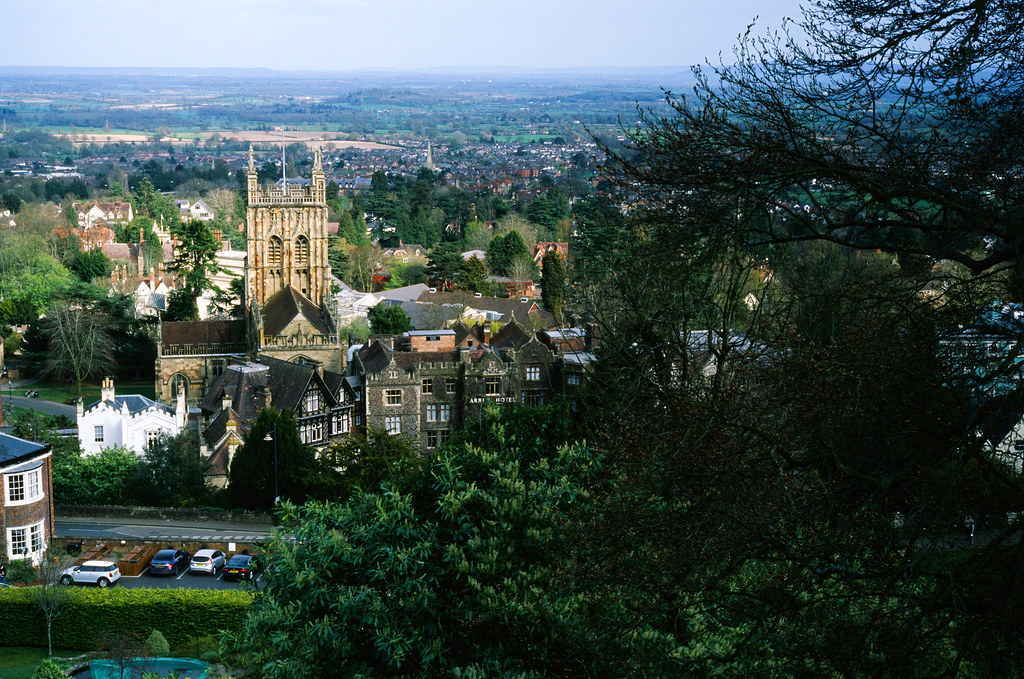
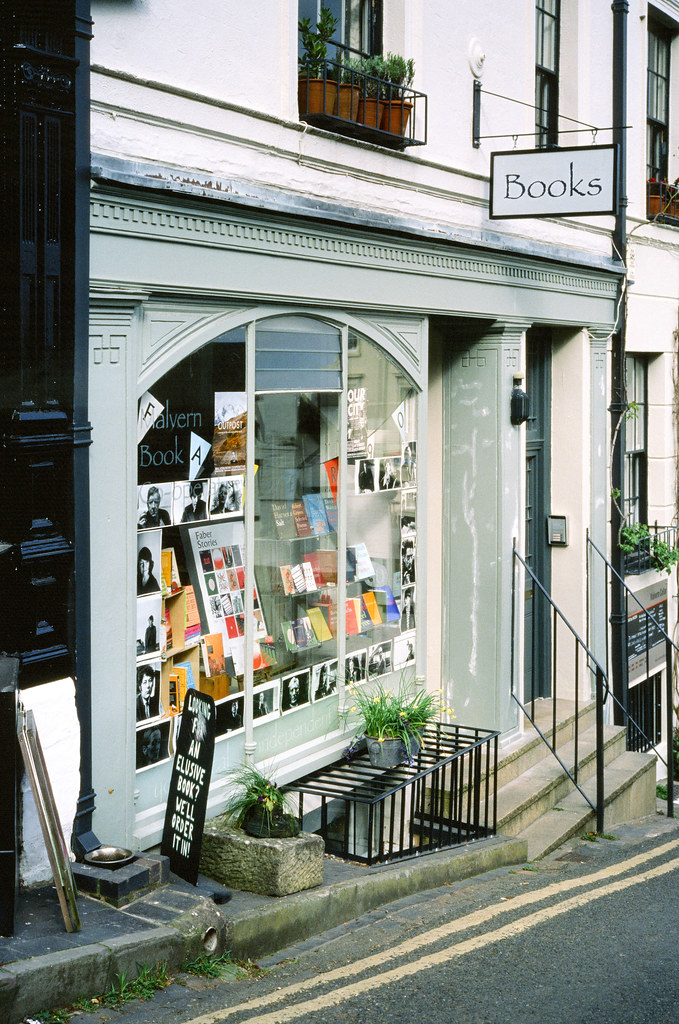
Combine this with the fact that specifically E100 apparently seems to respond ok to slight overexposure in favour of slight underexposure, and I found myself with a little more work do do in the scan/Lightroom. Actually, with these shots, there wasn’t much to do – only the shop front and the short of the Abbey were notably under. Another lesson learned for the next roll.
As I’ll come to in a second, this wasn’t to be the last lesson I’d learn from this roll either. Unfortunately, not every frame was able to teach me something. A couple I ballsed up, and just can’t remember what I did wrong. This next one is the best example of that. Beautiful sunny day, so I used the sunny-16 rule – what could go wrong?
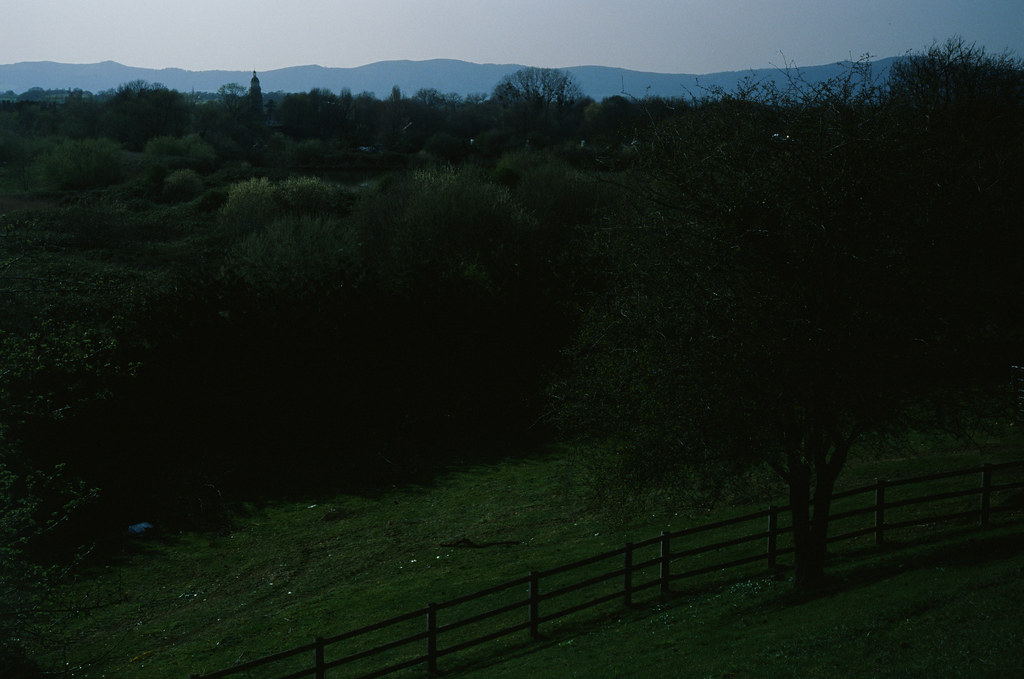
Well, in short, I don’t know what I did wrong – the only thing I can think is that I forgot I was shooting a 100 speed film and set the camera to f/16 or f/11 and 1/500th… But really, I have no idea. It’s actually confused me so much, I have sent the M3 back to Alan Starkie to check the shutter – you know what they say about a good photographer blaming his tools and all that! One way or another, no amount of tweaking was going to make this frame any less shit.
At this stage in the roll, I was starting to feel like I knew what I was doing – daft really, in hindsight, as I’d made more mistakes than not by this point. But anyway, I decided I should experiment a bit. One of the key learnings I wanted to be able to take away from this first roll was how well this film dealt with high contrast scenes. Walking into town one day, I had the perfect opportunity to experiment.
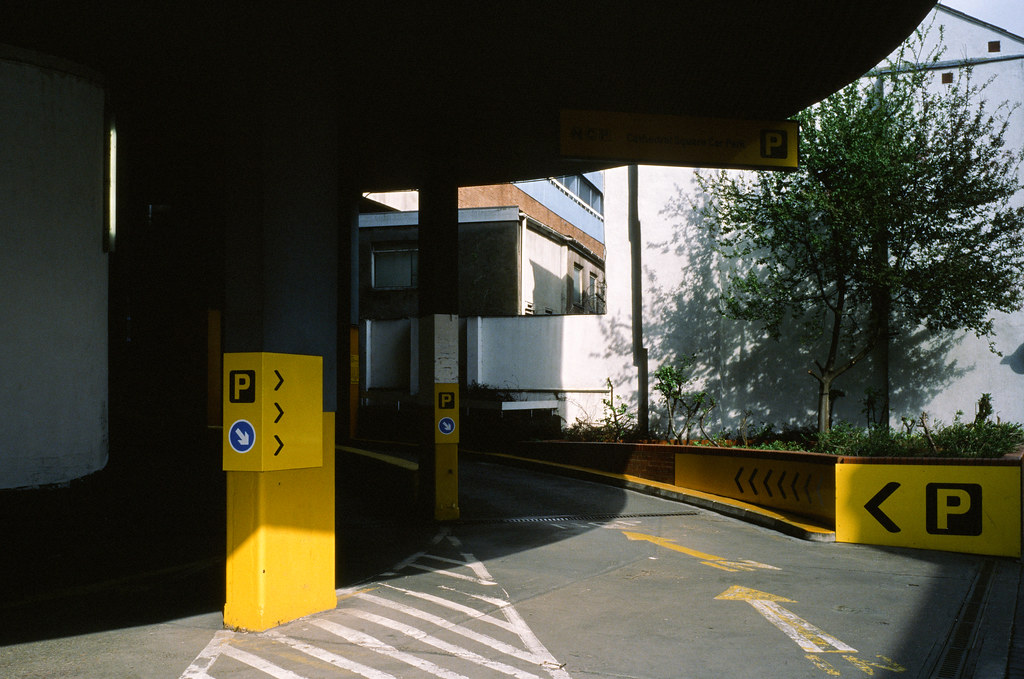
For this first image I set the exposure by using the Lumu app and adjusting the framing on the screen until I was happy with how the image looked combined with settings that I felt made sense for the amount of light. I then transferred the exact settings to the camera. Using the Lumu app like this almost feels like cheating it makes it so easy, but I can’t think of any good reason to deny myself the technology. It turned out well too – the image on the film looked good, and it scanned without much issue too. There isn’t much to be pulled out of the shadows, without introducing grain at least, but I guess that’s what is to be expected from reversal film. And really, I do like how it came out!
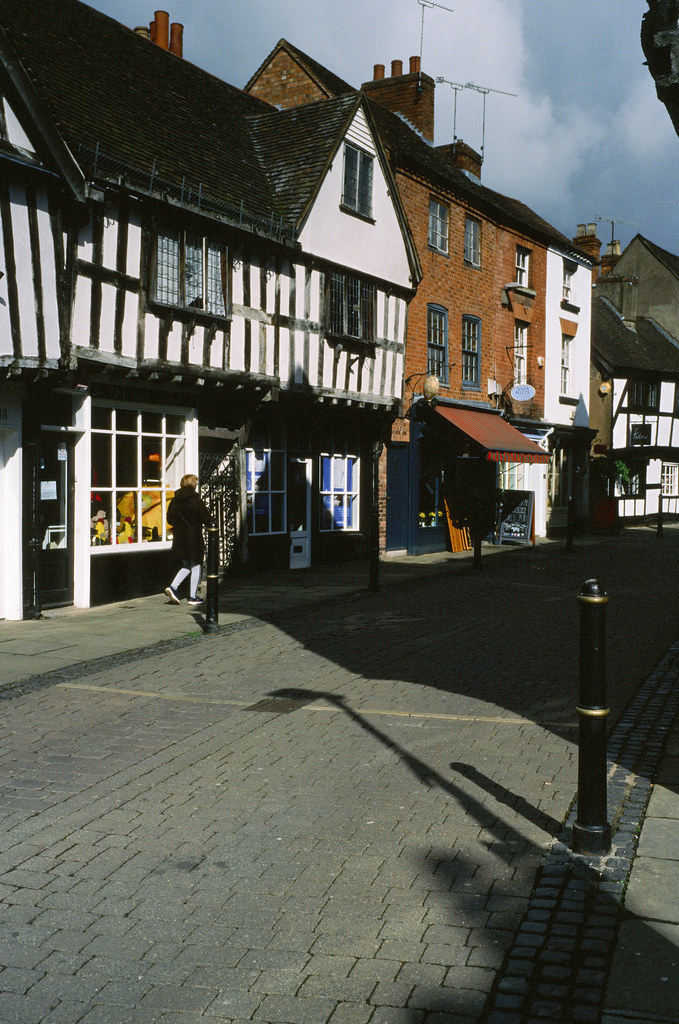
This second image I was more worried about the extent of white in the frame. The sun was really glaring off the walls, so with my fear of overexposure in mind, I underexposed a bit compared to the previous shot. This was a mistake; it didn’t turn out as well as I hoped, with the scan looking quite murky. I managed to fix it up in Lightroom ok, but I’m not sure it has come out as nicely as the previous shot. Pulling anything at all out of the shadows revealed quite a bit of grain, more even than in similar levels of shadow in the the previous frame. I should have just left the settings as they were from the previous frame, in fact, I’m not sure why I didn’t… again, too much overthinking!
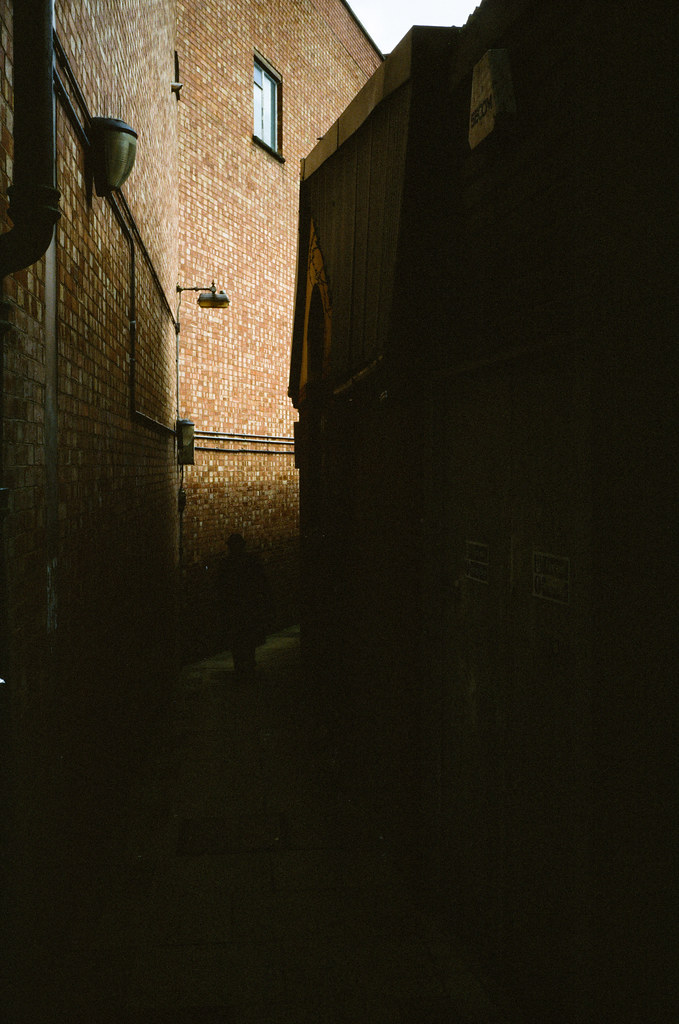
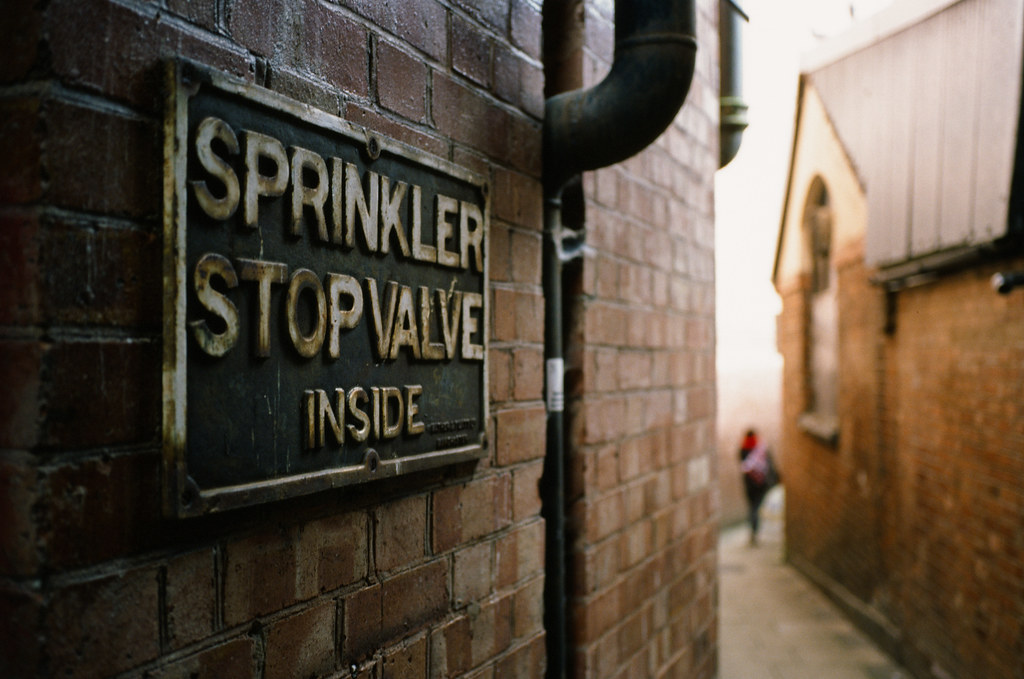
As an extension of this experiment, I then thought I’d take a wonder down a couple of dark alleyways. There’s one in particular that’s right by my office that I walk down most days. With the walls quite tight and at least a couple of stories high, even on a sunny day, it’s quite dark down there in places. In fact, as it turns out, it was at least a full 5ev darker than outside of the alley – know, because I actually wrote down the settings for these shots….
This first image was shot at 1/250th and f/7.1, which seeing as the sunshine was slightly muted by thin cloud would have been slightly underexposed even in the street outside of the alley. Suffice to say, it came out fairly underexposed. A shame, since the man walking toward me up the alley was quite smartly dressed – it would have made an ok photo of I’d not been fucking around.
This second shot, was exposed 5ev differently at 1/50th and f/2.8. It’s still a little underexposed for the subject, but I thought it was quite telling that the very bright area at the end of the alley was dull in the previous photo and washed out to white in this one.
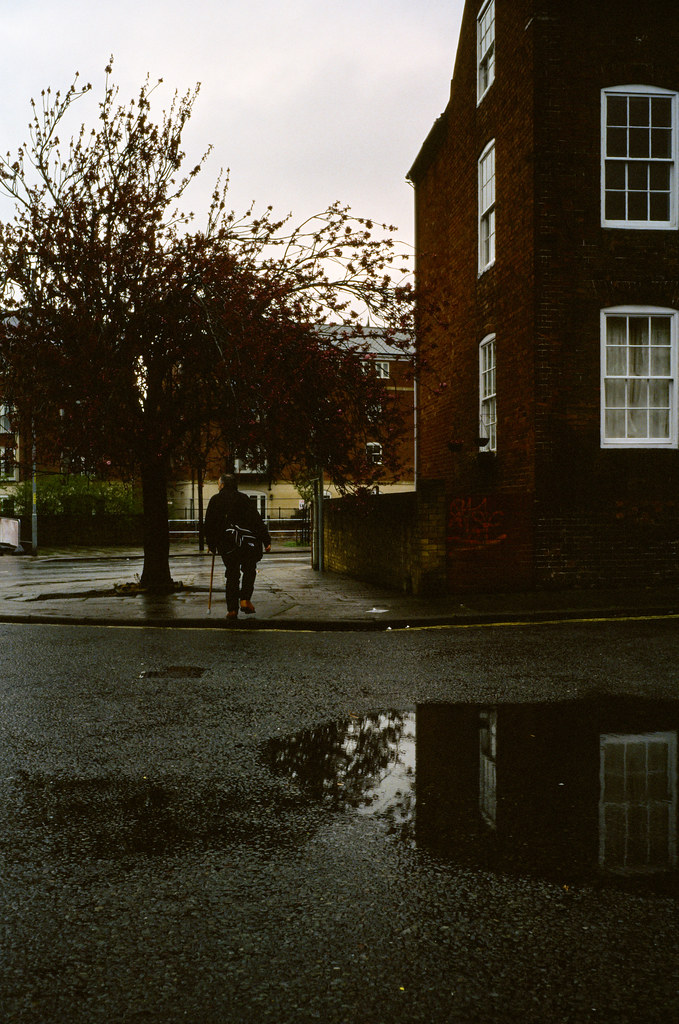
This final image was another sunny 16 rule miss. Again, I’m not sure what happened, but looking at the rest of my results, I would think I was at least 2ev underexposed. Again, I can only think I had the wrong film speed in mind. That, or I’m much crapper at judging the light than I think I am. Either way, this was another frame that came out of the scanner with a blue-cast. In the end though, whilst it might not be the best frame from the roll, once tweaked I quite like how it looks!
Lessons Learned
So what have a learned? Well, first off, having not shot reversal film in any meaningful way before, I can tell you for free that it’s not a good idea to try and be clever. The first thing I would recommend any do when shooting any film is to aim to expose it properly the first time you shoot it.
That said, trying to be clever has taught me a few things here. Fortunately for me, I do at least have enough context and experience to work out where and how I went wrong. Without this experience, I would have probably been quite frustrated at the results. Instead, I’m just a little frustrated at myself.
More specifically to Kodak Ectachrome E100, I do feel like I have learned quite a lot about how this film responds to light. For a start, I’ve learned that a little bit of overexposure is probably better than a little bit of underexposure. I’ve learned that 2ev of underexposure – at least when scanning and processing the way I do – can still result in a decent image, provided that I put a bit more work into the scan and Lightroom processes. I have also learned that 5ev of underexposure will mean a well dressed man will disappear completely into shadows making me wish I hadn’t been messing about and had just taken the photo properly! I suppose that’s just part of the gamble of trying new things though…?
What’s next?
Since shooting this roll, I’ve shot another two rolls, both of which haven’t gone entirely to plan either. The first was in my Hexar RF which decided to fail on me half way through the roll – its now gone off to have an issue with the frame counter fixed. I shot quite a few frames on that roll metering just using the camera’s meter in a fairly point & shoot way – it will be interesting to see how those come out. I also shot a couple in very low light when I was a little inebriated, but I don’t have much hope for those, if I’m honest!
The second roll was shot in my Olympus XA4 which I dropped half way through. This resulted in the back popping open and the camera landing film up. I was in a fairly low-lit room, so I am hopeful that all is not lost. If there are some frames that remained unscathed, it will be interesting to see how well the results come out of a fairly elderly point & shoot.
I shall, of course, be back with some thoughts on those two rolls in due course! In the meanwhile any thoughts so far, please feel free to share them!
Share this post:



Comments
Eric on Kodak Ektachrome E100 – First Rolls Review – Pt1 – My First Roll
Comment posted: 13/05/2019
Comment posted: 13/05/2019
Terry B on Kodak Ektachrome E100 – First Rolls Review – Pt1 – My First Roll
Comment posted: 13/05/2019
This has been an interesting read. I'd basically forgotten my own initial trials and tribulations when I first ventured into using slide film around 1965 or so using a Weston V Invercone with my non-metered cameras. Film then was Kodachrome and Ektachrome, and later I would use Orwochrome occasionally for its unusual colour rendition.
I'm intrigued by this film's response to variations in exposure either side of what may considered correct. I believe your lab has really highlighted that this film, or the batch you received, is not correctly rated at ISO 100, and this is based on the preponderance to under exposure you experienced, and I say this fully recognising your admitted "errors" and which won't have helped.
I generally shot at -1/3 to -1/2 a stop with reflected light readings when I couldn't take a proper highlight reading with the Weston, and -1/3 when I could. This helped preserve highlights. This was my preference for a more saturated slide, but other than this, the under exposure didn't seem to affect the results. But everything with exposure is a combination of meter and shutter accuracy, so the final result could be neutral, with any departure from correct being cancelled out, or they could be cumulative, and veering to under or over exposure. This was why slide film, with its restricted latitude, was a good means for checking our system's exposure accuracy as an integrated unit.
Admittedly only based on your initial experiences I'm not sure this film is as good as Kodak's two famous offerings of the past.
However, I do have a question that probably is more relevant today then when slides and slide shows were more common family entertainment: why shoot slide film and then have it digitised? To be seen at their best, slides really do have to be projected.
Comment posted: 13/05/2019
Comment posted: 13/05/2019
Comment posted: 13/05/2019
Matt on Kodak Ektachrome E100 – First Rolls Review – Pt1 – My First Roll
Comment posted: 13/05/2019
Comment posted: 13/05/2019
Comment posted: 13/05/2019
Comment posted: 13/05/2019
Comment posted: 13/05/2019
Comment posted: 13/05/2019
Comment posted: 13/05/2019
Comment posted: 13/05/2019
Comment posted: 13/05/2019
Comment posted: 13/05/2019
Comment posted: 13/05/2019
Comment posted: 13/05/2019
Comment posted: 13/05/2019
Comment posted: 13/05/2019
Graham Coad on Kodak Ektachrome E100 – First Rolls Review – Pt1 – My First Roll
Comment posted: 13/05/2019
Being 64, I started photography around fifty years ago with basic cameras and separate light meters, developing my own black and white with expired bulk film and chemicals, and the occasional colour print film for 'special occasions' if I could afford it.
Before long I was admiring the great colour images in photo mags, and absorbing the idea that SERIOUS photographers used reversal film, often intentionally underexposing for dramatic blacks and saturated colour, especially with a polarised filter!
I laugh because you have been doing pretty much what I did back in the pre-computer age, with similar results. Eventually I could afford a Pentax KM with a built in meter (1976?) and the first roll of Ektachrome I used in it, exposed as per the box speed and as the Pentax suggested resulted in 36 nice, correctly exposed shots around Minorca on my first overseas holiday.
The only snag was that while my various prints were looked at often over the years, my slides remained unseen in their box.
I must dig them out and do some scanning!
Great blogs, keep it up!
Sien Hong on Kodak Ektachrome E100 – First Rolls Review – Pt1 – My First Roll
Comment posted: 13/05/2019
Comment posted: 13/05/2019
Nigel Cliff on Kodak Ektachrome E100 – First Rolls Review – Pt1 – My First Roll
Comment posted: 13/05/2019
Comment posted: 13/05/2019
Sroyon on Kodak Ektachrome E100 – First Rolls Review – Pt1 – My First Roll
Comment posted: 13/05/2019
Comment posted: 13/05/2019
Comment posted: 13/05/2019
Comment posted: 13/05/2019
Comment posted: 13/05/2019
Gil Aegerter on Kodak Ektachrome E100 – First Rolls Review – Pt1 – My First Roll
Comment posted: 13/05/2019
Comment posted: 13/05/2019
Comment posted: 13/05/2019
JamesW on Kodak Ektachrome E100 – First Rolls Review – Pt1 – My First Roll
Comment posted: 13/05/2019
I recorded every single thing about the exposure. Not just the f-stop/shutter speed, but what the scene looked like, how I thought it affected the exposure, the filters, the height and direction of the sun, the time of day, the point of focus and apparent depth of field. I even wrote down my working procedure.
Anal, right? But I took a whole three rolls of film to absolutely crack Velvia. I could get the results from the lab, and then go over my notes and verify or rubbish what I thought worked. I could compare and contrast working methods with the results. It even showed me that I had to wait a minute or two if I changed lenses 'cause it sent the metered prism off kilter for a minute or two. That I would not have found out if I didn't have my notebook to check my workflow with the results. GET A NOTEBOOK.....
As I said, this works for me. YMMV, and I only looked a complete prat for about a fortnight..... WITH MY NOTEBOOK....
FWIW, 1/3 stop overexposure on both Velvia and Astia gave me breathtakingly consistent exposures.
Then when you have learned all you need to know about how and why it works, you don't need a notebook, right?
All the best with the next rolls.
Comment posted: 13/05/2019
Kodachromeguy on Kodak Ektachrome E100 – First Rolls Review – Pt1 – My First Roll
Comment posted: 13/05/2019
Comment posted: 13/05/2019
Nick Lyle on Kodak Ektachrome E100 – First Rolls Review – Pt1 – My First Roll
Comment posted: 13/05/2019
Comment posted: 13/05/2019
Comment posted: 13/05/2019
Comment posted: 13/05/2019
Steve Ember on Kodak Ektachrome E100 – First Rolls Review – Pt1 – My First Roll
Comment posted: 13/05/2019
My experience with the various iterations of Ektachrome (and Kodachrome-25!) began in the mid-60s with my two Pentax Spotmatics, later joined by an ES, and, aside from sometimes getting fooled into underexposure by including too much sky in the in-camera average metering, I came to love the results - especially when projected in a darkened room on a large lenticular screen by a Kodak Carousel, providing a whirring backdrop to my narrative!
I also quickly learned not to invest 100% confidence in the camera's metering when, for example shooting evening or forest scenes that you want to look accurate - or snow scenes that you want to actually look white! Forget the fudge factor negative films allow, even encourage!
I would add just a wee suggestion to those getting their feet wet with slide film, no matter the type, and that is to bracket exposures, if only by a half stop on either side of the "correct" meter reading. I found this extremely helpful - especially when traveling (as opposed to local spots to which I can easily return to "try again). Sure, it reduced the occasional 36-exp roll to a "twelve-exposure roll" but when one considers the subtleties slide film is capable of, it can often make the difference between lovely and WOW! And cameras like the better Canon EOS SLRs make it so easy with their AEB auto-bracketing. It's certainly worth "wasting" some frames in the interest of getting to know how a film reacts to different kinds of light (and shadings thereof).
On the other hand, more recently, I was thoroughly impressed at how the in-camera meter in my "new" Contax RX allowed me to shoot a (freezer stored) test roll of Velvia-50 (Exp 2013) at my "local" Meadowlark Botanical Gardens on a lovely spring day last May - without any bracketing, just some (-) exposure comp, selected intuitively to maintain the wooded look. One very good meter...one very lovely film.
Hopefully, one day I'll be able to say the same about the new E-100. Hopefully the wait will have been worthwhile.
Looking forward to reading - and seeing the results - of your continuing E-100 journey.
Comment posted: 13/05/2019
David K. on Kodak Ektachrome E100 – First Rolls Review – Pt1 – My First Roll
Comment posted: 13/05/2019
I've got 5 rolls of the new E100 but have yet to use 'em. My fav transparency film camera is the Contax Aria…it has a terrific evaluative meter that seems tuned for reversal film.
Comment posted: 13/05/2019
Dan on Kodak Ektachrome E100 – First Rolls Review – Pt1 – My First Roll
Comment posted: 14/05/2019
Comment posted: 14/05/2019
Simon on Kodak Ektachrome E100 – First Rolls Review – Pt1 – My First Roll
Comment posted: 14/05/2019
I have boxes of Fuji Sensia slides from my first spell of film photography with a Pentax P30. And despite being 13 at the time and doing little more than trust the rudimentary centre-weighted metering, guess what - they look fine. Over the last couple of years, I've shot Velvia with a Nikon F90 and F80, and the only time my exposures have been anything less than perfect is when I've thought I was cleverer than matrix metering. It turns out I wasn't.
This site gave me the confidence (and technique) to shoot a meterless camera (by exploiting the over-exposure latitude of Portra), and I think this article should give people more confidence to shoot slide film. I think what's particularly interesting to note is the added flexibility that scanning and a bit of tweaking in Lightroom give you. And I disagree that slides have to be projected - while that's great, it's not something I've done with my recent rolls of Velvia, but the scanned results are still clearly unique from any other film stock, or digital.
Looking forward to seeing more results, and I really must get round to trying it myself.
Comment posted: 14/05/2019
Dominique on Kodak Ektachrome E100 – First Rolls Review – Pt1 – My First Roll
Comment posted: 14/05/2019
I think you went about the Ektachrome experiment like a scientist! As I've learned, you learn much more from things that don't work (in the lab), than when things work perfectly. I, personally, learned much more from your underexposed images than the ones that were well exposed. Thanks for sharing this!
Comment posted: 14/05/2019
paul thomas elcock on Kodak Ektachrome E100 – First Rolls Review – Pt1 – My First Roll
Comment posted: 14/05/2019
Comment posted: 14/05/2019
Brett Rogers on Kodak Ektachrome E100 – First Rolls Review – Pt1 – My First Roll
Comment posted: 15/05/2019
Thanks for this piece. It's an interesting read. I've shot quite a bit of transparency over the years including a little bit of Kodak's older Ektachrome, but am yet to try the new product.
I also have to commend you for your willingness to share some of your misses as well as the successes. As photographers we tend, obviously, to only prefer to show people our better images. But having written this article from the perspective of a newcomer to photographing on transparency, informing readers about what may happen if exposure is not ideal can be quite helpful, in itself.
Having noted a previous remark about your competency which I can only describe as uncharitable, I would make two points. One: we were all new to the craft, once, including the critic in question, so, where online may we view his first roll of reversal exposures, please?Two: discussing your exposure errors so candidly suggests a trait that is increasingly hard to find today—particularly in the sphere of online publication—that is to say: integrity. More power to you, I say.
I'd not want to present myself as any sort of expert in shooting transparency film, although
I've done my fair share of it. But I would like to offer a few thoughts, if I may?
First, it's entirely possible to get completely satisfactory exposures with transparency using a reflective light meter. Indeed there will be situations when some type of reflective meter is the only viable option for getting a reading, period. But in many lighting situations a decent incident meter is going to be a very quick, easy and virtually foolproof way of ascertaining the ideal exposure value for your scene. This is in part, because it eliminates the issue of varying subject tonality and surface reflectance altogether—but also since (and this is not a universally understood point) the reading given will be keyed to preserving transparency highlights. Unless you are tackling a subject with unusually high reflectance (chrome plate on old cars, highly polished furniture, etc) simply dialling in your incident reading without any interpretation at all, will virtually guarantee your highlights should be preserved. (This assumes, of course, your reading has not been taken within the shadow portion of a scene).
You don't need to spend a fortune on a quality meter capable of incident light measurement (though one certainly can, if inclined!). I've used a humble Minolta Auto Meter III for decades with excellent results, easily available today for under $100, (and quite a versatile meter with the addition of a couple of easily found accessories).
In terms of exposure latitude, reading your article suggests you're already fast realising traditional wisdom about optimum exposure for transparency doesn't always apply, in 2019. Particularly if you'll need to scan the film.
It's worth noting then, that one's ideal exposure settings for a film that will be mounted into slides and projected may see slightly less light hitting the film in camera. A frame exposed strictly at its box speed incident reading (or maybe even pulled a third of a stop or so) might project beautifully with reasonable shadow detail. Life was arguably easier, in days past. One worried about overexposing highlights a bit, but the shadows would be less of a concern, for projection at least.
Exposing for scanning, on the other hand, is arguably harder. You still don't want to blow your highlights, obviously (except perhaps in those instances where shadow detail is everything and highlights be damned, and these do crop up, occasionally). At the same time, if the shadows are too dense as a result of too much caution in preserving one's highlights, only high end scanners are likely to be able to do a reasonable job of extracting clean, noise-free detail (if it's actually present, in the first place). The traditional wisdom of saving the highlights at all costs can get you into real strife with your shadows in the scanner.
You can't really overexpose E-6 (well, more on that in a bit), but underexposing it sees those shadows block up pretty quickly. More than ever, you really do need to nail the exposure precisely, if your image includes Eg elements in full sun as well as decently dark shadows.
It's often said that transparency has no tolerance for overexposure. Certainly, it has far less exposure latitude than C-41 films—but that does not mean there isn't a bit of scope for overexposure (for clarity, overexposure based on a good incident reading, or an accurate reflective reading off a grey card or other surface that has middle-grey luminosity).
I find Velvia, Velvia 50 & 100 and Provia can generally hold a good half a stop extra light—Provia probably more so than the other current Fujichrome offerings ("Velvia" being the original pre-2005 "RVP" product I still have a bit of a stash of, and still use occasionally).
That extra half a stop of light can help your scanner quite a bit, when you're trying to write a digital file with some reasonable prospect of edit-ability of your shadow detail.
I'd strongly encourage you to find yourself a reasonable quality projector anyway, before too long, Hamish. As pleasing as a well exposed and edited scan of a transparency can be—the paradox of using reversal film in a digital age is that, no matter how good your lab is, or your photoshop skills or the calibre of your scanning hardware and your ability to operate it—nothing, ever looks quite as wonderful as the original piece of film on a light box or projected onto a white screen. It's an entirely selfish pleasure but no less magical.
Here in Australia I've been gifted Kodak Carousel, Leitz Pradovit and Rollei P-11 projectors within the last couple of years and all bar the last can still be procured for quite low prices in most markets. If you can get hold of a Leitz or Rollei 35mm projector you may gasp in delight when first you see the projected results.
There was a recent discussion about the topic of exposing reversal film at Rangefinder Forum (in which I mentioned some of the points above, actually). I don't know if it will help but might be worth a look? You can find it here:
https://www.rangefinderforum.com/forums/showthread.php?t=168201
Keep up the excellent work. I love that you are generally happy to take a deeper look into topics other sites might be happy to gloss over. Should be more of it.
Best
Brett
Comment posted: 15/05/2019
David K. on Kodak Ektachrome E100 – First Rolls Review – Pt1 – My First Roll
Comment posted: 15/05/2019
ScottP on Kodak Ektachrome E100 – First Rolls Review – Pt1 – My First Roll
Comment posted: 17/05/2019
Do yourself and your descendants (and her descendants) a favor: have a high resolution scan made of it (if that one isn't) then have a few high quality prints made in a reasonable size. 8x10 would be fine, one 11x14 would be super. Imagine that on the wall in your office.
The slides will languish in a box in the attic, the scans will vanish when Grandpa's hard drives become obsolescent.
The prints will be a source of joy for people who aren't born yet.
--------
It WOULD be kind of interesting if you loaded a roll of E100 in your camera with the sophisticated evaluative meter, and just did what the camera told you. Maybe three shots of each picture, minus one-half, 0, plus one-half. Fight the urge to out-think the camera. I always get in trouble when I try to think.
I shot thousands of rolls of Ektachrome in the 60s and 70s mostly always one-third to one-half stop under.. It made the shadows blacker and the colors richer. (Granted, scanning wasn't an issue then.)
If the new film looks better when OVER exposed, then it's an entirely different animal.
Comment posted: 17/05/2019
Smitty on Kodak Ektachrome E100 – First Rolls Review – Pt1 – My First Roll
Comment posted: 17/05/2019
Comment posted: 17/05/2019
Bob Adams on Kodak Ektachrome E100 – First Rolls Review – Pt1 – My First Roll
Comment posted: 19/05/2019
MattK on Kodak Ektachrome E100 – First Rolls Review – Pt1 – My First Roll
Comment posted: 20/05/2019
1) you need to either project the film or view it with a good loupe and a goods backlight, if your main interest is in how the film compares. Evaluating the film's scanability (is that a word?) is probably more an evaluation of different scanning techniques than the film itself;
2) I heartily recommend the suggestion above to use an incident meter. It just about takes the metering technique out of the equation, leaving only the film and the accuracy of your shutter;
3) I got my best results at box speed - EI 0f 100 - and I bracketed to check;
4) I did experiment with intentional under-exposure and intentional over-exposure, usually with a 2/3 stop bracket and always with a view to emphasizing different areas of tone in the slide, and I more frequently preferred the slightly under-exposed result to the slightly over-exposed result;
5) when I scanned the results, the scanner handled the box speed and 2/3 stop exposed slides scanned more easily, but if I worked at it, the -2/3 stop exposed slides yielded good results too.
All my 35mm slides were shot in one of several Olympus OM bodies. For those times when I used the in-camera meters, I just took the meter reading and exercised judgment about whether or not the subject reflectance required an adjustment. In most cases, that works well (and bracketing helps when the subject is difficult).
FWIW, when compared with the old E100G, I see slightly better sharpness and slightly better shadow detail when the mid-tones and highlights are also properly exposed. This really does appear to be a 100 ISO film that should be exposed at an EI of 100. Colour response is good, although if you expose under open sky lighting, a warming filter is a good idea.
Keep up the good work. And be prepared to think less! :)
Mike Hinkleman on Kodak Ektachrome E100 – First Rolls Review – Pt1 – My First Roll
Comment posted: 27/05/2019
I was looking for a comment like "slides make phone images look incredibly good.."
The last time I took any slides was 20 years ago when Costco still sold and processed film, even transparencies. It was Ektachrome. Fairly bluish. I used a Nikon Ftn and the images of the dog, lake etc were pretty. Problem of course is that the only way you could share them was to get prints made at triple the price of negative film, longer wait, and in many cases disappointing with the prints washed out.
Or you could get out the old projector and invite people over to look at them. You had to bribe them with cake and booze.
Mostly I liked Kodachrome 64. I took boxes of slides with an instamatic 126 and they all looked beautiful. The color was different than the old negative films which were beautiful in their own way, kodacolor X and II.
Try some Ek100 in your Leica 1 standard with sunny 16. Maybe this new film is difficult to use or perhaps processing problems. Decades ago millions of beautful slides were taken by folks who didn't know the meaning of aperture
Comment posted: 27/05/2019
Shooting my First Rolls of Ektachrome - Part 5 - The Journey So Far - 35mmc on Kodak Ektachrome E100 – First Rolls Review – Pt1 – My First Roll
Comment posted: 14/10/2019