My stash of Polaroid pack film was running low when I realized that all of my Polaroid pack cameras would be film orphans soon unless someone started producing pack film again. The year was 2019 and the last batch of film produced was in 2016. Although the instant film community begged Polaroid to see what they could do to start producing it again, the challenges were too great for it to be feasible. One Instant rose to the challenge and did its best to offer single shot cartridges, but their product uses old stock and funky chemistry, with mixed results costing around $20 (CDN) per photo. It looked like all hope was lost to keep Polaroid pack film cameras fed with instant film. What to do?
2020 rolled around with its lockdowns and I had lots of free time on my hands. As I was resurrecting my film cameras and setting up a simple darkroom in my bathroom, I heard about the idea of using photographic paper as a negative in large format cameras and decided to give it a try in one of my Polaroid cameras. It’s sort of a large format camera, isn’t it? I cut a piece of photographic paper to the size of a Polaroid picture and loaded it into an empty film pack cartridge (under a safe light), then loaded it into a pack camera. I understood that photo paper shoots at around ISO 6 – 12, so I set the camera to ASA 75 and put a 4 stop ND filter over the electric eye. Using a tripod and a cable release, I shot a test photo, developed it and witnessed my orphaned Polaroid come back to life! The negative was high in contrast, but doing a contact print with a low contrast filter produced a usable Polaroid sized photo. The potential was there to get these cameras working again! This would set into motion hours of experimentation with filters, chemistry, 3D design/printing, and camera modifications to refine this idea.
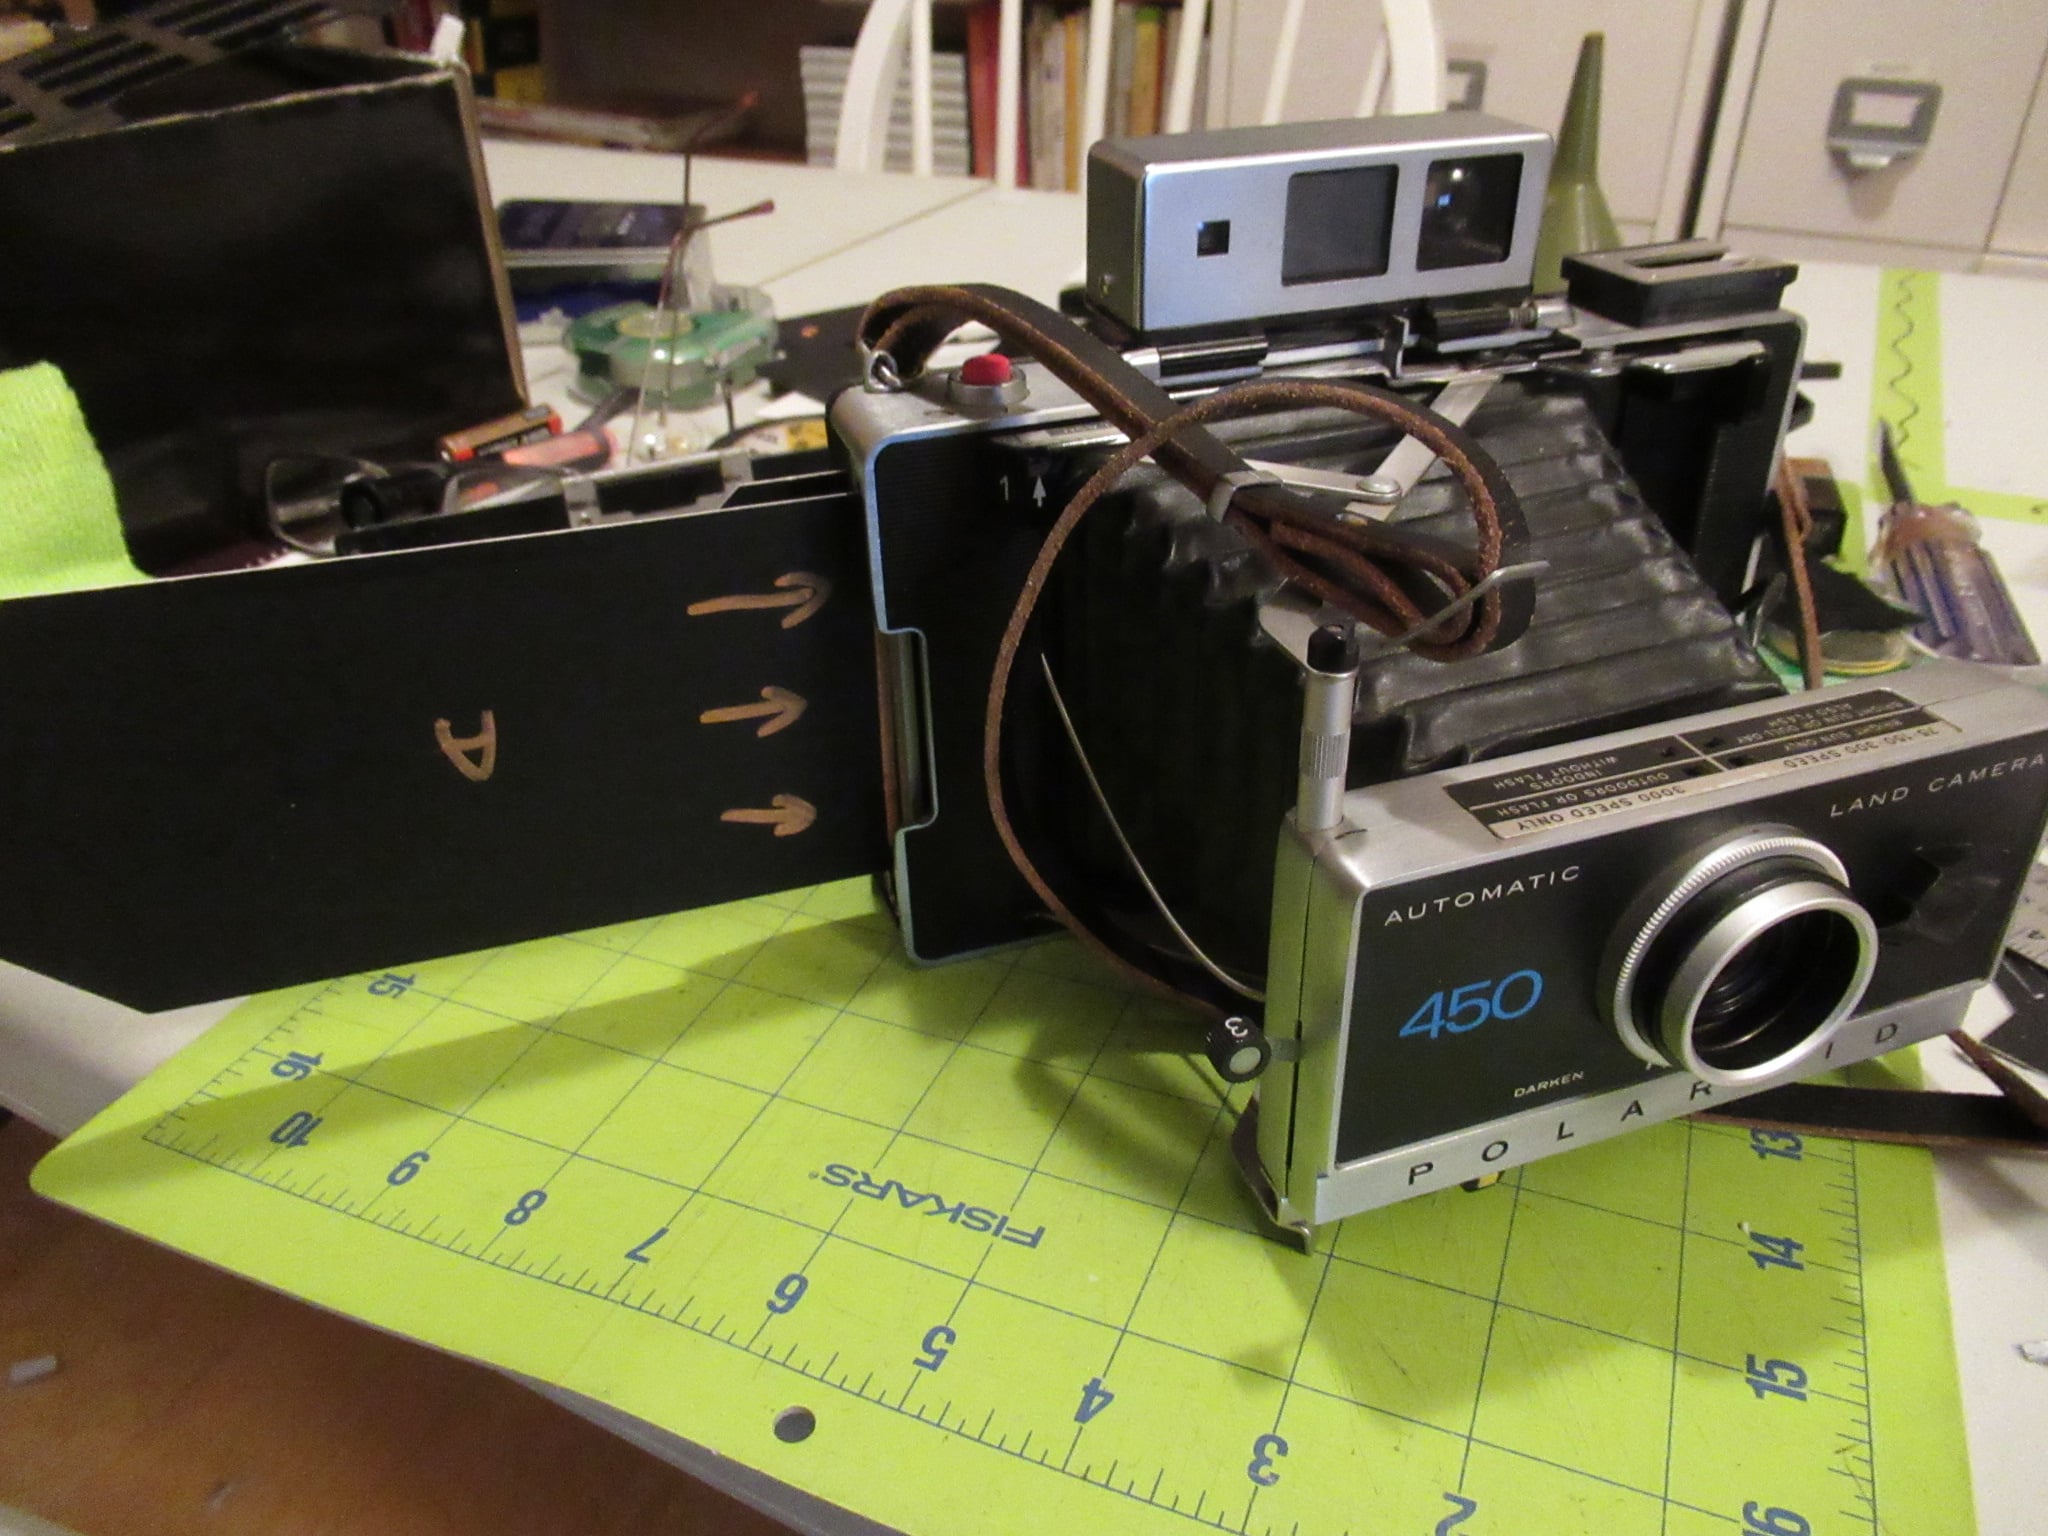
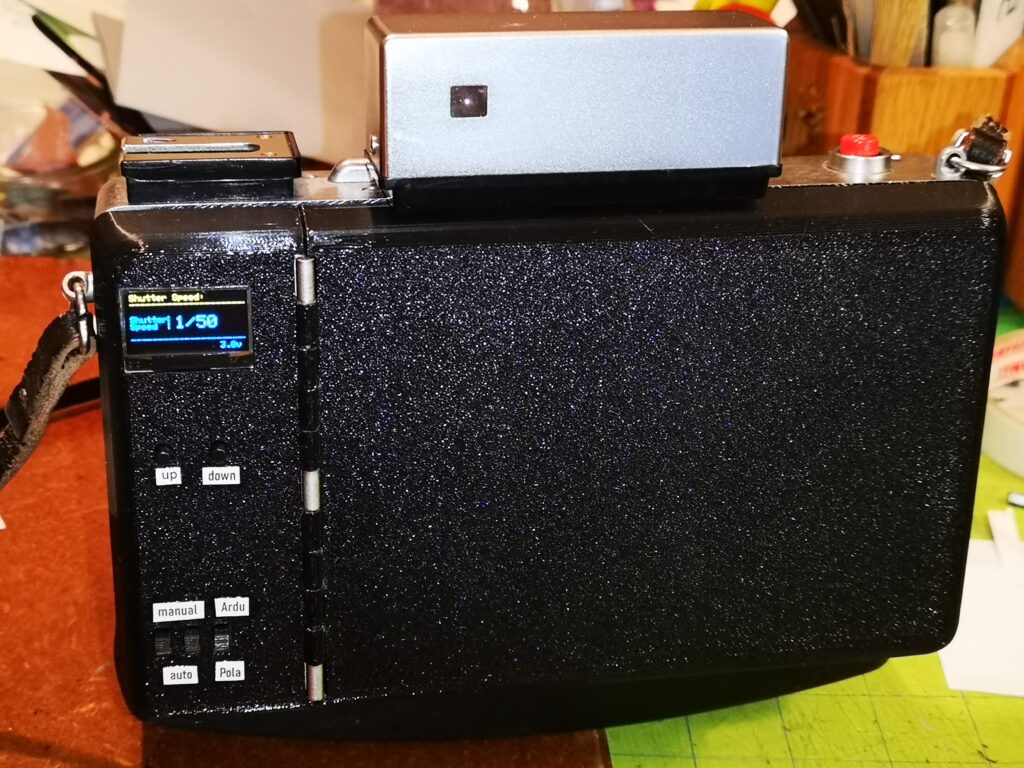
First, I had to get the camera to use low speed film such as paper. The neutral density filter over the electric eye sort of worked, but I found the resulting exposures were all over the map. I later learned that these cameras didn’t do well metering long exposures over a second, so to get things going, I simply taped over the electric eye to force the camera to shoot bulb all the time. I found timing an exposure under a second with a cable release is somewhat of a challenge, so I had to resort to using small apertures in sunlight to force a longer exposure that I could shoot with a cable release. On these pack cameras, the aperture is set by the ASA and indoors/outdoors settings and apertures up to f/45 are possible. But if I wanted to be able to choose the aperture while using a higher shutter speed, I’d need manual control over the shutter. Many hours of experimenting and testing later, this was achieved (see details in this article) and these cameras became a lot more capable! The distributed code gives shutter speeds from 2 seconds to 1/1500 in 1/3 stop increments, though it can be modified however you please.
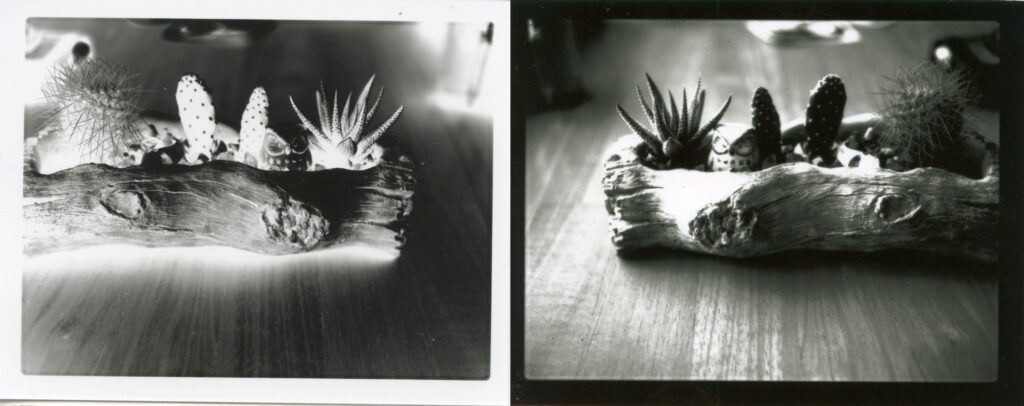
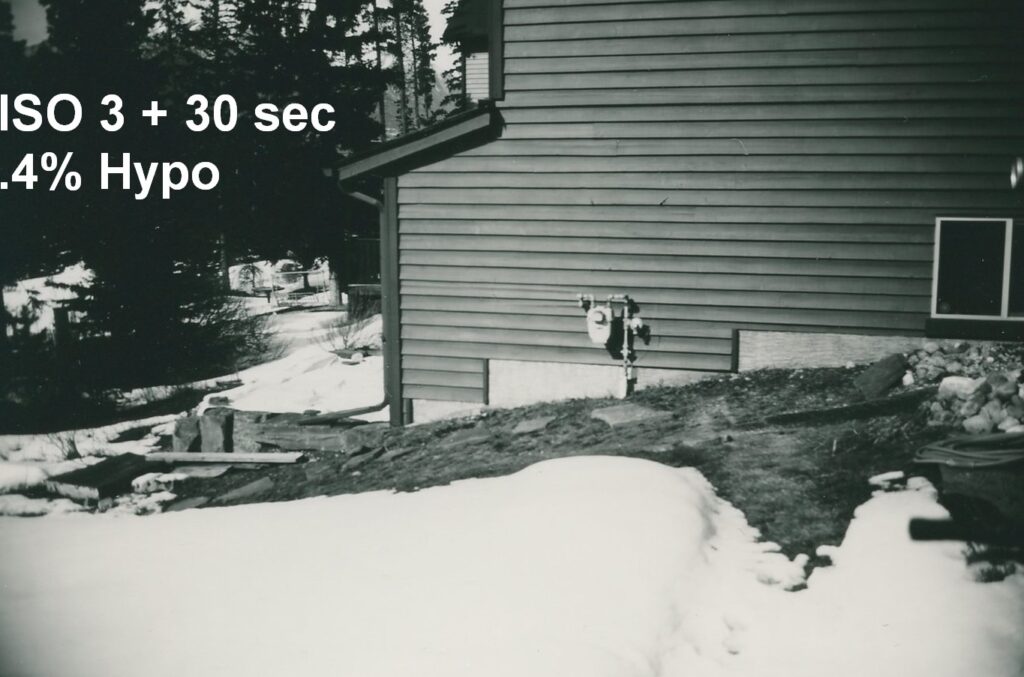
Using photographic paper as a negative produces very high contrast results. This is partly because it’s designed to print from a negative, which compresses the dynamic range into the emulsion when you take the picture, expanding it again when printing on paper. One way to lower this contrast is to flash the negative (exposing it to a low level of light) before using. I found this method to work well, but was inconvenient because it required the use of an enlarger to flash the paper effectively. I found the easiest method is to use multigrade paper with the lowest contrast filter possible, such as the Multigrade 00 filter. I found this gave acceptable results at ISO 3, resulting in a negative that could be contact printed with a grade 2 filter. Getting a usable photo still requires contact printing the negative, but the Polaroid can take pictures again!
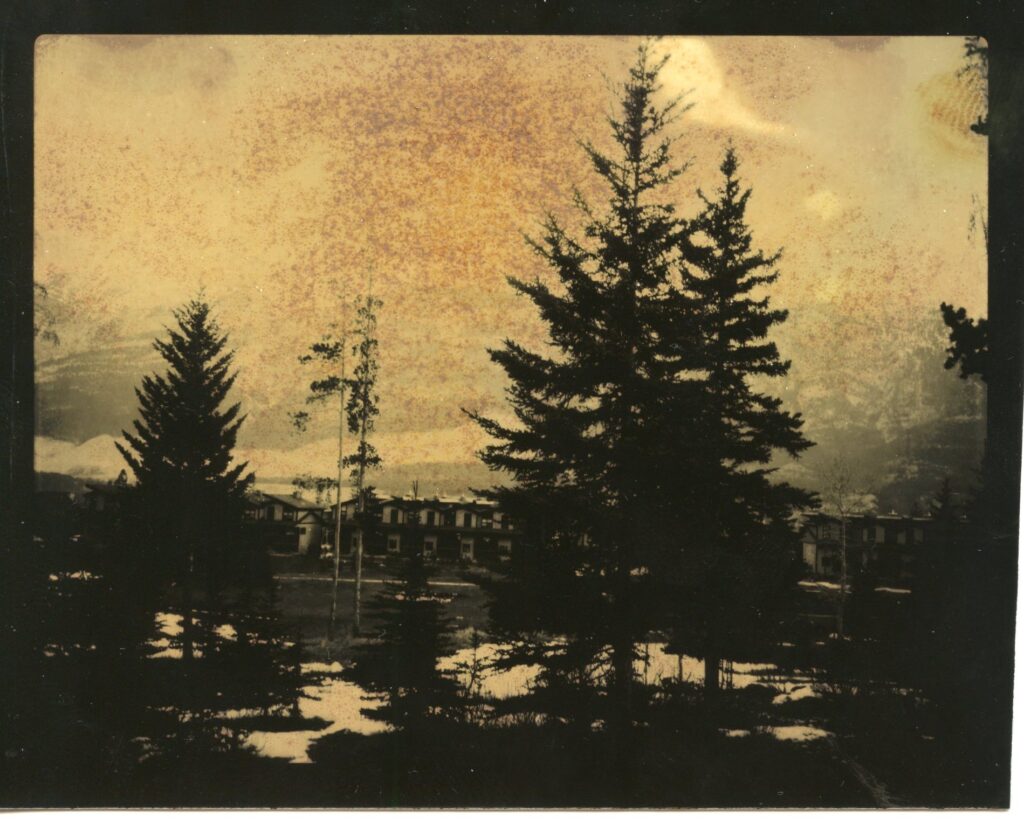
In shopping for photographic paper, I came across Harman direct positive paper, which you can develop normally and get a print from, instead of a negative. This was exciting because this process came closer to actual instant photography. But I quickly ran into some downsides: very low speed (ISO 1.5), super high contrast, mottling in the highlights, kind of pricey, and only available in fiber based paper. It is the last downside, which requires a LOT of water and rinsing to remove the fixer, that got me searching for another way of getting a positive out of normal photo paper. A bit of research later, I found the process is fairly straightforward: develop the negative, bleach it to remove everything that has been developed, expose it to light to reverse it from a negative to positive, then redevelop it to get the photo. At first, I tried using hydrogen peroxide in various strengths (up to 18%!) with citric acid for bleach but found it sometimes didn’t bleach everything, would sometimes stain the picture, left a damaged emulsion, and would lose its strength after just a few pictures. Ilford publishes their bleach recipe using Potassium permanganate, and although it solves all of the previous issues, only lasts for a few hours before it is ineffective. I settled on using Potassium dichromate and sulfuric acid for the bleach–the same as used in old style instant photo booths. Yes, it’s very toxic and has been banned in some countries. But here in Canada, you can still get it for pigmentation for art, so I got some, along with 35% sulfuric acid (battery acid from an auto parts store), and mixed some up carefully using gloves and good ventilation. I was very impressed how quickly it worked and later how long it lasted. I’ve successfully used dichromate based bleach a year after it was mixed up. My best results were shot at ISO 3, using dektol as the developer, 9.5g Potassium dichromate + 12g sulfuric acid/liter of water, 5% sodium sulfite for clearing the bleach, then soaking in .4% hypo to reduce mottling in the highlights, followed by turning on the lights and redeveloping in dektol. Although the reversed negative is itself optically reversed, I find this process satisfying, especially during the final development where the picture appears. Instant photography seems to be getting closer.
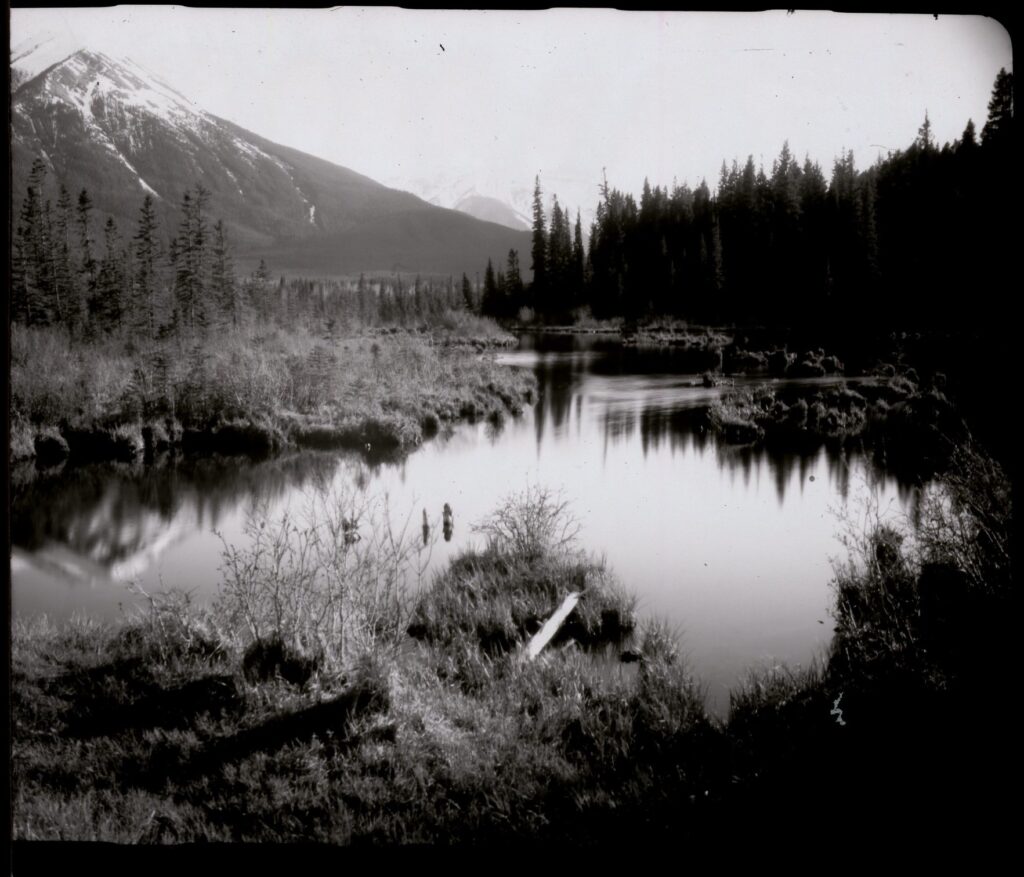
While looking into the methods of taming contrast in negatives, I ran across lith film, noticing that it costs a lot less than normal film. I liked the idea of being able to enlarge a Polaroid photo, instead of just contact printing a paper negative. Lith film shoots around ISO 6-12 but when developed in dektol, produces very high contrast negatives. This is OK if you want that effect, but could this film, meant for typesetting, get mid tones? I found it it possible, using an active developer with a little less restrainer, leading me to get some raw chemicals and mix up some developer myself. The recipe I find myself using the most is 1:3 ANSCO 120, which uses 12.3g of Metol, 36g of Sodium Sulfite, 30g of Sodium Carbonate, and 1.8g of Potassium Bromide for 1 litre of stock developer. Diluted D-23 is similar, as well as FX-1 and these can be used with a compensating bath with borax to further develop the shadows. I find myself using lith film quite a bit, partly for the challenge of getting a good negative from this film, as well as the overall look.
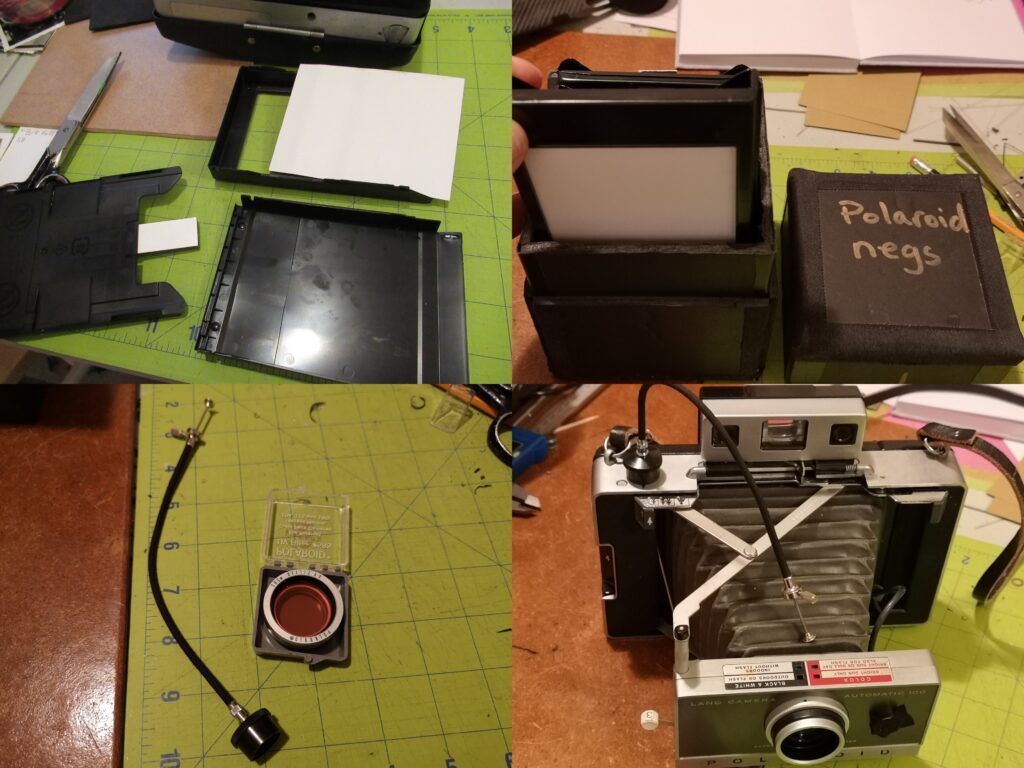
The next issue was film handling. To get going quickly, I was simply loading paper negatives into old pack film cartridges, storing them in a dark box, then unloading/loading them into a camera with a dark bag on the field. This worked OK, but was a little awkward. My next project would be making film holders so I could shoot multiple pictures without hauling around a dark bag and awkwardly changing cartridges with it. The first attempt was painful, using book board to make the side rails that would hold in the film and allow the dark slide to seal out light and move freely. I also modified the film door of the Polaroid camera, removing the rollers and other stuff that was in the way of the film holder when the door was closed. Using them was so freeing! Taking a picture was like using a graflex camera with a rangefinder, making this a pretty compact (semi) large format camera. A 3D printer with design software improved the film holder, making it more light tight and easy to produce, and a replacement back alleviated the need to modify (hack!) the back to make it work. The Polaroid was much easier to take pictures with!
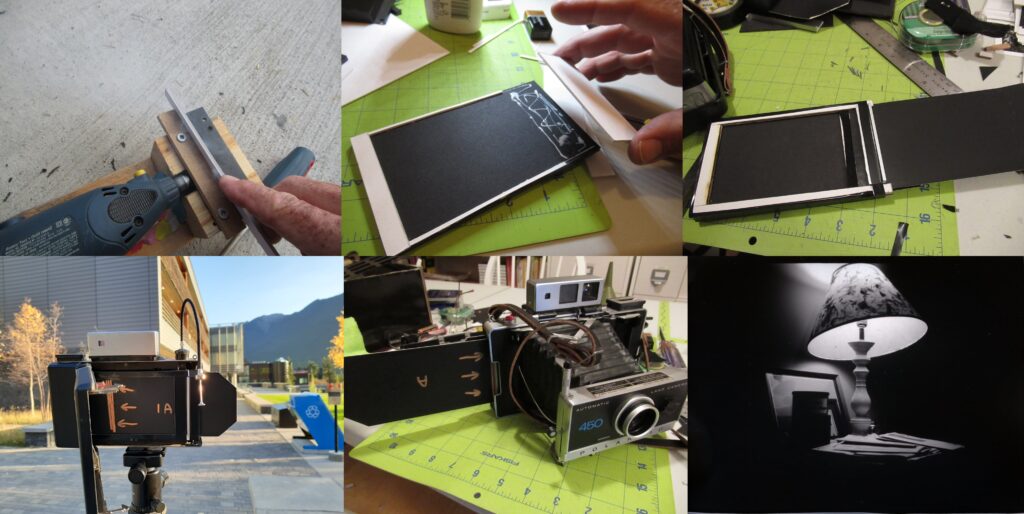
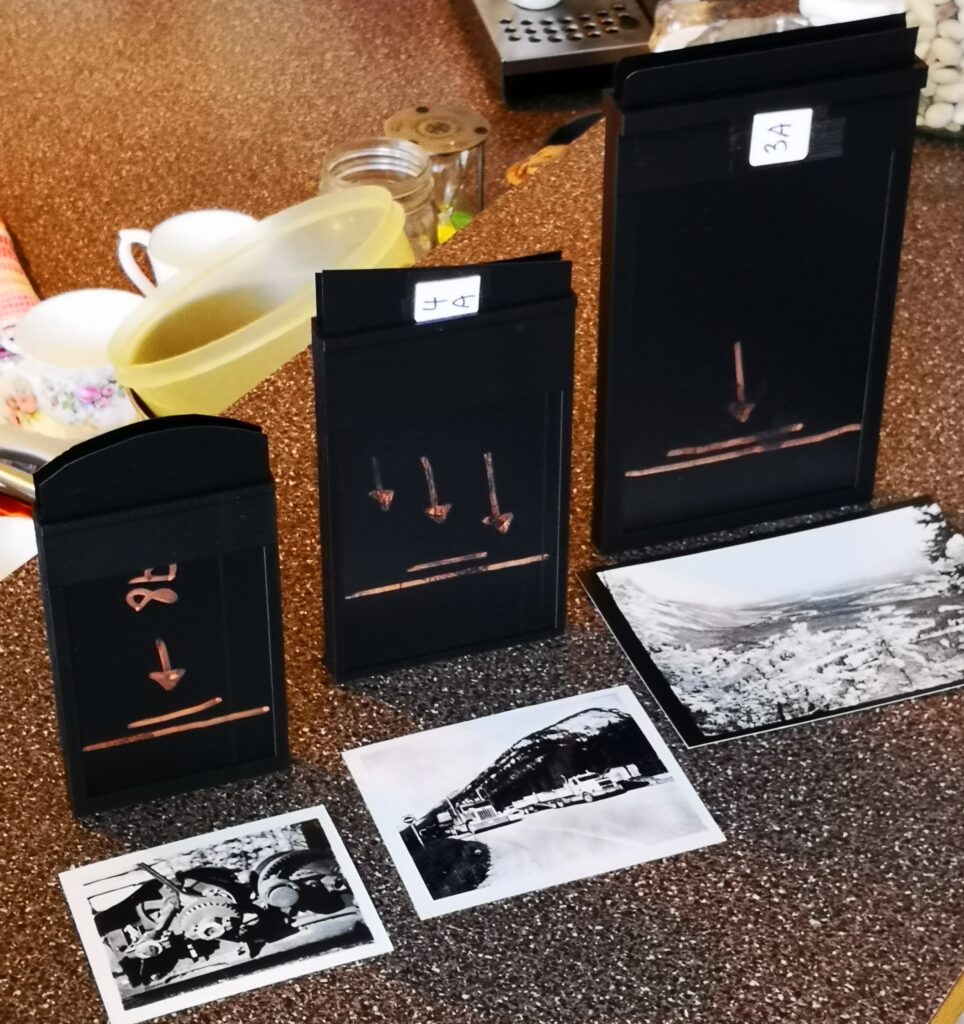
These film holders work well with high speed film. Trimming down a 4×5 or 5×7 sheet is a little tricky in complete darkness, but can be done with tape used as guides on a paper cutter. I found that lots of care needs to be taken to keep the emulsion side of the film known, by either retaining the notch from a cut down 4×5 sheet in the upper right corner, or by carefully keeping the emulsion side up or down and storing them carefully in a dark bag with an indication which way the emulsion faces. This is the biggest challenge using this film. Although using film gives the best results, it is more expensive and takes longer to develop, but it’s nice knowing I can take a high quality picture using film with my Polaroid. I went on to use the 3D designed film holder to make larger film holders as well.
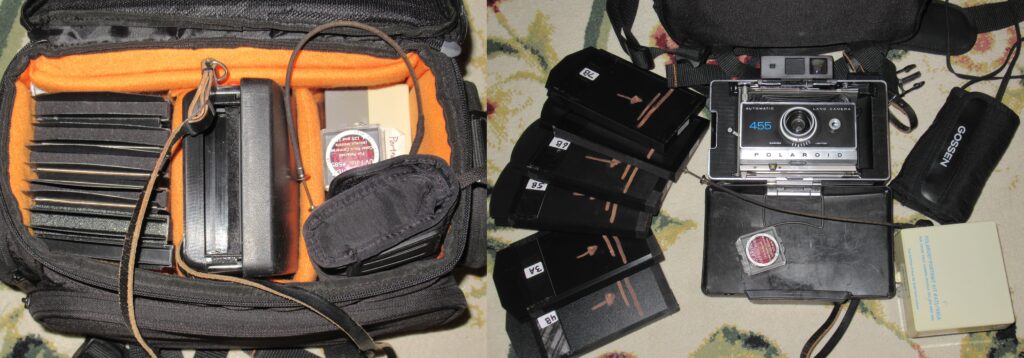
What’s the end result of all of this? Shooting pics with a Polaroid pack camera again! It’s not instant, but these Polaroid cameras are fun to use and often draw the attention of people who have never seen this type of camera, or the person who remembers back when they were ubiquitous. My small camera bag contains a Polaroid modified for manual shutter speeds, a light meter, cable release, tripod mount, MG 00 filter, portrait attachment, and 6 film holders: 2 each loaded with high speed film, paper negatives, and lith film.
What’s in the future? Well, what I really want to accomplish which has so far eluded me, is quasi-instant photography, where I take the picture and I see the results shortly afterwards. Brainstorm with me: Trying to recreate instant film would be a huge challenge, involving making the reagent and finding the recipe for coating the receiving layer on the positive sheet (this is quite elusive), and keeping the whole DTR (diffusion, transfer, reversal) process from light–not a trivial task! Even if it was doable, it would be quite labour intensive to prepare the film pack. A film holder that doubles as a developing tank could work, but the necessary film plane offset (since the film would need to be set back to allow chemicals to develop it) is a challenge for an unmodified camera. A system of quickly transferring the exposed negative from the film holder (in daylight) to a developing tank would require rethinking the film holder, using light tight trap doors and docking stations. This is the method I’m still trying to conceptualize, so if you have any ideas of how this could be done, definitely let us all know in the comments!
I’ve had loads of fun trying to keep these cameras alive by shooting sheet film. And although the process can be a little involved, it’s still fun using a Polaroid camera, even through the results aren’t very instant. If you are interested in hacking Polaroid cameras, check out these links:
- A list of Polaroid conversions, including 3d files
- My Instagram hackaninstant page
- My Youtube channel
Share this post:


Comments
Geoff Chaplin on Shooting Sheet film in a Polaroid Pack Camera
Comment posted: 13/08/2024
Comment posted: 13/08/2024
Nick on Shooting Sheet film in a Polaroid Pack Camera
Comment posted: 13/08/2024
Comment posted: 13/08/2024
Richard on Shooting Sheet film in a Polaroid Pack Camera
Comment posted: 13/08/2024
Loved the article by the way.
Comment posted: 13/08/2024
Jeffery Luhn on Shooting Sheet film in a Polaroid Pack Camera
Comment posted: 13/08/2024
Comment posted: 13/08/2024
Gary Smith on Shooting Sheet film in a Polaroid Pack Camera
Comment posted: 13/08/2024
Comment posted: 13/08/2024