
I got started with a spare body cap; drill hole in centre; tape a laser drilled pinhole over the hole (cost about 10$/£/€). Simple. Any idiot can do it – even me.
If you are using a digital camera and are worried about dust entering then you can tape a piece of clear acetate over the hole or tape a clear filter to the body cap. Be aware that if dust gets trapped in the pinhole then it will stay there and may cause an additional diffraction effect. On 35mm film cameras a 0.2mm hole is probably best, on digital (where the sensor is closer to the hole) a 0.15mm hole is better. See the section at the end on pinhole lens caps for more detail.
Here I recommend you start with a digital camera and shoot colour – results are instantly available, you can crank ISO up or down at will, and image stabilisation is your friend. This is incredibly liberating: you can try many different things and it won’t cost a fortune, just time deleting the uninteresting results. Be sure to set the camera to ‘shoot without lens’.
All the images in this article were shot on a Sony A7Riii hand held with exposure times up to one second and are just ‘fun’ shots. A more meaningful series of film based images can be found in my post “Venice into Dreams”.
Technique
What could be easier? you ask – no focussing, no aperture adjustment just decide the exposure time and done. But no! – what could be more challenging than only having exposure time to play with and a camera that only shows a fuzzy image and little detail? I started pinhole photography about 20 years ago at the insistence of a friend and I have to admit it took me a while (shooting film) to develop a style and understanding of pinhole imagery. The fast route to progress – which I should have taken 20 years ago – is to use a digital camera.
Pinhole characteristics, getting started and what to take
Fuzzy image, we already understand. But the small aperture, typically f125 to f500, requires much longer exposure times than when using a lens and the same ISO setting. Think about what this means – image blur from subject movement and image blur from camera movement, also diffraction effects. Blur can be minimised by using a tripod and faster film / higher ISO. But is this the right answer? Why not turn these ‘faults’ into advantages?
Colour or B&W, film choice
For all film stocks be aware of your film’s reciprocity failure which generally affects exposures longer than one second. A rule of thumb I use is “t” seconds exposure time goes to “t x root(root(t))”; for example 16s → 16x2s.
Any colour film can work well though if I pan a moving object I prefer a slower film – longer exposure time and a longer pan – and a film with pronounced grain: this can give a pointillist effect which I like. See panning examples in Venice into Dreams.
B&W I generally find more difficult and best in contrasty lighting. It can work well with simple compositions and subject movement against a static background and can also work for night scenes (take a chair or bed!). For long exposures Acros has minimal reciprocity failure and can cut a six minute exposure to two minutes and an hour and a half’s exposure down to 20 minutes.
I generally overexpose print film between one and two stops in good light.
Using a tripod / support
Taking a static scene using a tripod and slow shutter speed can lead to a lot of boring shots, like poor snapshots, but can be useful in setting a scene in a photo essay, and of course can work with dramatic lighting.

Image Ideas
Diffraction:
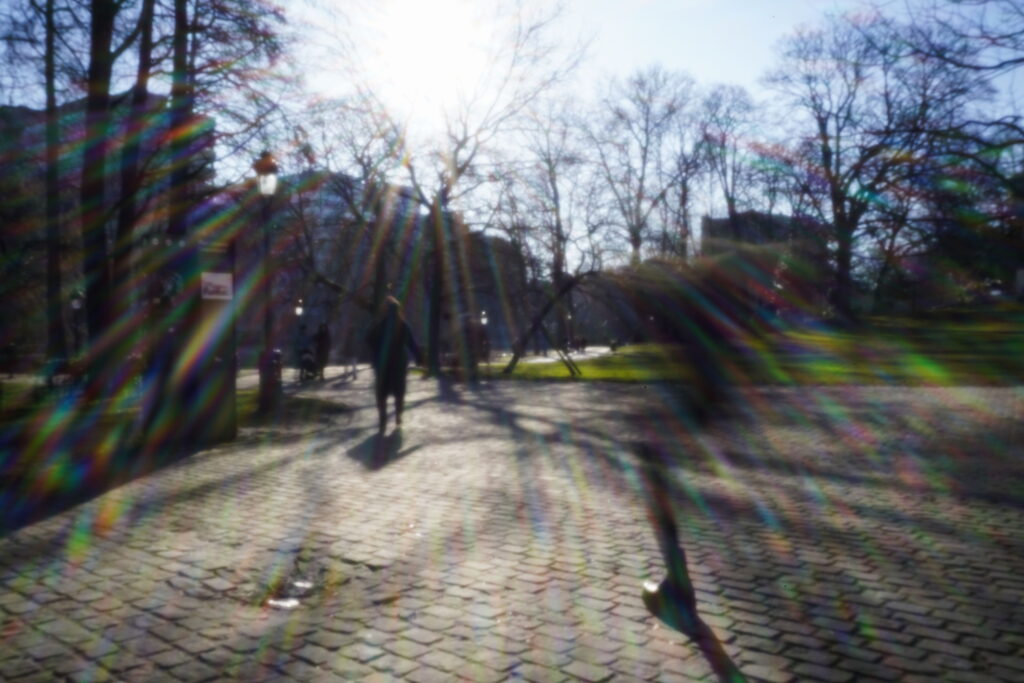
Shooting directly into the sun produces strong diffraction patterns. Try different placement of the sun in the scene, just outside or partially obscured. Post processing under or over-exposed images can emphasise different aspects of the pattern and background.
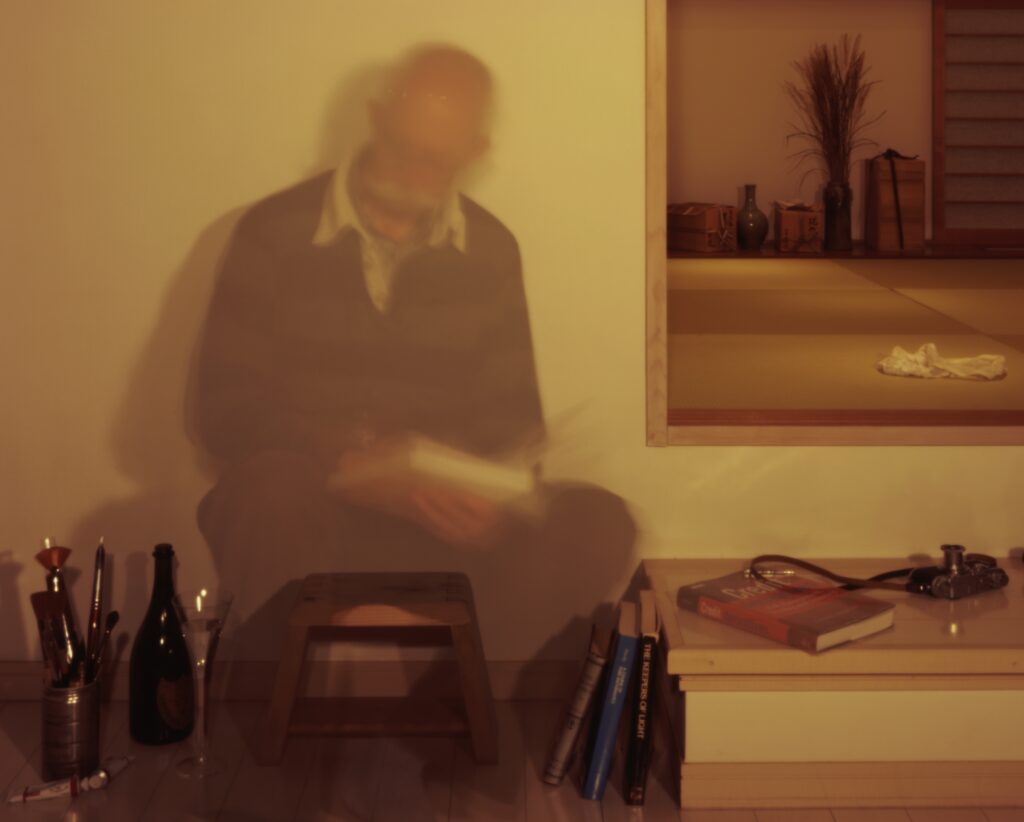
The features image shows a strong diffraction effect from shooting directly into the sun through branches and twigs of a nearby tree. I may have boosted saturation a little.
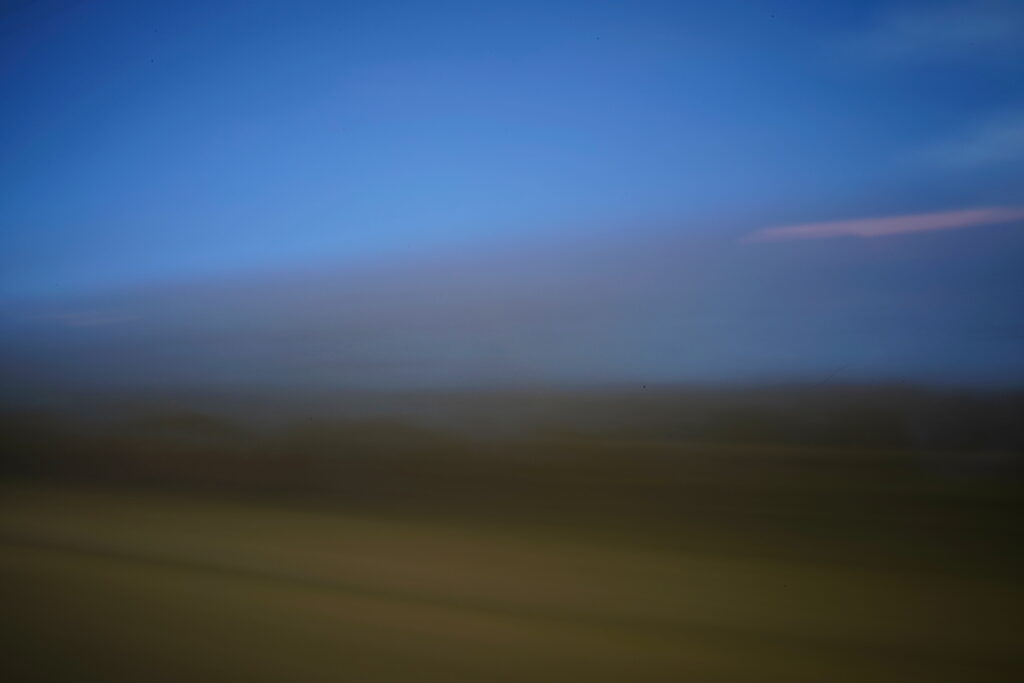
Blur
Pure blur can be attractive. The following taken through a train window.
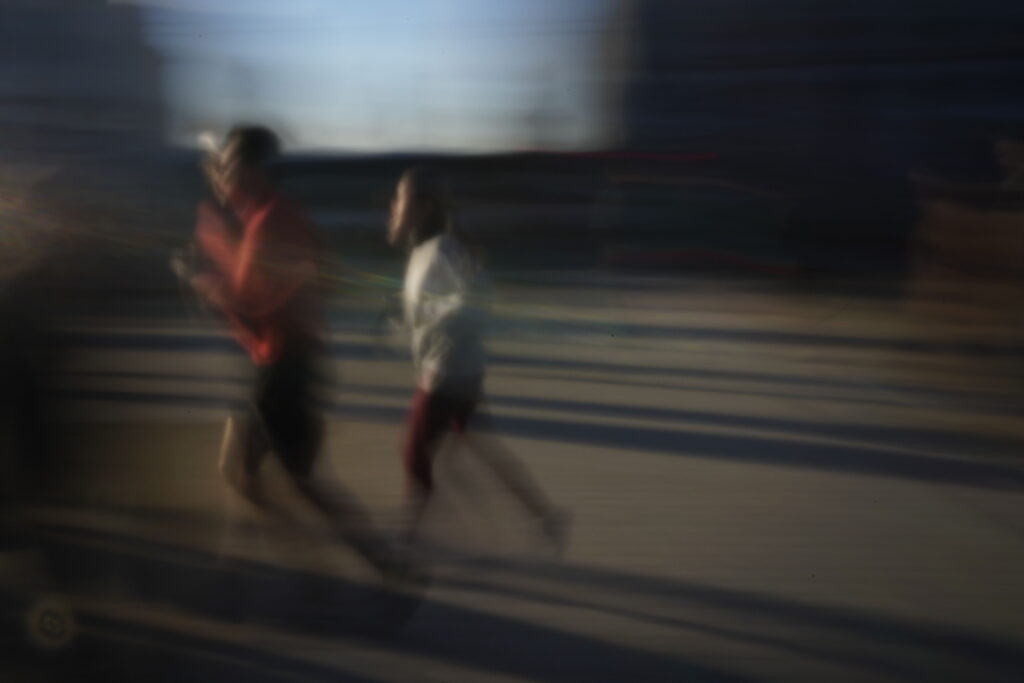
Subject movement:
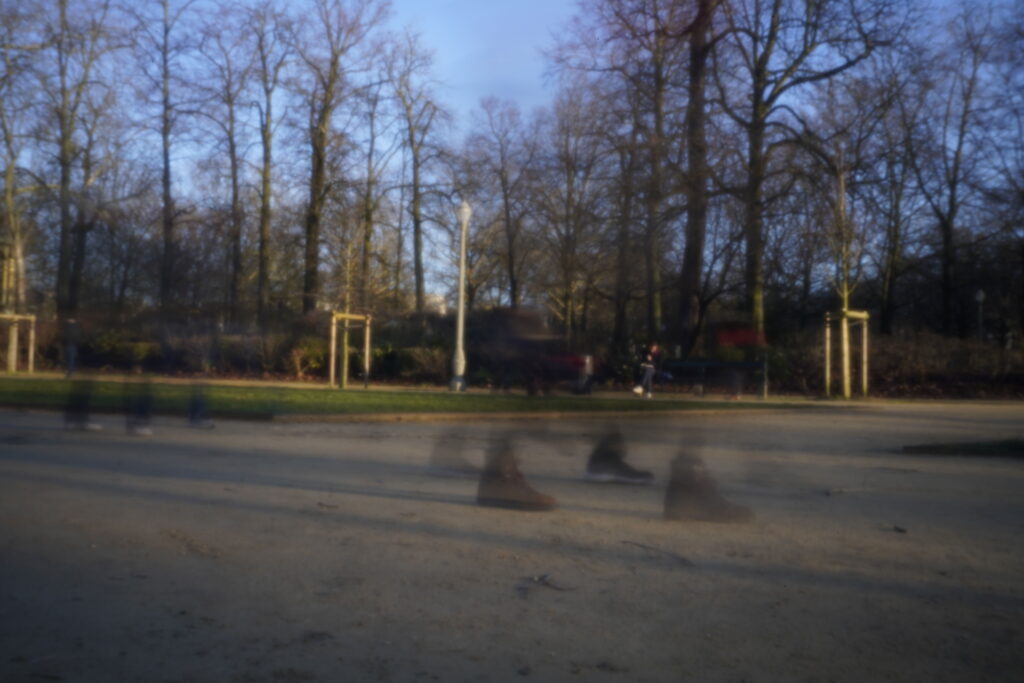
Trees or flowers blowing in the wind, cars or people moving against a static background, sea washing around rocks all taken with a static camera. My preferred approach is to pan a moving subject (person, vehicle, boat etc) following the subject. Rangefinder cameras can be good for this, particularly screw Leica bodies with the magnified and narrow field of the rangefinder window. For other cameras a hot-shoe narrow angle viewfinder is helpful for pans lasting more than a fraction of a second.
The following image with a static camera shows the different effects from people movement at different distances. Those close to the camera have a high angular velocity so are completely blurred out except for their temporarily stationary feet. In the far distance a complete person is visible because of the low velocity across the film. In the middle distance a vague impression of the whole person.
People and ghost pictures:
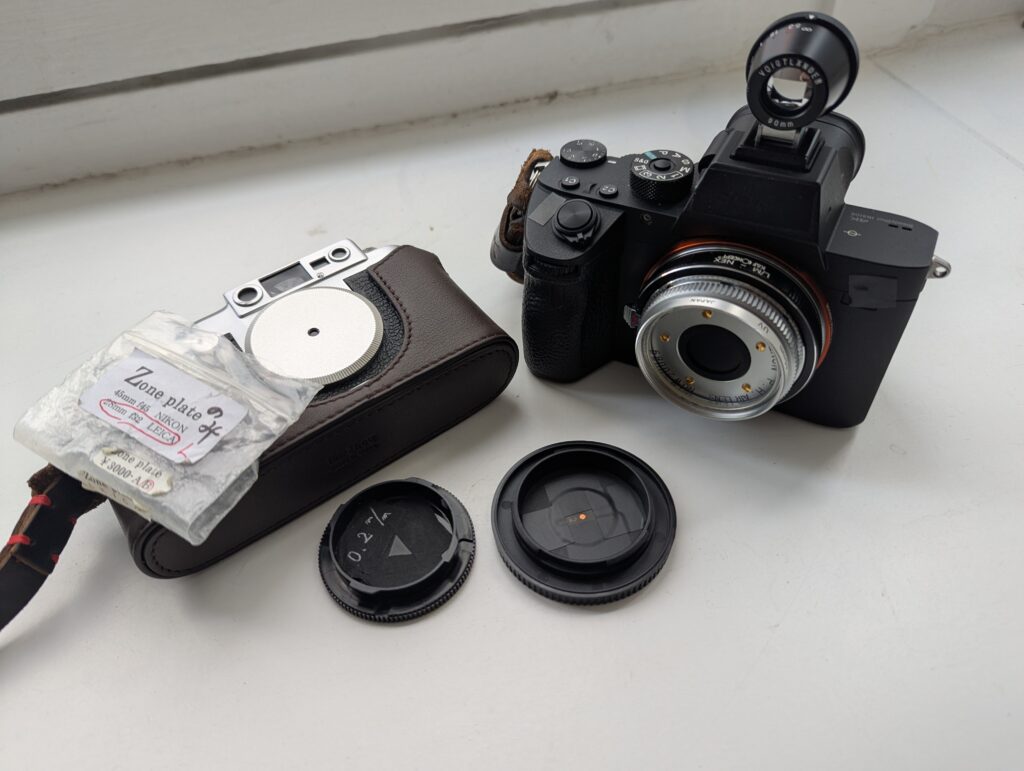
If you’re taking a pinhole portrait then high ISO and/or good light are necessary to avoid image blur. An alternative is to use a “zone plate” – a more complicated design and typically f32 to f45 but much sharper than a simple f32 pinhole would be. On the other hand if you want to show the movement of a group of people a tripod or camera support will be useful – see the “tour group” in “Venice into Dreams”.
I took an autobiographical self portrait using an 8×10 xamera – a 15 minute exposure and I sat in the scene for about 8 minutes – surrounded by the things of my life both work and leasure.
Pinhole Video
Just set your ISO to about 6 stops higher than needed for photography at f16 (your pinhole is probably around f128). Alternatively set ISO to auto. Generally you’ll need a support – tripod or convenient solid base.
Pinhole Lens Caps
The easy option to get started is to make a pinhole camera using a spare body cap and a bought (they’re cheap) laser drilled pinhole such as those from “Reality So Subtle”. (I have no connection with the company other than having bought from them in the past. Their pinholes are perfectly round and made in very thin metal to minimise vignetting and available in a variety of diameters.) Drill a hole in the centre of the body cap and tape the pinhole disc in the inside making sure the pinhole itself is centred in the hole. There are many websites and YouTube videos covering the process.
If you are DIY averse there are some sources selling ready made caps for various cameras, for example pinholeresource.com has caps for both film and digital, daystarlaser.com for M mount cameras,
Once upon a time there was an “Avenon Air Lens” which had a filter properly mounted on the front – these are no longer made but are occasionally available second hand, albeit an expensive option.
Pinhole size
Yes, size matters. For a given distance between pinhole and film/sensor (‘focal length’) there is an optimal diameter of pinhole in terms of sharpness (or rather, minimal fuzziness) of the image. You don’t have to use the optimal size but images will then be fuzzier than optimal. Measure the focal length and take the square root, and then multiply by 0.0368. The table below gives some results:
‘focal length’ in mm Optimum pinhole diameter in mm
20 0.16
30 0.20
40 0.23
50 0.26
80 0.33
120 0.40
240 0.57
500 0.82
In practice you’ll have to take the closest available size.
Remember Worldwide Pinhole Day April 27, 2025 and https://pinholeday.org/
If you would like a deep-dive into pinhole photography info, you can find a great series of articles by Sroyon here
Share this post:


Comments
Manuel on Pinhole Photography – Another Challenge!!
Comment posted: 14/03/2025
Gary Smith on Pinhole Photography – Another Challenge!!
Comment posted: 14/03/2025
Your article headline photo is sure captivating!
Thanks Geoff.
Comment posted: 14/03/2025
Bill Brown on Pinhole Photography – Another Challenge!!
Comment posted: 15/03/2025
Comment posted: 15/03/2025