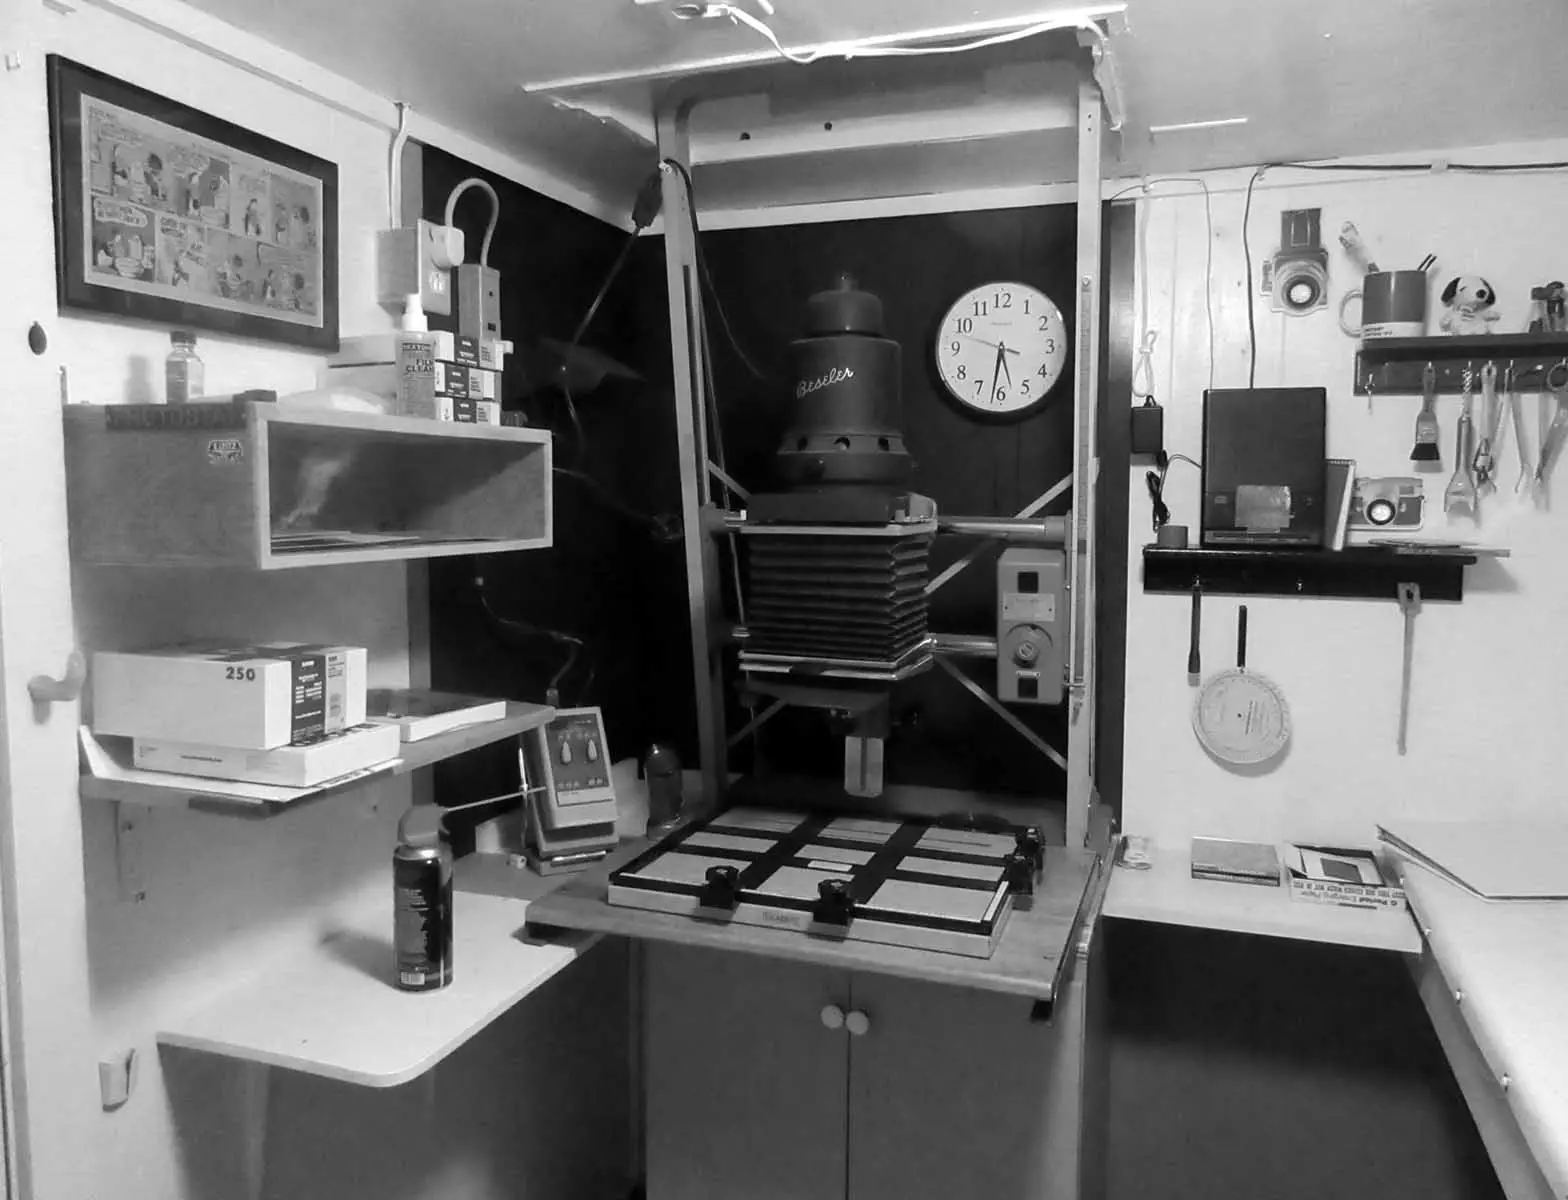
Beseler 45MCRX
For more than 40 years, taking photographs has been more than a hobby for me. It’s how I react to the things I see around me as I go about my day. I can’t explain why I react to what I photograph. It’s just what I do. It helps me make sense of the world. Taking a photo is my reaction to a ‘visual itch.’ It’s uniquely mine. It’s never existed before, nor will it ever be duplicated.
Process also plays an important part in my photography. The undeveloped negative is the same as the beginnings of a song that a musician hears in their head (think Keith Richards and the famous opening to ‘Satisfaction’) or a preliminary drawing in an artist’s sketchbook. At this stage, it’s fragile. It’s there, but it’s invisible. Unless the process is carried out correctly, the photo will be compromised or lost. It becomes my responsibility to do it right.
My darkroom isn’t an indulgence. It’s an indispensable part the process that began with reacting to a scene that might have potential for a completed photograph.
Yeah, But What About Digital?
The workflow of digital photography doesn’t present any benefits to me versus my film-based photography. My work wouldn’t suddenly be any better. It would be different, but I prefer the timeless look and traditional process of film-based photography. However, when the need arises to convert one of my negatives into a digital file, I’ve got the software to accomplish that task. If the need arises, I’ve got a photo quality inkjet printer if I need to make a digital print. There are no Luddites living in our house.
Background.
I first became aware of a darkroom when I was around 6 or 7. My dad was making contact prints & my mom let me peek into the semi-darkness of our basement where he was working. I remember amber lights and an odor.
I learned to work in a darkroom when I was 18 and now I’m 66. Except for a 3-year span at the start of my teaching career, I’ve always had a darkroom; either my own, access to a community facility, or the darkroom attached to my classroom.
The Origins of the Current Darkroom.
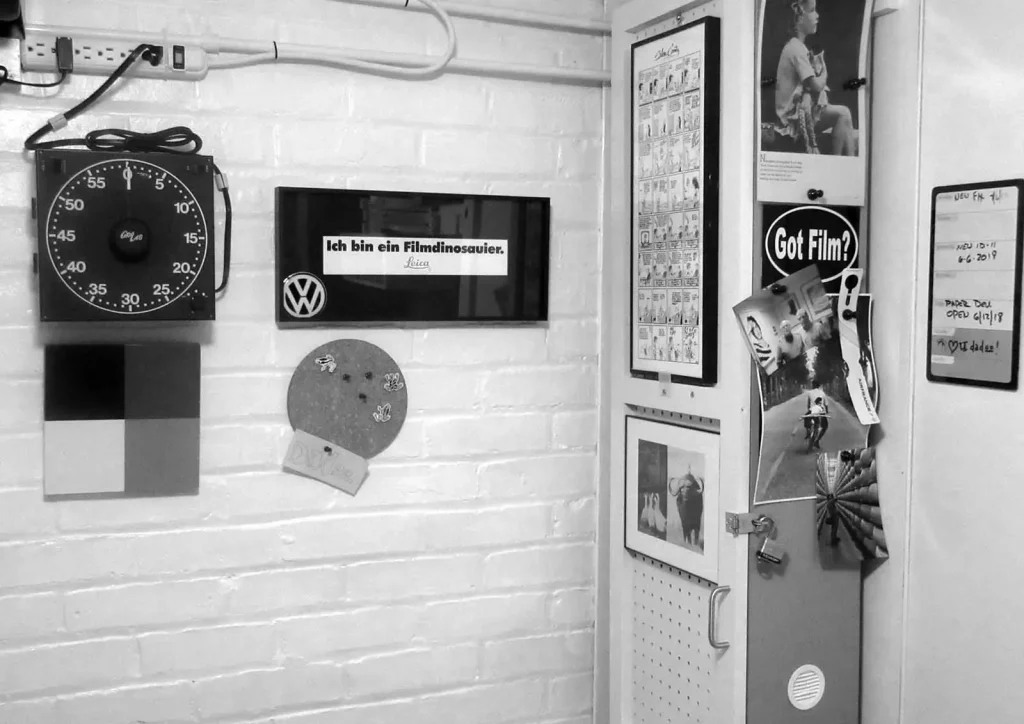
Back in 1986, my wife & I bought the house that we live in today. Soon after, I portioned part of the basement and built a permanent darkroom. I worked on weekends, and the initial construction took about 8 weeks. I did most the work myself; a friend who was an electrician helped me wire the room.
The darkroom is tucked into half of our cold [secondary] cellar. It’s 6 ½ x 8 feet with a 6 ½ foot high ceiling. I was lucky enough to take advantage of 3 existing walls, so only one wall was new construction. I used a commercial concrete sealer to waterproof the existing walls. I ‘built out’ the three walls using standard stud & plate framing. The walls were insulated using pink fiberglass batting. The final wall was treated like any normal room framing in a home: stud & plate with a rough opening for a finished pre-hung door. The walls were covered with finished wood paneling and the ceiling insulated and covered with sheetrock. The ceiling was painted white. The concrete floor was painted with epoxy floor paint. A normal room light provided white light and was operated by a short ball-chain.
Electricity was standard US house current. I surfaced mounted the electrical fixtures onto the walls & ceiling. All the wiring was protected by GFI circuits at the electrical panel.
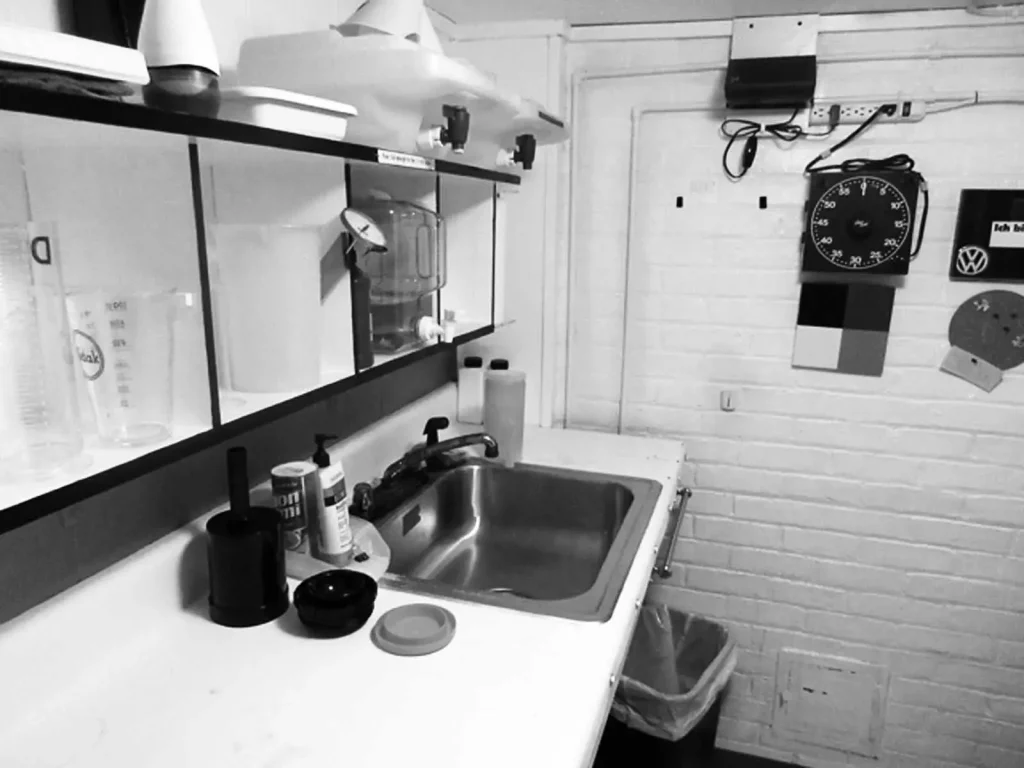
I used a couple of kitchen base cabinets which were converted into the enlarger table. Along one 8’ wall, I build a countertop and installed a stainless-steel sink w/hot & cold running water. I tapped into existing water supply lines and ran the pipes outside the walls along the ceiling. They were fitted with shutoff valves in case of freezing temps.
It would have been expensive to dig up the concrete floor and install proper floor drains, so the sink empties into 5-gallon pails. The pails were carried to a nearby utility/laundry sink. Next to the utility sink was a small table where I installed an archival print washer and a film washing device. All the film & prints were washed at this outside location.
When everything was completed, I sat in the room for a few minutes with all the lights off and checked for light leaks. I patched all leaks and I was ready to go.
The Renovation.
By the time I retired from teaching in 2012, the darkroom was showing its age after 25 years of regular use. It badly needed an upgrade. I started the reno by stripping everything off the walls. I designed, built & installed new shelving & storage. The wiring was upgraded. I repaired walls & repainted the entire room a semi-gloss white & medium grey. The area behind my enlarger was painted flat black. New industrial grade flooring was installed over the concrete floor. I replaced the faded red safelights with amber-colored filters. I retained the set-up for drainage & post processing washing. It still would have been cost prohibitive to jack-hammer the basement floor and install drainage pipe. The 1980’s boom box finally gave up the ghost and was replaced a compact CD stereo.
I spent about 10 days on the rehab. That’s the joy of retirement, more uninterrupted time.
Equipment.
• Beseler 45MCRX w/a 35mm film carrier
• 50mm f/2.8 Schneider-Kreuznach Componon-S enlarging lens
• Omega 16×20” 4 blade adjustable easel
• Gra-Lab 450 electronic timer wired into the enlarger
• Micro Focusing Aid
• 5×7 Kodak OC darkroom lights
• Patterson multi-reel developing tanks
• Gra-Lab white dial/black case laboratory timer
• Digital thermometer
• Developing trays & graduated beakers in various sizes
• Chemical resistant storage containers
• An exhaust fan for air circulation
• 12×18” light box w/a Pentax 5.5X loupe
• CD stereo w/a collection of blues, jazz, etc.
• Ancillary bits & pieces that make life easier when working
Because the darkroom is located in the cold cellar, it’s warmed during the cold months by a small electric space heater. It’s only on when I’m in the room. During the summer the darkroom can get stuffy; the exhaust fan is not quite up to the job. During the summer, I usually work in the early evening, when it’s usually cooler.
Film, Paper & Chemistry.
I’ve used Ilford films & enlarging paper since the early 1970’s. They were less expensive than their equivalents offered by Kodak but were equal in quality. This was important for an undergrad.
Today, I still use HP-5; occasionally FP-4, and on rare occasions Delta 3200. My paper of choice is Ilford Multi-Grade IV.
I keep my chemistry simple: Ilford ID-11, Ilford Rapid Fixer, Sprint Industries liquid paper developer, Sprint washing aid and Perma-Wash, Harman Selenium toner. Film cleaner. Film Process.
I shoot anywhere from 50 to 60 rolls of film a year. My lowest output is usually during the winter/early spring. My highest output is during the summer/autumn.
There are two advantages to developing your film: control & personalization. No waiting for film to come back from a lab. You can soup one roll or multiple rolls. Adjustments can be made during processing for subject conditions, to compensate for over- or under- exposure or for a particular effect. You can experiment with various films & developers; you can adjust for a sluggish shutter or an uncoated antique lens.
I’ll develop my film to archival standards. After it’s dried in a dust-free area, I check the physical condition of the roll & examine the images w/a 5.5x loupe. The negatives are then cut and placed in Print File sleeves. Now, here’s the crazy part: I file the film away for 2-3 months. I use this time to let the emotional buzz I experienced when making the picture fade away and allow objectivity to take over. This ‘visual rediscovery’ often leads me to consider quieter images that I would pass over if I had rushed into the darkroom immediately after processing. Since I’m not meeting news deadlines or shooting for a client, this approach works for me.
I don’t make contact sheets; I’d rather examine each negative on a light box with a loupe before heading into the darkroom. This has worked for me over the years.
Print Process.
My printmaking process is straightforward. I pop a negative into the enlarger, and crop if necessary. Focus is done at f/2.8 with the aide of a grain focusing device. I stop down to f/8 (on the Componon-S, this is achieved with a handy lever.)
The two advantages to making your own enlargements are control & personalization. Adjustments can be made during exposure & processing for contrast control, to compensate for over- or under- exposure film or for a particular effect. I slide in a #2 ½ multi-grade contrast filter and make a test print. I use an entire sheet of enlarging paper for the test print. A 2 ½ filter is ‘normal’ in the multi-grade filter line. Forget what your negative looks like. Start with a standard reference point from which you can deviate as you fine-tune the print.
I develop the paper for a standard time of 1 minute using constant, but gentle agitation. I use water for a stop bath (one minute) and fix with constant agitation for one minute. I give the print a 30 second quick rinse in running water to wash off the surface fixer and examine the print under room light.
Now the fun begins. Looking at the test print, I examine it for two things: the first is the minimum amount of time I need to see all the detail in the negative. I make a full print with the time I think is correct. This print is evaluated in room light, and fined tuned for exposure.
Once I have the correct exposure, then the second thing I look for is the contrast. I like my prints with a bit more ‘snap’ or punch, so I usually replace the 2 ½ filter for the next print. This third print is washed and quick-dried w/a hair dryer or in the microwave. If I’m satisfied with both the exposure time and contrast, this print becomes the ‘road map.’ I’ll mark it up with a Sharpie marker. I indicate local areas that may need burning in, dodging or localized contrast change.
If the print ‘dried down’ darker than I like, I’ll adjust exposure time. Then, I tape this print next to my enlarger. I’ll work to produce a final print. If I like it, I make a second copy. The final prints get a turn in selenium toner in a tray outside the darkroom.) I’ll wash the prints for the recommended time. The prints are dried on mesh screens (made from window screen mesh.)
The time in the darkroom has a calming effect on me. Working under the glow of the safelights, music in the background, I get totally lost in the process. Some refer to this state of participation ‘in the zone.’ I talk softly to the negative (yup, now it’s out – I’m crazy) and ask it not to give me much trouble; I tell the negative that I remember making the picture. I sometimes curse at an unexpected element ruining my composition. Mostly, however there is cooperation between the film and myself.
It takes time and patience to make a good enlargement. I usually work in 2-hour blocks of time; longer times lead to fatigue.
Other Important Considerations.
Standardizing the process is rather simple. A few general points:
• Adopt a method of notetaking that works for you. If you write it down, you’ll remember it.
• Always put things back in the same place (I know this is a tough one for us guys…)
• Master basic tasks, then adapt them to fit your needs.
• Perform the repetitive tasks the same way each time [film developing, mixing chemicals, print processing]. They’re boring, but imperative for consistent, repeatable results.
• When you need to break the rules for a particular reason, then you’ll do it with confidence. You’ll know how and why you’re doing it.
Avoiding the Zap Factor & Keeping Healthy.
The darkroom brings together two elements that should be kept apart: liquids & electricity. You can build the room yourself, but I can’t stress enough to at least consult with licensed tradespeople to plumb & wire the darkroom. Hiring them is even better. My background was in construction, so I knew what I was doing. My plumbing requirements were simple, and I did that work myself. I had a friend who was an electrician inspect my work to see if it was done properly and posed no safety hazards.
I would suggest that you check with your local municipal officials to see if you need a construction permit. I didn’t for a simple reason: the wall I built is temporary – it’s not secured to the basement floor in a permanent manner.
When working with darkroom chemicals, follow the recommendations from the manufacturer of the chemicals. Eye protection, protective gloves and proper disposal of the chemicals must conform to established health & safety rules. Check with your local health officials for the proper disposal of the exhausted chemicals.
Wash your hands frequently. Don’t rub your eyes (or bring your hands up to your face) with chemicals on your hands. Constantly clean your work area; immediately wipe up all spills.
Black & white chemicals are safe when stored in proper chemical-resistant containers (never in food containers!) Always handle & dispose of the chemicals properly. Always remember, they still can contaminate or cause health issues. Treat them with respect.
Download and become familiar with the MSDS for every chemical you’ll use in the darkroom. If you have any health concerns, see a medical professional before you start to work. Every MSDS has a toll-free number to call if there is any medical emergency when using the product. The MSDS is a valuable source of information. Keep a 3-ring binder with up-to-date information on all the chemicals you use. Why a paper copy? Because if you need to go to the ER, it’s easier to read, copy and attach to your chart.
You’ll get visitors in the darkroom. Make them aware of potential hazards while they marvel at the magic they’re witnessing. Keep children & other creatures out of the darkroom [do I need to say it? Dogs, Cats, little brothers, etc.]
Don’t eat pizza (or sushi, or ice cream, or anything!) in your darkroom. Food & chemicals don’t mix. Nor does smoking/vaping. No TV or tablets/phones/laptops or any visual distractions in the darkroom. I leave my mobile outside the room.
Standardization & Repeatability.
For 99% of my work, I use 400 speed Ilford HP-5. After 45 years, I pretty much understand how HP-5 reacts to different situations. When I’m making the initial exposure, I’m aware that I’m starting a continuous chain of events that will eventually end with a completed print. Every step in the process is of equal importance. Any break in the chain may result in poor quality results or failure.
If my exposed film is raw material, then the darkroom is my workshop, much like a furniture maker has a woodshop or an artist has a dedicated space/studio to create. It’s where I attempt to bring to fruition my way of seeing my world. What I initially saw must now pass through & be altered via/by lenses, film, paper & chemistry. I want the process to be as seamless/painless as possible while preserving the integrity of the work.
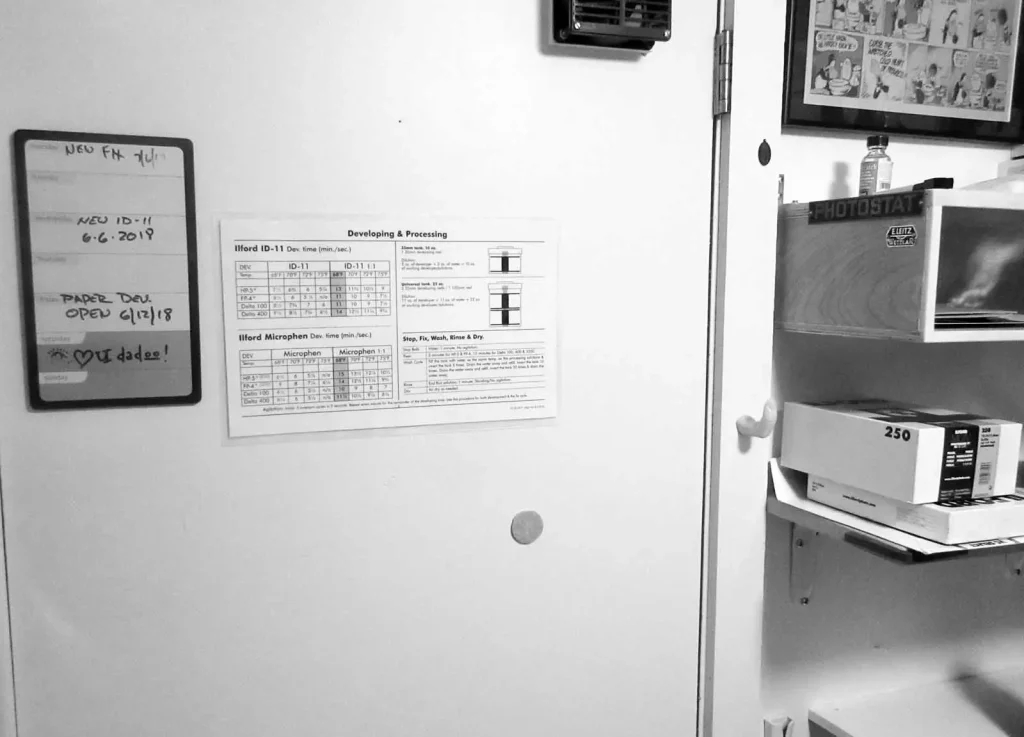
Everything in my darkroom has a specific place. I can find scissors in the dark, or I know on which shelf my developing beakers are located. I gave the interior design lots of thought and tweaked it through trial & error. I took the information specific to the films & chemistry I used, and using InDesign, created large charts to be easily read at eyelevel. They were laminated and attached to the back of the darkroom door.
I make mistakes, but because I follow standardized procedures I’m able to back-track and see where I may have gone astray, and self-correct.
Sources. No darkroom? No chance of building a darkroom?
• Locate a camera club, community darkroom, or rental darkroom. I believe Ilford maintains a directory of private darkrooms whose owners are willing to share with fellow photographers.
• Grab a bunch of like-minded enthusiasts and build a group darkroom. The creative energy that is produced could power a small town.
• Ilford & Freestyle Photo maintain up-to-date resources on home processing & printing. Check their sites out. Scour used bookstores or search Amazon for out of print books on tools & techniques of photography. Look for new publications.
• Put together a film developing kit and process your own film. Obtain a scanner, scan your negatives. Load a software package like Lightroom or Photoshop onto your computer. Purchase a photo quality printer and print your negatives. This is a hybrid approach, combining traditional methodology with 21st century tools [not a true, chemical-based darkroom, but it does work.]
• Move to someplace where you can set-up a darkroom.
Examples of my black & white work.
When I was studying for my teaching degree in Graphic Arts, I was required to take classes in bookbinding, offset press lithography, graphic arts photography, graphic design, black & white photography and visual exhibit design. These classes gave me lifetime skills that I used in the classroom and now, in retirement. Sadly, this university program no longer exists.
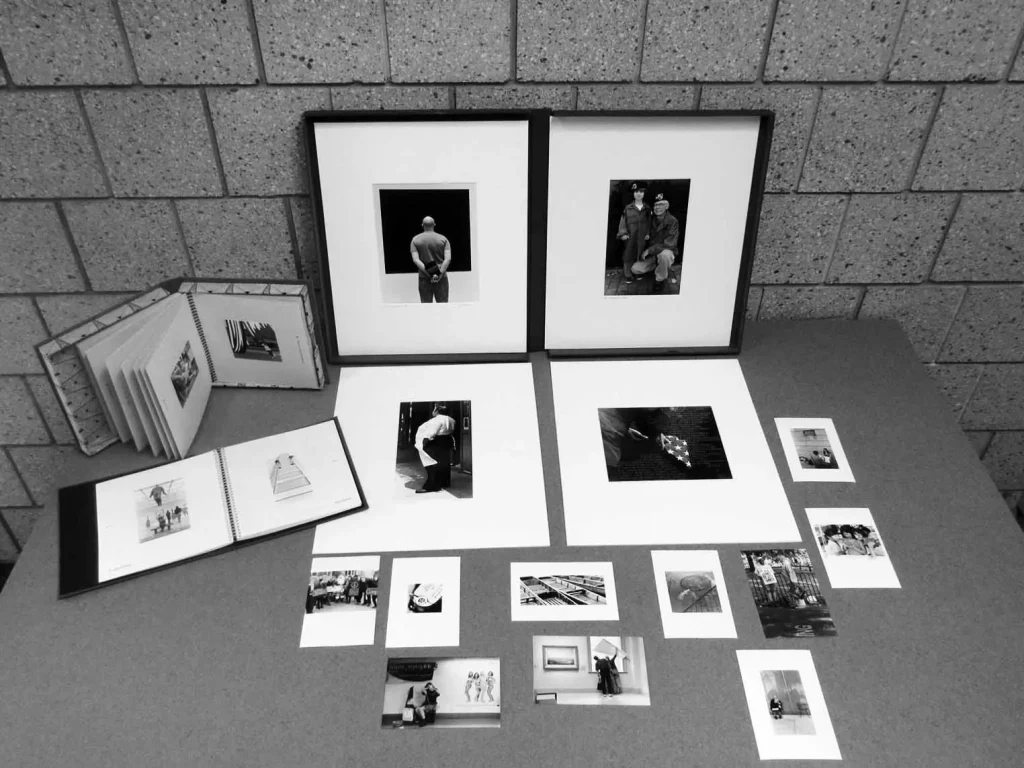
In the photo above, the two hard-bound books on the left are artist’s books. Each current year, I edit and print a selection of negatives from the previous year’s photography. Each book holds about 30 prints. The books are designed in InDesign, then the pages are printed on a large format color printer. The B&W prints are made in the darkroom, then ‘tipped’ into the pages of the book. I make the hard-bound cover, then gather & bind the pages into book form. The books are made in editions from 2 to 6 books. Each book from conception to completed edition can take anywhere from 2 to 4 months. I also design and print specialized books for the Christmas season. These go to my family.
On occasion, I’ll be asked to make exhibit-quality enlargements. I mat & frame these prints myself.
The large matted prints were made for a personal exhibit of photos I made at the Viet Nam Memorial spanning 35 years and a group exhibit on the technique of Chiaroscuro.
The postcards are made on a weekly basis. I use Ilford’s B&W postcard enlarging paper and make a few to send out to our daughter and some fellow photographers. The post card project has been ongoing for over 15 years. It gets me into the darkroom, even when I’m not motivated.
Finally, Conclusion.
When I began my adventures in photography, it was impressed upon me that if you’ve got one good negative out of 36, you’re doing well. I was also taught that a garbage bin is a most important piece of equipment any photographer can own.
Ansel Adams once stated that you should end up with ten good prints a year. I shoot random subjects on a single roll, so I’m happy if I have two or three worthy negatives. I’m a tough critic of my own work, but I do make more than 10 prints a year.
I’ve never lost the sense of excitement as I hang a roll of film to dry. When a print slowly appears in the developing tray, it’s still magical. I’m amazed that the combination of cameras, lenses, chemicals, silver, gelatin and invisible images actually works, and they become visible images. I never seem to tire of it.
In a present-day society where technology has a short life span, the darkroom connects you to a tradition and practice that stretches back to the beginnings of photography. It’s not a nostalgic endeavor – the darkroom facilitates a unique visual expression for photographers trying to understand their world.
I maintain a flickr site: flickr.com/photos/dcastelli9574/
I don’t use Instagram, twitter or any other social media site. I don’t want to complicate my life.
Share this post:




Comments
Michael Kay on A Tour of my Darkroom and some notes for setting up yours – By Dan Castelli
Comment posted: 14/09/2018
Austin O'Hara on A Tour of my Darkroom and some notes for setting up yours – By Dan Castelli
Comment posted: 15/09/2018
Comment posted: 15/09/2018
George Appletree on A Tour of my Darkroom and some notes for setting up yours – By Dan Castelli
Comment posted: 15/09/2018
“Now, here’s the crazy part: I file the film away for 2-3 months. I use this time to let the emotional buzz I experienced when making the picture fade away and allow objectivity to take over. This ‘visual rediscovery’ often leads me to consider quieter images that I would pass over if I had rushed into the darkroom immediately after processing. Since I’m not meeting news deadlines or shooting for a client, this approach works for me”
I had a darkroom during many years, and considered it a must practice for a photographer.
Times have changed and it’s difficult to differentiate a lovely hand made analog print from a machine made digital print. Also people, common people, cannot really appreciate finely made works.
So I wonder at what end darkroom printing is nowadays a result to keep into consideration (even for archival purposes) other than for personal enjoyment.
Mika on A Tour of my Darkroom and some notes for setting up yours – By Dan Castelli
Comment posted: 15/09/2018
Thanks for sharing that with us Dan !
Mika
JR Smith on A Tour of my Darkroom and some notes for setting up yours – By Dan Castelli
Comment posted: 15/09/2018
Brett Franklin on A Tour of my Darkroom and some notes for setting up yours – By Dan Castelli
Comment posted: 20/09/2018
Comment posted: 20/09/2018
Dale Willetts on A Tour of my Darkroom and some notes for setting up yours – By Dan Castelli
Comment posted: 22/09/2018
Comment posted: 22/09/2018
Chris Pattison on A Tour of my Darkroom and some notes for setting up yours – By Dan Castelli
Comment posted: 04/10/2018
Comment posted: 04/10/2018
How to Build a Darkroom for £100 or Less - Darkroom Technique Part 1 - by Sroyon Mukherjee - 35mmc on A Tour of my Darkroom and some notes for setting up yours – By Dan Castelli
Comment posted: 06/04/2020
How to Build a Darkroom for £100 or Less - Darkroom Technique Part 1 - by Sroyon Mukherjee - 35mmc - NSO News on A Tour of my Darkroom and some notes for setting up yours – By Dan Castelli
Comment posted: 23/04/2020
joe dupont on A Tour of my Darkroom and some notes for setting up yours – By Dan Castelli
Comment posted: 27/06/2020
Comment posted: 27/06/2020
Richard Vaara on A Tour of my Darkroom and some notes for setting up yours – By Dan Castelli
Comment posted: 29/09/2020
But this time, I have a fine shed in the back yard, which is plenty of room to play in. However, I kinda forgot how to set up all the attachments...i.e., the cooling fan, safelight, timer, etc. In other words, what hooks up tp what?
I previously had the manual for the Dichro head which had a diagram of how to hook everything up, but alas that manual is in a box somewhere and I can't locate it. I've checked on line and can't find anything to show me how all the equipment goes together. Help!
Thanks,
Richard Vaara
Everett, WA