
This camera shoots unlimited film photos!
Has become a popular click bait title in the YouTube photography space. These creators are attempting to capitalize on a widespread desire to achieve the impossible. It should go without saying, that no digital camera will ever achieve these claims. And yet, the videos get hundreds of thousands, occasionally millions of views. But is there really a way to achieve unlimited film photos?
Ok, maybe not unlimited. But what if we could take the best aspect of digital photography, being it’s near unlimited number of shots, and combine that with the pleasing character of film. This is exactly what I set out to do with this experiment. The inspiration came from the photographer on YouTube, Jason Kummerfeldt. He uses a technique involving the transfer of digital images to film with the intent of recreating the aesthetic of Kodak’s legendary IR color film, Aerochrome.
Jason takes the initial photo on an IR converted digital camera, performs some photoshop wizardry to achieve the Aerochrome colors, then transfers the image to slide film by photographing the screen of his iPad using a 35mm camera. My plan was to attempt the same thing, minus all the IR steps.
The justification…
The best thing about digital photography is the nearly unlimited number of shots. However, the colors, tones, and grain character often fall short when compared to film. Especially if you’re accustomed to the results of shooting film.
Film is just the opposite. The number of shots is very limited. But the results are often more visually pleasing. When the number of shots at your disposal is limited your shutter finger naturally becomes more conservative. Some may argue that it is a good thing to be very intentional and thoughtful with what you shoot. While I don’t disagree, there are times when a scene may require 5, 10, or even more shots before you get what you want out of it. With digital, this is no problem. Just shoot until you find what you’re looking for.
One initial shot. Maybe the light will look better from this angle? Second shot. Maybe I should get closer? Third shot. Maybe I should move an inch to the left? Fourth shot. Etc, etc. With film I’m cringing by the third or fourth. Because every shutter click is the sound of money. Hopefully money well spent, but you won’t know until the negatives come back. With digital, who cares? Take 100 pictures of the same thing then pick the best one. It does not make any difference in the world.
So, how can we merge the strengths of both formats? To accomplish this, I selected 36 digital images I’ve taken over the years on various cameras. Some full frame, some APS-C. Some Canon, some Sony, some Fujifilm, some Pentax and Ricoh. Some JPEG and some edited RAW files. I wanted the sample size to be wide enough so that hopefully, I can learn from what turn out good, and ditch whatever turns out bad.
The process…
The process is straight forward. Full screen the pictures on a high-res monitor, preferably an OLED. Although, I didn’t use an OLED. Set up your film camera on a tripod with a macro lens and position it to point at your computer screen. Ensure the image is straight, square, and no part of the monitor is visible around the edges of your viewfinder. Next, shoot each of the selected digital photos using the film camera’s two second timer or a shutter release cable to minimize motion blur.
Since this was my first time, I wasn’t sure how the film would react to over or under exposure when shooting a computer screen. Knowing that film usually prefers over exposure rather than under, I over exposed by only 1/3 of a stop.The film stock I chose is Kodak Ektar 100 because of its low grain, great colors, and ability to render high detail. I made no effort to warm up the color tone of my monitor, just set the brightness to the max setting.
I adjusted the RAW files slightly to make them look natural, increased the contrast and saturation and called it good. For the JPEGs, I either left them alone or reduced the contrast.
After readying all my photos, setting up my monitor and tripod, I fired away my 36 shots of Ektar, unsure if what I was doing was the equivalent of tossing a whole roll of film into the trash. I received my negatives back from the lab and rescanned them with the same Canon DSLR I used to take many of the original shots. (Canon 5D Mark III)
My thoughts on the results…
I was surprised to learn that none of the digital cameras seemed to outperform each other. Some shots from the Canon, for example, turned out very good and others not so good. My biggest mistake in all of this was setting the contrast of the digital files too high. In future attempts, I would only use low contrast images, making RAW files the ideal candidates.
Contrast which appeared normal to my eyes on a computer screen, proved to be too high for the film stock. The higher than ideal contrast led to the shadows and highlights getting crushed in some cases, resulting in loss of detail in those areas.
With that said, I am happy and pleasantly surprised with many of the photos. I could absolutely see myself repeating this experiment again with the changes I mentioned above and even utilizing other film stocks. This technique will not replace shooting on a film camera for me, but it does offer an interesting way to merge the strengths of both digital and film photography. Now, whenever I’m shooting digital it will be nice to know that film is still always an option.
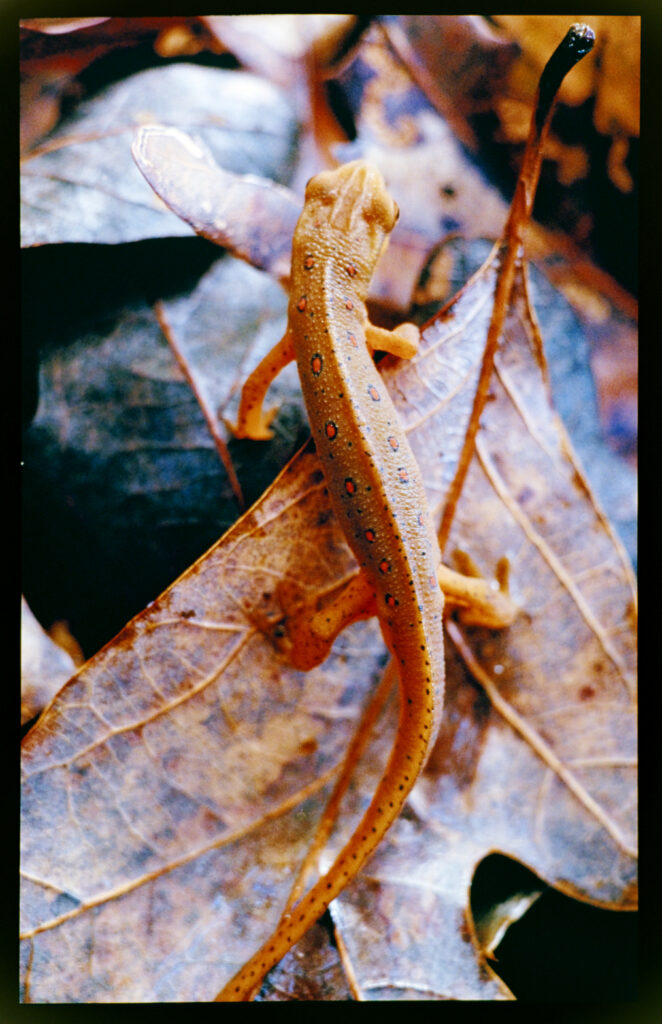
I used the positive film color profile from the Ricoh GR III for this photo. No, that irony is not lost on me!
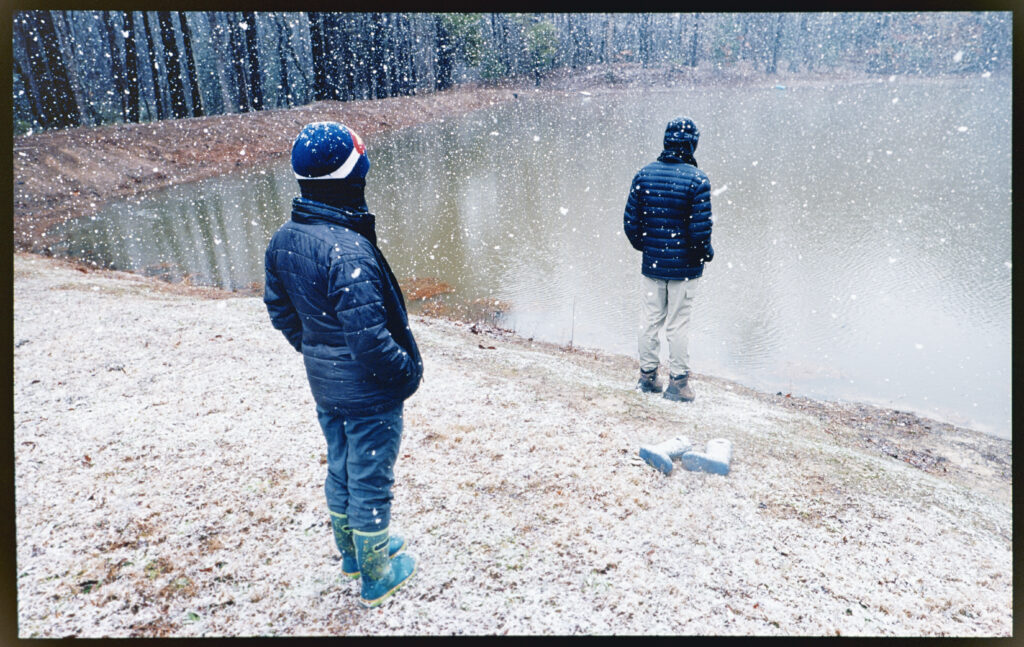
This is an older shot way back in 2021 during a North Carolina winter. I believe this may be the best result from the experiment. I love the colors and contrast. The blacks are deep, but they still look natural.
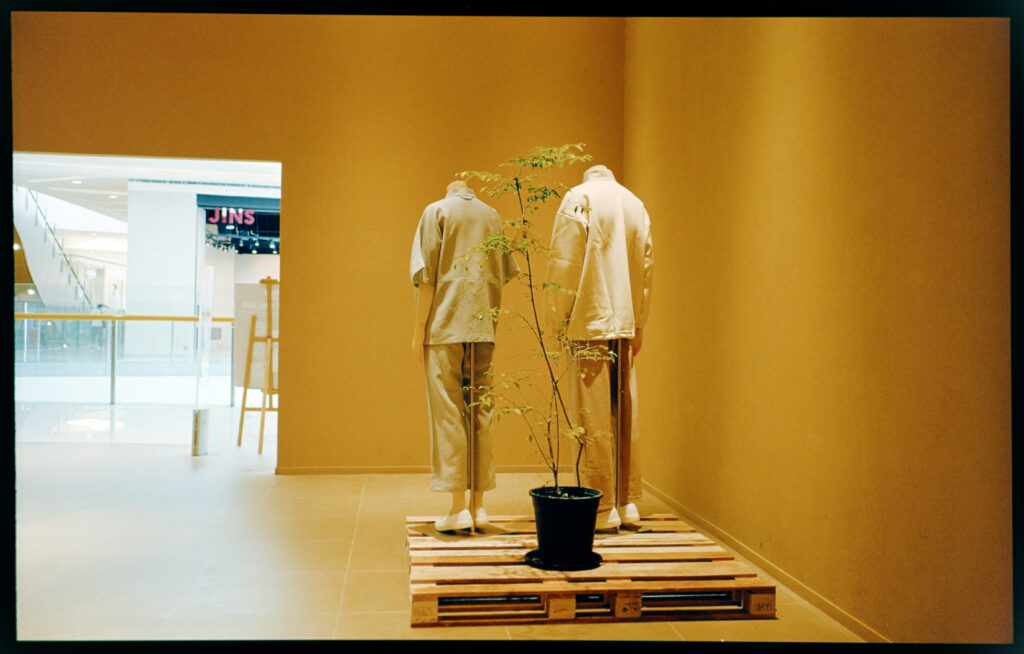
I believe the somewhat bland colors of the Sony combined with the low contrast of the RAW file lend themselves well to this technique.
From an absolutely stunning afternoon in the Philippines, 2022. Original shot was an edited RAW file from my Pentax DSLR. I think lifting the shadows of the RAW file a bit more may have helped this one.

This was originally a JPEG using the Velvia simulation on my Fujifilm XT-20. Irony again! The Fujifilm JPEGs were interesting. Some of them turned out VERY good. Others had strange orangey skin tones that I consider to be total failures.
The last photo I will leave you with is a JPEG from my Canon 5D classic. To showcase the look of skin tones using this technique.

Thanks for reading!
You can find me on Tumblr and Instagram.
Share this post:


Comments
Rita Heinz on 5 Digital Frames Transferred to Film (An Experiment)
Comment posted: 14/09/2024
There are so many presets to give a digital photo a film touch, so why the detour via monitor and film, which also costs money?
Comment posted: 14/09/2024
Joe on 5 Digital Frames Transferred to Film (An Experiment)
Comment posted: 14/09/2024
Comment posted: 14/09/2024
Ron Peters on 5 Digital Frames Transferred to Film (An Experiment)
Comment posted: 14/09/2024
Comment posted: 14/09/2024
Kevin on 5 Digital Frames Transferred to Film (An Experiment)
Comment posted: 14/09/2024
Gary Smith on 5 Digital Frames Transferred to Film (An Experiment)
Comment posted: 14/09/2024
I never understood that claim, there must be something I'm missing? I have 6 film cameras that will shoot film until I run out of film.
My digital cameras shoot digital.
I do have to digitize my film to see the shots since I'm no longer doing wet prints.
I may start doing digital prints to see how 8 or 9 ink printers do.
Hamish Gill on 5 Digital Frames Transferred to Film (An Experiment)
Comment posted: 14/09/2024
https://nofilmschool.com/Dune-Digital-Film-Process
I personally think it’s a really interesting idea and a perfectly valid approach to achieving a certain desired look/fell
Comment posted: 14/09/2024
Jens Kotlenga on 5 Digital Frames Transferred to Film (An Experiment)
Comment posted: 14/09/2024
Thanks for posting your input on this quirky experiment - I will follow this up by giving it a try myself ...
Comment posted: 14/09/2024
David Smith on 5 Digital Frames Transferred to Film (An Experiment)
Comment posted: 14/09/2024
Comment posted: 14/09/2024
Jukka Reimola on 5 Digital Frames Transferred to Film (An Experiment)
Comment posted: 15/09/2024
Comment posted: 15/09/2024
Alexander Seidler on 5 Digital Frames Transferred to Film (An Experiment)
Comment posted: 16/09/2024