As part of the process of playing with, testing and reviewing the Pentax Espio Mini – in much the same way as I did with the Oly mju-ii – I have become intrigued by the idea of the modifying the camera to behave closer to how I would like it to. But unlike my failed experiments with the Olympus that left the camera feeling broken, my experiments with the Pentax seem to have been a success!!
The problem…
One of the biggest issues I find with little point & shoot cameras is that they forget their flash settings when they are switched off. It happens fairly infrequently, but on the odd occasion I take a photo forgetting to switch the flash off I find myself fairly irritated. I also know that I’m not the only one who finds this irritating, as not only do I read about it on the forums, but once in a while I get an email asking me to recommend a camera that remembers its flash settings. Unfortunately, short of a few anomalies like the Canon 120 prima autobot (or whatever it’s called) there are very few cameras that both remember flash settings and don’t break the bank… Which was what led me to my failed attempts to mod the Olympus mju-ii.
Starting with, and learning from the previous failure.
The obvious solution to stopping a camera from forgetting its flash settings when you switch it off, is quite simply to not turn it off. Of course this leads to issues with protecting the lens, accidentally taking photos, the battery dying quicker than it should etc. The Olympus offered a potential solution to some of these issues by having a “clamshell” sliding front cover, that fits over the lens even when the camera is switched on. So by disabling the mechanism that connects the door to the off switch the lens can be covered, but the camera remain on.
The problem with modifying the Olympus like this is that if left switched on for long enough the camera crashes and ceases to function entirely. The battery needs taking out, leaving out for a few moments before putting back in, so returning the camera to normal function. Less than ideal!
Modification of Pentax Espio Mini to retain flash settings
The first thing I wanted to make sure with the Pentax Espio Mini was that if left on, it wouldn’t crash. So, I left in on over night without touching it… and then over two nights without touching it… Neither caused any issues. In fact, the only thing that seems to happen is that the lens very slightly retracts after 5 or so minutes. And even after it does that, when taking a photo with it, there isn’t even any need to re-activate the camera in any way, it just works as normal.
First (and possibly final) steps
The next thing to ensure was that the lens cover would fit over the lens if it wasn’t retracted first. Of course the only way to do this was to actually modify the camera to not switch the camera off when closing the door.
Just like the Olympus, the front door will simply lever off with your finger nails under one edge. I’ve found having the door at the half open point makes this easier. Also like the Olympus, be aware of a little bit of metal flying free when you take the door off. Don’t lose this, it goes here, like this:
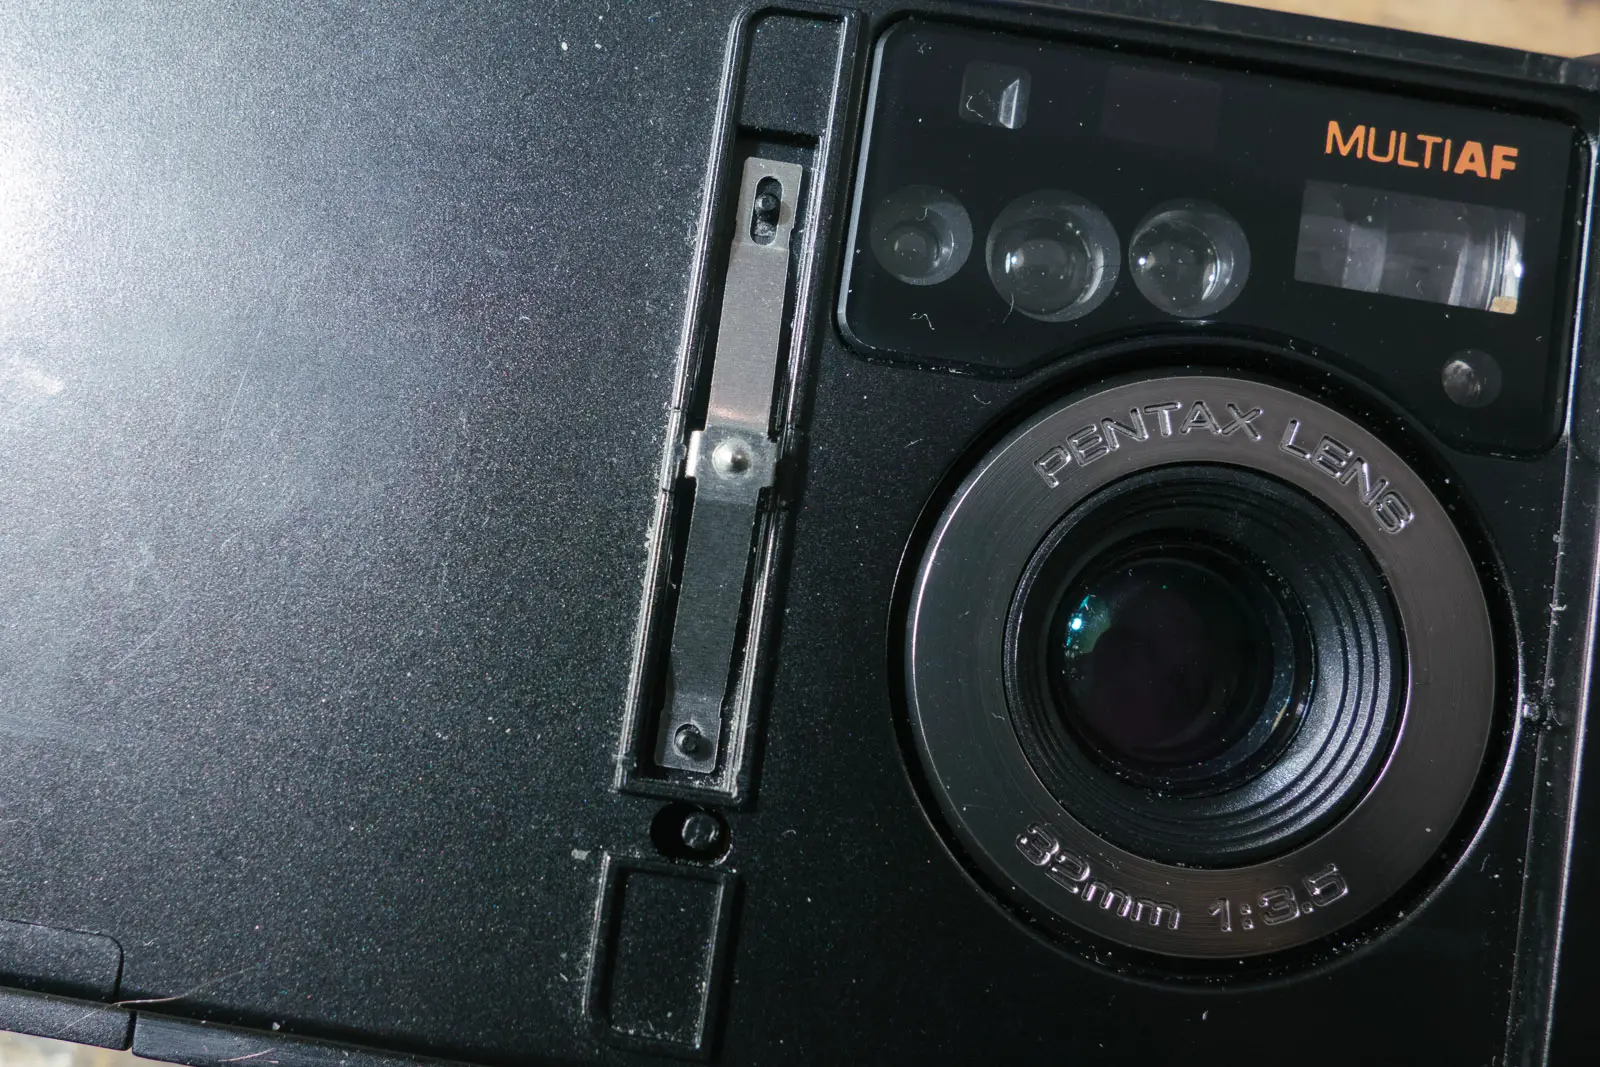
Again, just like the Olympus, there is a mechanical switch behind the “clamshell” door. In the case of the Pentax though it is a sprung switch that is held in the on position by the door.
My first thought was to just jam something – in my case a very small rolled up bit of paper – into the gap the switch occupies in its off position like so:
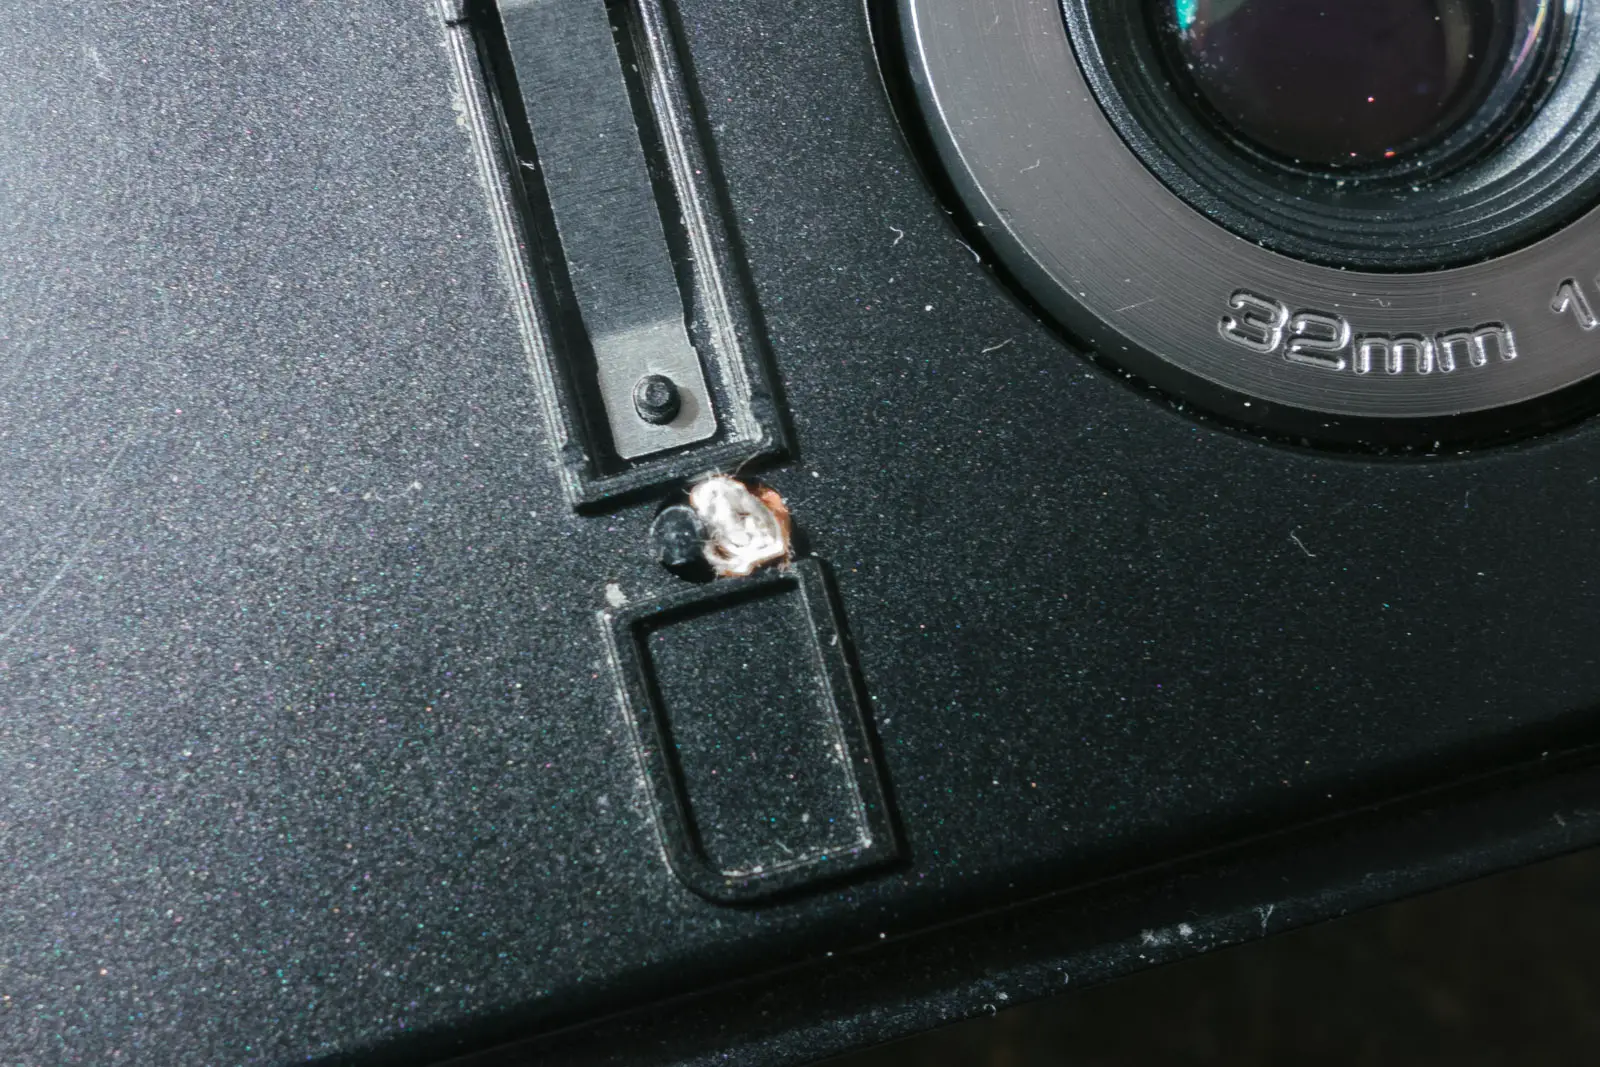
This actually works pretty well, and if nothing else confirmed that that the door would close over the lens with the camera switched on. This method clearly isn’t a permanent solution, if you want to return the camera you can just remove the bit of card. And of course this non-permanent solution is probably as far as most people will want to go. That being the case for you, then you can stop reading now…
Taking the modification a step further.
This wasn’t quite enough for me. Apart from anything else, it failed on me at one point, allowing the camera to turn itself off. This meant that the camera flashed even more unexpectedly (I should have noticed the little red light warning me, but I didn’t think about it). One way or another, I decided I was going to take things a step further, open the camera up and see if I could make the modification a little more permanent …
A warning
Before I go any further I just want to point out that taking cameras apart is quite dangerous if (like me) you don’t really know what you are doing. A camera’s flash needs quite a bit of power to fire as bright as they do. This power is stored in a capacitor, and should you touch the terminals of that capacitor, or any bare connection to it, you’re liable to receive a fairly nasty electric shock. There is also significant chance that you might break your camera for good! In short, I don’t actually recommend doing any of what I am about to illustrate, and if you do choose to do it, do it at your own risk!
That out of the way…
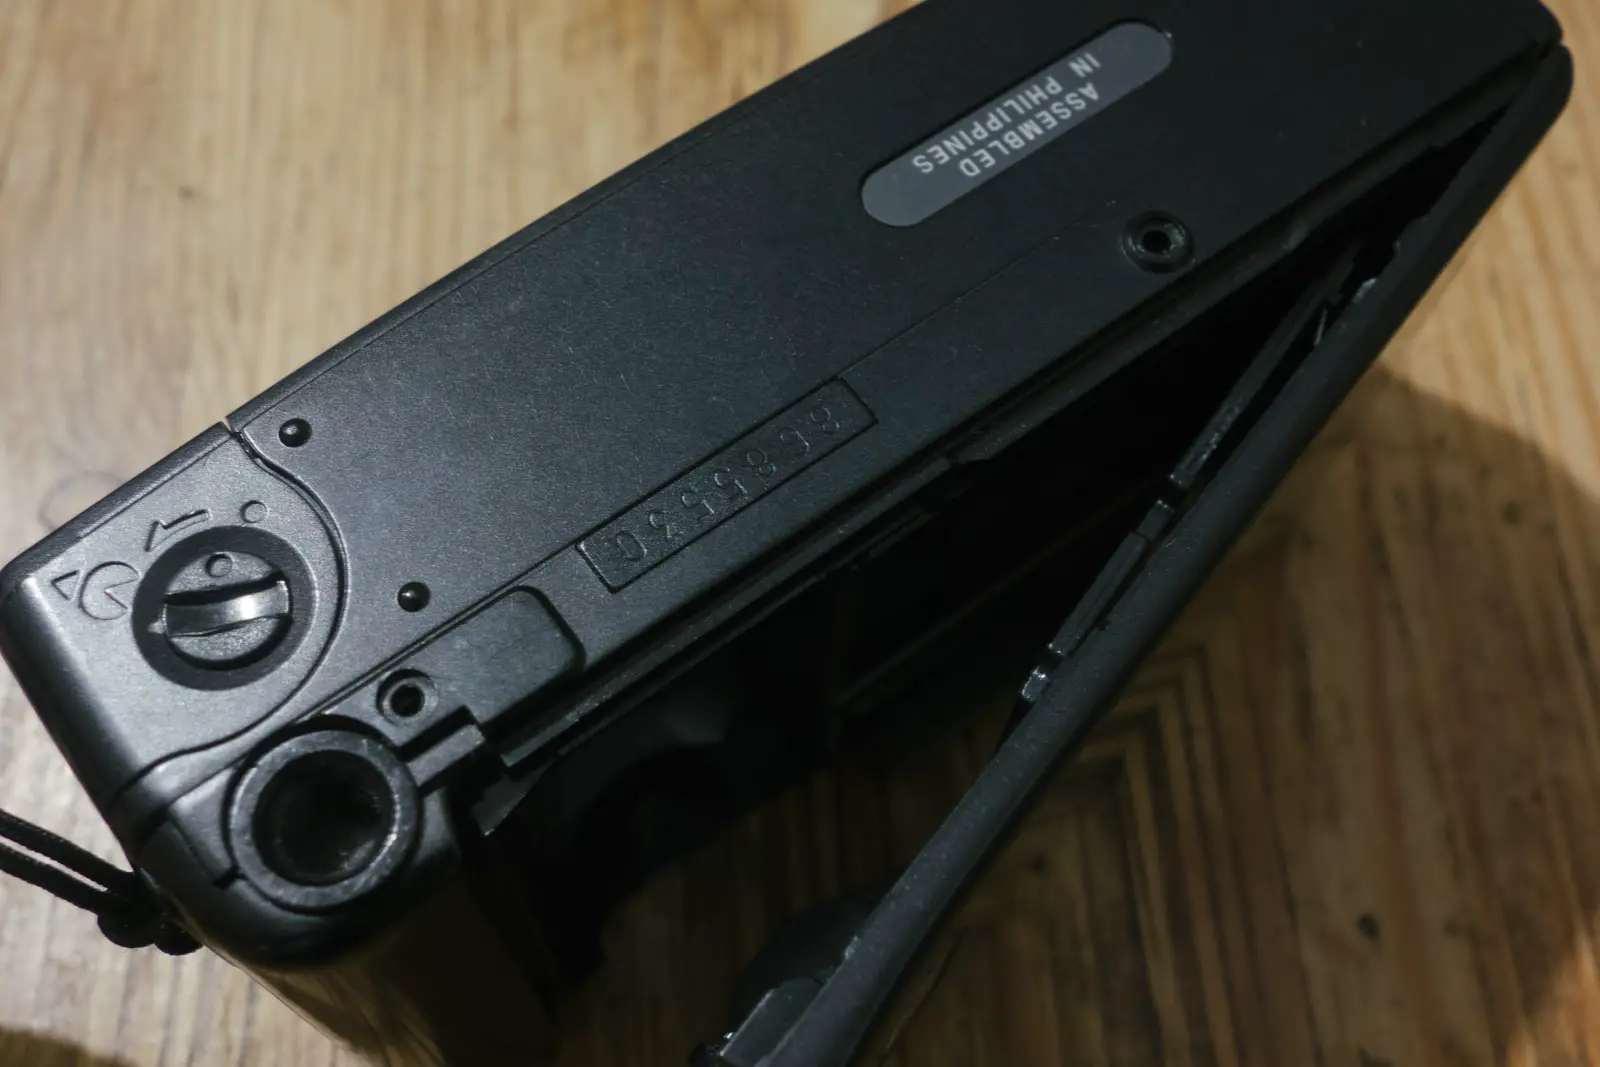
To get inside the camera I first unscrewed all of the 5 screws on the outer shell of the camera, and one just inside the back cover. Here you can see empty screw holes on the bottom of the camera:
With a bit of jiggling the top/back part of the camera and then the screen cover came off:
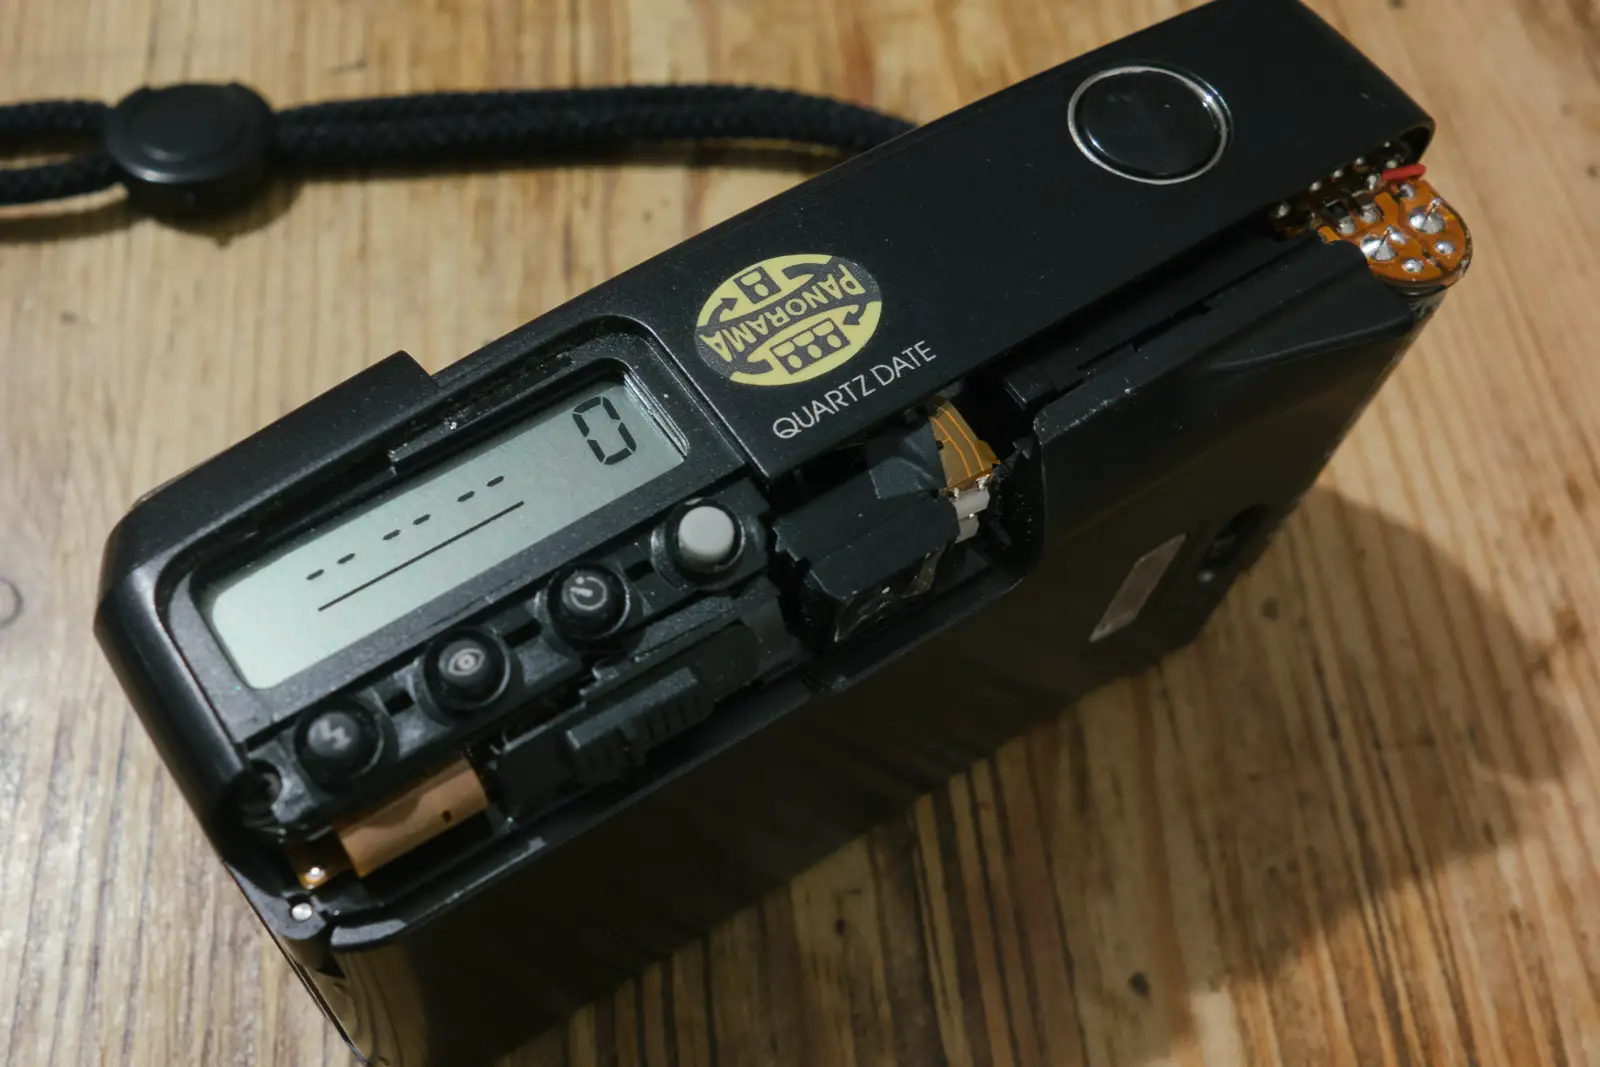
This revealed the flash capacitor, it’s big black thing down the back right of the camera. Here you can see the terminals at the top right of the photo above. Please be careful from this point on if you choose to emulate what I have done here.
The next step was to take the front of the camera off. Once again, this just took a bit of jiggling:
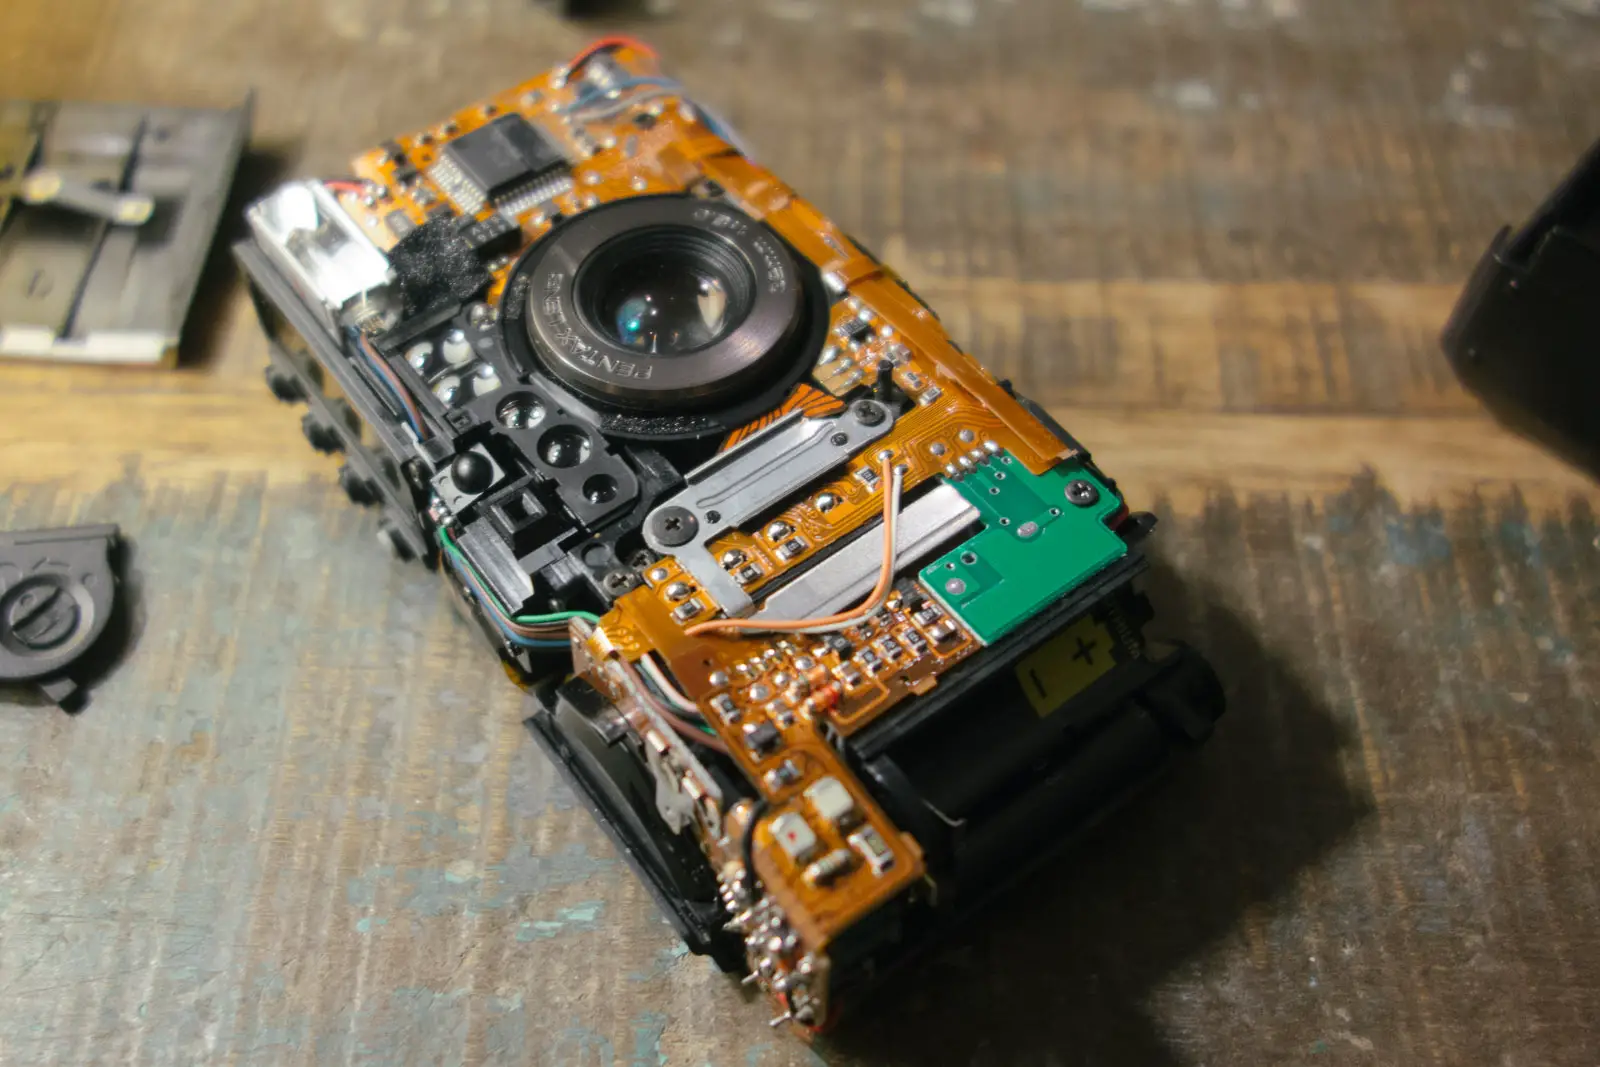
Once off it was time to work out how the switch worked. As it turned out, it was based around a very simple parallel pair of thin metal plates that when the switch is pushed are held together. As long as they are held together, the switch circuit is complete, and so the camera is on. Unfortunately whilst fiddling under the flexible circuit board I was too distracted to take photos of the switch itself (though you can just see part of it in the photo below), but for the sake of this demonstration, it doesn’t actually matter. What I worked out digging under the circuit board was that the switch is connected to it here:
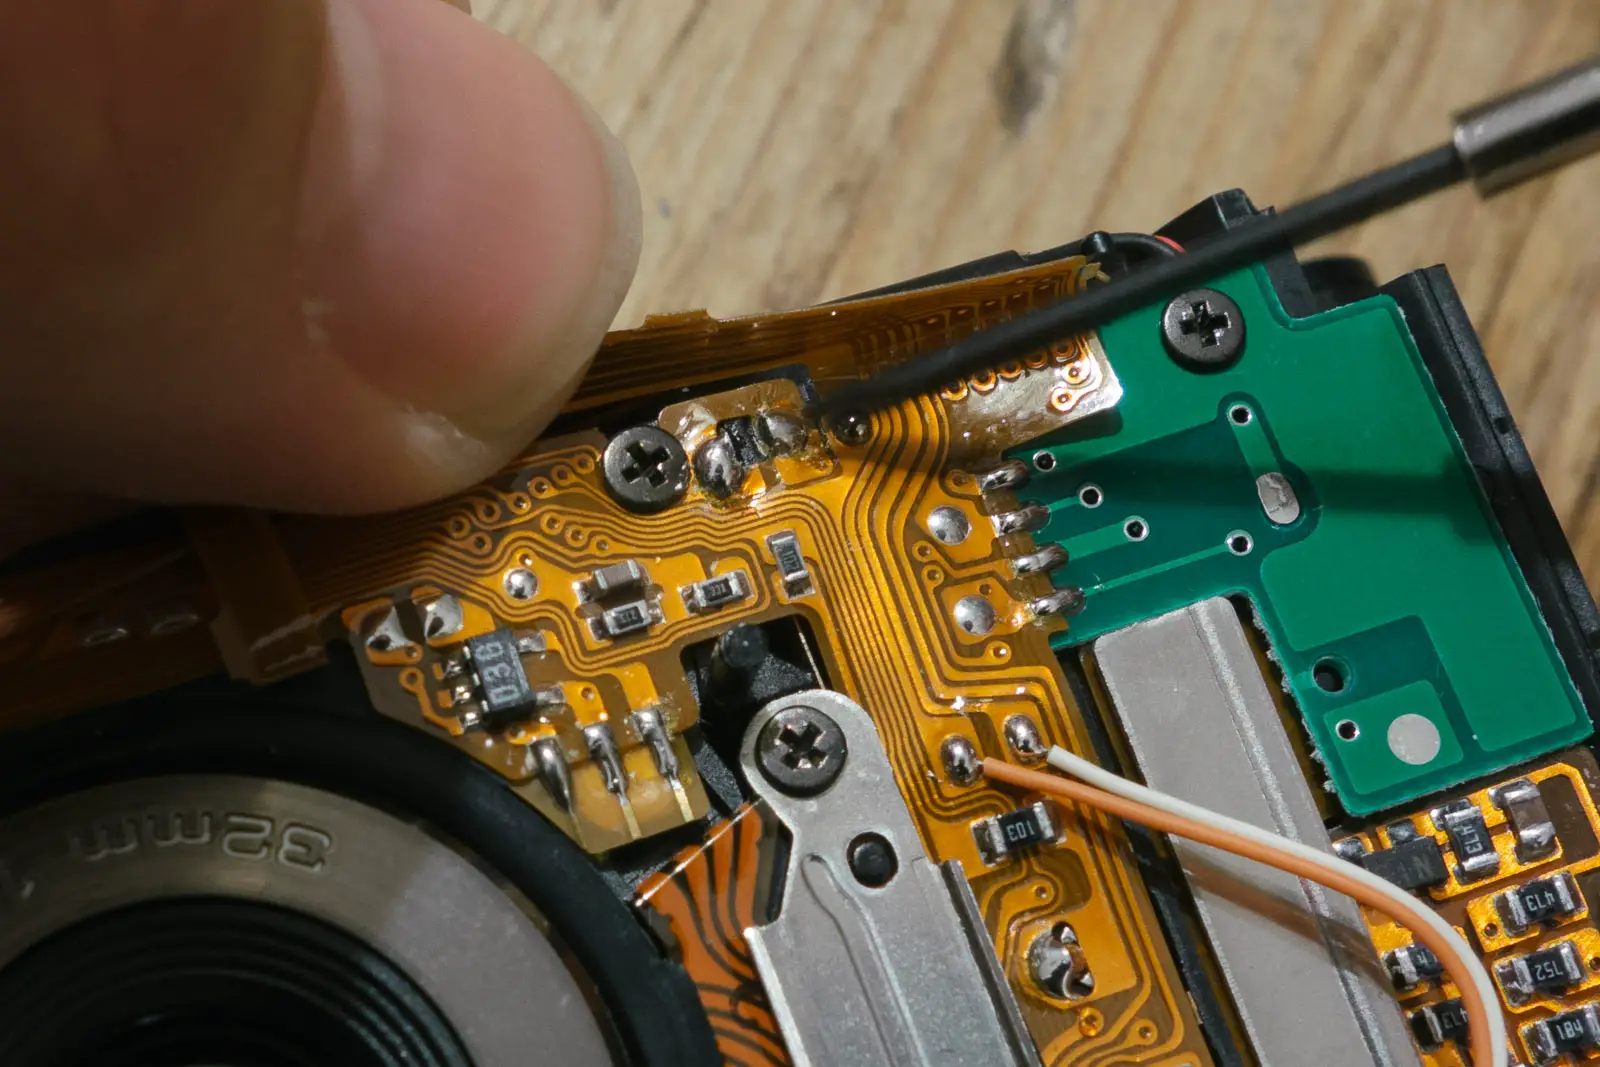
So, to bypass the switch altogether, and permanently complete the circuit, all I needed to do was to solder these two connections together… Like so:
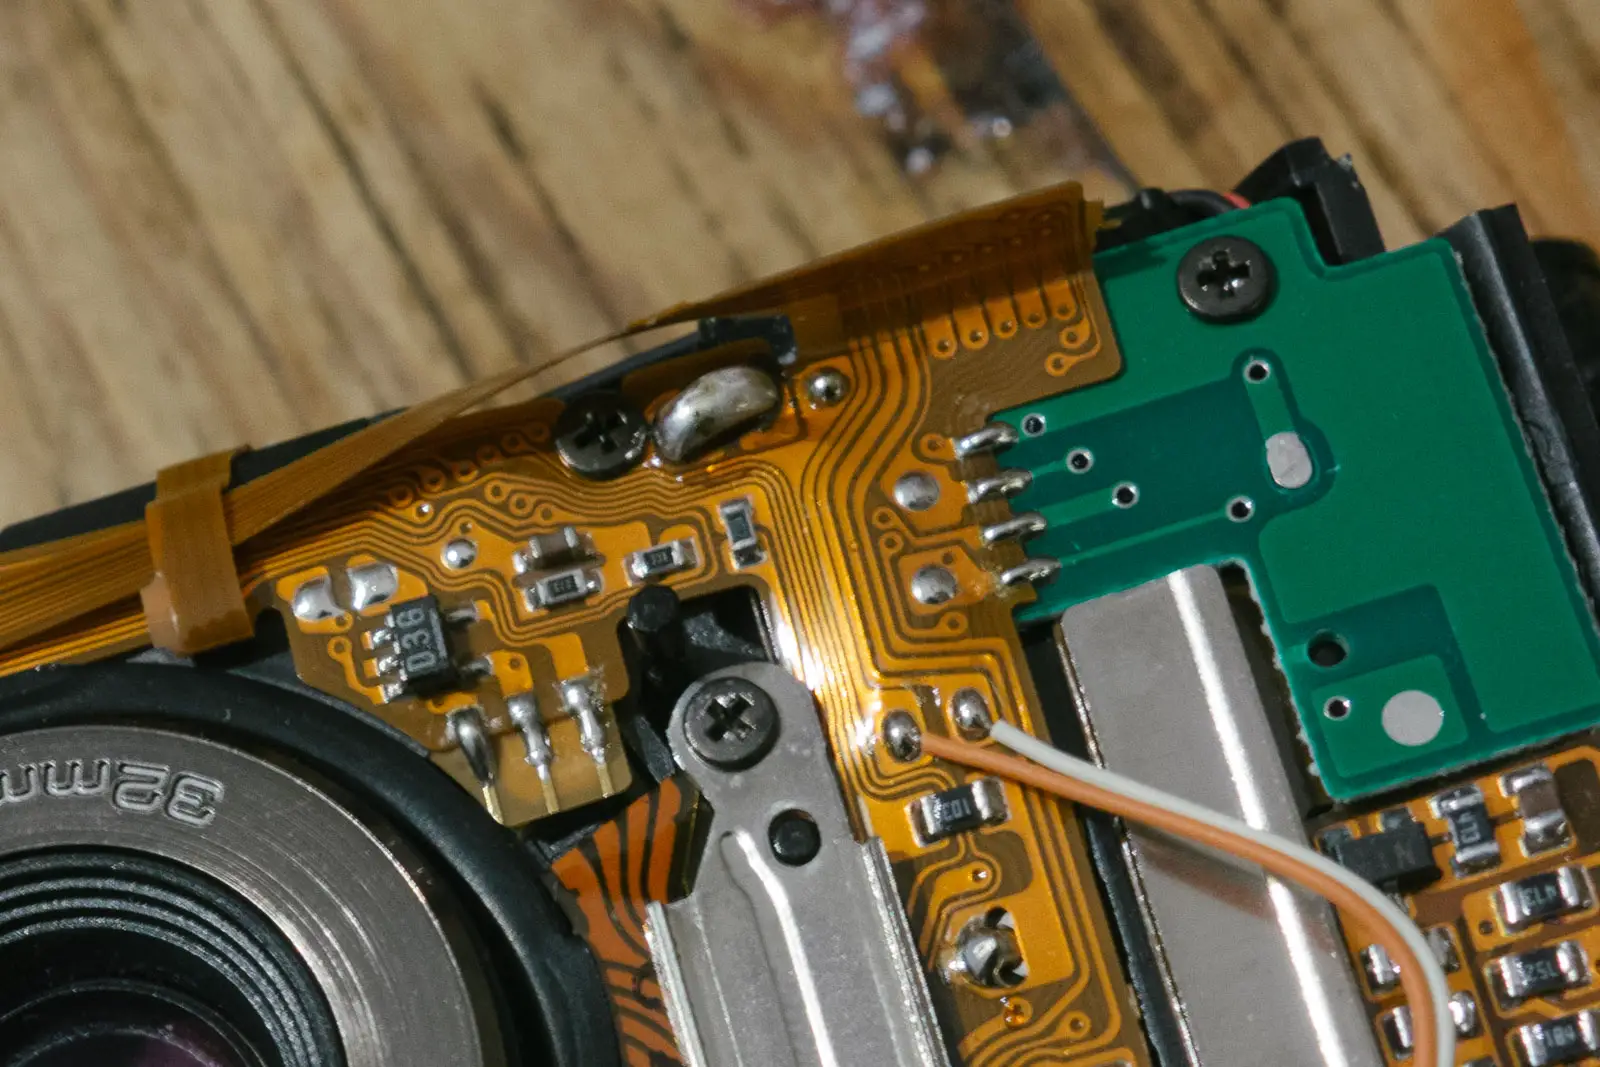
And so my modification was complete!
If you do follow me in this process, it is also worth while giving the viewfinder a little clean whilst you are inside the camera. The main area of dust in mine was just inside the back of the camera. It cleaned up a treat!
In practice, I’ve found the modified camera, for my tastes at least, an improvement! As I said, it doesn’t crash like the Oly did and it doesn’t need awakening after is goes to sleep and the lens retracts. One thing I was worried about was what happened if the shutter button is accidentally pressed with the door closed. Well, even that doesn’t seem to cause a problem. In the unlikely event this happens, the camera reports an error code on the top screen and the shutter doesn’t fire. I wouldn’t want to do it all the time, but since the shutter button is flush to the camera, I’m not expecting it to happen often if at all.
All in all, I’m pretty pleased with this mod… of course there is plenty of time for it to go to crap and something go wrong, so as I have said, emulate what I have done at your own risk! Oh, and don’t forget to take the battery out if you shelf the camera for a while – which is of course good practice anyway!
I shall be posting my thoughts on the modified camera over the next few weeks!
Cheers for reading,
Hamish
Share this post:


Comments
Derek on Modification of Pentax Espio Mini to retain flash settings
Comment posted: 06/11/2016
Bit late to the party here but I'm wondering how this mod effects battery life? Do you notice any drain by effectively having the camera on at all times?
Thanks!
D
Comment posted: 06/11/2016
Ulrich on Modification of Pentax Espio Mini to retain flash settings
Comment posted: 17/03/2023
Does your camera still live? And does your mod affect battery life?
Thanks in advance
Ulrich
Comment posted: 17/03/2023