Polaroid pack film cameras are very cool. Sitting somewhere between medium and large format (3″x4″), these cameras took instant peel-apart pictures that looked and felt like a real photo. The 3 element glass lens took sharp photos, and as a bonus, the bellows folded into a compact case. They were easy to use, utilizing an “electric eye” to give the camera automatic exposure, alleviating the photographer from having to measure the exposure of the subject, then setting the camera’s shutter and aperture before taking the picture. Back in the ’60’s this feature was a breakthrough in photography. Fast forward to now – not so much. A deep dive into the analog process almost demands complete control over the aperture and shutter of the camera. Could these cameras be coaxed to shoot with manual shutter speeds?

First though we need to ask why we would do such a thing when pack film was discontinued 8 years ago and the price for expired film keeps rising as it gets harder to find. Well, these cameras turn out to be quite versatile. They are able to be converted to shoot film in a variety of formats including Instax Wide, Polaroid i-type, 120 and 35mm roll film, as well as 3×4″ and 4×5″ sheet film (Details can be found here). And although you can sort of control the shutter by setting the film speed setting to 75, 150, 300, or 3000 ASA (which basically changed the aperture) and using the lighten/darken control to tweak things, it’s somewhat unsatisfying to be bound by a fixed aperture and to trust your camera to do the right thing when it comes to exposure. Combine this with the problem of Polaroid shutters “going dark” (the tendency to underexpose over time because of old circuitry), and the need for manual shutter control becomes more apparent.
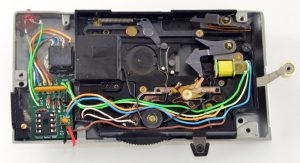
I was aware of an electronic solution which literally did away with the old and brought in the new – replacing the old analog circuit with digital using a microprocessor. But this required major surgery to the shutter circuit – gutting the old circuit and replacing it with newer components, losing automatic exposure in the process. I was still interested in this conversion, but when I went to my favourite electronics store and asked them about working with a PIC microprocessor (the main component in this conversion), they looked at me like I just came out of a time machine (“PIC? that’s a name I haven’t heard for a long, long time…”) and introduced me to the Arduino. I got one that day, intent on making it work somehow, but I put it aside thinking there had to be an easier way.
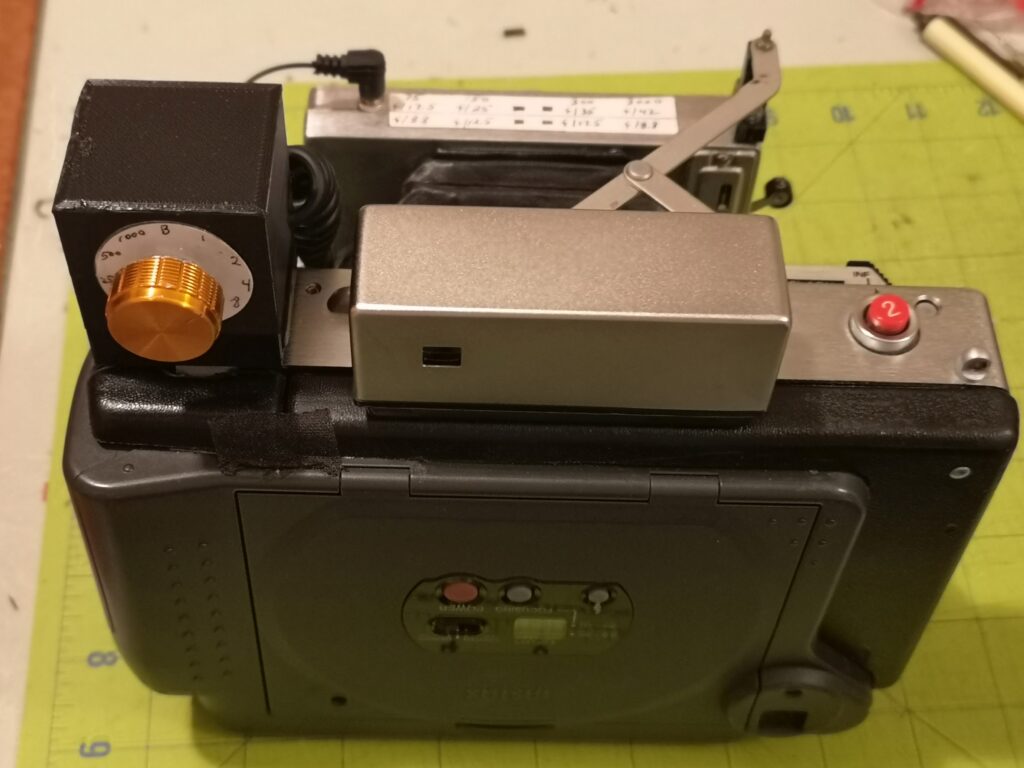
It turns out there was. The “electric eye” is simply a variable resistor which changes its value depending on how much light it reads, so wouldn’t it make sense just to replace it with a potentiometer (a variable resistor with a dial knob) that does the same thing? Well, that’s been tried before and didn’t work out for lack of accuracy in dialing in shutter speeds, but maybe a resistor array – a 12 position switch with 12 resistor values representing 12 shutter speeds – would work.
That project is detailed on my website and it indeed works, but one caveat remained: when switching apertures, sometimes the shutter speed would be 2 stops slower and you’d have to remember that when taking a photo. The Polaroid camera has 2 main settings: sunny day only, and normal pictures outdoors and indoors with flash.
The nice thing about this is you get more apertures to choose from. You can use f/8.8, f/12.5, and f/17.5 with the normal setting, and additionally f/25, f/35, and f/45 with the sunny day setting. In effect, the sunny day setting simply increased the aperture by 2 stops and lowered the shutter speed by the same amount. It’s amazing how many times I forgot to compensate for this. Add to this the fact that 60 year old shutter circuitry is, well, old and inconsistent between cameras – some other solution had to be out there.
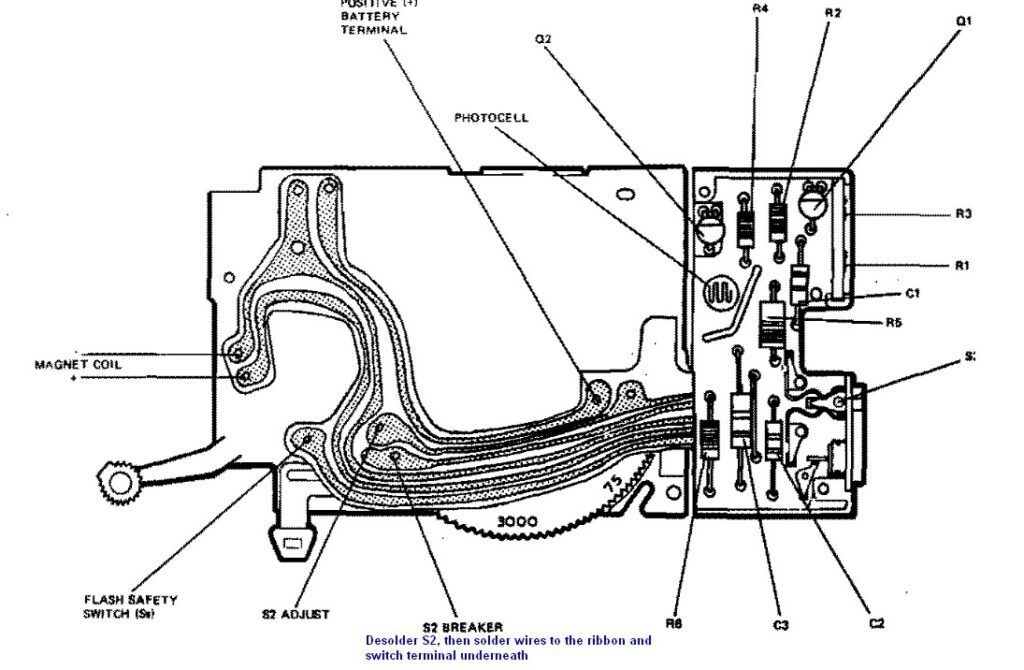
After messing with the Arduino to make a servo controlled shutter for large format cameras, I wondered whether the Arduino could “think” fast enough to control a high speed shutter, like in a Polaroid camera. Another question was whether I could get the Arduino to control the Polaroid shutter without having to totally replace the circuitry. I kind of like the idea of retaining the original circuit and being able to use auto exposure if I want to. The breakthrough came when I got ahold of the maintenance manual and studied the shutter circuit. It’s quite simple – once the shutter is tripped a shutter timing switch is opened, which initiates the timing circuit that releases the closing shutter curtain when the exposure is complete. If an Arduino could tap into that timing switch, it could detect when the shutter opens and time the exposure, then release the shutter by simply removing power to the camera.
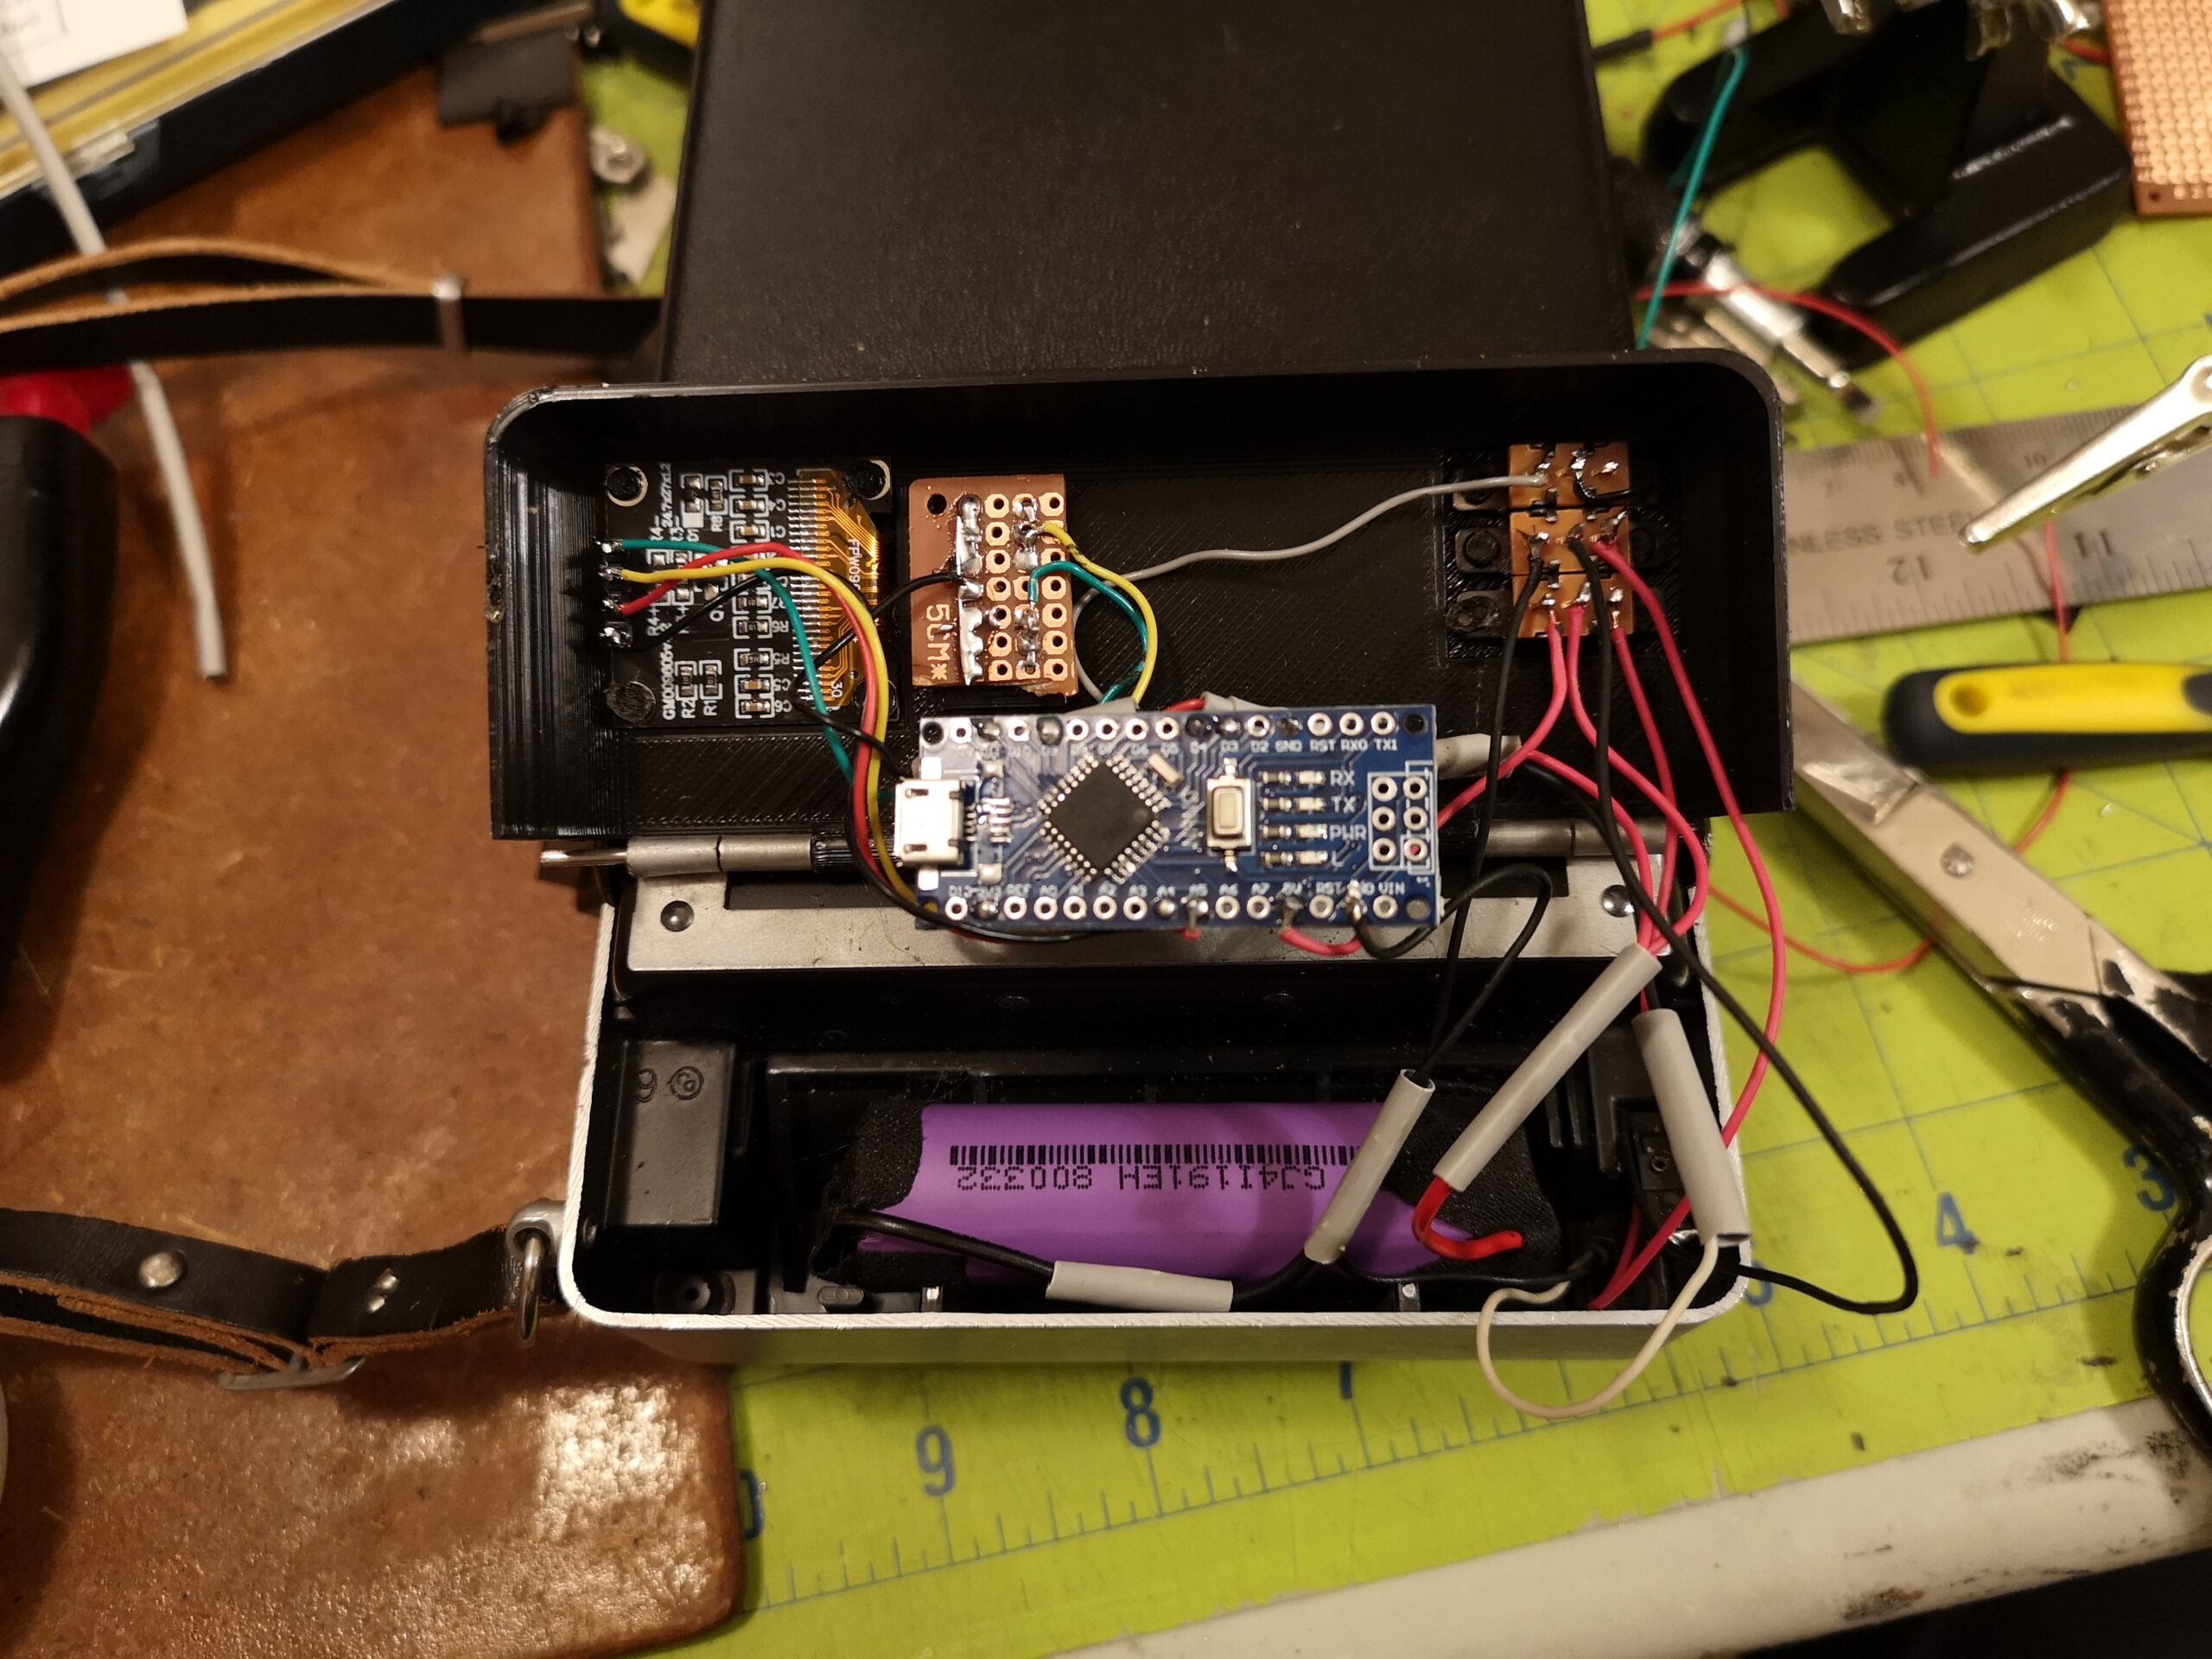
I quickly adapted the code from the servo shutter and soldered a wire to the Polaroid shutter timing switch and ran the shutter program – it worked! And it worked up to 1/1200 of a second! Not only could I get accurate shutter speeds, I could also get shutter speeds in 1/3 stop intervals. This is handy because the aperture on the Polaroid can only be changed in 1 stop increments, making accurate exposures more possible. All the circuitry fits into the battery compartment and two buttons control the shutter speed while 3 switches switch between auto an manual shutter control. A 3D printed battery compartment door rounds out the mod by making it easier to mount the oLED display and switches onto the camera.
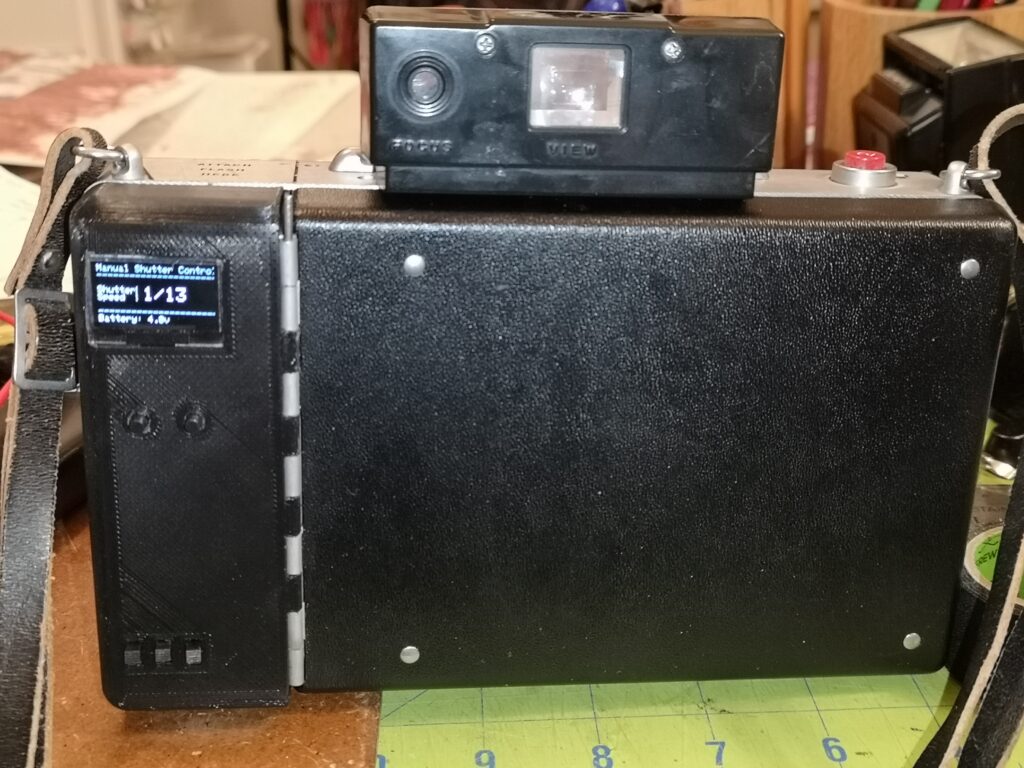
But really, how hard is this to do? Well, it does take some soldering skills as well as messing with an Arduino and a computer. But full instructions are on github with illustrations, code, explanations, 3D files, and even beginner instructions on how to program the Arduino. Tapping into the Polaroid shutter circuit involves peeling off a label, removing 3 screws to open the lens body, then removing 4 more screws to remove the shutter circuit, then desoldering a contact from the ribbon cable and soldering wires to the timing switch and ribbon cable and leading them back to the battery compartment to connect to the Arduino. Once it’s working, your once lowly automatic Polaroid is transformed into very capable camera that will work very well with any film format you throw at it!
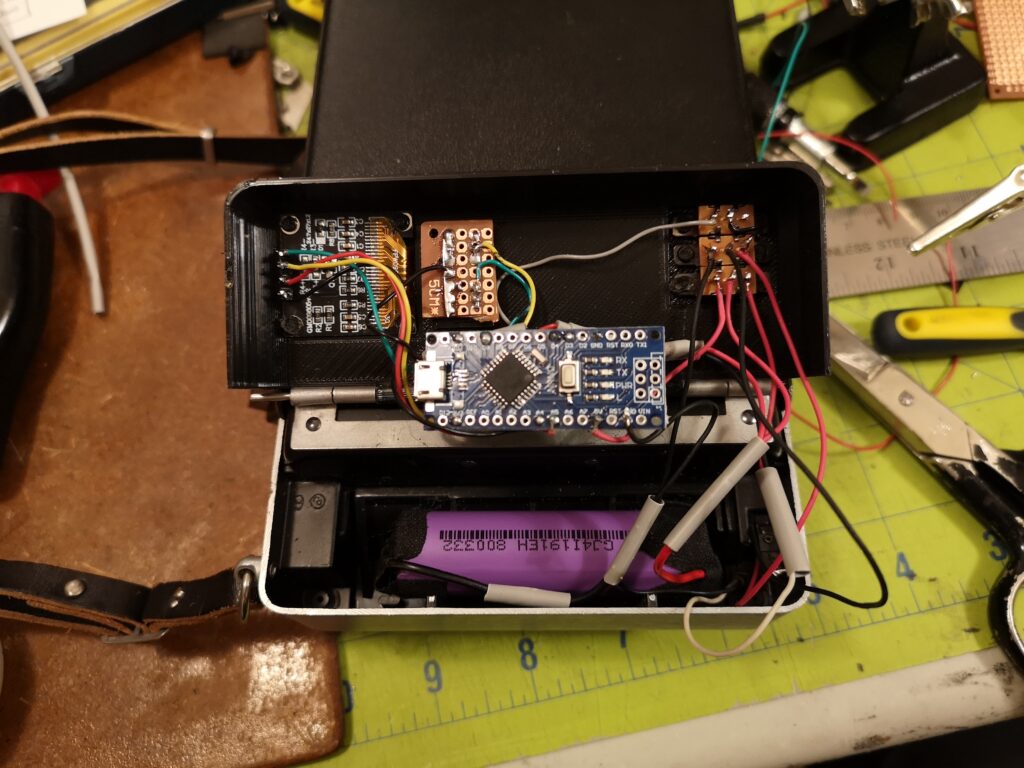
On the field, this modification worked seamlessly. I can still use auto exposure if I want to take a quick snapshot, or I can switch to manual shutter control and get out the light meter to more carefully determine the exposure. This modification also makes it possible to use low speed film types, such as paper negatives and lith film. And being able to choose a shutter speed in 1/3 stop increments means I can get exactly the exposure I need.
There are literally millions of Polaroid pack cameras in the wild, waiting to be used! Check out what they can do @thisisbanff on Instagram, then head on over to the Polaroid conversions page to see how to get these cameras going again with alternate film.
Share this post:



Comments
Stevenson G on Controlling the shutter on an automatic Polaroid pack camera
Comment posted: 16/07/2024
Jukka Reimola on Controlling the shutter on an automatic Polaroid pack camera
Comment posted: 16/07/2024
murray on Controlling the shutter on an automatic Polaroid pack camera
Comment posted: 16/07/2024