Nowadays, I use analogue photography for 90% of my Street Photography, with the only exception being when it’s raining outside and I don’t want to get my analogue camera wet, so I use my digital one. Usually, I use black and white film stock, but this summer I really felt the urge to shoot some colour film. I checked the usual online shops and noticed how much more expensive colour film had become compared to when I started shooting film around 4 years ago. I was very sad about these prices and wasn’t sure if I wanted to spend at least £12 for a single roll of 35mm colour film stock.
The discovery of something new and wonderful to me
Then, one day, while reading a book called ‘Old School Photography’ by Kai Wong, I learned something really cool. I don’t think the book is particularly good, but he mentioned over there that Cinestill 800T is simply Kodak Vision3 500T, which is a motion picture film, with the ramjet layer removed. Naturally, I immediately headed to Google to see if this film was available for purchase, and to my surprise, it was. In fact, there are a handful of people here in the UK who respool this film from bulk rolls and sell 36-exposure 35mm cassettes for around £7. This was an amazing discovery as it offered the possibility of shooting colour film for the same price as black and white.
The catch
However, there is a tiny little “catch”. Kodak Vision3 film stock is supposed to be developed using the ECN-2 process instead of the standard C41. Because the ECN-2 process is not commonly used, the cost of getting a film developed using this chemistry is much higher than C41, and the turnaround times tend to be at least two weeks for most labs. Additionally, this film comes coated with a so-called “ramjet” layer on the side opposite the emulsion, which basically means that it cannot be developed in standard minilab machines, at least not without removing the ramjet layer first. Since Kodak Vision3 is designed for motion pictures and not stills, this ramjet is put there to protect from light piping, base scratches, static, and halation of highlights during exposure recording. The good news is that this ramjet layer is removable, and Kodak Vision3 can be developed using C41 at the expense of colour shifts and increased contrast (this is called cross-processing).
The solution
My first thought after learning all of this information was that if we are limited to a more expensive and slow process like ECN-2, then the advantage of paying less for the roll is defeated when it comes to development, as we would be spending the money we saved on the film in the developing process anyway. Hence, I started a quest. I wanted to find out how different the results really are between developing Kodak Vision3 film using C41 instead of ECN-2.
The experiment
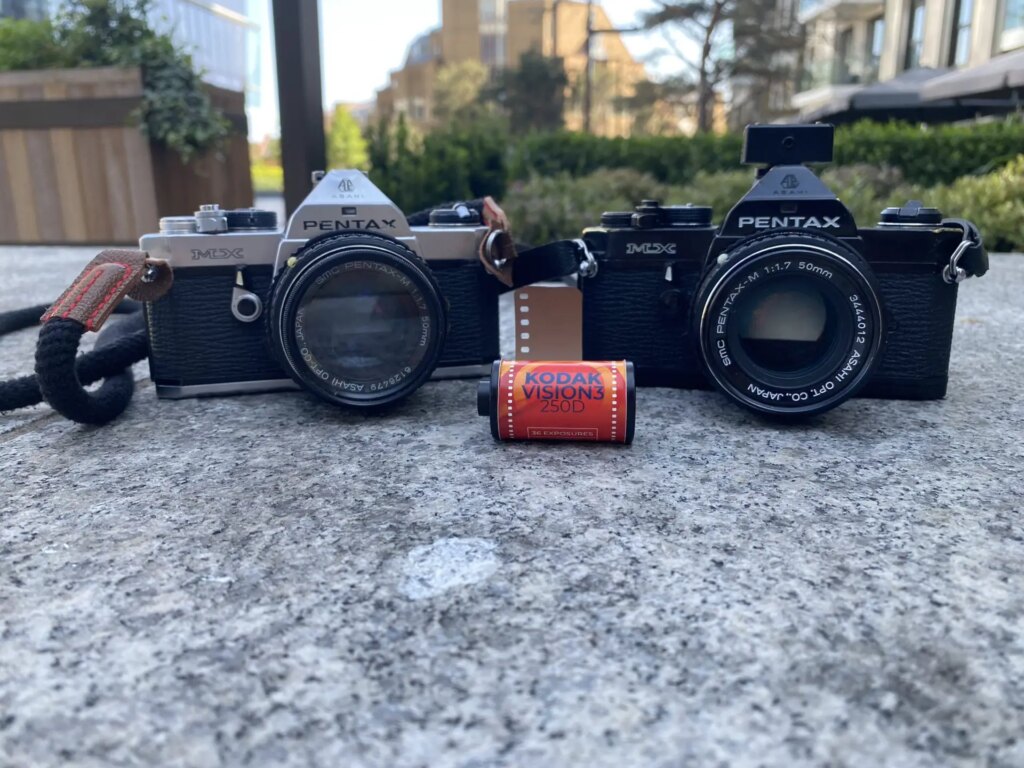
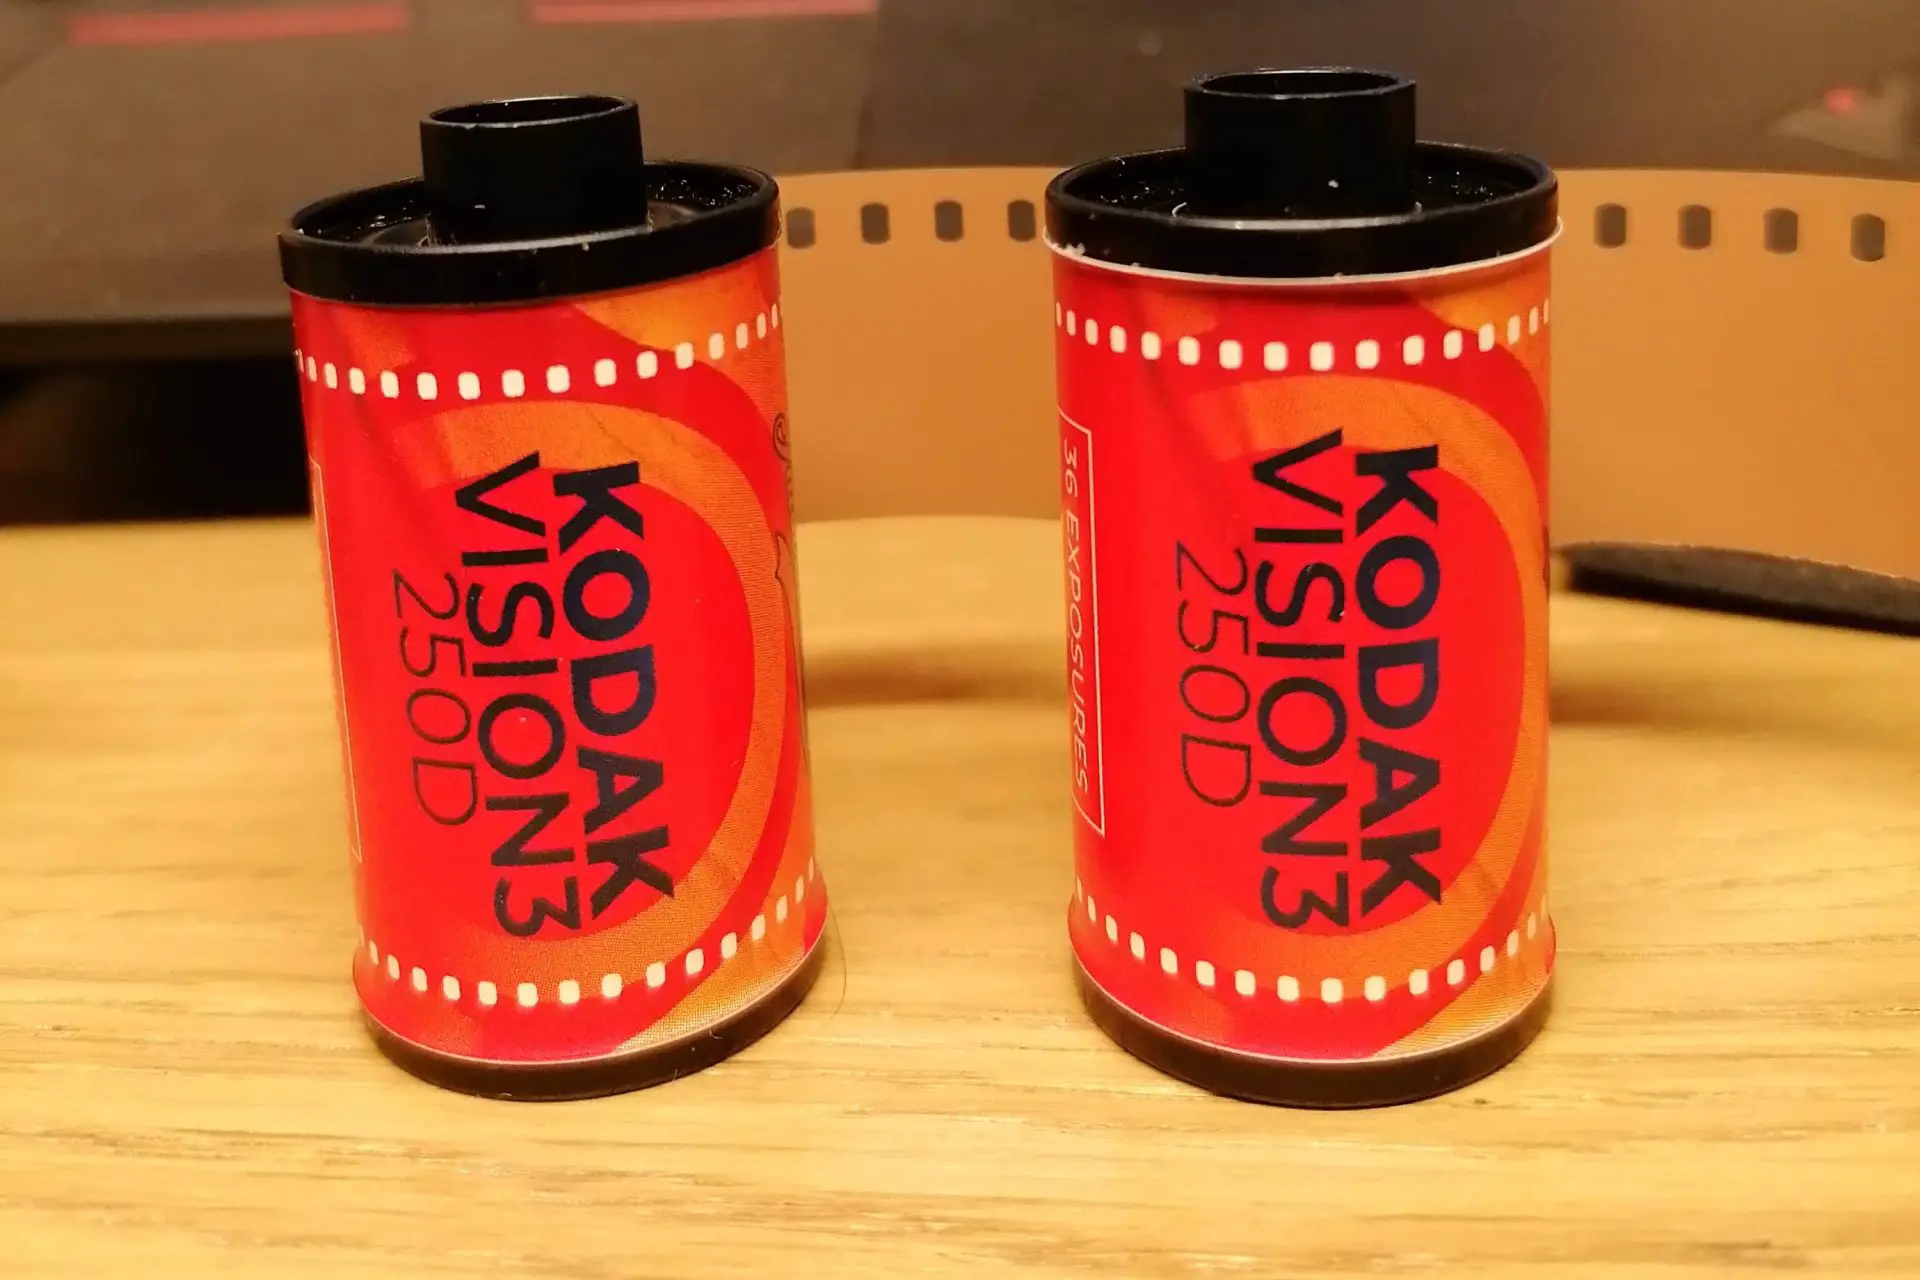
I geared up for the experiment. I purchased two rolls of Kodak Vision3 250D and put one in each of the Pentax MX cameras that I own, both with the same 50mm prime lens. I then headed to London and took the same scene using the same exposure settings. So, same film, same cameras, same lens, same scene, and same exposure. I took around 10 photos like this and then finished the rest of the rolls with other photos. Finally, I sent one of the rolls to a lab to be developed using ECN-2, and I developed the other one myself at home using the C41 process, of course, after learning how to remove the ramjet layer myself. But that is a story for another day. If you would like me to write about the procedure I used and what I have learned in the process so far, let me know in the comments section, and I will write an article about it.
The results
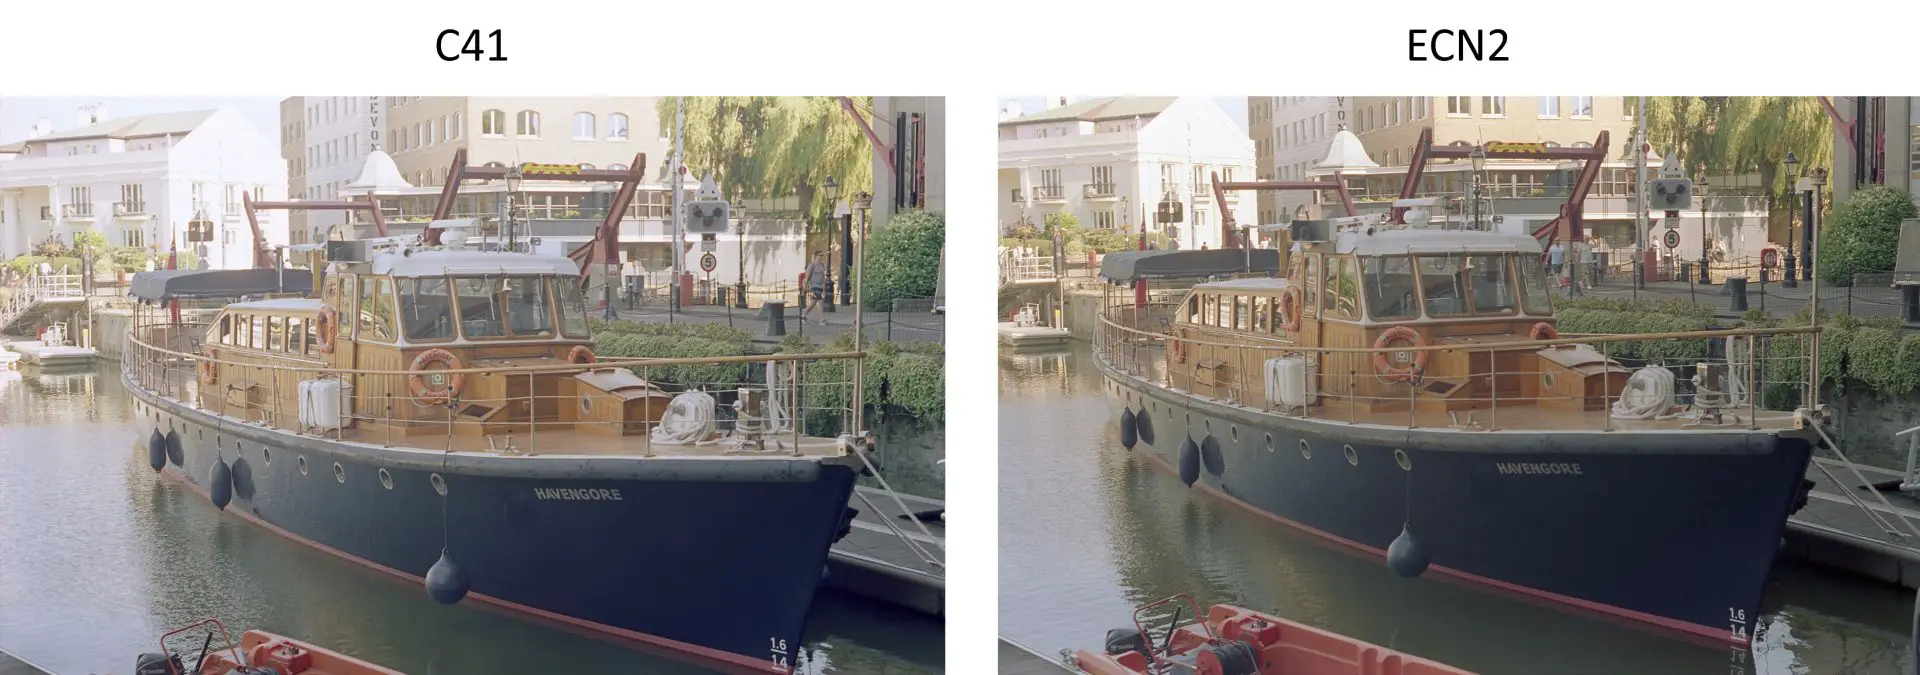
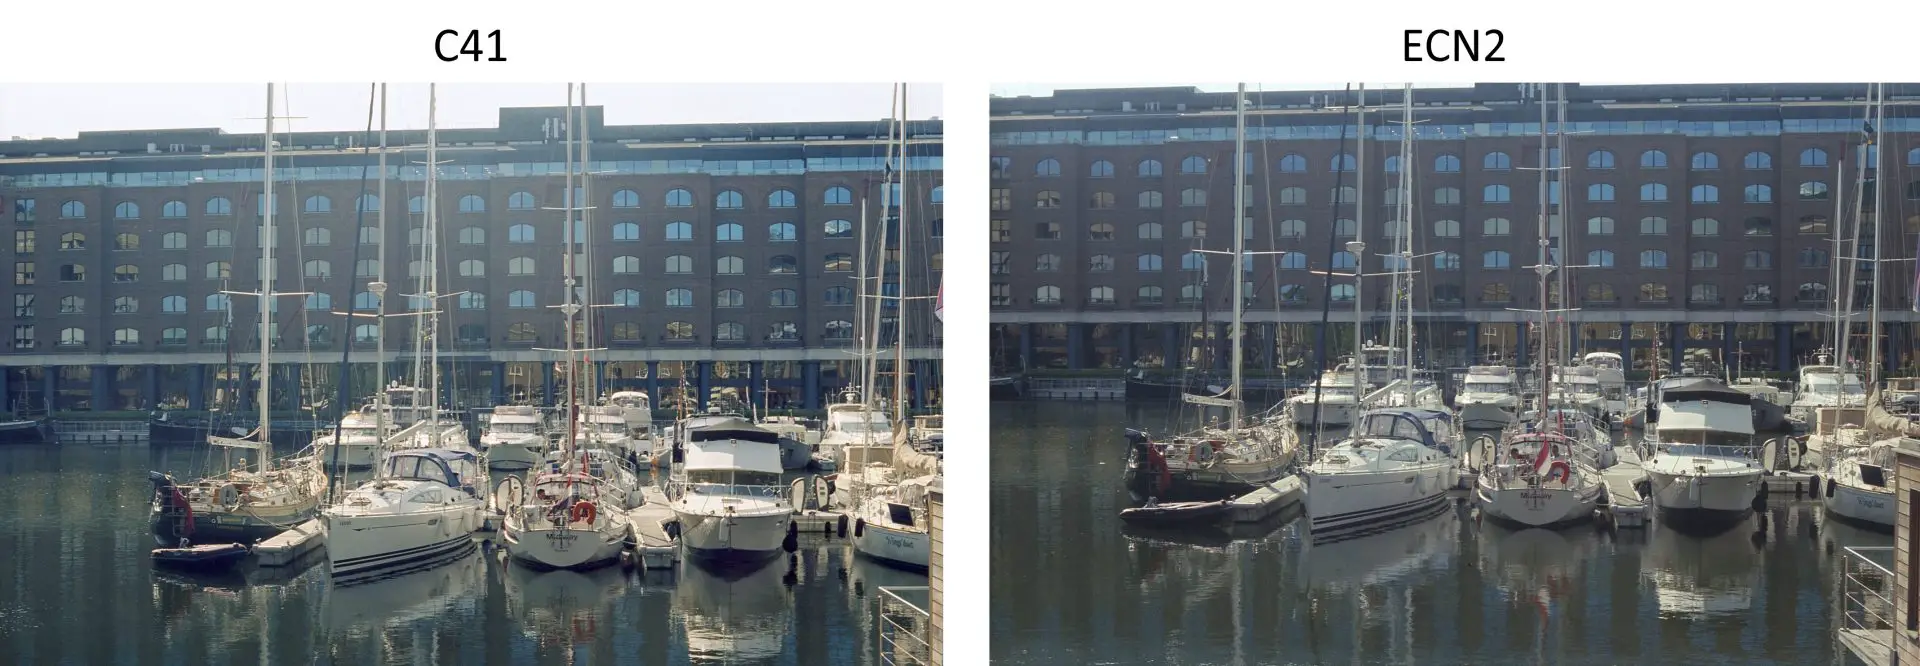
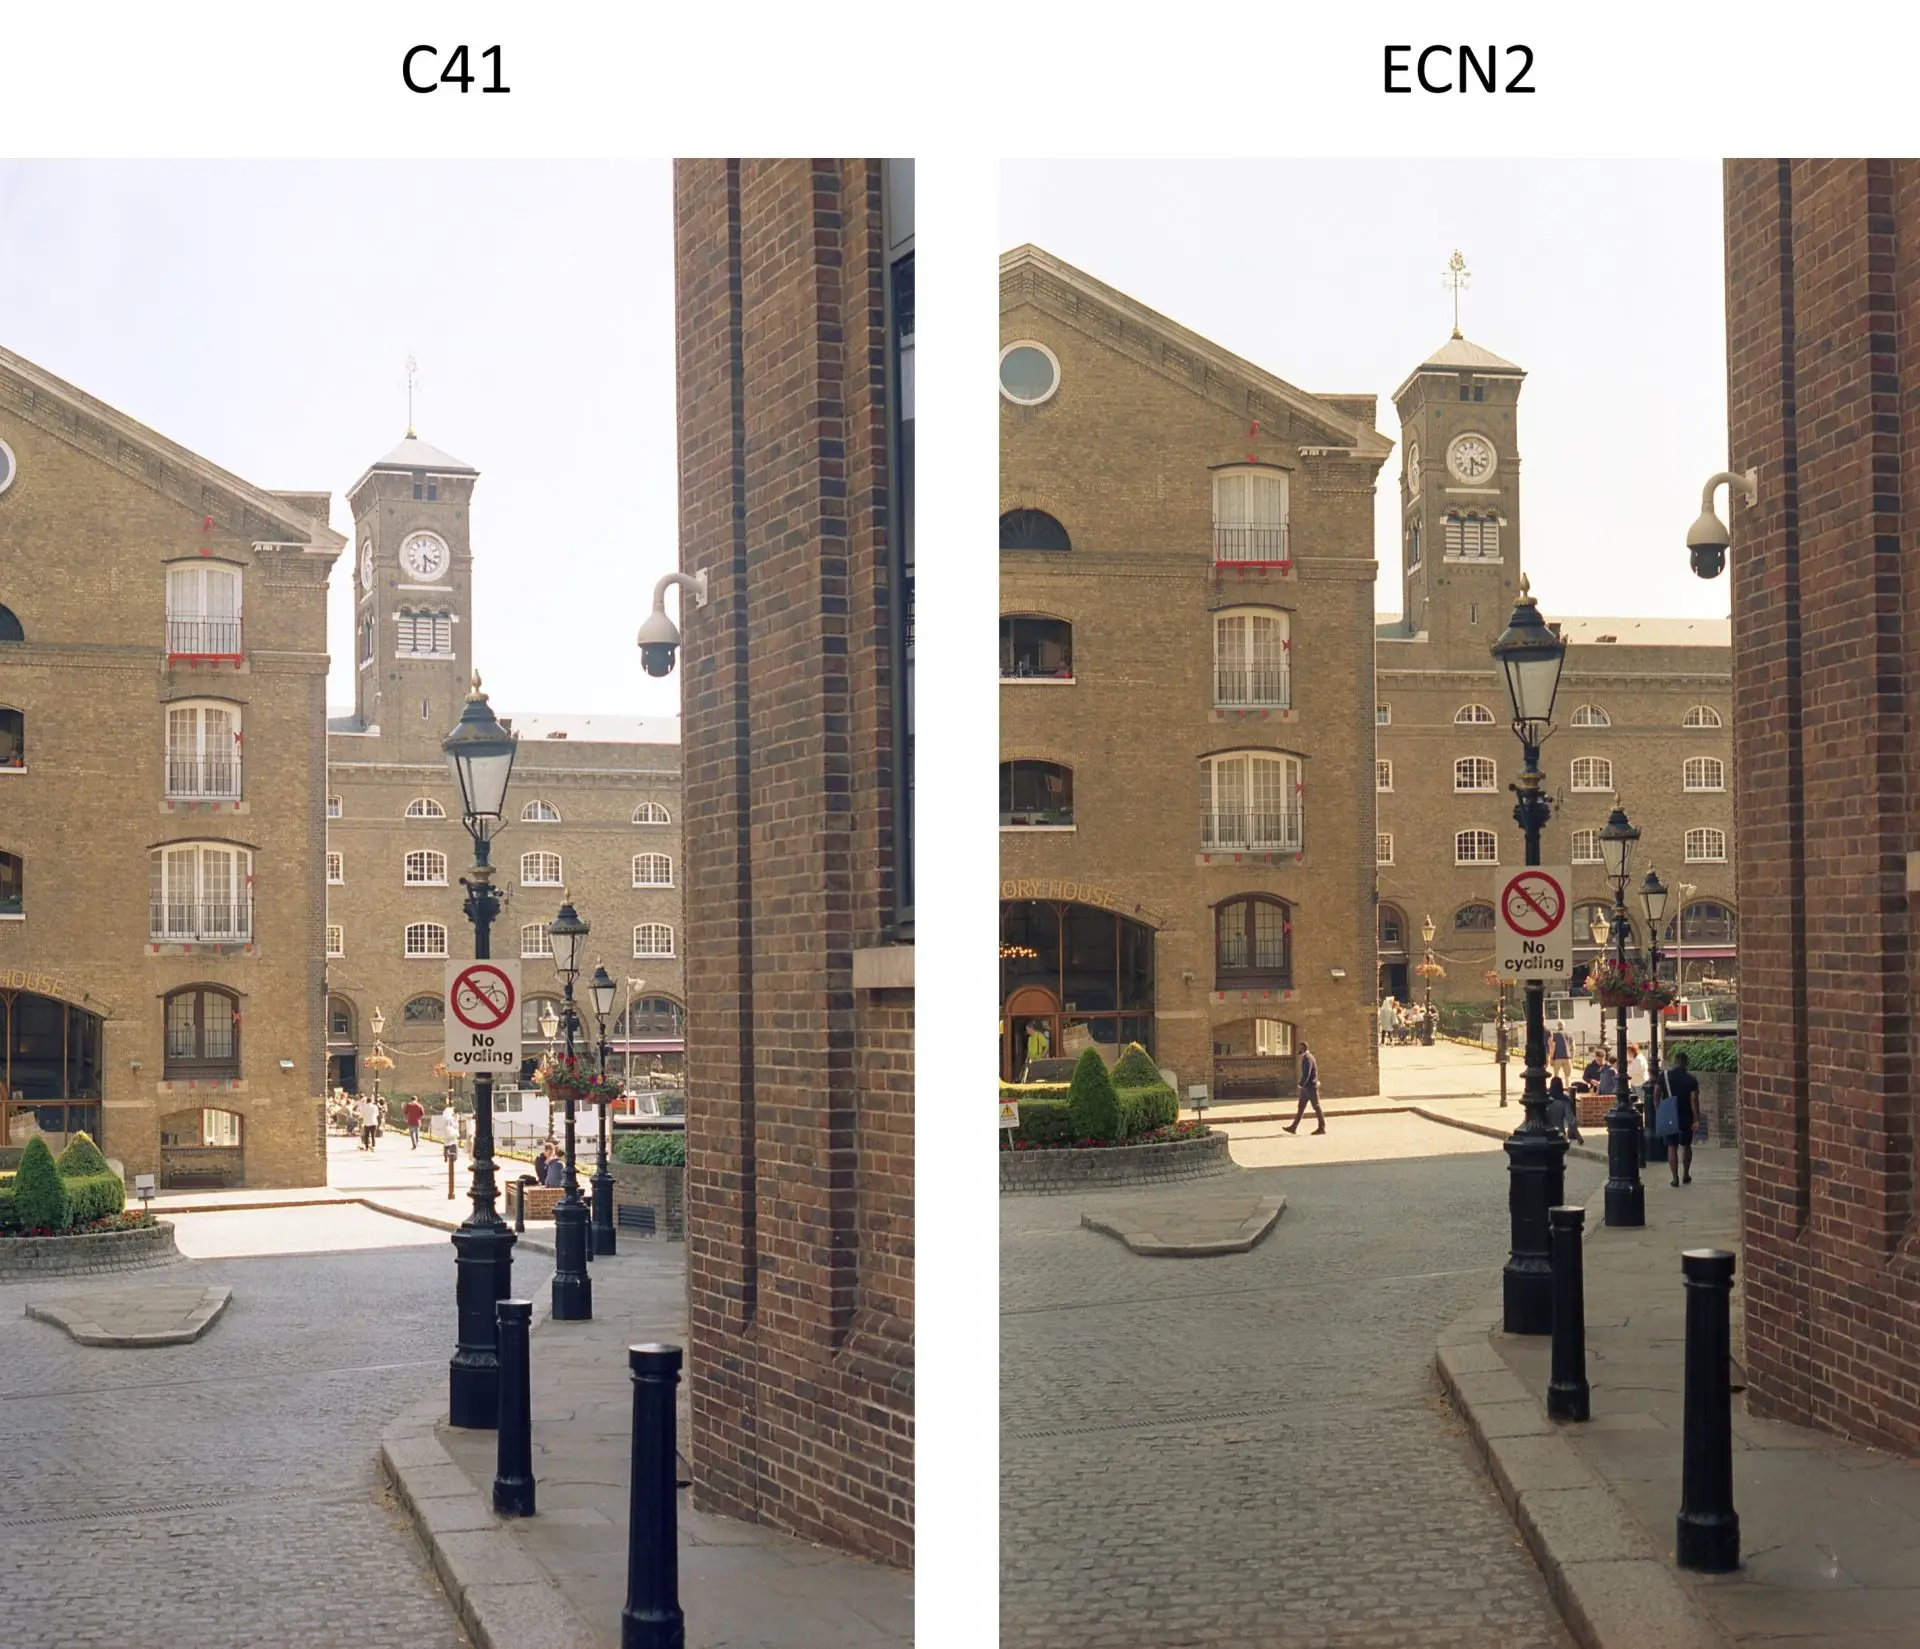
I was very excited and had great expectations when the ECN-2 negatives came back to me to see how different (or similar) the photos were. I scanned the negatives at home using my Epson V500 flatbed scanner. In the photos below, you can see some of the initial results. Initially, I did not change any settings for the scanning, so these examples are exactly how the photos came straight from the scanner.
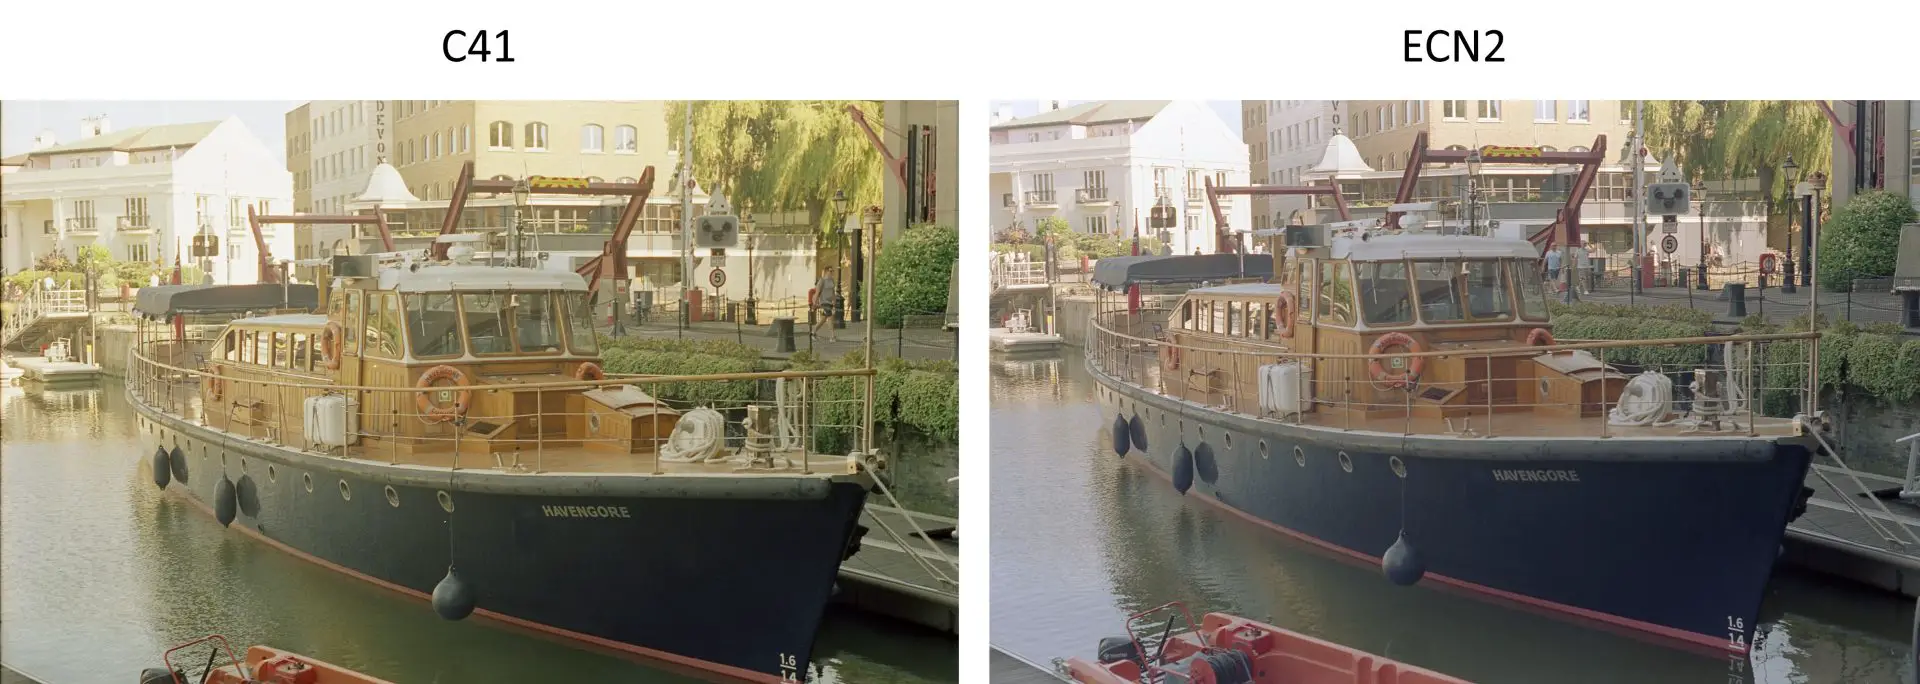
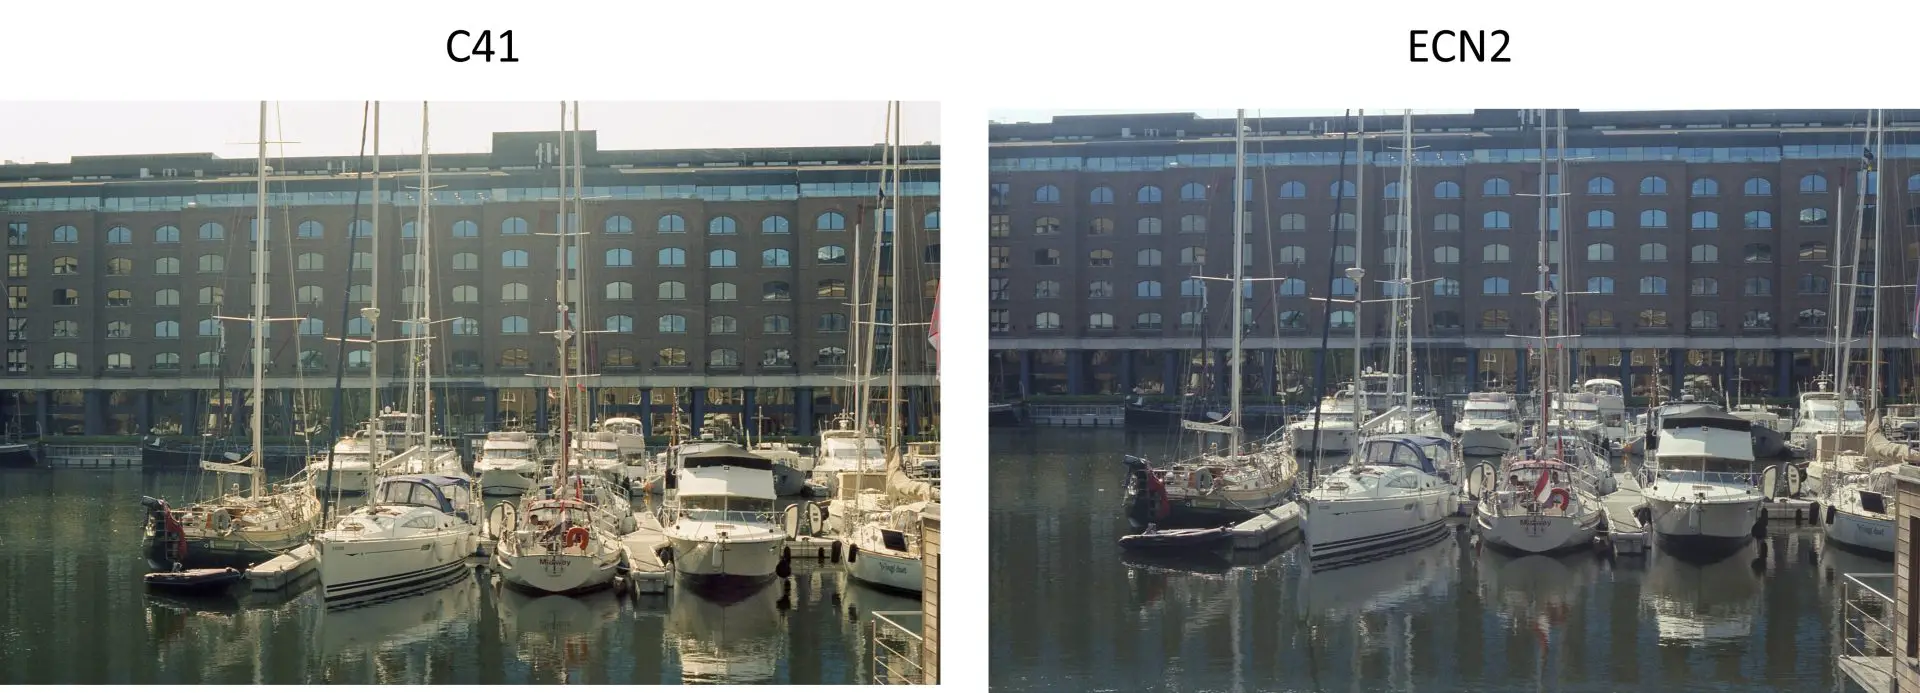
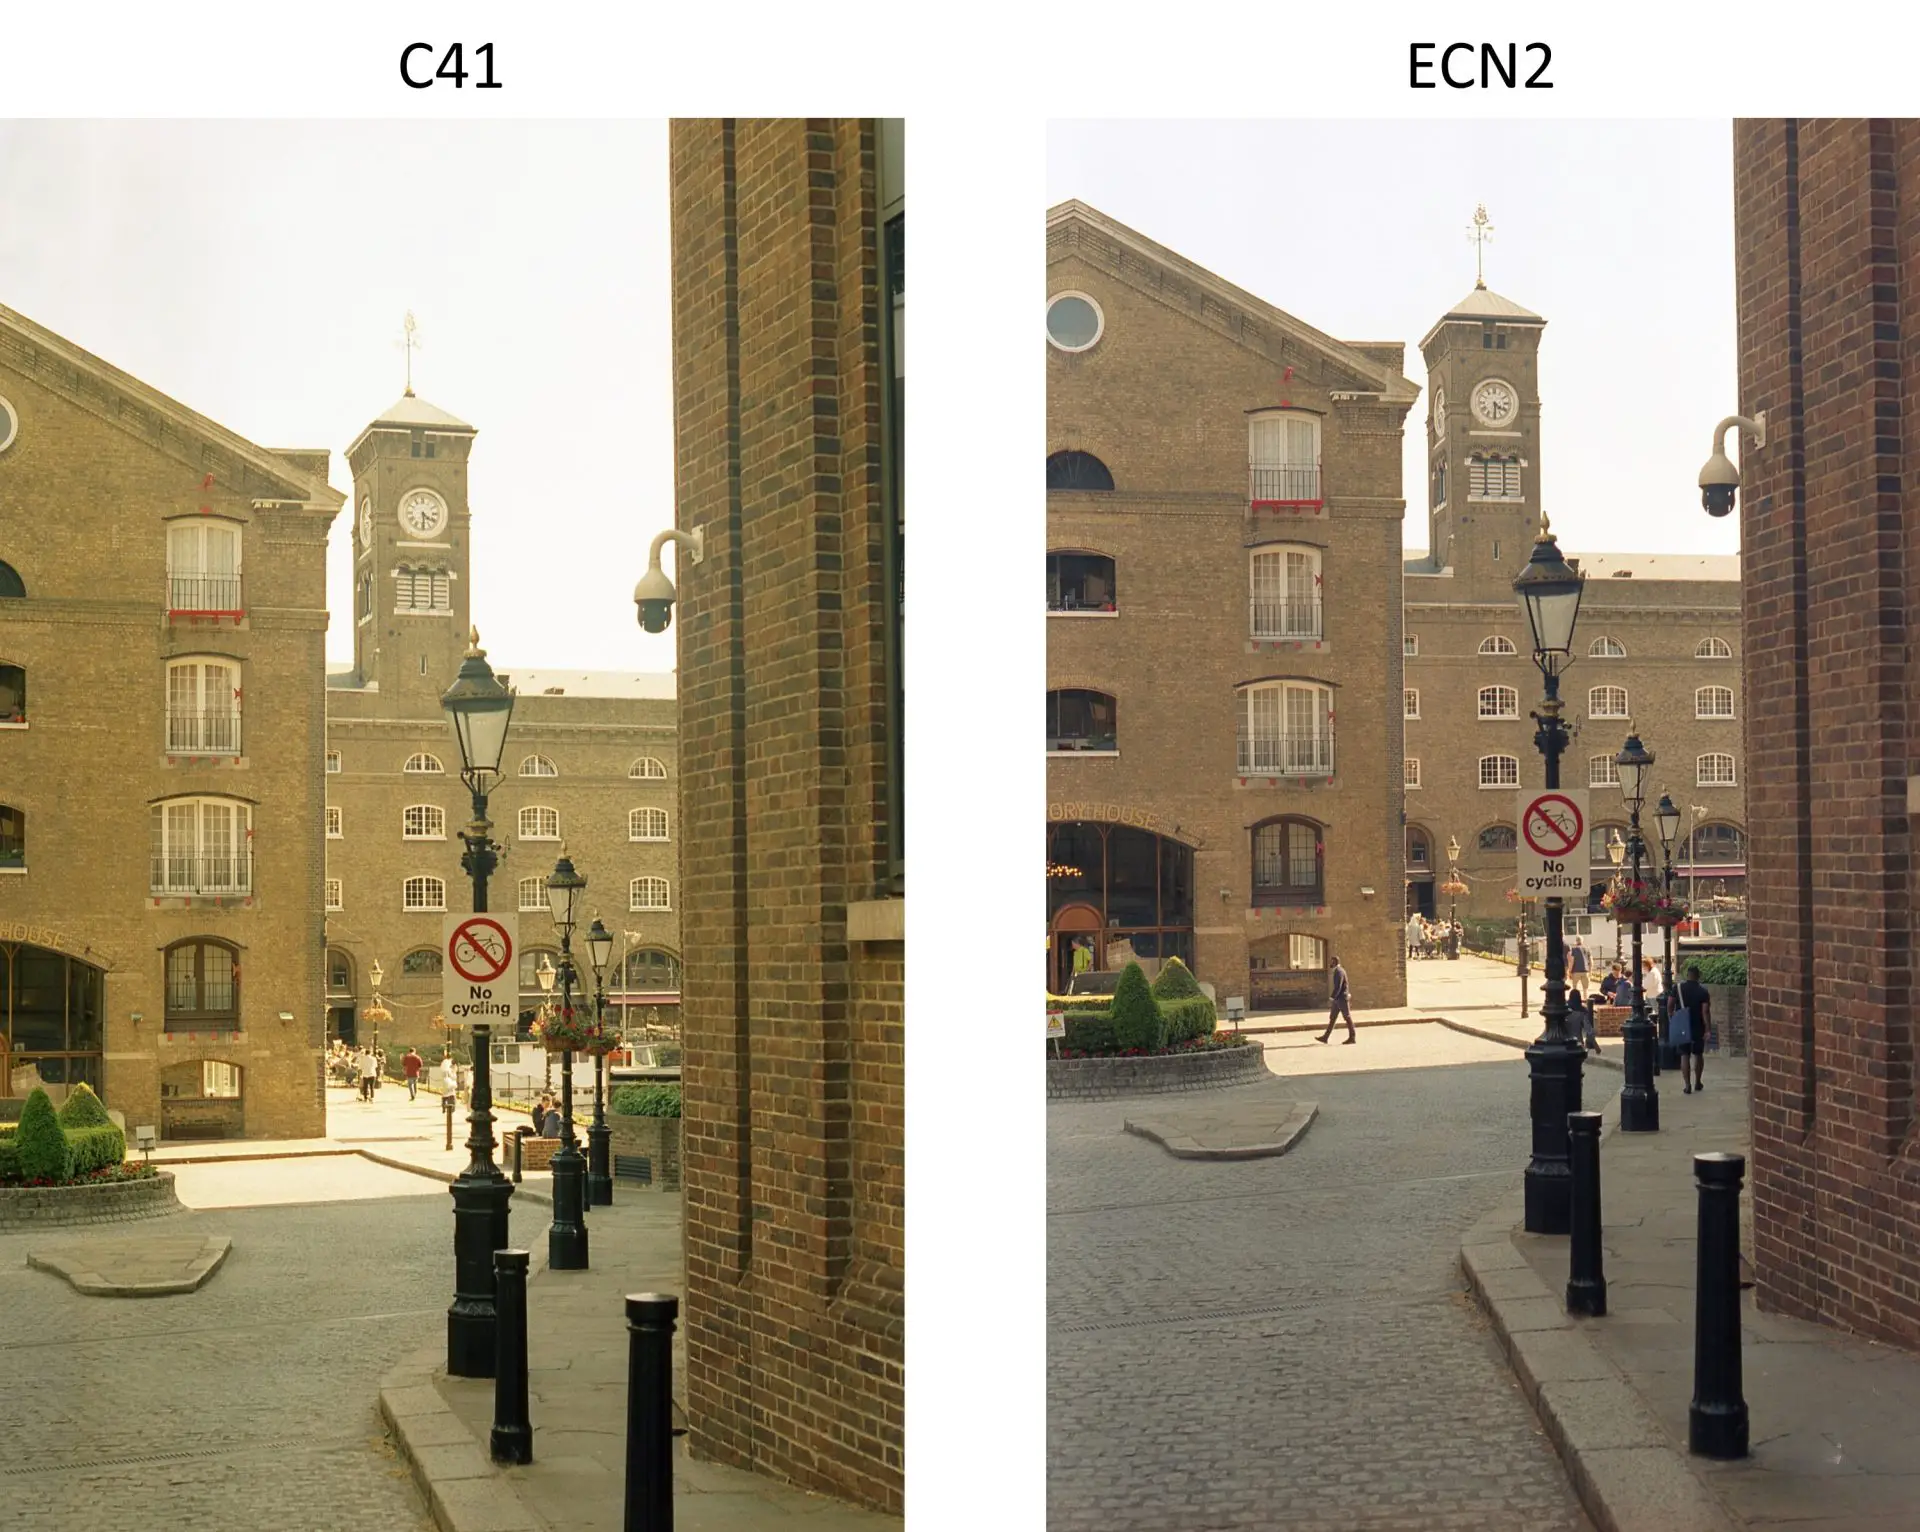
The first thing you might have noticed is that the photos developed using C41 have a yellowish hue compared to the ones developed using ECN-2. They also seem to be a bit more contrasty, and some of the details seem to have been lost in the highlights. I then scanned the negatives developed using C41 again, but this time I did a bit of minor colour correction. The results will surprise you.
The results with a bit of colour correction
As you can see in the comparison below, the results are extremely similar after adjusting the colours a bit during scanning. I didn’t do much tweaking at all; I just modified the yellow hue towards the magenta to make the photo less warm. This adjustment made the results extremely similar to me. So similar that after getting such results, I find it very difficult to justify using the more expensive and cumbersome ECN-2 process instead of the common C41.
The conclusion
In my opinion, Kodak Vision3 250D can be perfectly developed using the C41 process after removing the ramjet layer. After some minor colour adjustment (which is normally done while scanning and digitising negatives anyways), the results become almost indistinguishable from one another. It is true that using C41 generates a more contrasty image and some of the details are lost in the highlights, and this makes sense as the film is designed to be processed using ECN-2 to get the optimal results. However, for hobbyist and amateur photographers like most of us, I find it difficult to justify using a more expensive process. If you are doing a movie production with Kodak Vision3 and you are spending thousands of pounds on the movie, like in Hollywood, then of course, it makes sense to use ECN-2. But for most of us, the C41 process seems to be more than perfectly fine. And this is great because it makes this film stock feasible and accessible for all of us to use.
If you would like to know more details about my experiment comparing Kodak Vision3 250D developed using ECN-2 vs. C41, I made a YouTube video about it that you can watch on my channel by clicking here.
My Instagram
You can learn more about my work in my Website.
Truly yours,
Armando Caballero – Street Photographer.
Share this post:


Comments
Armando Caballero on My First Time using Kodak Motion Picture Film – ENC-2 vs. C41.
Comment posted: 17/08/2023
Comment posted: 17/08/2023
Comment posted: 17/08/2023
Comment posted: 17/08/2023
Comment posted: 17/08/2023
Don Goodman-Wilson on My First Time using Kodak Motion Picture Film – ENC-2 vs. C41.
Comment posted: 17/08/2023
Looking at the negatives, do you see much different in the contrast?
Comment posted: 17/08/2023
Comment posted: 17/08/2023
John Squillace on My First Time using Kodak Motion Picture Film – ENC-2 vs. C41.
Comment posted: 17/08/2023
Comment posted: 17/08/2023
Comment posted: 17/08/2023
Dirk Saeger on My First Time using Kodak Motion Picture Film – ENC-2 vs. C41.
Comment posted: 17/08/2023
you might want to check out silbersalz35. They sell 4 rolls of Kodak cinevision for €87,60 including scan and web-upload. For an extra 10€ you get your films scanned with Apollon 14K at high resolution. Chemistry is ECN2.
The 250D is not available at the moment, due to high demand.
Greets
Dirk
Comment posted: 17/08/2023
JP O’Connor on My First Time using Kodak Motion Picture Film – ENC-2 vs. C41.
Comment posted: 17/08/2023
For those unable to do their own processing, Atlanta Film Co. working with Dunwoody Photo and Kodak Film Lab Atlanta offers short roll ECN-2 processing and scanning. They will cross-process Ektachrome (E-6) in ECN-2 as well. They offer all the Eastman cine stocks, including Ektachrome color reversal and Double-X black and white in 135 format, along with some other interesting current and future offerings, and international shipping. Search the company name here on 35mmc for several articles on their activities and offerings.
https://www.35mmc.com/26/09/2022/atlanta-film-co-offers-new-cinema-film-and-ecn-2-processing-in-same-lab-as-major-motion-pictures/
Comment posted: 17/08/2023
Patrick on My First Time using Kodak Motion Picture Film – ENC-2 vs. C41.
Comment posted: 17/08/2023
Comment posted: 17/08/2023
Vlad Serebryany on My First Time using Kodak Motion Picture Film – ENC-2 vs. C41.
Comment posted: 18/08/2023
Comment posted: 18/08/2023
Ryan Barrett on My First Time using Kodak Motion Picture Film – ENC-2 vs. C41.
Comment posted: 19/08/2023
Lower contrast due to dye coupling reactions as the film then needs to be contact printed to positive reel.
Again, difference in dye coupling due to CD-3 vs CD-4, partially responsible for yielding different colour temperature target as the processed reel will go on to be colour graded.
Slight emulsion differences also account for part of the above. I am not sure whether it's just chemical, or even physical eg something that we could see in a microscope compared to C41 targeted films.
The anti-halation layer, while removed in processing, does have an effect on colour exposure, as inner reflection and refraction will be attenuated whereas in non backed films there could potentially be a colour shift. That said, the remjet layer still reflects some light and the conventional thought is that it acts mostly on the red layer.
pH and temperature:
I don't know if you've ever test processed a roll of Kodachrome into B W, but you can follow the same process and use borax or baking soda or lye even to increase the pH and it will come off more easily. You can also just blast it with water if you really don't have another method to get off the last bit of gummies. Some people increase temp a bit too. I don't know if that matters as much as the pH of the rinse though. Here's a bit more info https://www.photrio.com/forum/threads/removing-rem-jet-for-ecn-ii-films-and-kodachrome.92959/
Yeah, this is a bit of a ramble, but it might help, eg a hybrid process using CD-3, or keep some of the chemistry differences in mind and even adjust pH and temp slightly to compensate during development. I don't see enough of that suggestion in home darkroom discussions, but in my opinion it's worth considering for anyone who is experimenting.