What wondrous place is this? And why am I here? I’ve used all sorts of cameras in my time: SLR, TLR, viewfinder, rangefinder, box, pinhole, monorail, Schmidt (this one, for the curious) and yes, even 35mm compact, but the latter isn’t my home territory. Still… y’know… Hamish’s infectious enthusiasm and all that… Anyway, here’s a tale of a modest little camera that eschews almost all of the technology found in modern cameras (even more basic than an LTM…), and it just about fits the ethos of this blog.
My first camera—a Box Brownie—had an aperture around f/11. Next came Dad’s Yashica-Mat, a TLR with an f/3.5 taking lens. After that, an old Praktica mated with an Industar-50-2 3.5/50. A little later, I bought a Nikkormat FT3 and adorned it with a Vivitar 35mm f/2.8 and a Tamron 105mm f/2.5. Somewhere along the line I acquired a Vivitar 28mm f/2, which was fast but fuzzy wide open. Eventually, I managed to plonk the famed 50mm 1:1.4 S.S.C. on my FD mount Canon EF; aperture fever had gripped me.
In the late ’70s, I came across pinhole photography, while taking an applied photography course, but I don’t recall whether it was part of the course or just something I found along the way. I had found the ultimate antidote for aperture fever! I borrowed a college 5×4-inch Arca and shot a few landscapes, but those pictures are long gone, I’m sad to say. And that, apart from a brief experiment with some pinhole-pierced aluminium foil and a Pentax S1a, was the extent of my foray into the world of lensless imaging for nearly two decades.
Fast forward to the late 1990s, and the end of my employment in the Photolabs at the Royal Observatory, Edinburgh. I had served that august establishment for over 15 years and was by then bored senseless. To while away the time between exposure tests and other mundane matters, I set about creating a pinhole camera or three, and rekindled my interest. However, a few months later I finished work there and lost access to a fine suite of darkrooms, which meant that processing & printing my own work became effectively a thing of the past; unfortunately my shooting also tailed off and became almost non-existent for another decade or so until I started dabbling with the new kid on the block, digital imaging.
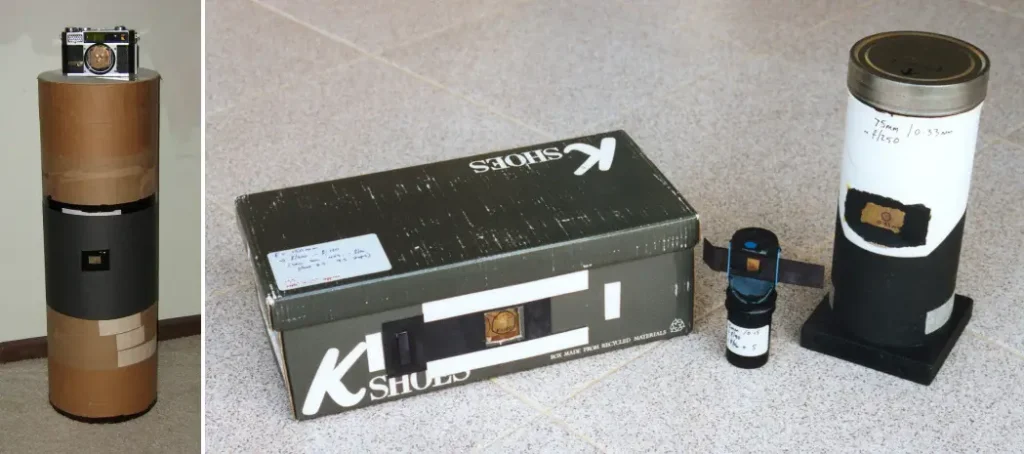
Amusing though digital was, it wasn’t long before the itch to play with film, paper and chemicals needed to be scratched and I started to tinker again. I had a bottle of HC110 somewhere, and brought it into service (oh, the sheer, unalloyed delight of using film again). It was just a matter of time before I veered back towards pinholes, so I dug out some of my creations. My biggest camera (giant mailing tube about 8 inches/200 mm diameter) took a whole 20×16-inch sheet of enlarging paper; the smallest, 10 sprocket holes of 35mm film. Each had a pinhole to suit, based upon calculations that took focal distance and diffraction into account, for a perfect balance. In theory, anyway. The giant was now useless to me, as I couldn’t process paper that size any more, and the tiddler was pretty fiddly to use, so I avoided that too.
One of the cameras was a smaller mailing tube that took a 9×8-inch sheet of paper, which I could process easily in my old Cibachrome drum, but one of my favourite pinhole cameras is a shoebox, kitted out with a ‘focal plane’ that forms about 155° of a circle. [There is no focal plane in pinhole photography, of course, as everything is equally in—or out of—focus, and given that what you might call the focal surface is curved, focal plane is also something of a misnomer. However, pedantry aside, we all know what’s meant by the focal plane, so I’ll stick with that.] The ability to step outside the limitations of the conventional flat focal plane is one of the appeals of pinholing, for me. To use a curved focal plane—either for distortion or for extreme wideangle shooting with curvilinear image geometry and very little fall-off in illumination from edge to edge—is one of the unique benefits available with a pinhole camera.
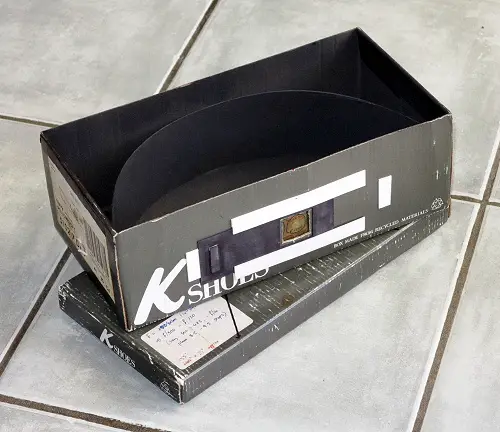

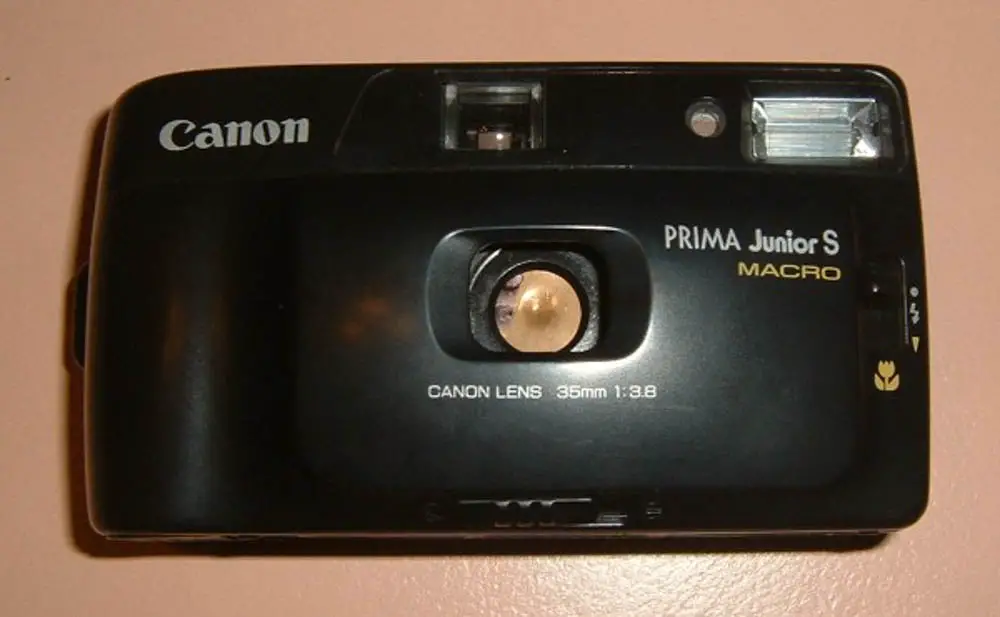
However, it has to be said that having to reload after every shot is a bit of a nuisance, so I looked at ways of giving myself more than one shot per load. One incarnation, which never went beyond an imperfect prototype, was a 120 camera with the film wrapped around the inside of a large mailing tube; it produced negs approximately 6x13cm and satisfied the more-than-one-shot spec, but there were problems that I never got around to solving. Eventually I rummaged around in the discarded cameras (you know the ones) in a charity shop, and found a likely candidate for modification: a basic point-and shoot Canon; this would become a multi-shot pinhole camera, easy to load, carry and use.
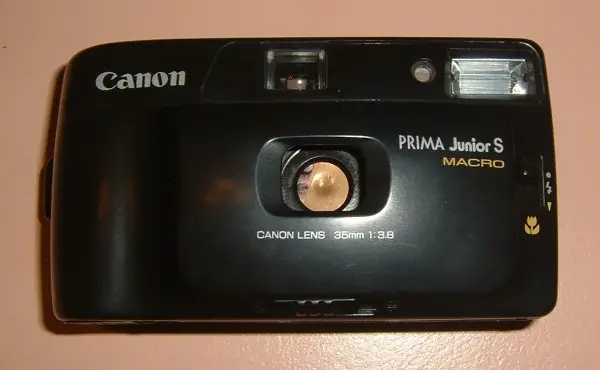
The first thing was to open it up—which I can say, after having opened numerous moulded plastic appliances, is not often easy if you want to avoid destroying the thing in the process. The second task, after opening the body, was to disable the flash capacitor. (I’d advise you never to discharge one of these into your body; they are large capacitors, and the effect is fairly unpleasant—as I’d found in a careless moment during a previous camera-dismantling endeavour.) I first fired the flash normally, then made sure by shorting the capacitor contacts with a stout plastic-handled screwdriver, before simply cutting the wires with ordinary scissors; this worked for me, but I give no warranty for anyone else to do likewise: do it at your own risk.
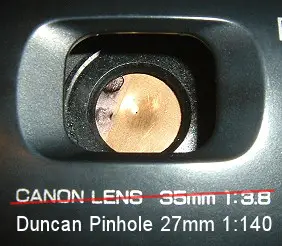
With it being a no-frills point-and-shoot, there was not much involved in taking it apart and installing the pinhole, so I was able to keep the power wind and frame counter, which are very handy. In fact the only thing I removed was the lens and shutter assembly, leaving the sliding lens cover as a functional shutter.
The pinhole was made from some thin brass sheet, according to my standard method for making a precise pinhole. The simplest method is to take a piece of aluminium foil, and stick a pin through it; that will certainly give you a pinhole. However, I like to optimize the pinhole size for the camera: a short focal distance needs a smaller pinhole than a large focal distance (there are various formulae that give similar results, and an online search will bring up a few for you), and an actual pinhole is too big for, say a 25mm focal distance. Of course, producing a specific size of pinhole is easier said than done, and is not absolutely necessary, depending upon your artistic intent and preference, but I have some equipment that is a great help.
First, a brief explanation of good pinhole design. (If using very thin metal foil, then you can ignore the following, but the thicker the material you are using—and some folk simply drill a hole in a body cap—the more important it becomes.) Think of a pinhole as a hollow cylinder: the longer the cylinder, the more restricted the view when you look through it. If the material is fairly thin, then the field of view will be wider, but still limited. In practice, this doesn’t simply affect the actual field of view of the camera, but causes vignetting towards the edges of the image; to some, this is to be desired, but if you want a very wide angle photograph, it’s not ideal. So, by making a ‘pimple’ in your metal sheet, then grinding the top off the pimple, you can have a far wider unvignetted field of view:
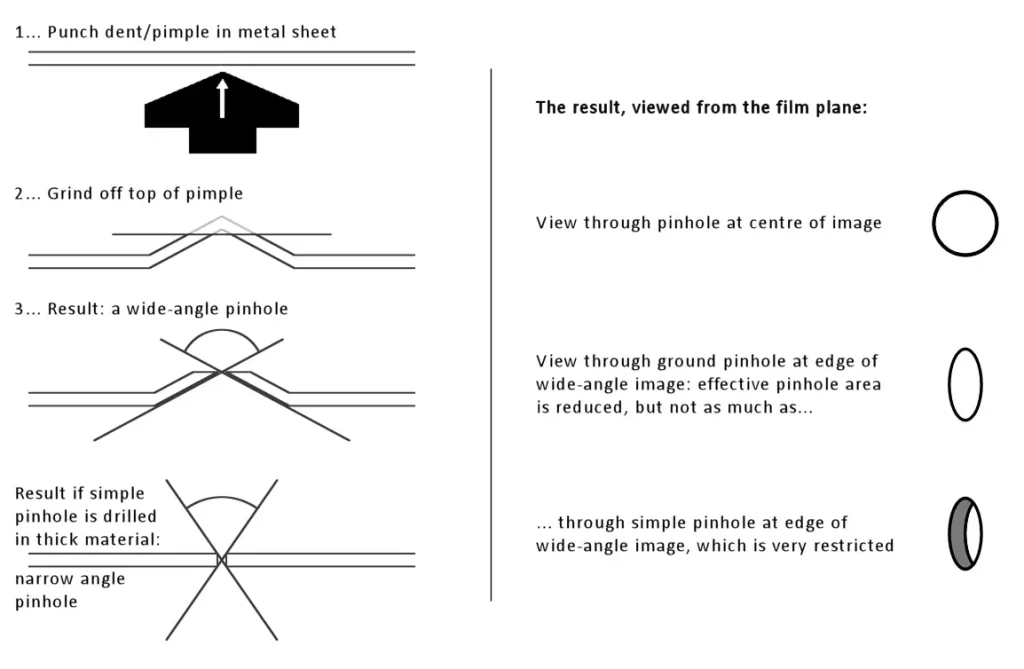
To make the pimple, I use a large bolt with the head ground to a shallow cone (put a bolt in your drill chuck, and ‘drill’ against a grindstone to get the conical profile). Then use this conical head to dent the metal sheet: support the sheet with thick card or timber and tap the bolt with a hammer to get a good-sized dent. Turn the sheet over and using a grindstone then fine emery paper, take the top off the pimple; I finish the hole with grade 1000 ‘crocus’ paper, but this is probably overkill.
I used to use brass sheet but found it hard to get a very small pinhole (~0.25 mm), as the soft brass deforms before it breaks through, which gives you a large ragged* hole. My preference now is the lid of an empty cocoa tin**; that metal is harder and breaks through more cleanly. You just need to judge how big to make the hole, so a magnifier and a fine reticule is useful, although I use a low-powered binocular stereo-microscope. If you have none of these aids, try using a needle, and push the point through the metal, but not all the way. One pinholer suggested using a needle with the tip snapped off, before the full width of the needle shank is reached, then using this to “punch” a clean hole hole in tinfoil.
* the smoother and more circular the whole, the sharper the image
** or Milo, Ovaltine, etc
So, back to the camera; does it work? The proof of the pudding is in the eating, they say… It gives just about as good an image as a small-format pinhole camera can, but it has pros and cons:
Pro:
- exposure times are short, which is good in low light
- the ‘shutter’ is easy to use
- the viewfinder gives the central field of view for a fair guide to aiming the camera
- wind-on & exposure counter work
Con:
- exposure times are short, which can be tricky in bright sunlight: about a second or so, with ISO-100 film
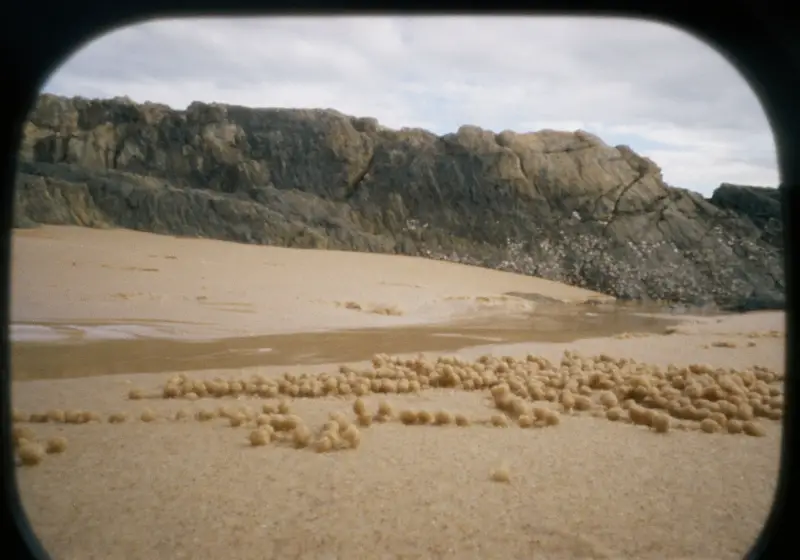
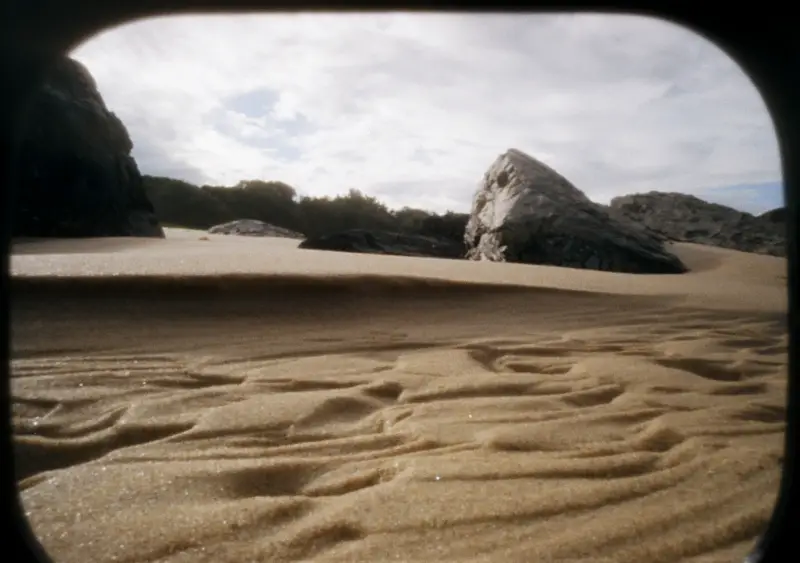
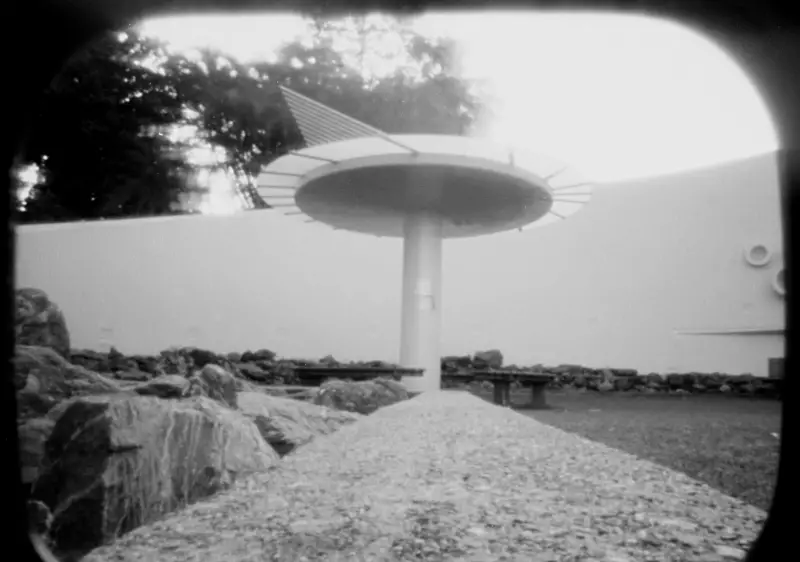
- the moulded aperture in the camera body creates a rounded rectangular vignette—which could be OK, but I did not centre the pinhole perfectly, so it’s an unbalanced vignette
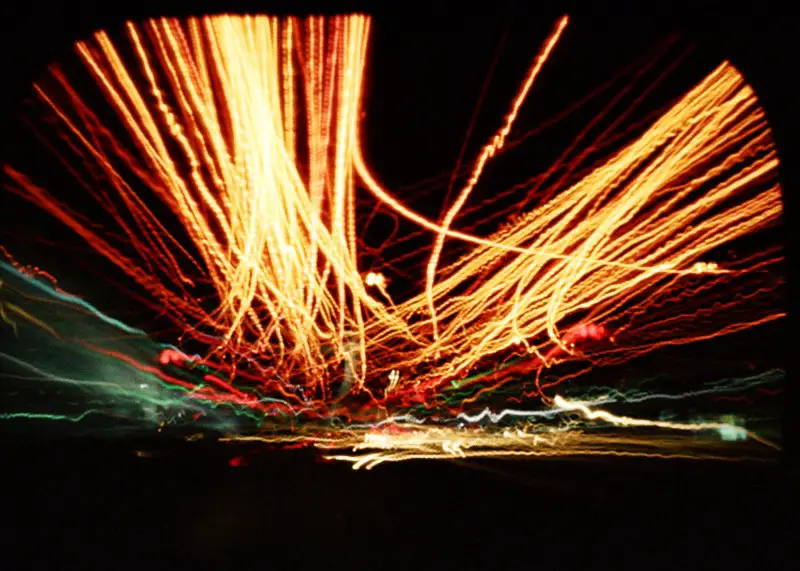
Here are some of the photos I’ve managed to get with this camera. Ultimately, one man’s art is another woman’s rubbish, and this may never be more true than with pinhole photography: you have to look beyond the temptation to say “hey, it’s a pinhole photo; no lens, just an f/gazillion pinhole”, and judge whether it’s a good image, regardless of how it was taken. But that’s photography all over.
Next: the Travelling Pinhole project…
Share this post:


Comments
Hamish Gill on The Road to Making a Pinhole Modified 35mm Compact Canon Camera – by Duncan Waldron
Comment posted: 19/01/2016
Looking forward to what's next now! :)
ehpem on The Road to Making a Pinhole Modified 35mm Compact Canon Camera – by Duncan Waldron
Comment posted: 19/01/2016
In terms of making the pinhole - I have used the thin brass foil and an entomology pin. Entomology pins come in a variety of very fine and consistent diameters that are known. They are expensive in bulk, but I know an entomologist who shared a few. Lacking a microscope I checked the size (and roundness) of the pinhole by scanning at about 1200 dpi (if I recall correctly), then I magnified the image on screen and counted the pixels. Not super precise, but serviceable. The higher the resolution the scan, the more pixels to count and I seemed to come out at pretty much the same place.
I very much like your explanation and diagram of dimpling the surface of thicker materials - a better explanation than any I saw when researching my pinhole making.
Comment posted: 19/01/2016
Comment posted: 19/01/2016