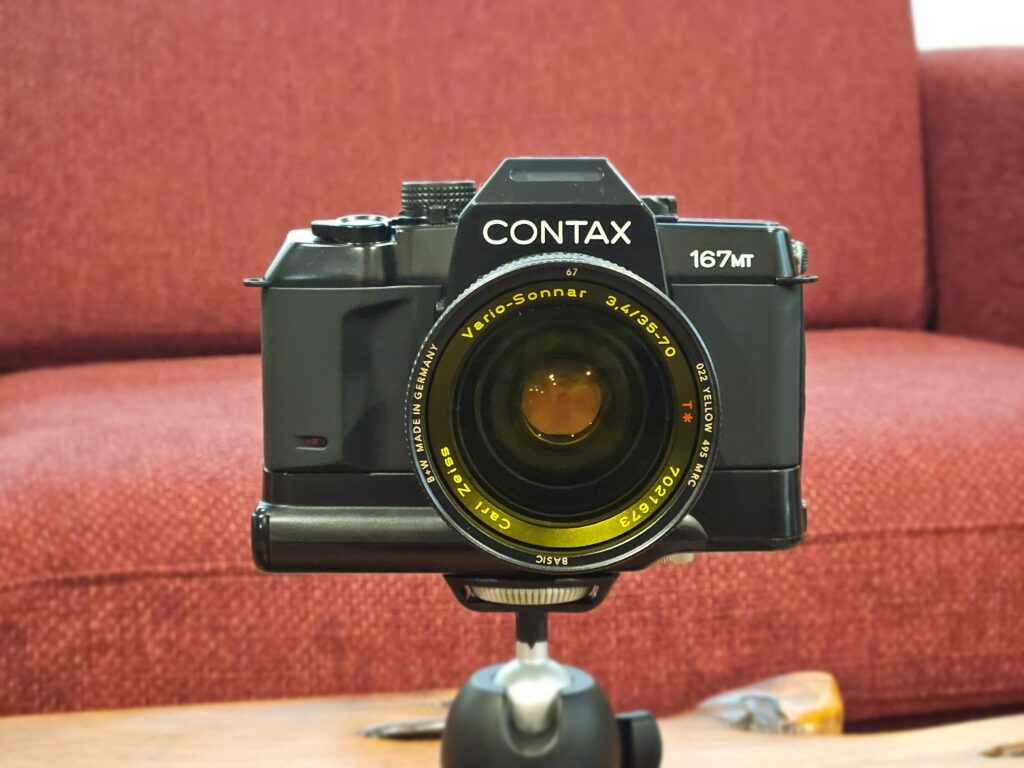
I am having a fascinating journey delving into 110 and 16mm subminiature formats with several ups and downs along the way and the accumulation of a surprising number of useful bits and pieces. If you have a look at my profile, all the episodes can be found if you would like to know how I reached this point.
I have also managed to get on top of most problems and learned a great deal into the bargain. The most useful episode for me has been making a device to strip 16mm wide lengths of film from larger formats to allow these intricate little cameras to show what they can do with modern materials and processing. Good as Lomography’s Orca monochrome film is, there are other emulsions that give finer grain and detail, but kodos to them for supporting the revival of the format with their range of films.
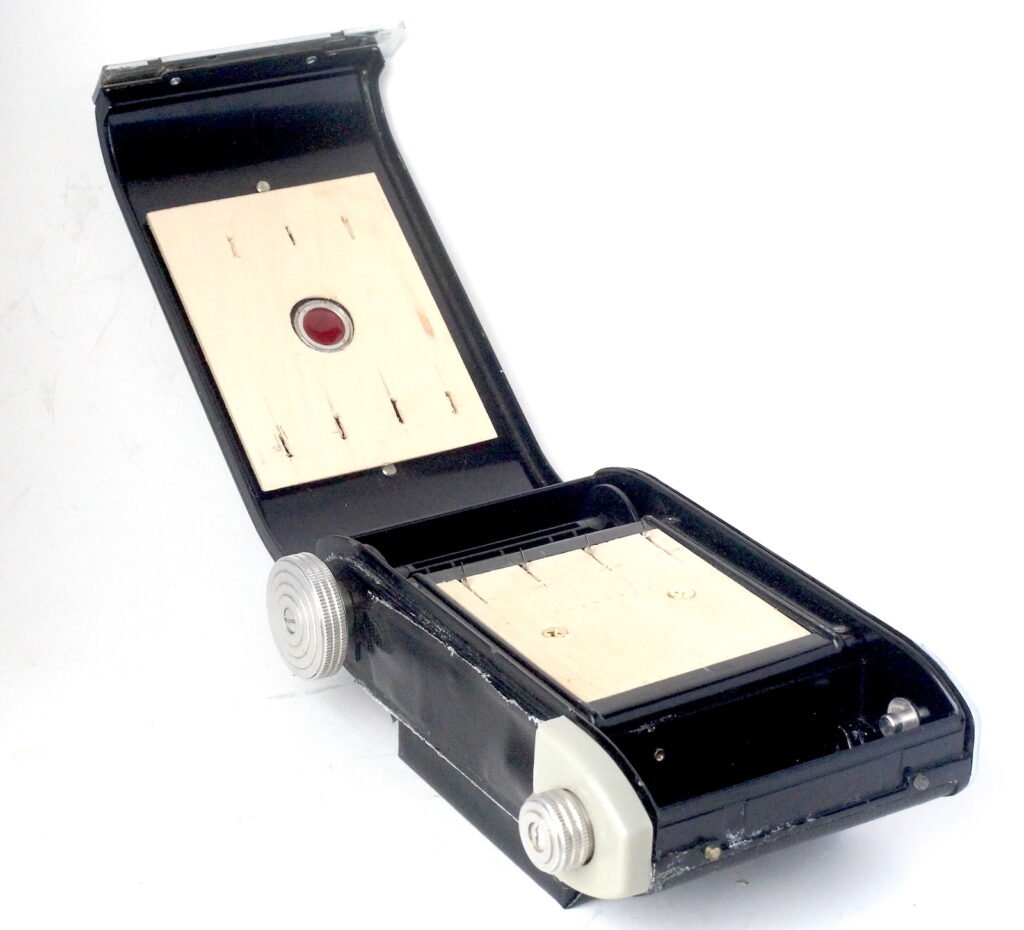
My original 120 film stripper is still the most economic option to feed my re-cycled 110 cartridges and reloadable 16mm cassettes. It allows the stripping to be done in the light with progress visible through the red window to check the frame numbers. Its 6cm width provides three 75-80cm lengths which match 110 length. Its main drawback, such as it is, is the need for some pretty careful handling and a disciplined workflow to keep the coils from tangling up in a heap and mixing up film and backing paper.
Learning from my early experiences I have worked out that, for 120, beginning the stripping just after the film is taped to the backing paper and stopping just after the last frame number has passed in the red window allows both ends of the film to be restrained and held across my work surface for the lengths to be detached individually. This helps because, in the complete darkness necessary, differentiating between backing paper and emulsion is tricky and I once ended up with the backing paper loaded into the cartridge and the film discarded on the floor!
As a result of my experiences with the 120, I began wondering how using 35mm cassettes as a source would work where only a single strip would need to be controlled. This threw up some interesting points.
• A 36 exposure length of 35mm is around 160cm so a film will produce two of the 75-80cm lengths I need for 110 rather than the three from 120. I usually get 18-20 frames in a 110 camera using unperforated film rather than the full 24 but still economic. The 16MG needs 47cm so 3 lengths would be provided like the 120.
• No backing paper is involved to confuse things.
• Looking at my design for the 120 I felt I could modify it for a quite simple 35mm version that wouldn’t require a donor camera body.
• A minus would be that the stripping would have to be done in complete darkness but conversely loading and setting up could be done in the light. I wouldn’t have to gingerly feel for the needle sharp tips of the blades in the dark to check they have penetrated the film.
• After the first length is removed the second strip will remain safely in the cassette ready for producing the next length, later on if it is not needed immediately.
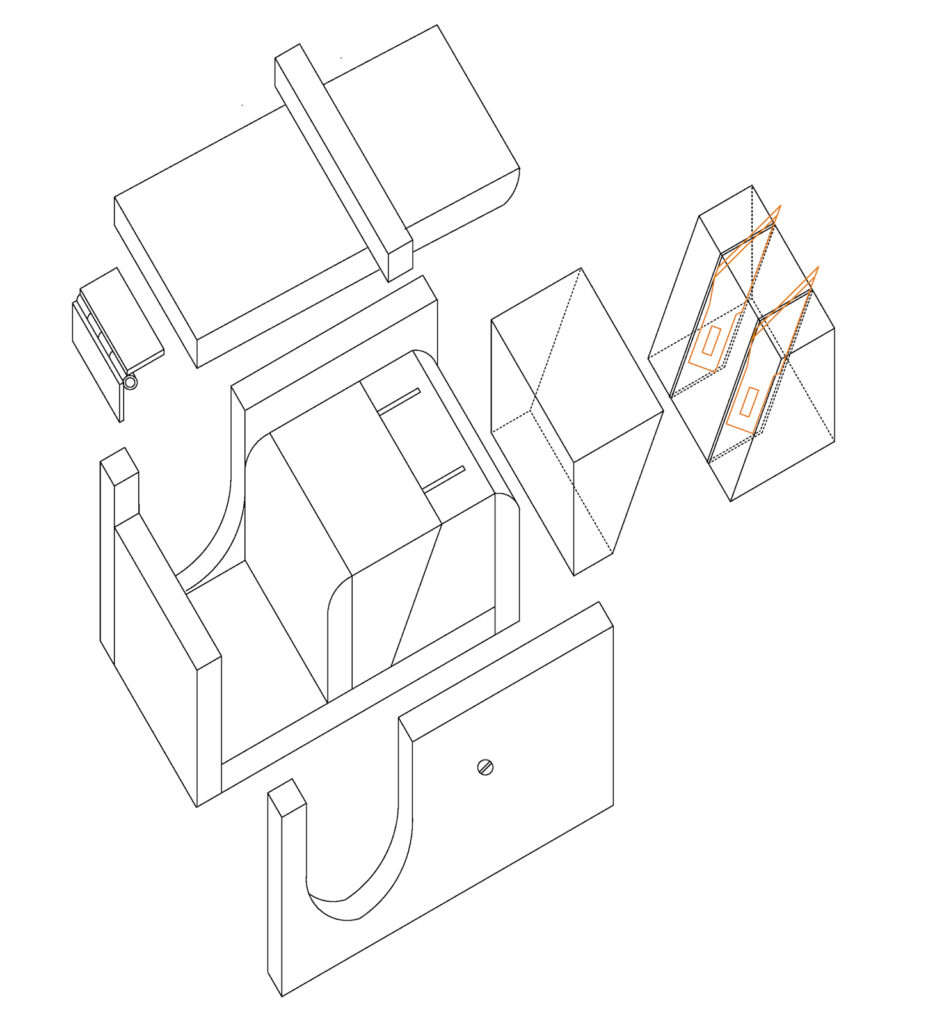
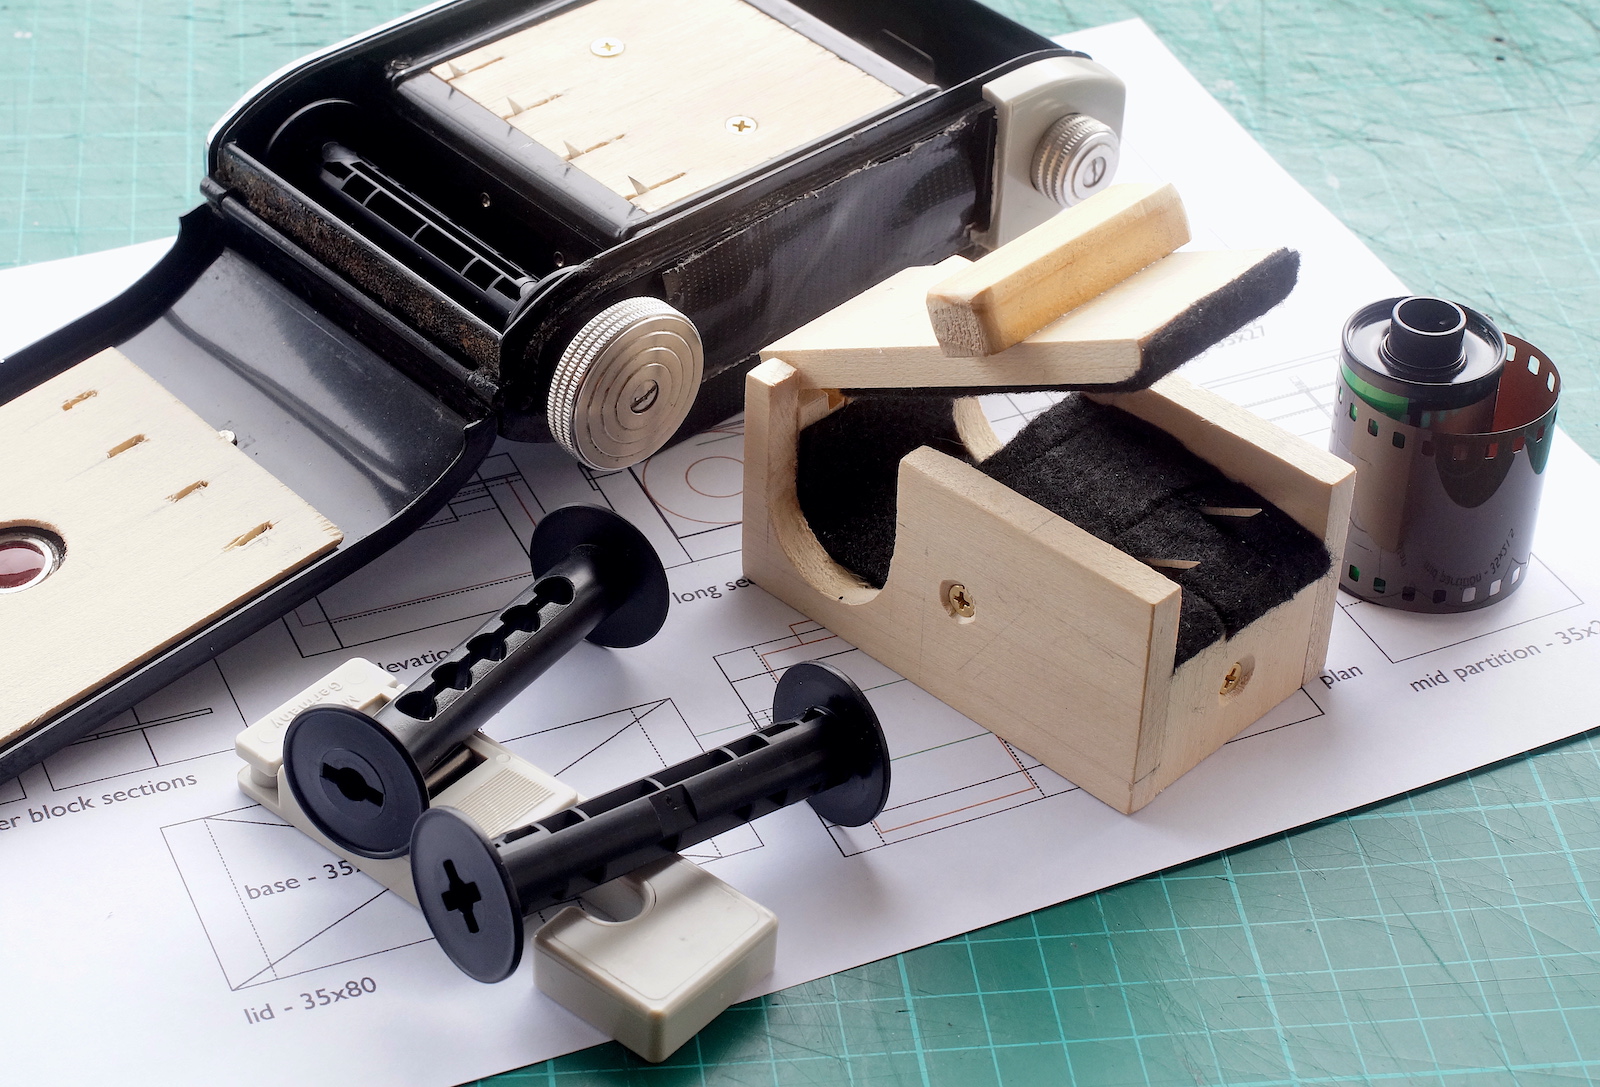
The design I came up with is similar in appearance to many of this size I have seen which operate on similar principles, i.e. by pulling the film through the cutters manually. It seems it would suit 3D printing well but I don’t have that capability and the woodworking scrap box provided the raw materials. (If anyone with the necessary skills and equipment wants to try this I will happily provide a drawing file).
I used the same block design to hold the cutting blades but with only two blades rather than four for 120. This would make cutting less hard work into the bargain. The old 12-on 120 camera I used is hard to wind and tends to chew up the type of plastic 120 reels with cruciform slots, the single, cross slot versions work better but is still hard work.
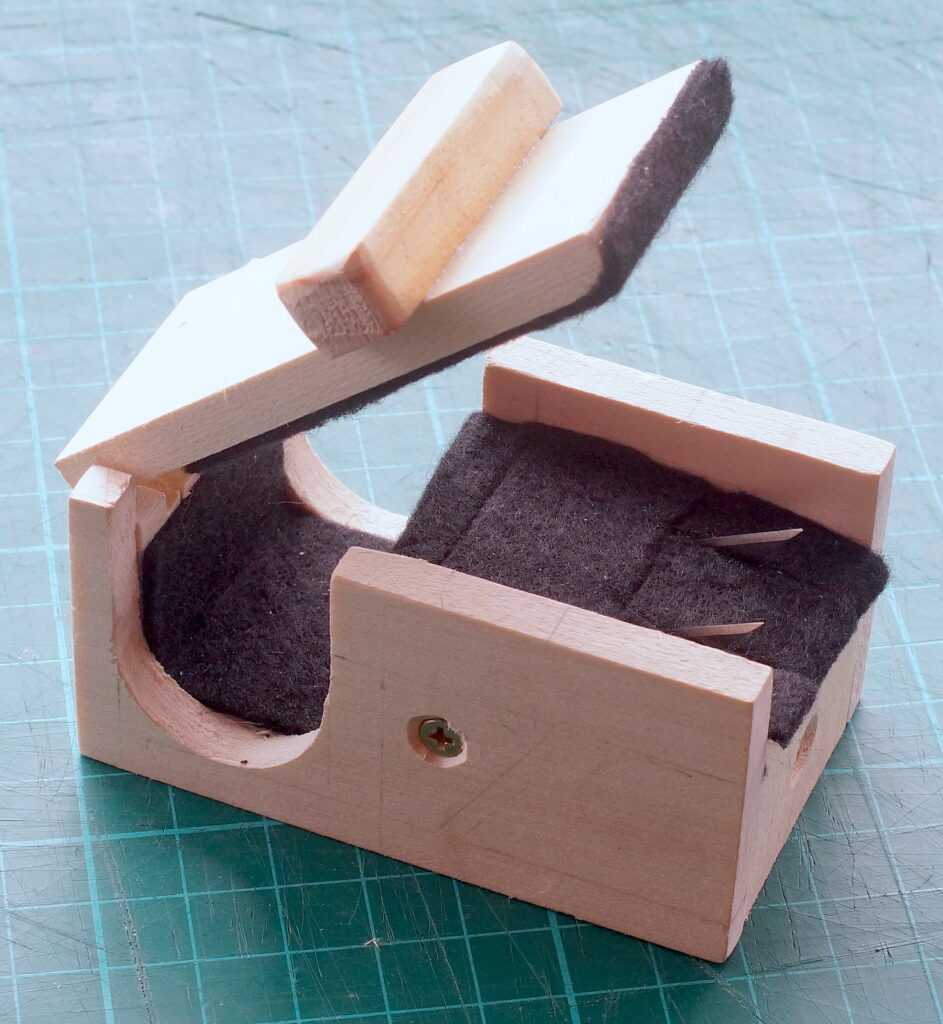
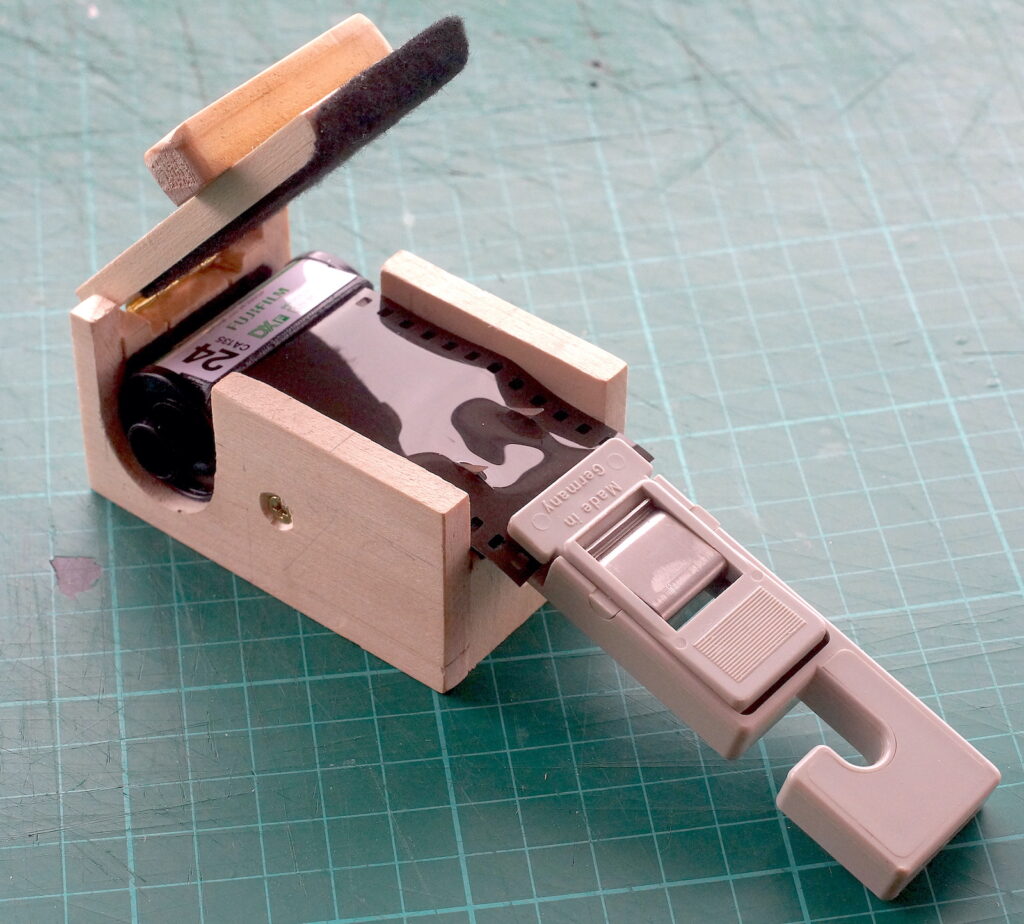
This version holds a 35mm cassette at one end under the hinged lid and feeds the film over the cutting blades at the opposite end where the film appears in order to be pulled out to the required length. Setting up and checking that the blades have cut through the film before starting to pull the film through can be done in the light which is reassuring.
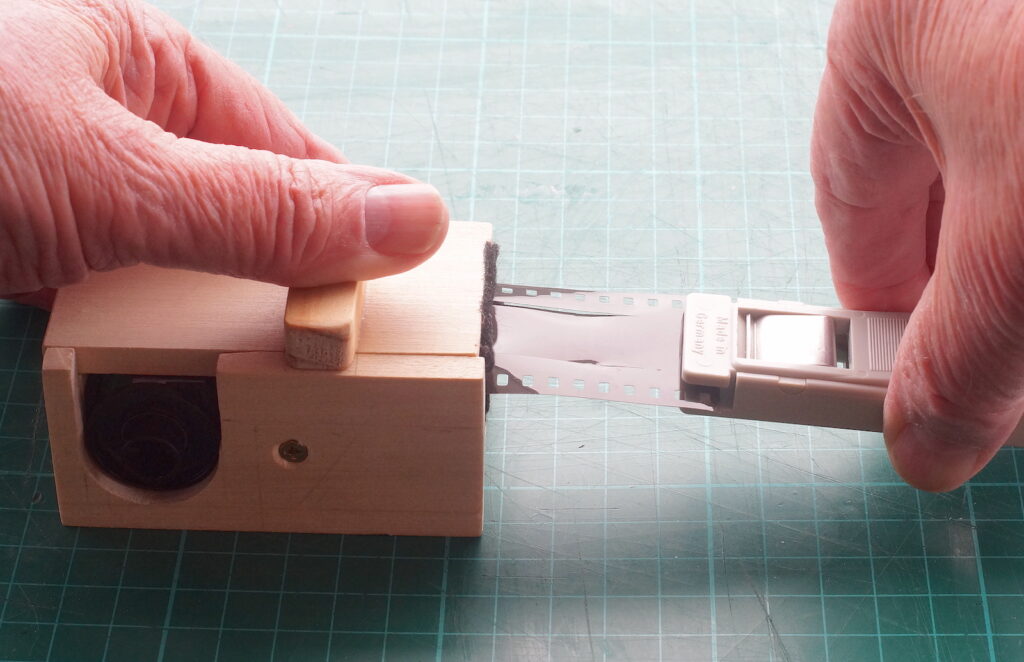
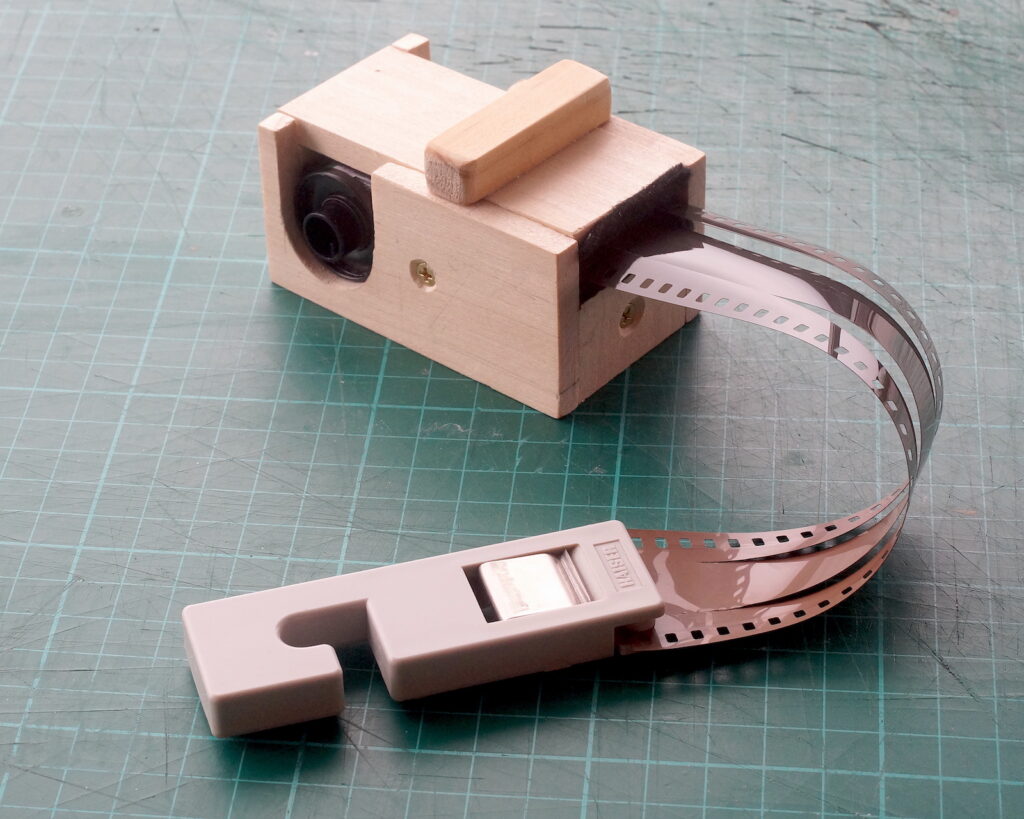
I attach a weighted processing film clip to give good grip and the weight tends to hold the film in place while I cut the first length off and store it away before putting the light on.
So Adox CMS 20 Pro is the next sharp and very fine grain film to try in the 16 MG.
As mentioned, if anyone wants to make one of these, by whatever process, I am happy to supply a drawing file. Just drop me a message below.
Share this post:


Comments
Martin on A DIY 35mm Film Stripper
Comment posted: 19/09/2024
For those who do not trust their own wood working or DIY skills, much like me, there is a guy in Italy who 3D prints those things. E.g a combined on to cut Minox and 16mm from 1 roll of 35mm film or various formats from 120 film. Their website can be found at camerhack.it .
I don't get any commission or benefits for mentioning his website, just to have said it.
Comment posted: 19/09/2024
Comment posted: 19/09/2024
Comment posted: 19/09/2024
Comment posted: 19/09/2024
Comment posted: 19/09/2024
Comment posted: 19/09/2024
Comment posted: 19/09/2024
Comment posted: 19/09/2024
Comment posted: 19/09/2024
Gary Smith on A DIY 35mm Film Stripper
Comment posted: 19/09/2024
I've probably said this before: I'm glad that all of you DIY'ers do all this stuff but at 70, and with failing eyesight and fumbling manual dexterity I'll leave you to it!
Thanks for sharing Tony!
Comment posted: 19/09/2024
Comment posted: 19/09/2024
Comment posted: 19/09/2024
Karen McBride on A DIY 35mm Film Stripper
Comment posted: 20/09/2024
I would love a copy of your design drawing.
Thanks
Karen
Comment posted: 20/09/2024
Alexander Seidler on A DIY 35mm Film Stripper
Comment posted: 20/09/2024
Comment posted: 20/09/2024
Lance Rowley on A DIY 35mm Film Stripper
Comment posted: 21/09/2024
Comment posted: 21/09/2024