I recently started following a friend of a friend on Instagram, who posts his black & white images fairly regularly and decided I should really be doing something similar as it would give me a bit more purpose with my photography… and it’s just nice to share!
So a few photos went on and I started trying out a few different things like caffenol developing and using some of my older, less used cameras. Then I stumbled across a load of negatives taken on my Zero Image pinhole camera.
Like many people I loved the simplicity of the pinhole camera and the old-world almost dreamlike quality of the images. The Zero Image takes 120 film and I have adapters to put a roll of 35mm through a 120 camera. It occurred to me how good the images would look on 35mm since they’d stretch over the sprocket holes and I really love that look!
Unfortunately the way film travels in the Zero Image meant the orientation of the 35mm film cassette and adapters was wrong so it wouldn’t fit. I was really disappointed and had to go and spend some time sulking and browsing other pinhole cameras on the internet that might take the 35mm cassette.
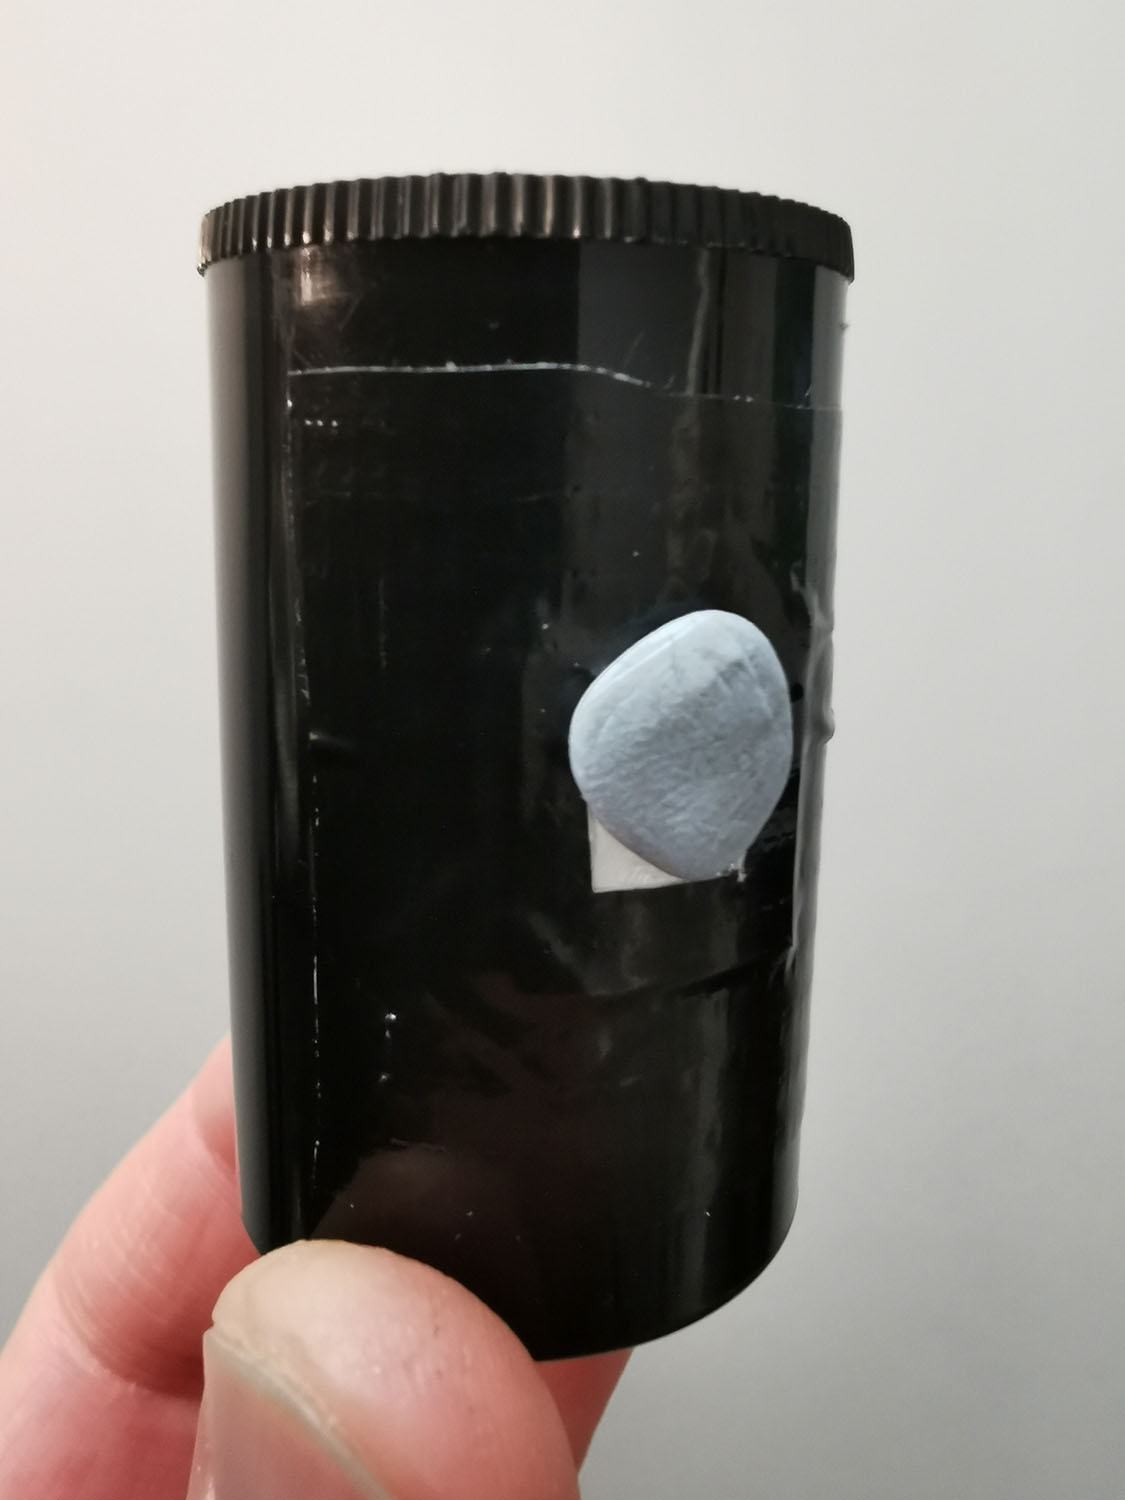
If you’ve read any of my other articles you’ll know I don’t like to spend more than I have to and all the production pinhole cameras were way above what I would spend. That’s when I stumbled on a pinhole camera that someone made out of a film pot. This was much more my style and definitely my price range.
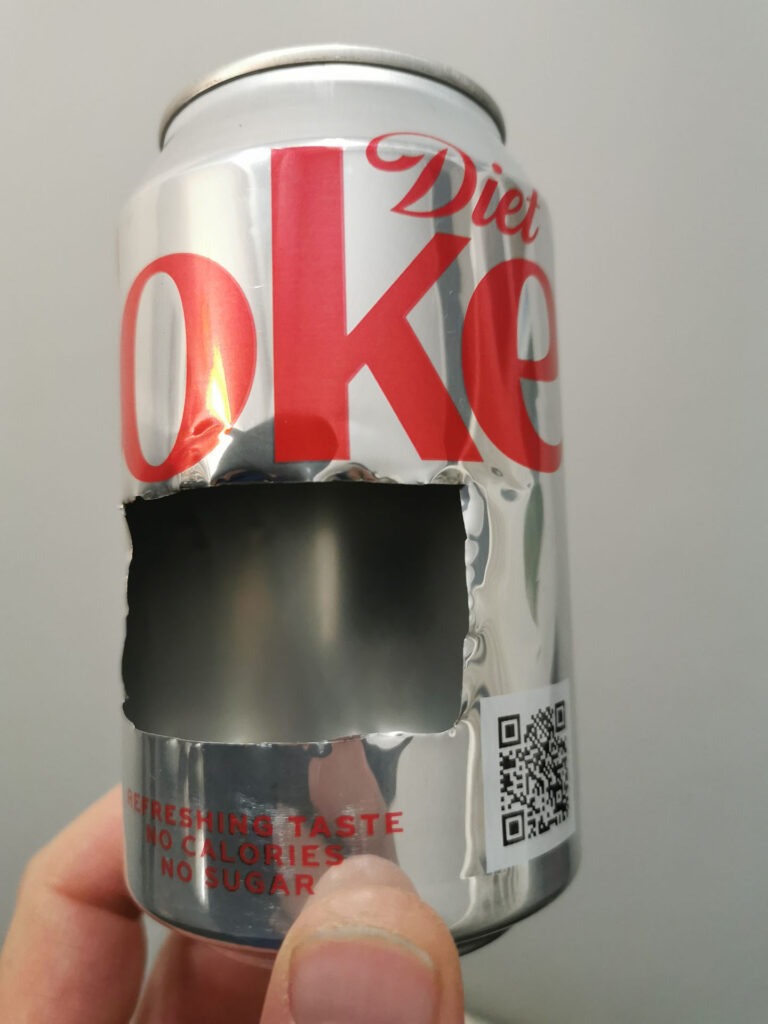
Off to my garage I went to drill a reasonable sized hole in the side of my film pot. Then I needed to find some sort of piece of metal to make a pinhole in. In the stuff I’d read online a few people had used posh brass shims and some had used a piece of aluminium from a drink can. Bet you can’t guess which one I opted for!
My problem now was that no-one in my family drinks cans so I hadn’t got any. One quick raid of next-door’s recycle bin sorted that problem and I proudly carried my ‘kill’ off to the garage. I sliced a nice little oblong out of the can with a Stanley blade and was ready to make the pinhole.
I thought the best method would be to punch a dimple in the metal, thin it out a bit with some fine sandpaper and then pop the pinhole using the finest sewing needle I could find. It almost worked out as I had planned apart from the sandpaper bit. The finest paper I had was still way too coarse and just succeeded in making big scratches on the aluminium. No matter – the dimple I’d made with an old nail had rendered the foil thin enough anyway for a fine sewing needle to pop through it easily.
I took a quick shot of the pinhole on my phone with a ruler near it and estimated I’d made a pinhole or around 0.25mm diameter. The diameter of the 35mm film pot was 32mm so that gave me a rough f-stop of f128.
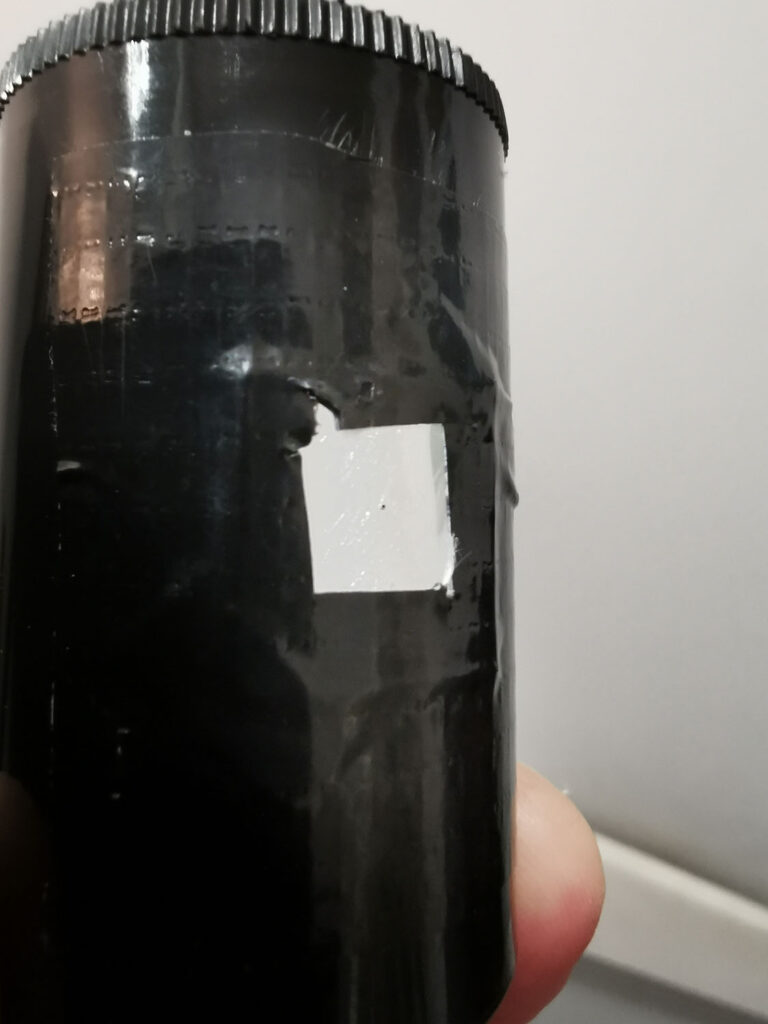
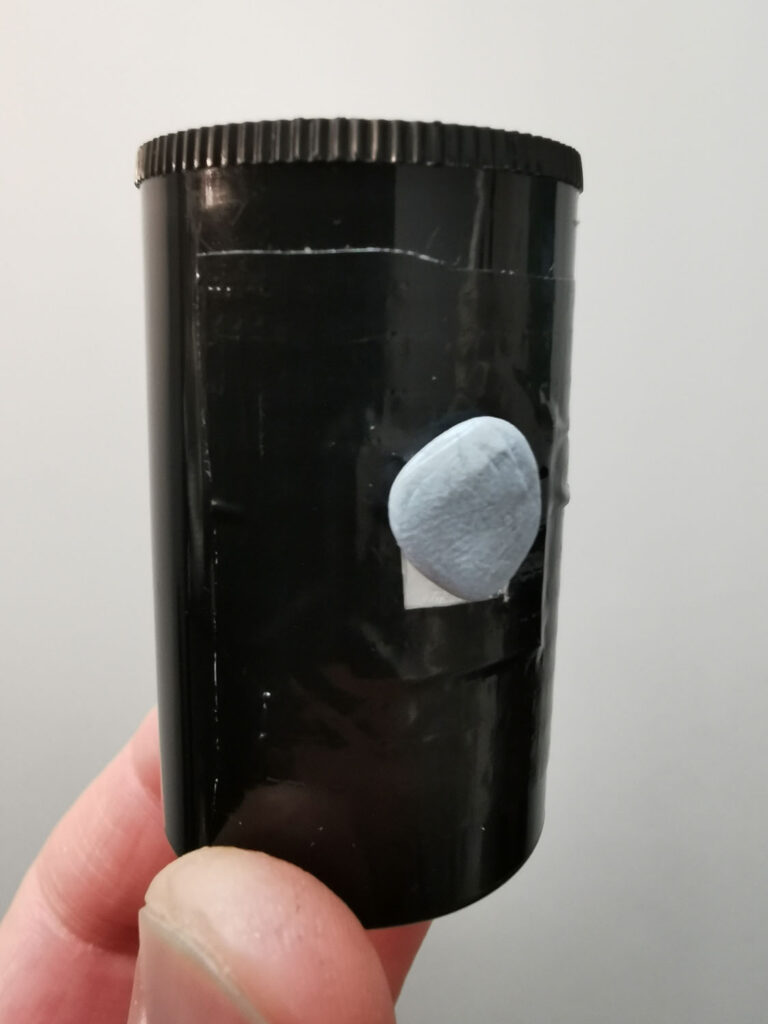
I attached the aluminium with it’s new pinhole to the film pot with some black duct tape and I was almost ready to go.
From the article I’d read I knew I’d need a piece of 35mm film about 7cm in length to go around the inside of the film pot. I do most of my ‘darkroom’ stuff for small projects in a changing bag so I just cut a piece of plastic from an old credit card to 7cm to use as a measuring stick inside the bag.
The next thing to think about would be how to position the film so that is was opposite the pinhole and not over it… Blu-Tack to the rescue! A small blob of the stuff just above and below the pinhole on the inside would be my guide. I also stuck a small sausage of Blu-Tack on the bottom of the film side of the pot so that the film would hopefully sit midway up the pot
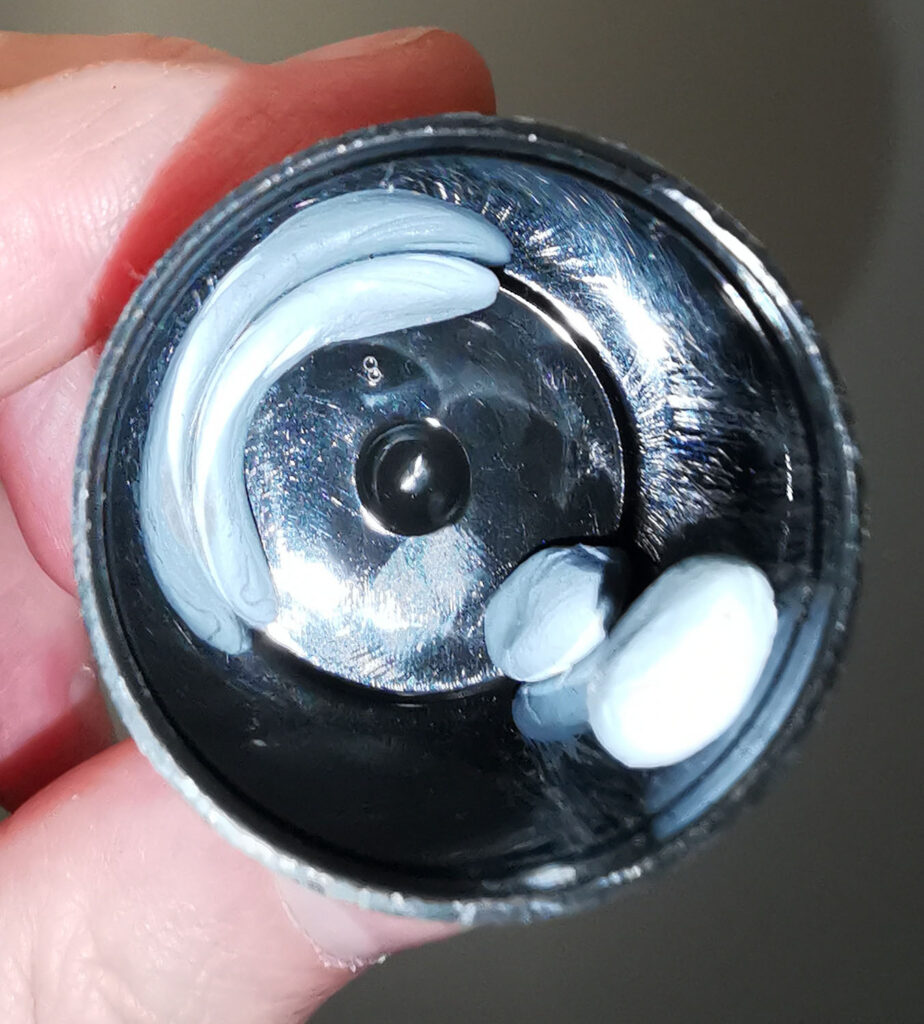
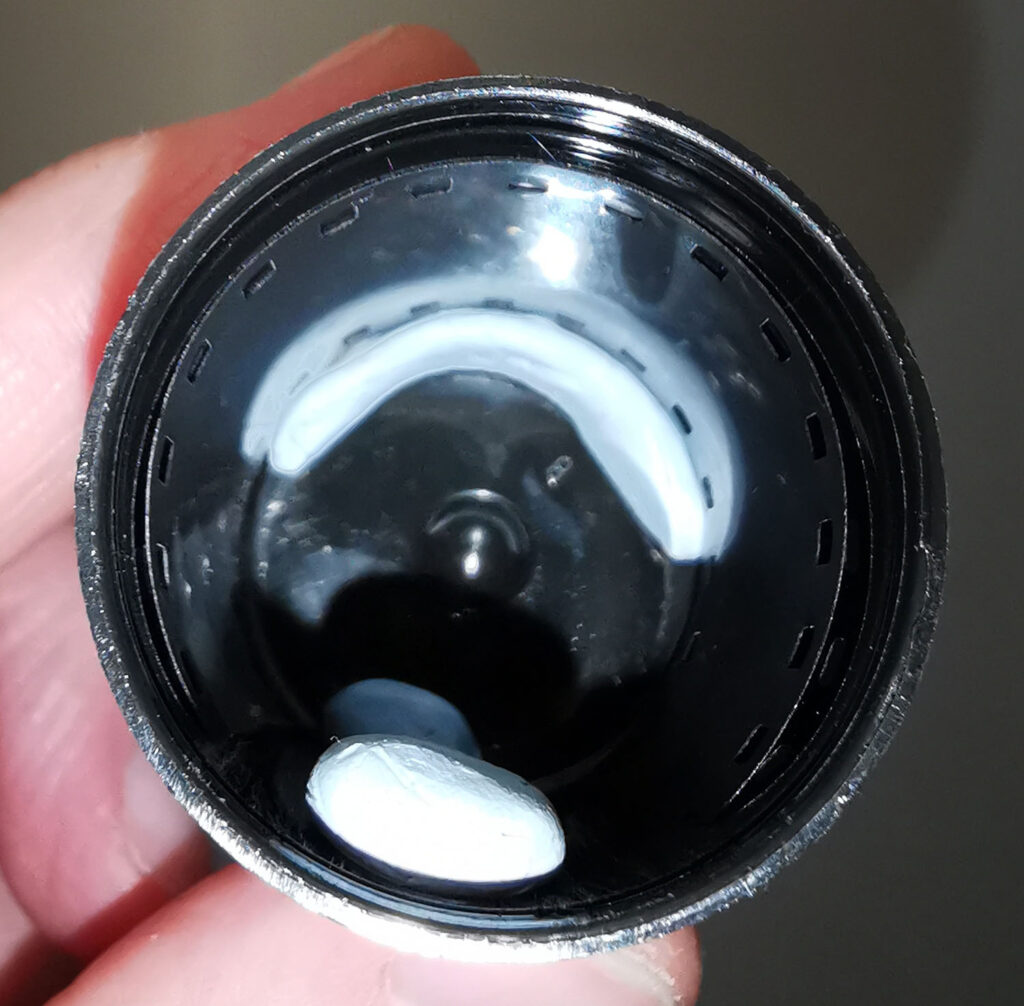
I really felt ready now to load the film and get going. One last thing was to add another piece of Blu-Tack as a lens cap. I had some bulk film in a loader (Kentmere 100) so just popped the loader, film pot and a pair of scissors in the bag. Measuring by feel, cutting and loading the pot went of smoothly and I was ready to go at last.
It happened to be a typical UK miserable rainy weekend and I wasn’t sure how good the images would be so I literally just stuck to taking pictures around my house and garden, popping back into the house to the changing bag to reload each time. Exposures were between 30 seconds and 1 minute. I kept the exposed pieces of film in an old bulk film box I’d hung on to ‘just in case’. As I was initially intending any decent images for a 5 Frames article I only took 5 – 4 around my house and I saved one for when I was at work to take a shot looking out of my office window.
The following weekend was processing time! As I was going to use a Jobo 35mm tank there was a fair bit of faffing in the changing bag to get 5 pieces of 7cm long 35mm film onto one plastic spiral without them touching each other. Then I just processed in Rodinal 1:50 as that’s always been a reliable combo for me.
After fixing it was the moment of truth… I pulled out the pieces of film and initially they all looked black. Gutted. Then I held them up to the light and saw that they were simply overexposed by about half a stop to a stop but I did actually have some reasonable images! Here they are:
This is not a great image and I have to say part of my learning curve! It was looking out of my son’s bedroom window but I got the direction of the pinhole wrong and ended up with a large portion of the window frame!
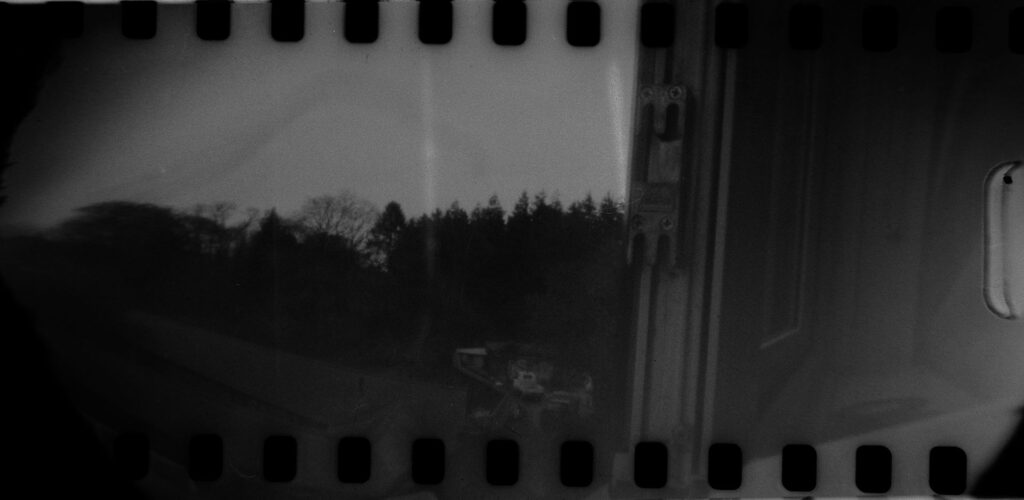
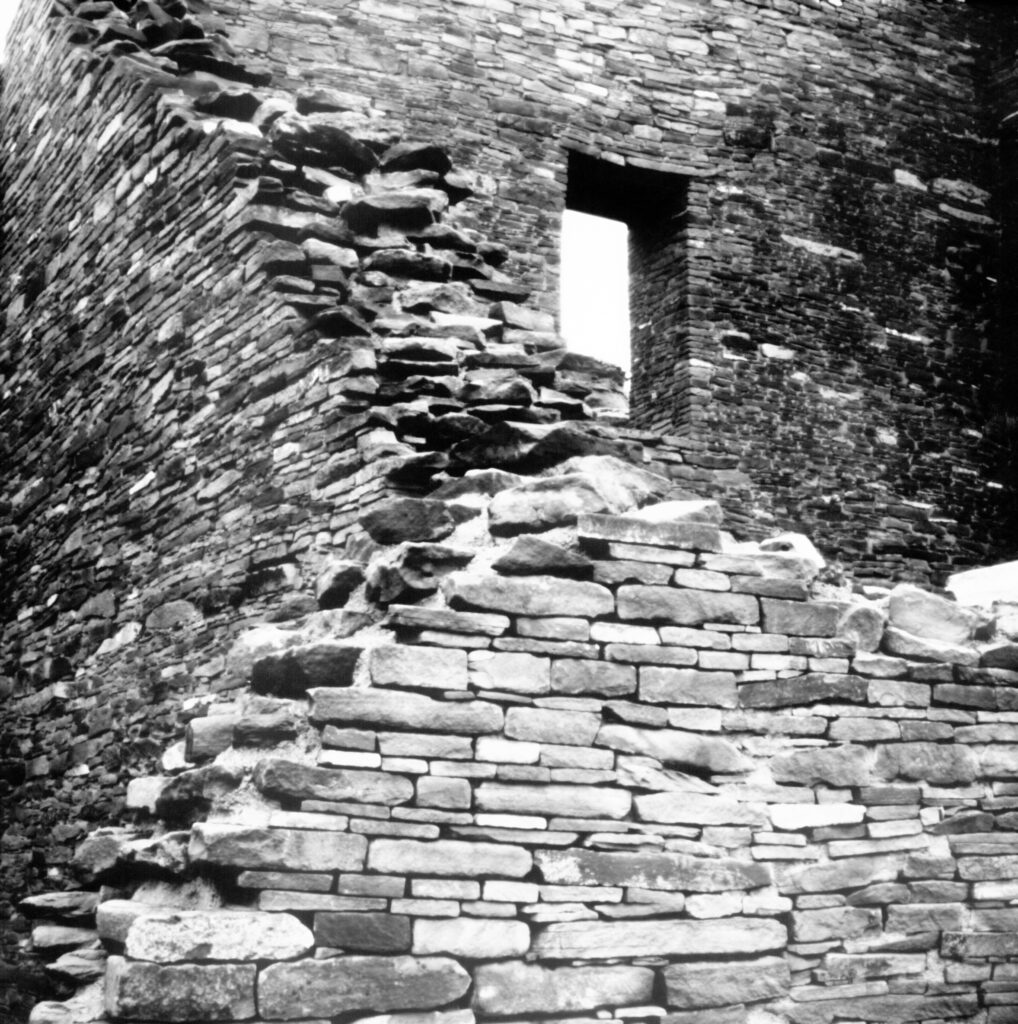
This is another slightly dodgy shot where I balanced the film pot on the wheelie bin between mine and my neighbour’s house, looking out over the tress at the back.
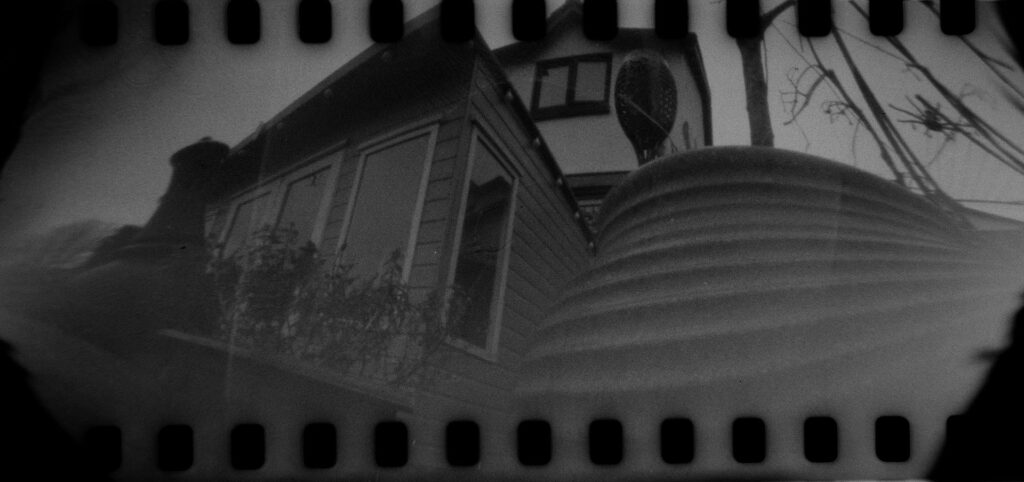
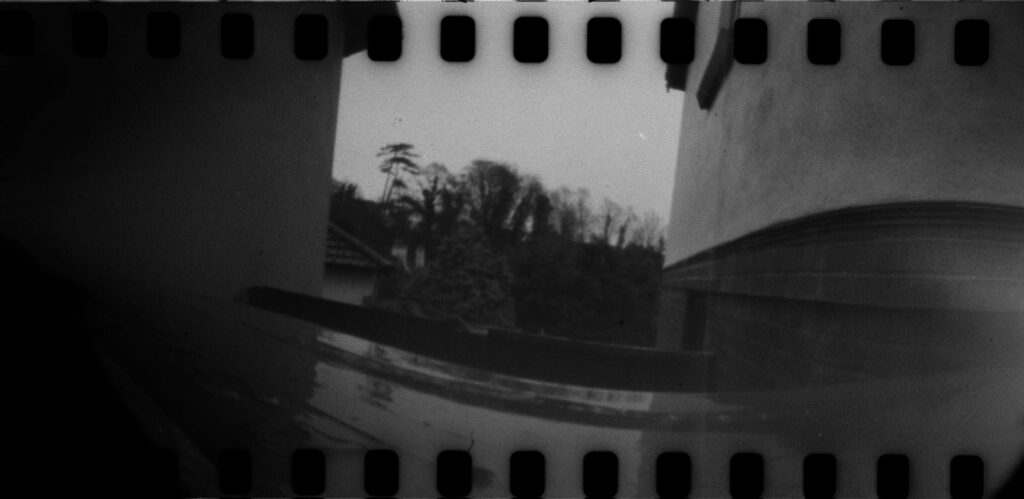
This one is with the pot balanced on a wall in my back garden, looking up at my Wife’s painting studio and the back of our house. To the right is a large plant pot that has a cherry tree in it.
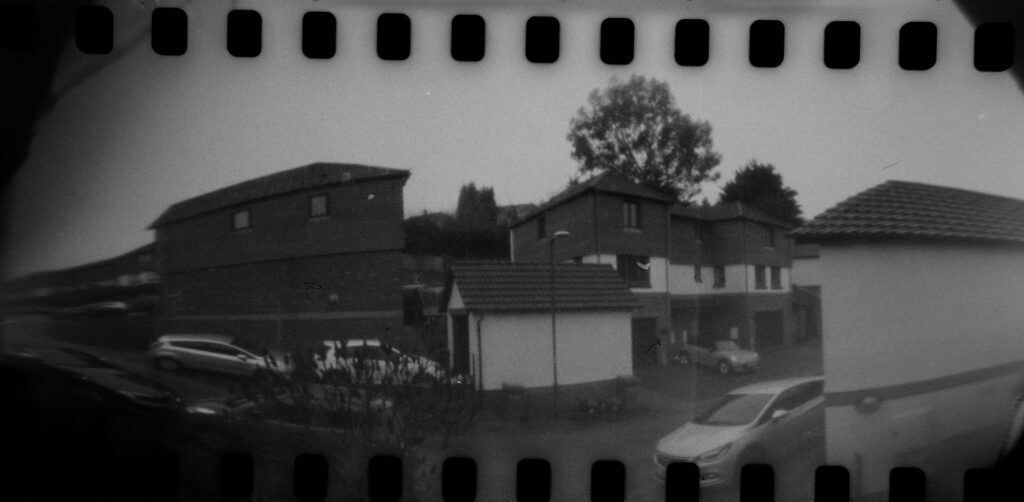
This is a shot out of my bedroom window looking over the street
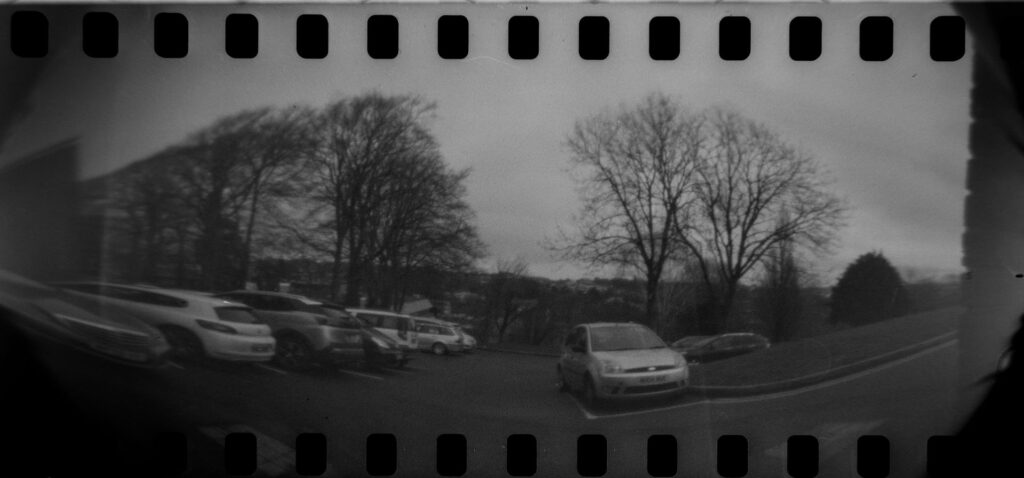
And finally this is the one looking out of my office window at work over the car park.
Overall this was a lot of fun and I will take some more I think. I was really pleased how well it all went considering I’d read other articles about multiple tries and fails with film pot pinhole photography. I certainly felt lucky to get a result first time. With hindsight I think I’ll use something else for the lens cap in future as the Blu-Tack was a bit too sticky and tricky to get off whilst keeping the pot steady for the exposure. Speaking of keeping the pot steady I found using some Blu-Tack on the bottom was handy for securing it whilst exposing.
Anyway I hope you’ve enjoyed the article and images
Here’s my Instagram link in case you’re interested in my occasional image posts: Bobblehob
Share this post:


Comments
Geoff Chaplin on 35mm Film Pot Pinhole Camera
Comment posted: 20/09/2024
Comment posted: 20/09/2024
Gary Smith on 35mm Film Pot Pinhole Camera
Comment posted: 20/09/2024
I'd say that you have the gear and the process nailed! Good job!
Looking forward to your "Blu-Tack Pinhole Photo Book" project.
Comment posted: 20/09/2024
Jeffery Luhn on 35mm Film Pot Pinhole Camera
Comment posted: 21/09/2024
It's always interesting to see pinhole experiments. It takes us back to the roots of photography. I did some talks for elementary school kids in which I tried to have them make their own cameras. That was chaos, so I made a bunch of cameras from large cans. Pained black inside using a black plastic lid. We used 5x7 photo paper, and then made face-to-face contact prints using sun paper, which we fixed. Even with all of that upfront work, the complete process was over two hours. I made the pinholes in tin foil and blackened the hole with carbon from a candle flame. Interesting for some kids, but about 30% lost interest. Eventually, so did I. Maybe I'll revisit it with college students. Thanks for inspiring me.
Comment posted: 21/09/2024