Lomo have released a new daylight tank that avoids the need for a changing bag. They were kind enough to lend me a copy for this review.
Because the tank relies on having the film leader out of the 135 cassette, Lomo supply a leader retriever.
The tank itself is made up of many parts which assemble into a fiendish device that is capable of transferring your film into a reel for developing without the need for a dark bag or other blacked-out spaces.
The tank (and how it goes together)
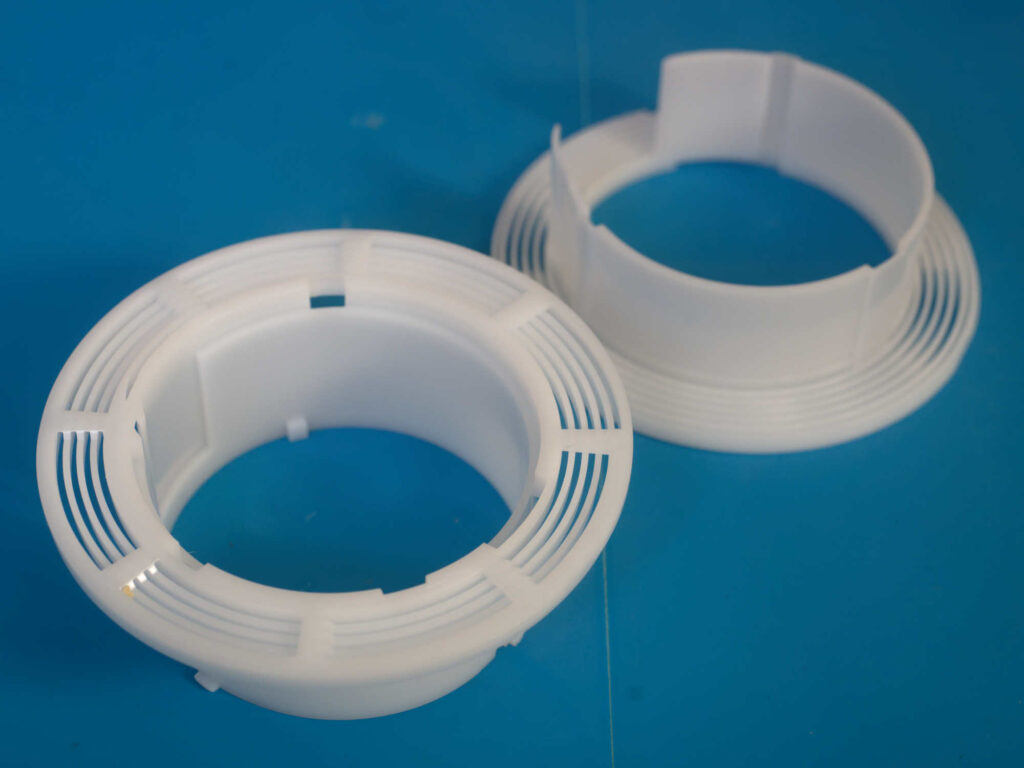
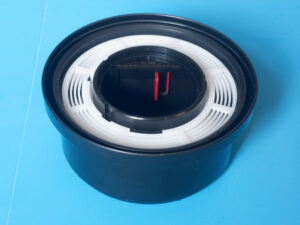
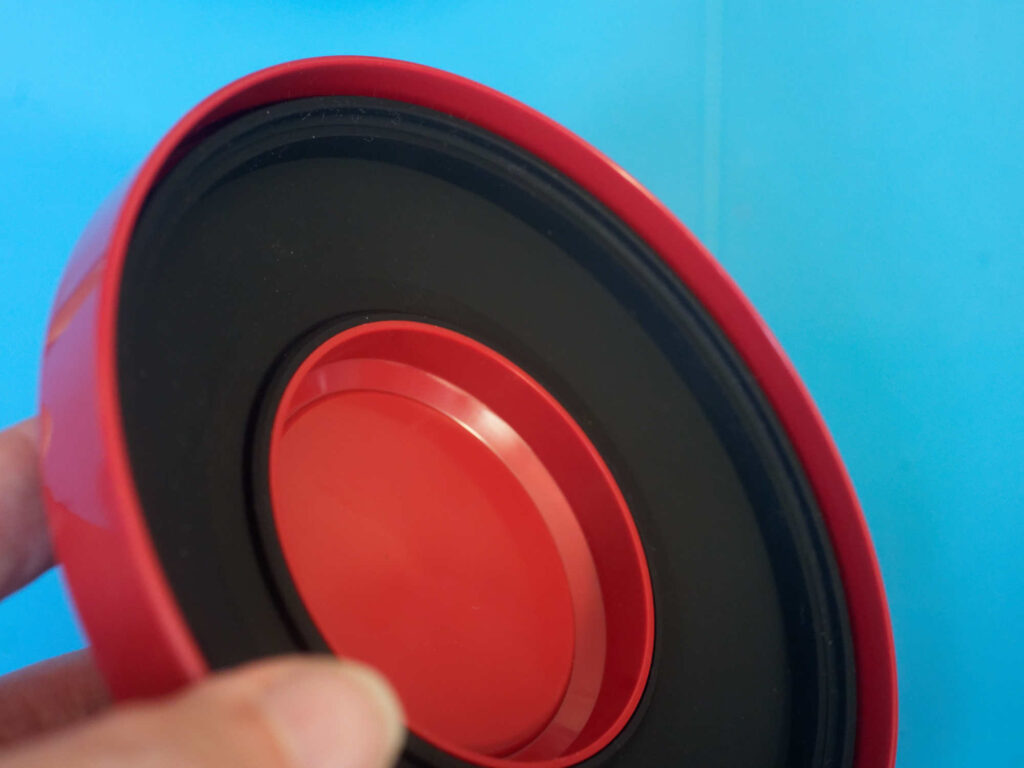
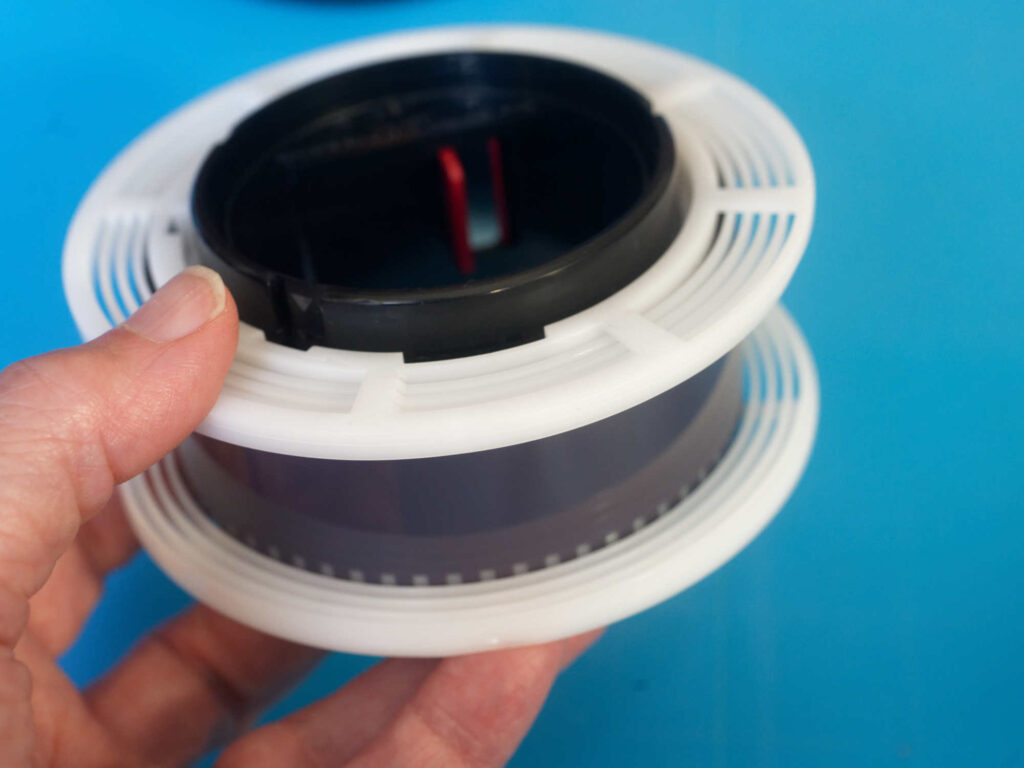
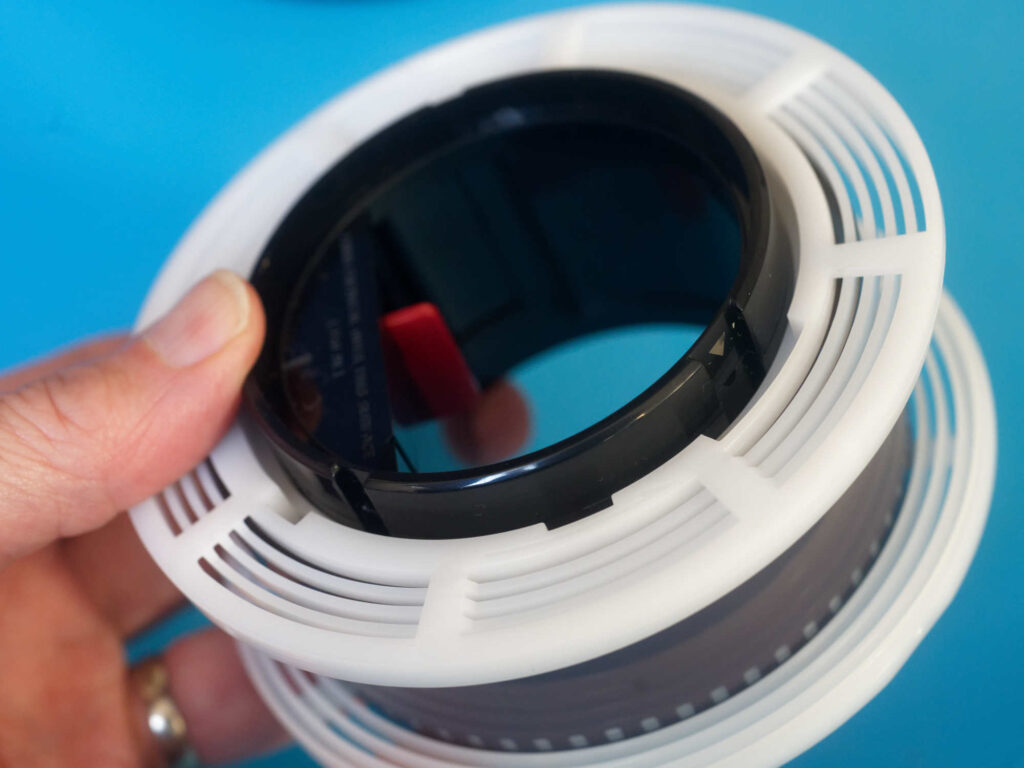
The spiral is nicely made. It slots together in one position only and twists to lock.
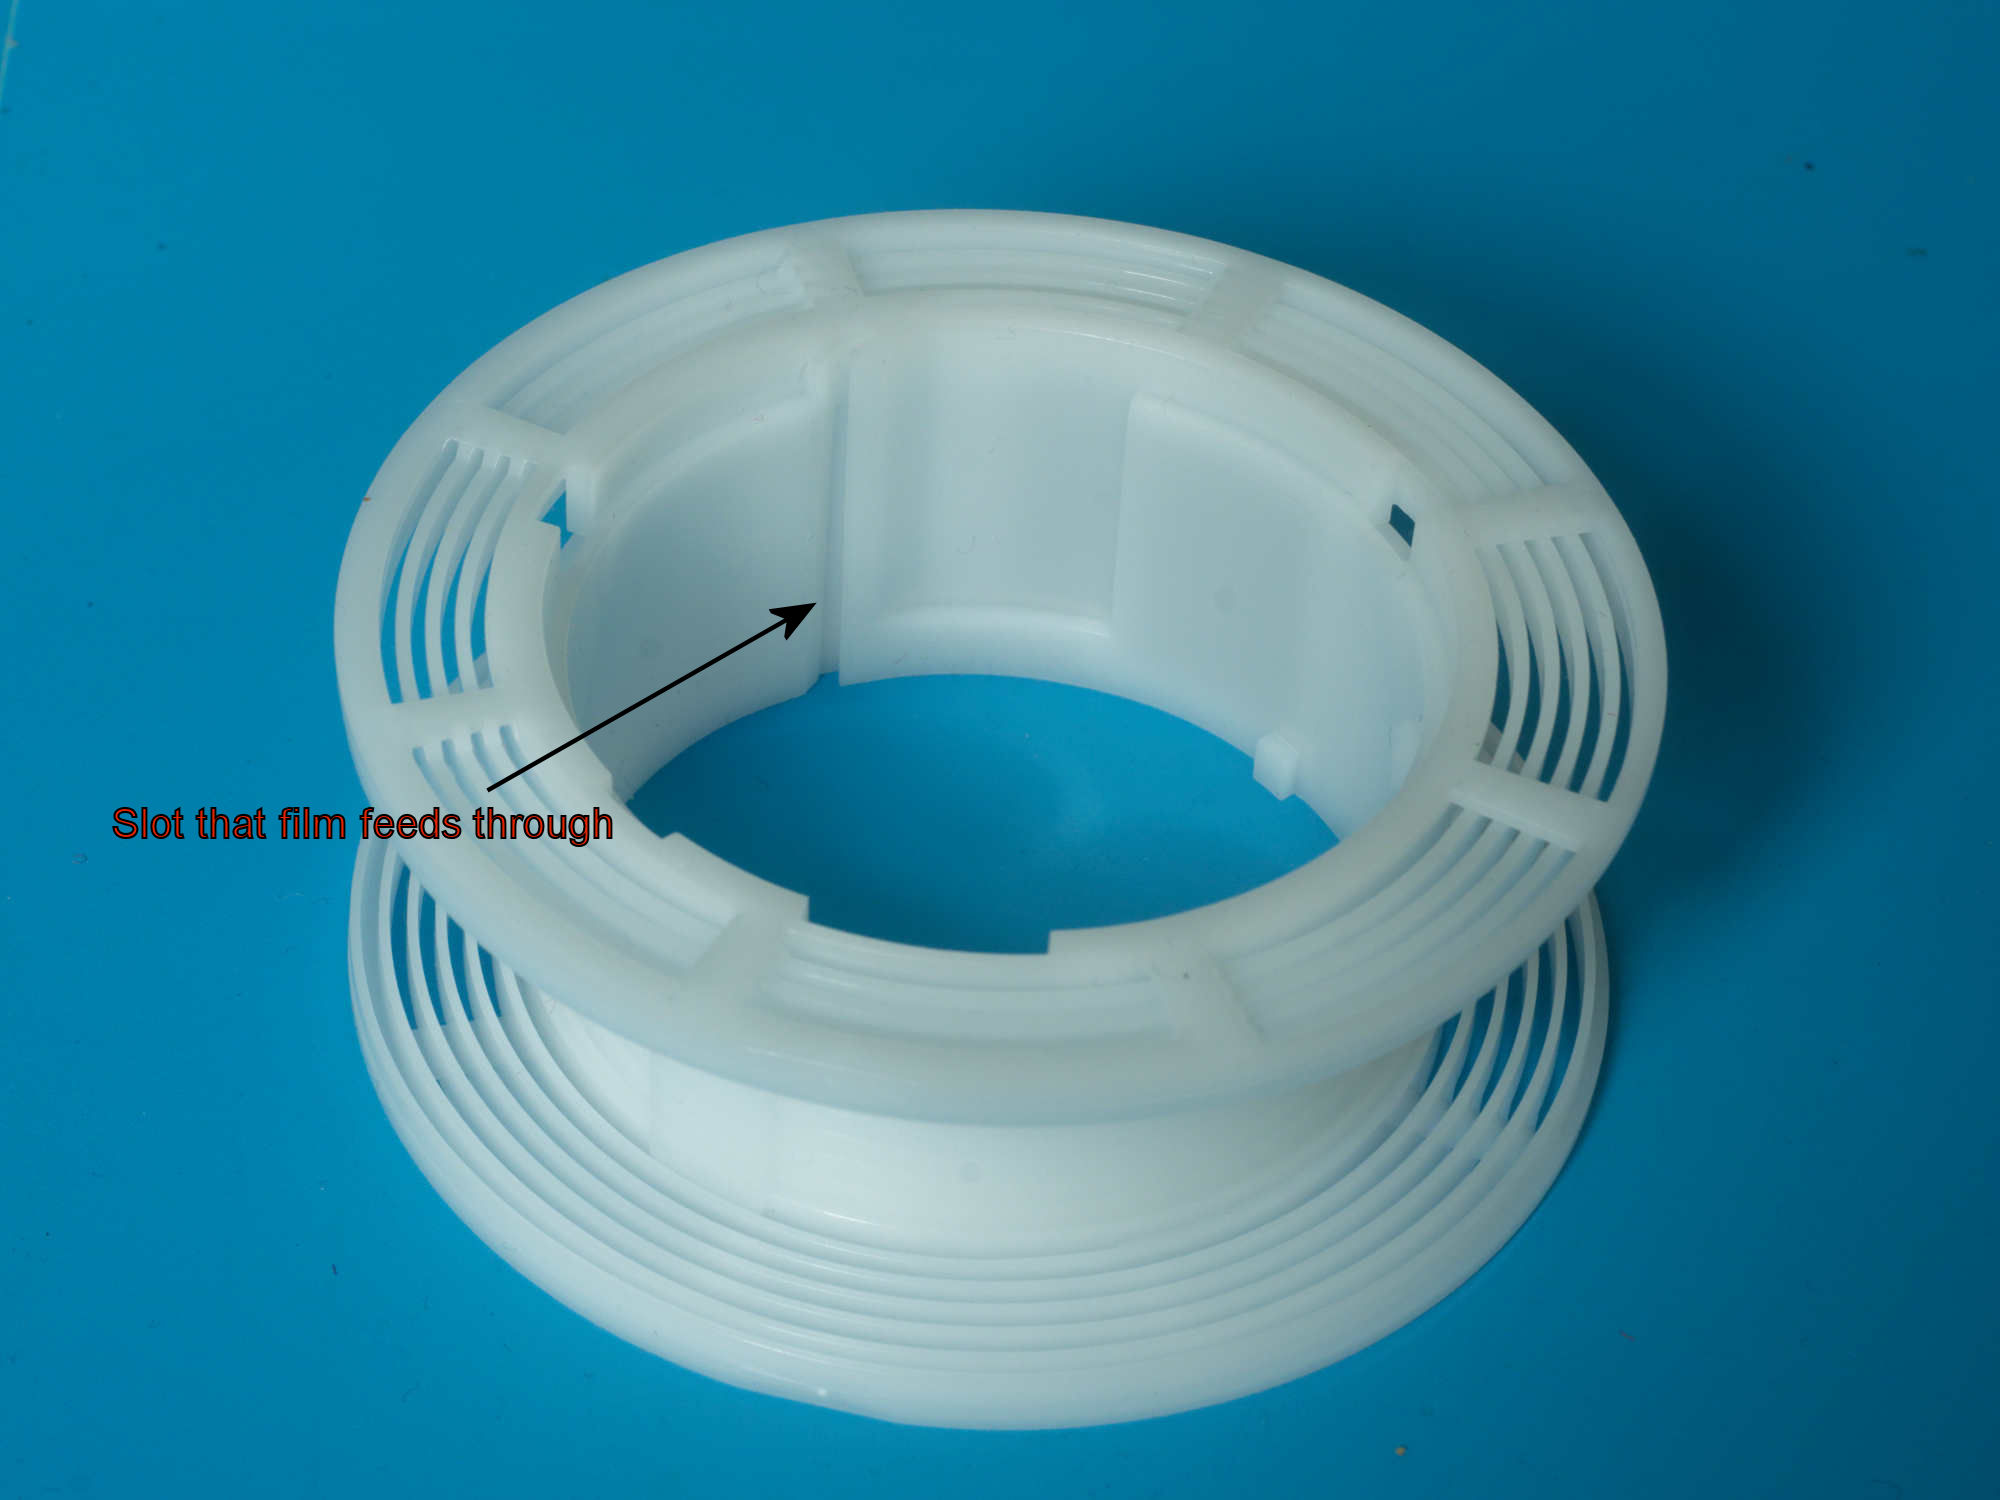
The unusual thing is that the spiral feeds from the centre rather than the edge.
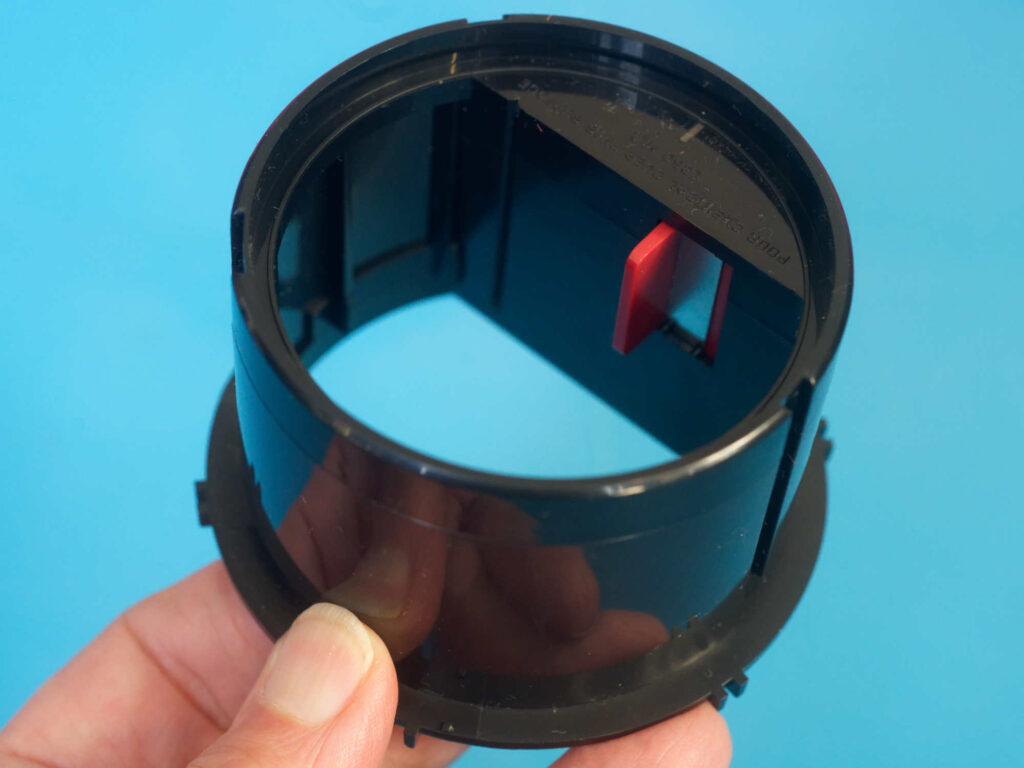
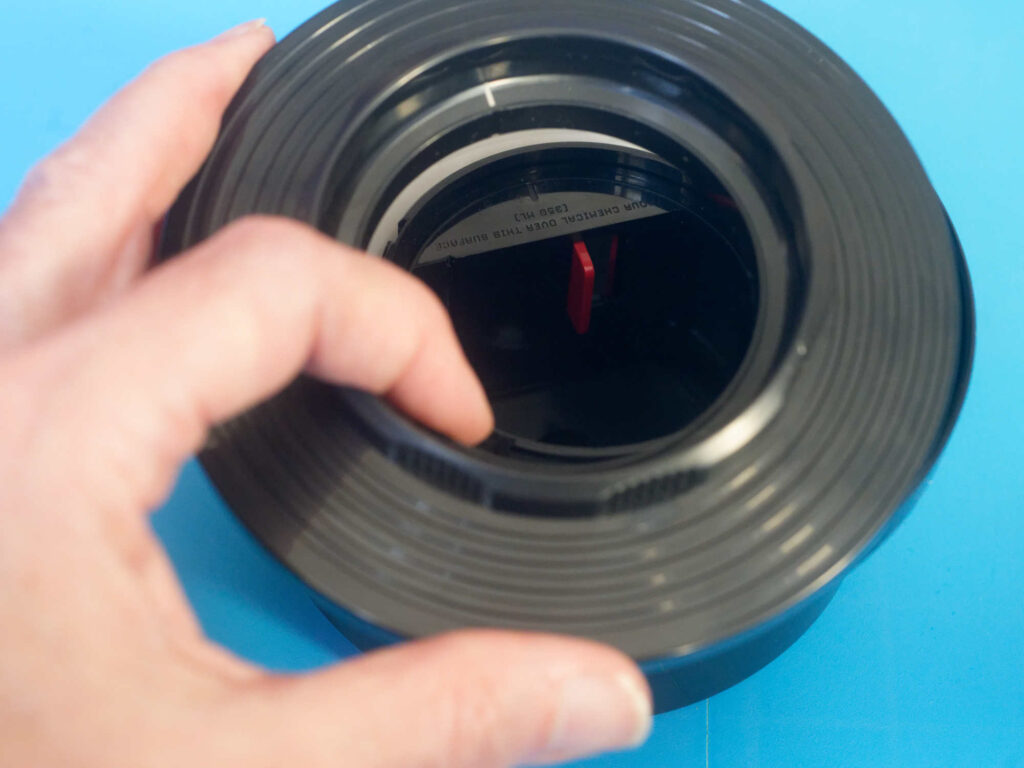
The shaft features a red tab which will only engage/disengage with the feeder insert when the gate slot (seen here over to the left) is closed. In effect, the gate is a guillotine with a sharpened edge that will cut the film after it has been loaded.
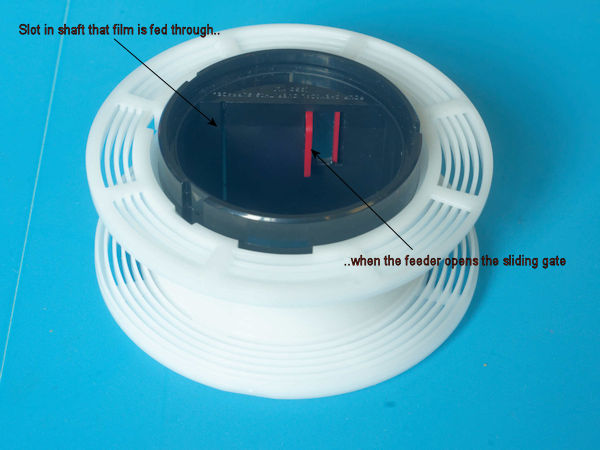
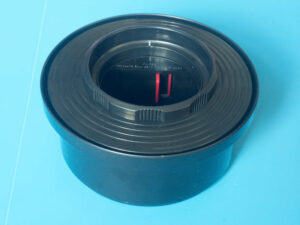
Above, you can see the shaft and spiral locked together – the open slot of the spiral is now positioned just behind the closed guillotine blade. When you lock the feeder the red lever is pushed over, opening the slot for the film to pass through, while making sure the feeder cannot be accidentally removed.
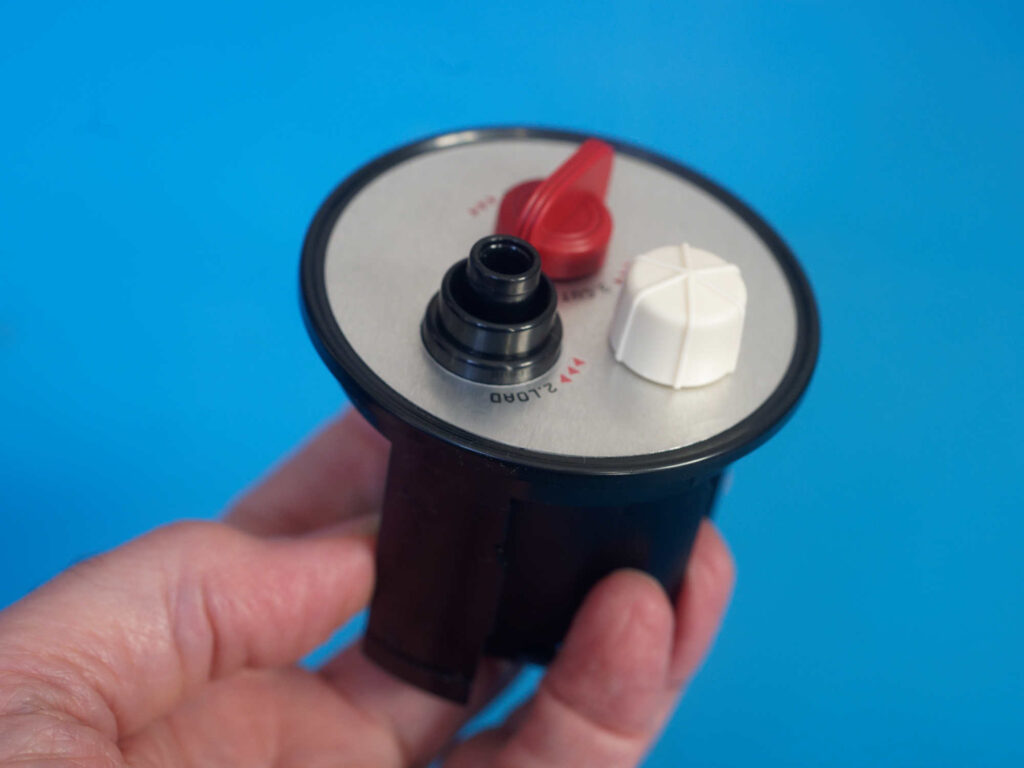
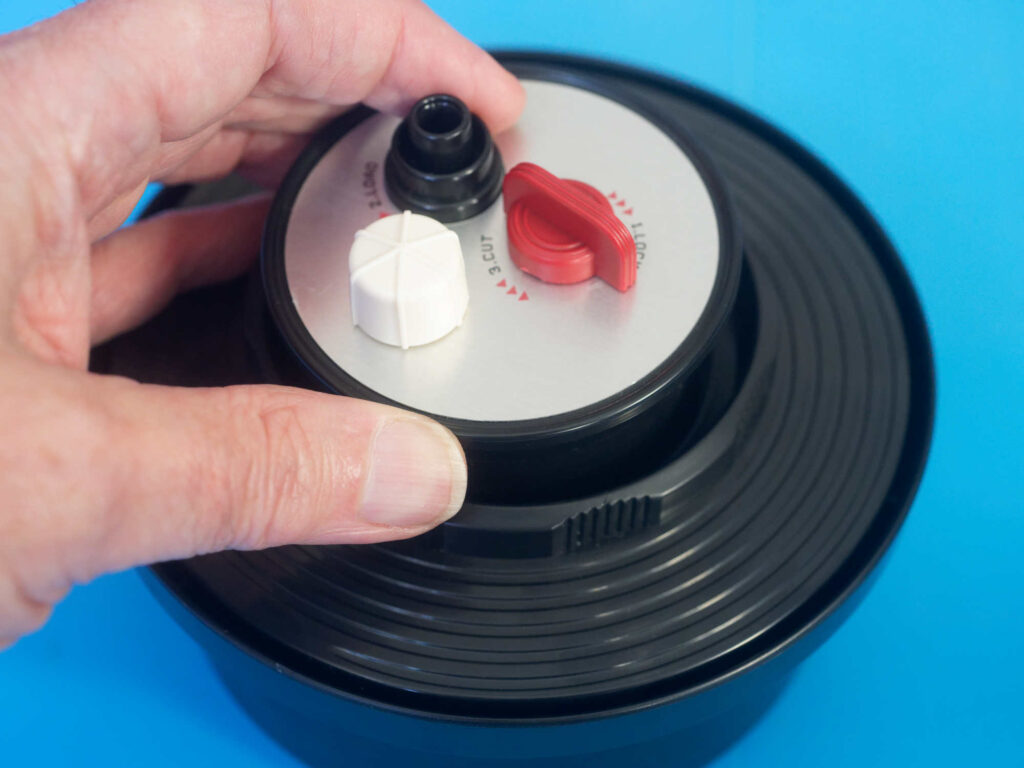
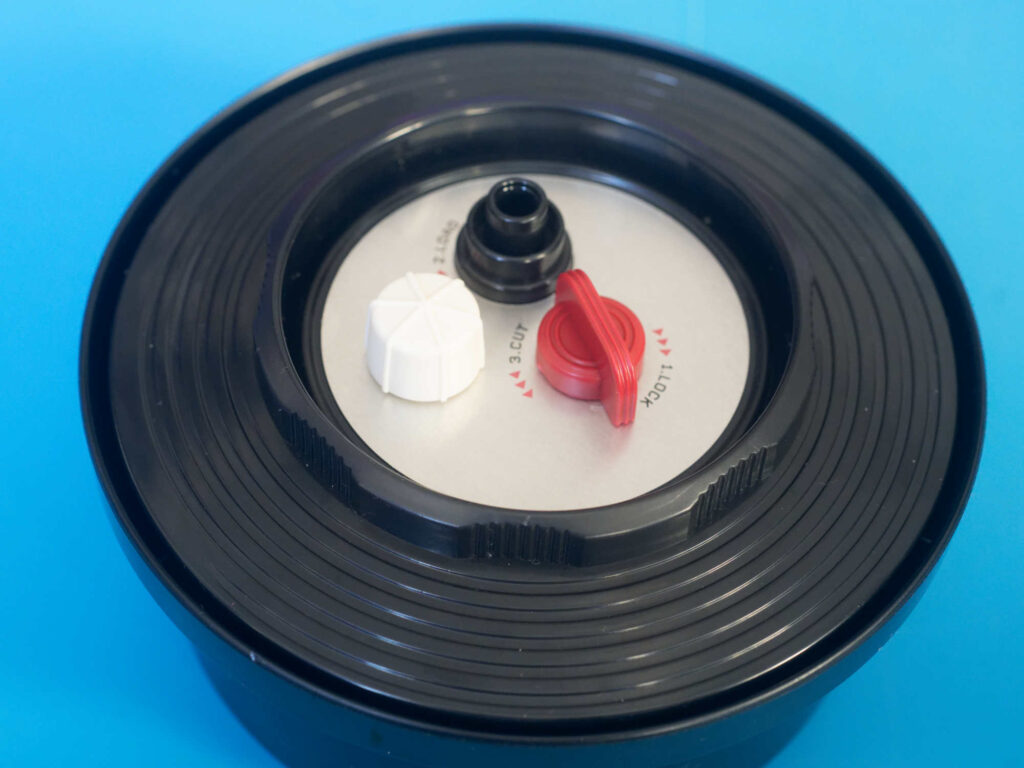
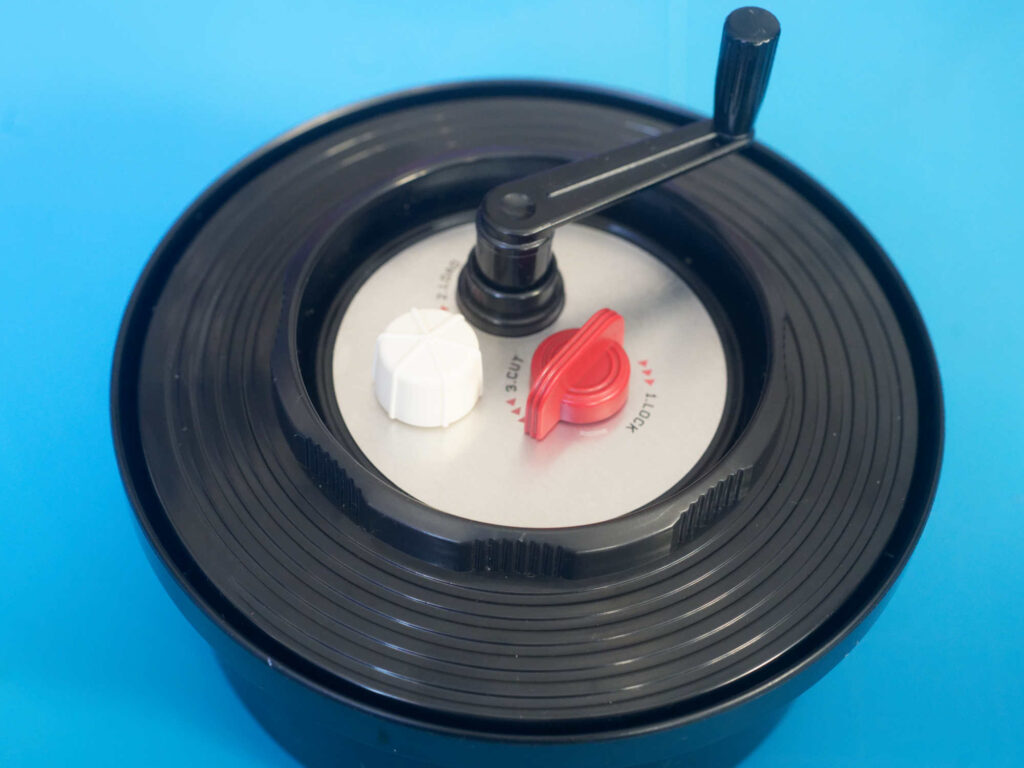
The feeder insert has a red switch to open and close the guillotine door, a white knob that shows when the cassette spool is in motion and a black socket to take a crank.
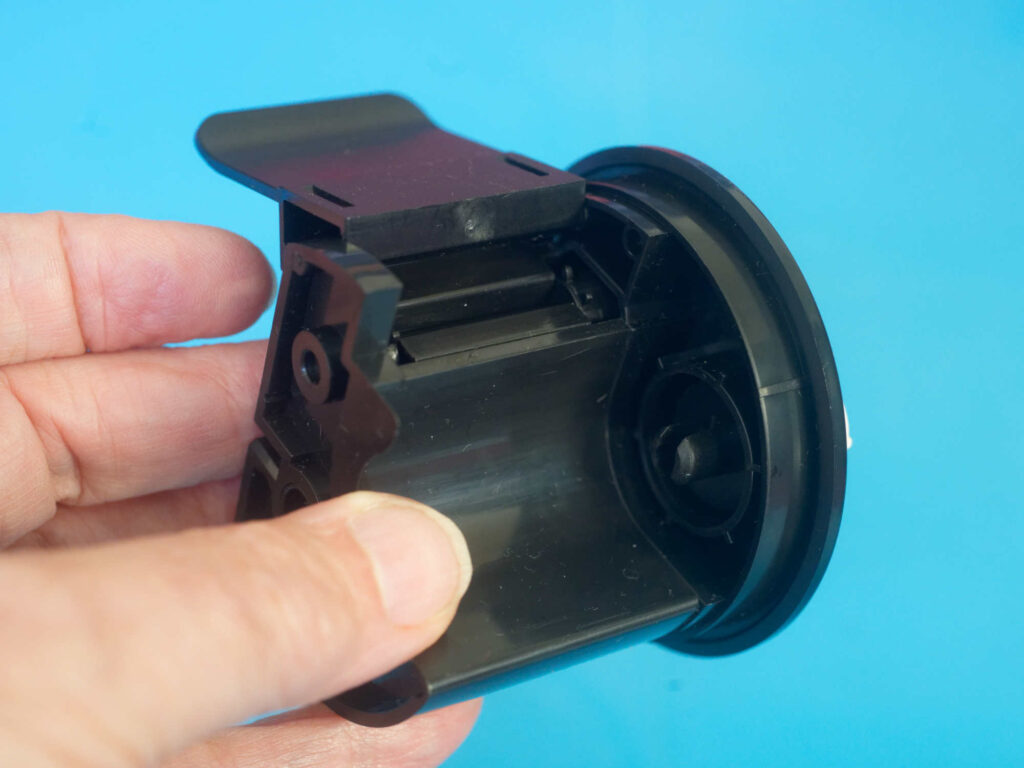
The feeder has a door flap that keeps the cassette in place, some sprockets connected to the crank socket, and a receiver to engage with the cassette spool to keep it in place and show that the film is being fed out when cranked.
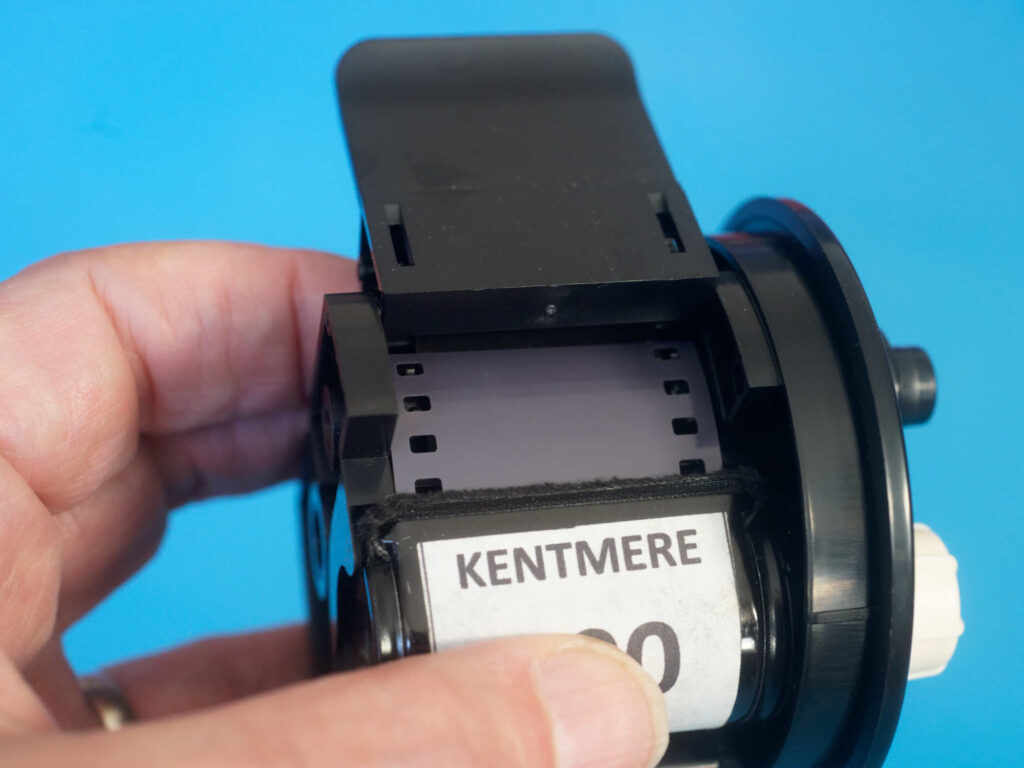
Put the cassette in place with the long end of the centre core engaging with the receiver for the white knob.

Make sure that the sprocket holes in the film are properly engaged with the teeth on the feeder’s drive sprocket. Misalignment or thin film may lead to shredding of the sprocket holes!
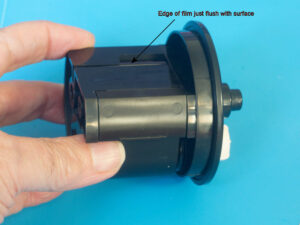
Once the feeder door flap is closed over the sprockets, make sure the edge of the film is flush with the flat surface so that the feeder slots in nicely.
Note that the feeder will only fit one way and only then if the ‘gate’ is closed.
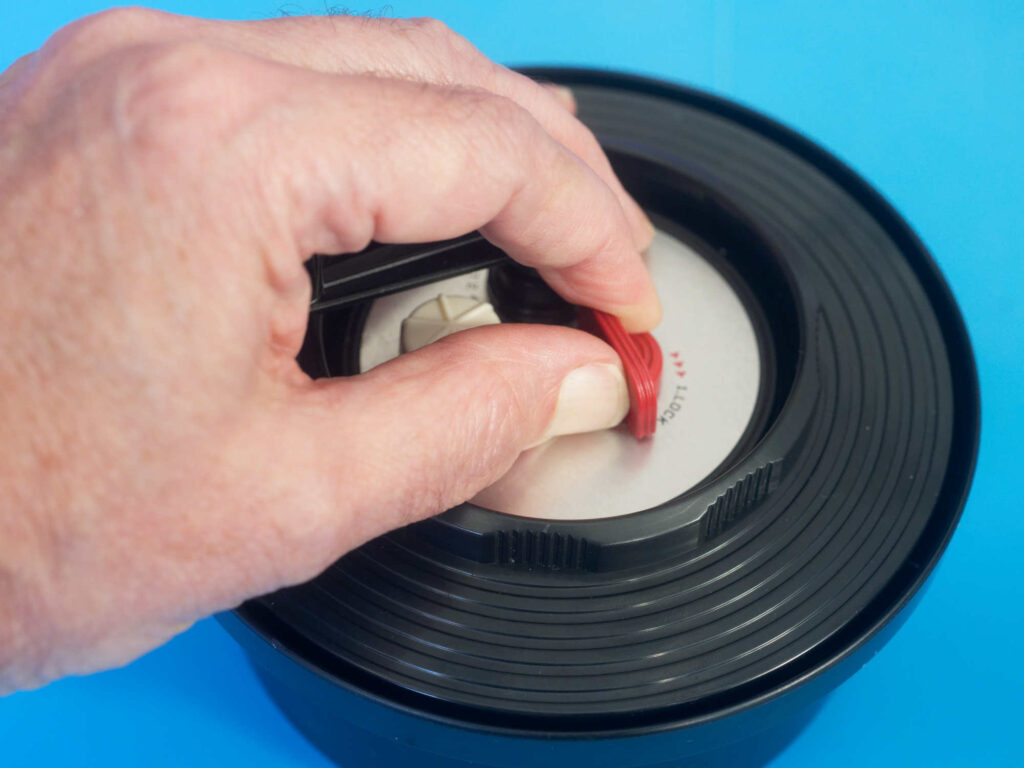
Make sure you move the red switch clockwise to open the guillotine ‘gate’ before turning the crank clockwise.

There should be little or no resistance when the crank is turned clockwise and the white knob should also start turning clockwise (once any slack is taken up). Listen out early on for any nasty noises – if you hear any, stop as the film is unlikely to load (maybe check the red switch position). As a general guide, one turn of the crank ought to advance the film by 8 perforations (one frame) into the spiral. A slight resistance on the crank will be felt when the film is fully wound out of the cassette. Moving the switch anti-clockwise should cut the film and unlock the feeder.
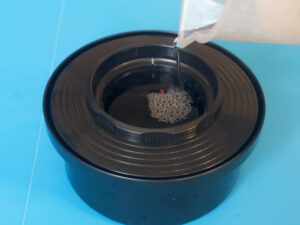
When the feeder is out of the way, chemicals are simply poured into the middle of the shaft. The recommended 350cc of liquid should reach the ‘step’ in the shaft.
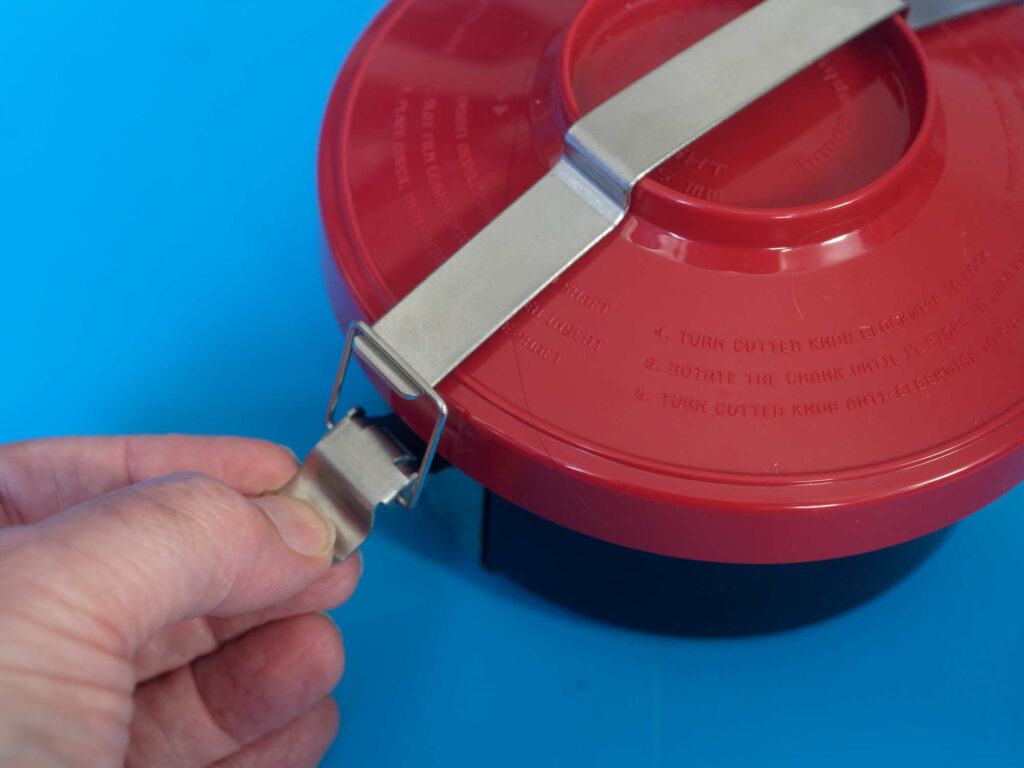
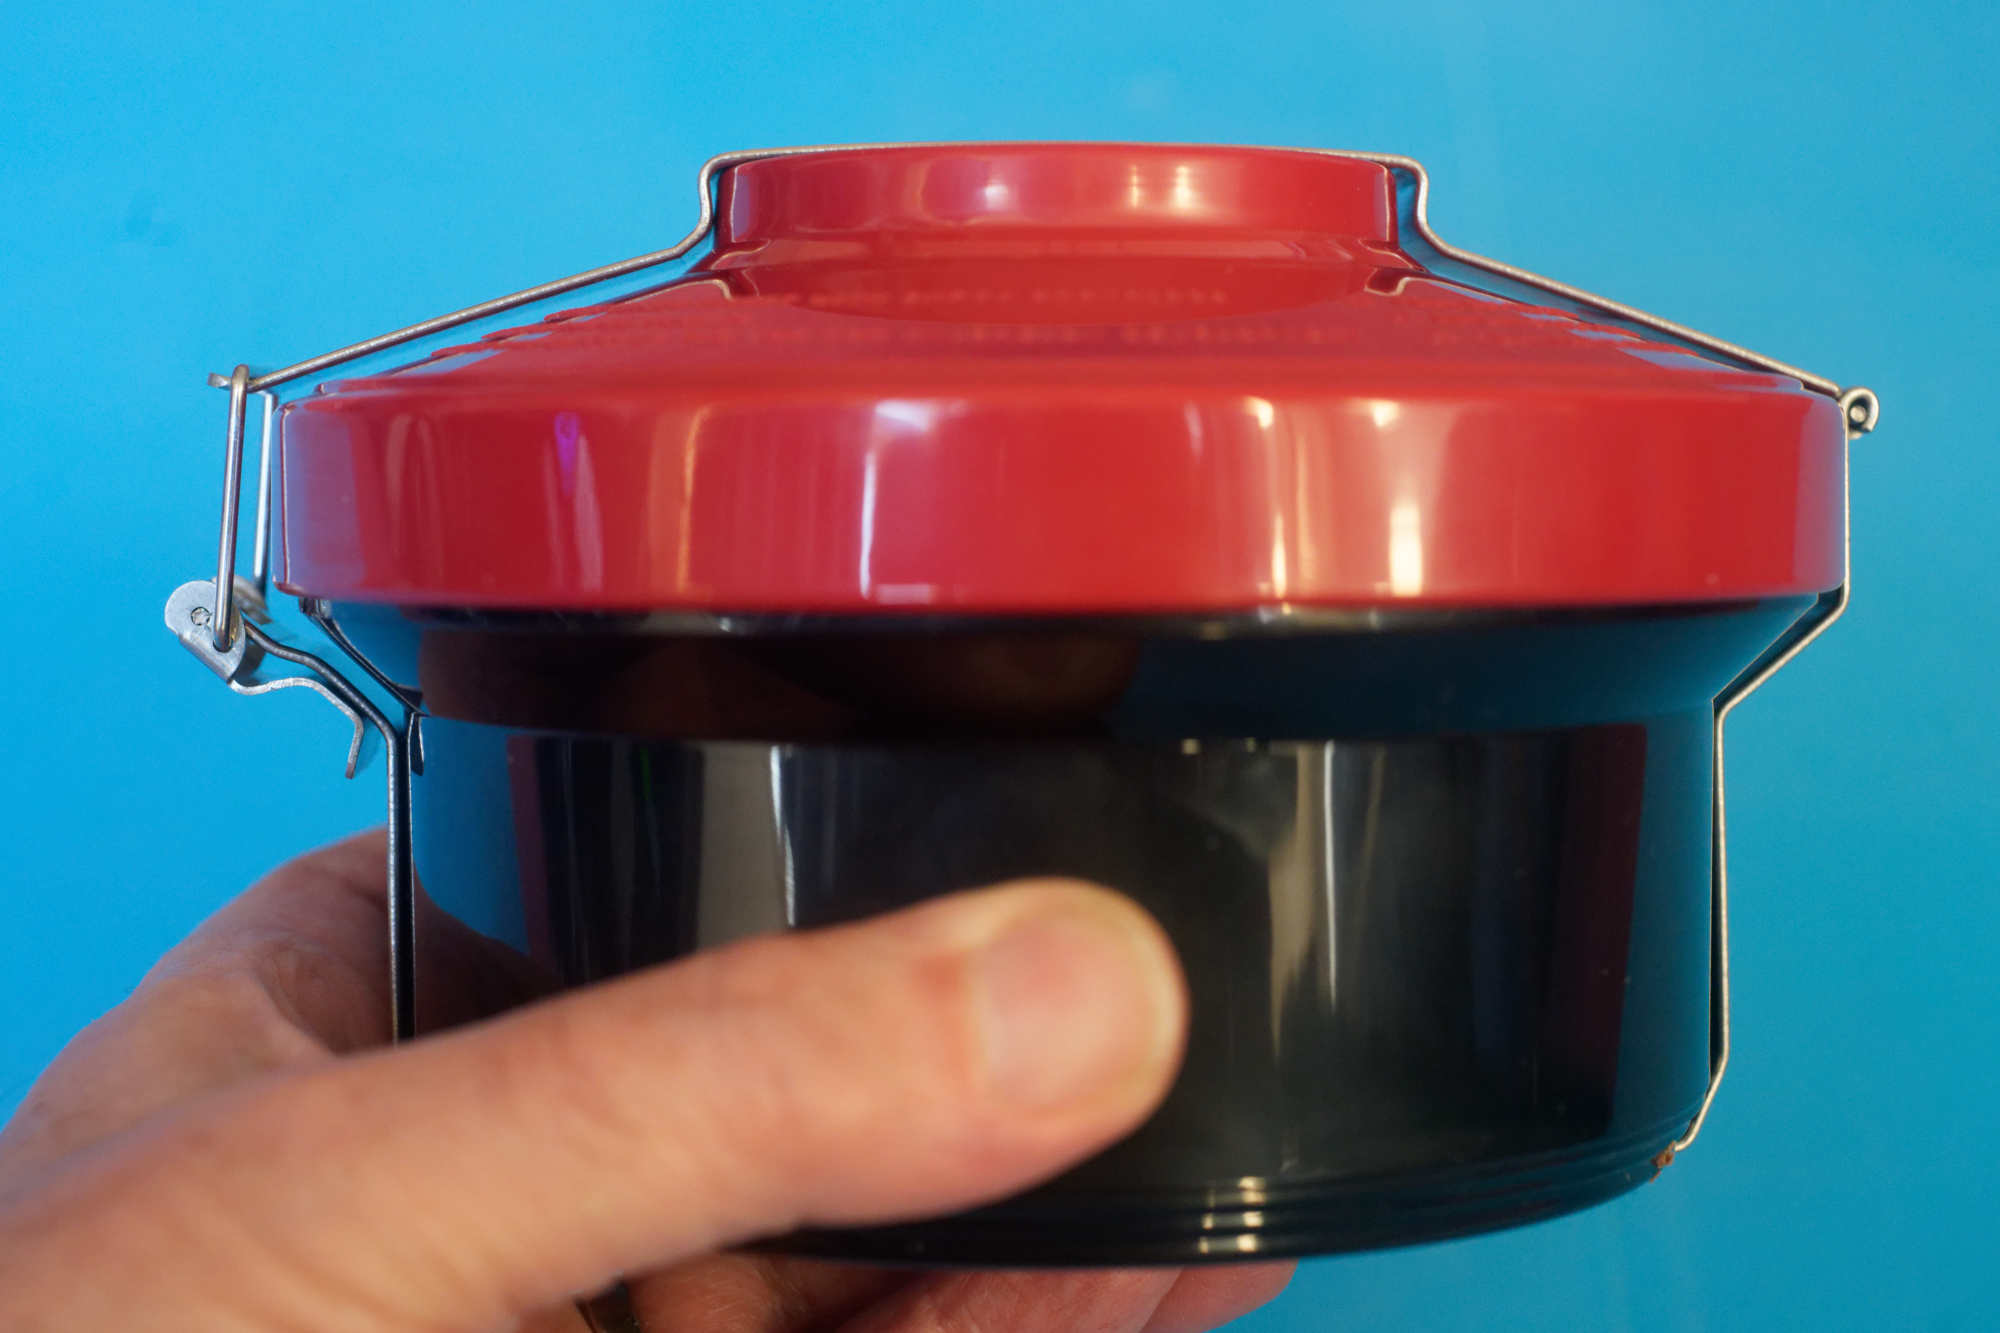
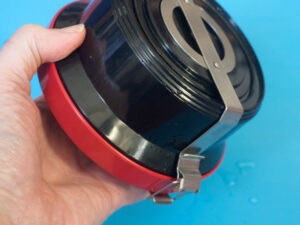
The lid and strap are quite substantial and give a real retro feel to the whole tank. The rubber lining of the lid, plus the pressure of the strap should stop any leaks while the tank is inverted.
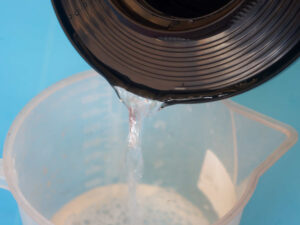
When poring out, fluid exits via the gap between the lid and the tank which forms an effective light trap. Remember to allow extra time to undo the strap and remove the red water-tight lid for developer, stop, fix and wash.

In use
Now I must confess that I’m normally one of those ‘discard the instructions and leap straight in’ sort of guys, but as I was looking to write my experiences up as a review, I took time to watch the instructional video online.
I tend to leave leaders out on all of my used films, so took the conscious decision to deliberately wind the leader on a roll of Fomapan 400 back into the cassette and try the leader retriever.
Mistake. Try as I might, I couldn’t get the retriever to work. I think it was down to me rather than the product (see the bit in ‘Conclusion’ at the end of the article) – however, as I now had no option but to break open the cassette, using the Fomapan as a test roll was out – instead it went into a dark bag with a regular Paterson tank and spiral.
The other roll I had was some Fuji NEOPAN 1600. I couldn’t remember how long it had been sitting waiting for development, but it was a film with its leader out, so it looked a good candidate to use for a first film.
The instructions are clear that you cut off the leader to leave a square end to the film with the cut being between two sets of perforations. I followed through with the process as I had seen in the online video, but was greeted by a nasty graunchy sound as I turned the crank. Maybe I was not careful enough with positioning the film over the sprocket holes, maybe the base of the NeoPan was just too thin and brittle to deal with being driven into the tank, or maybe I forgot to turn the red switch clockwise… Whatever the reason, another mistake – and another candidate for the dark bag and Paterson tank. When developed, it turned out the NEOPAN was from about 16 years ago, so age of the film may also have contributed to its brittleness.
After my abortive attempts, I decided to sacrifice about 12 frames of film and load it into a reusable 135 cassette to use as a dummy. Checking myself in daylight and then repeating as a ‘dry run’ I confirmed that, when loaded properly and carefully into the feeder and remembering to operate the red switch, film was indeed delivered as expected into the spiral. In fact, it worked impressively well. Time after time it worked flawlessly, with the dummy film getting shorter each time it was cut from the cassette. I don’t know what went wrong with the NEOPAN, but I don’t think it was due to the product.
The tank does exactly what LOMO claim it will do. It allows you to load a film from a cassette into a tank without a changing bag, It will also cleanly cut the film from the cassette, allowing the feeder to be removed. All without the film getting exposed to any unwanted light.
Upsides and downsides
Upsides
- This is a nicely made bit of kit. It goes together well.
- Despite being fiendishly complicated, it works. It appeals to the bit of me that appreciates an intricate bit of machinery.
- Once you are familiar with the tank, loading a film can be remarkably quick and simple.
- There is no danger of touching the working surface of the film until after the film is fixed.
- It really suits developing partly exposed films as you can judge the number of exposures to develop (counting turns of the crank) and keep the remainder of a partially exposed film in the cassette.
- It has a definite ‘retro charm’.
- I don’t have to remember to remove my luminous watch before loading a film for development.
Downsides
The downside of this product can be encapsulated by ‘three Cs’:
- Capacity – The tank only supports processing one film at a time. It can also only accommodate 135 format film.
- Complexity – While the man-child in me is genuinely impressed by the intricacy of how all the bits work together to achieve a result, the programmer and software tester in me bridles at solutions that are complicated. ‘Keep it simple stupid’ was a mantra impressed upon me from early days – cemented over many years of trying to fix other people’s undocumented code. With the Lomo tank – if something goes wrong with the loading process, you are likely going to need a dark bag and a conventional tank as fallback. I’m not sure how the tank will stand up to wear, or how sharp that film guillotine will stay.
- Cost – for the price of the Lomo tank at release, you can buy a fairly roomy dark bag and a genuine Paterson 4 tank and probably still have some change left. Although it is not a huge factor for anyone doing their own processing, the tank also requires 60cc more chemicals than a standard Paterson 4 tank for one film (350cc against 290cc).
Conclusion
If you manage to get it at the right price, it is a nice bit of kit and it does avoid having to keep track of bits of tank, cassette openers, scissors and film in a dark bag. It would be very useful to anyone who ever has a need to develop part-rolls of film. If you don’t find yourself getting on with conventional tanks it might well be worth a look. I’m a big fan of the Paterson Super System 4 tank and its reels, but would happily use the LOMO tank for single 35mm film rolls (knowing I have the Paterson tank and a dark bag as a fallback).
I can now confirm that the leader extractor tool does work. After the original draft of this review was completed, I accidentally rewound a film I wanted to transfer between two cameras back into the cassette – as the on-loan extractor was there waiting to be sent back to LOMO, I thought I’d give it a try – It worked perfectly without hitches. I think the previous fail was because I tend to crease over the leader on used films to differentiate between them and unused ones – as I had done on the Foma film – this seems to stop it working with the leader extractor, but is not likely to be a problem otherwise.
In general I would advise that a dark bag is a really useful thing for any analogue photographer to have around (even if you do have to remember to remove your watch).
Share this post:


Comments
Michael Zwicky-Ross on Lomo Daylight developing tank – A review
Comment posted: 21/04/2025
Comment posted: 21/04/2025
Bill Watts on Lomo Daylight developing tank – A review
Comment posted: 21/04/2025
I have used, for many years, Johnson & Johnson Essex "35" and Kent "20" daylight loading tanks for processing 35mm and 120 film. Both are now more than 70 years old and fabricated from Bakelite. I recently replaced the strap that draws the film into the spiral on both tanks for the first time! I have owned both tanks for approximately 50 years and they get regular use. I suspect the longevity of the plastics used in the Lomo tank will not last as long as they are thermoplastic and look a little thin.
Comment posted: 21/04/2025