A little background first. A few years ago I was having some serious issues with my negatives in the darkroom, and at some point I thought I had it narrowed down to a misuse of Photo Flo. I took to the internet to get advice from the community on best practices for using it and instead of answers, what I got were more questions. The following are just some of the ONLY ways I should be using Photo Flo. Skip to the end if you want to keep your sanity and read my recommendations. You have been warned.
The ONLY Way…
“Dilute per instructions. Use to rinse film after washing. Hang film to dry.”
Seems simple enough, by the book. 7/10
“Very simple. Make sure there are no bubbles or foam on top. Dip your negative for 30 seconds and then hang to dry fast. Do NOT squeegee.”
Close to the first suggestion, but I like bubbles, they make me smile. 6/10
“There is a number on the bottle; Photoflo 200. That number tells you the recommended ratio of photoflo to water. In this case 1 part chemical to 200 parts water. I usually use it at about half that concentration with distilled water only. It works very well. After the final wash you dip the film processing holder in the diluted solution of Photoflo and hang it to dry in as dust free, air movement free area as possible. Let the film hang until dry. Do not try to squeegee the excess moisture off with a film squeegee your fingers or anything else, you will scratch the film.”
Thorough, detailed, but a little condescending. 5.5/10
“I like a couple drops undiluted in the tank and agitated for a minute or so. Squeegee with fingers never a squeegee.”
Alright, so yes to squeegee, but an organic squeegee, got it. 7/10
“Dip a knitting pin in the photoflo. Then dip it in the final rinse water. You just want to break the surface.”
What the fuck is a knitting pin? -2/10
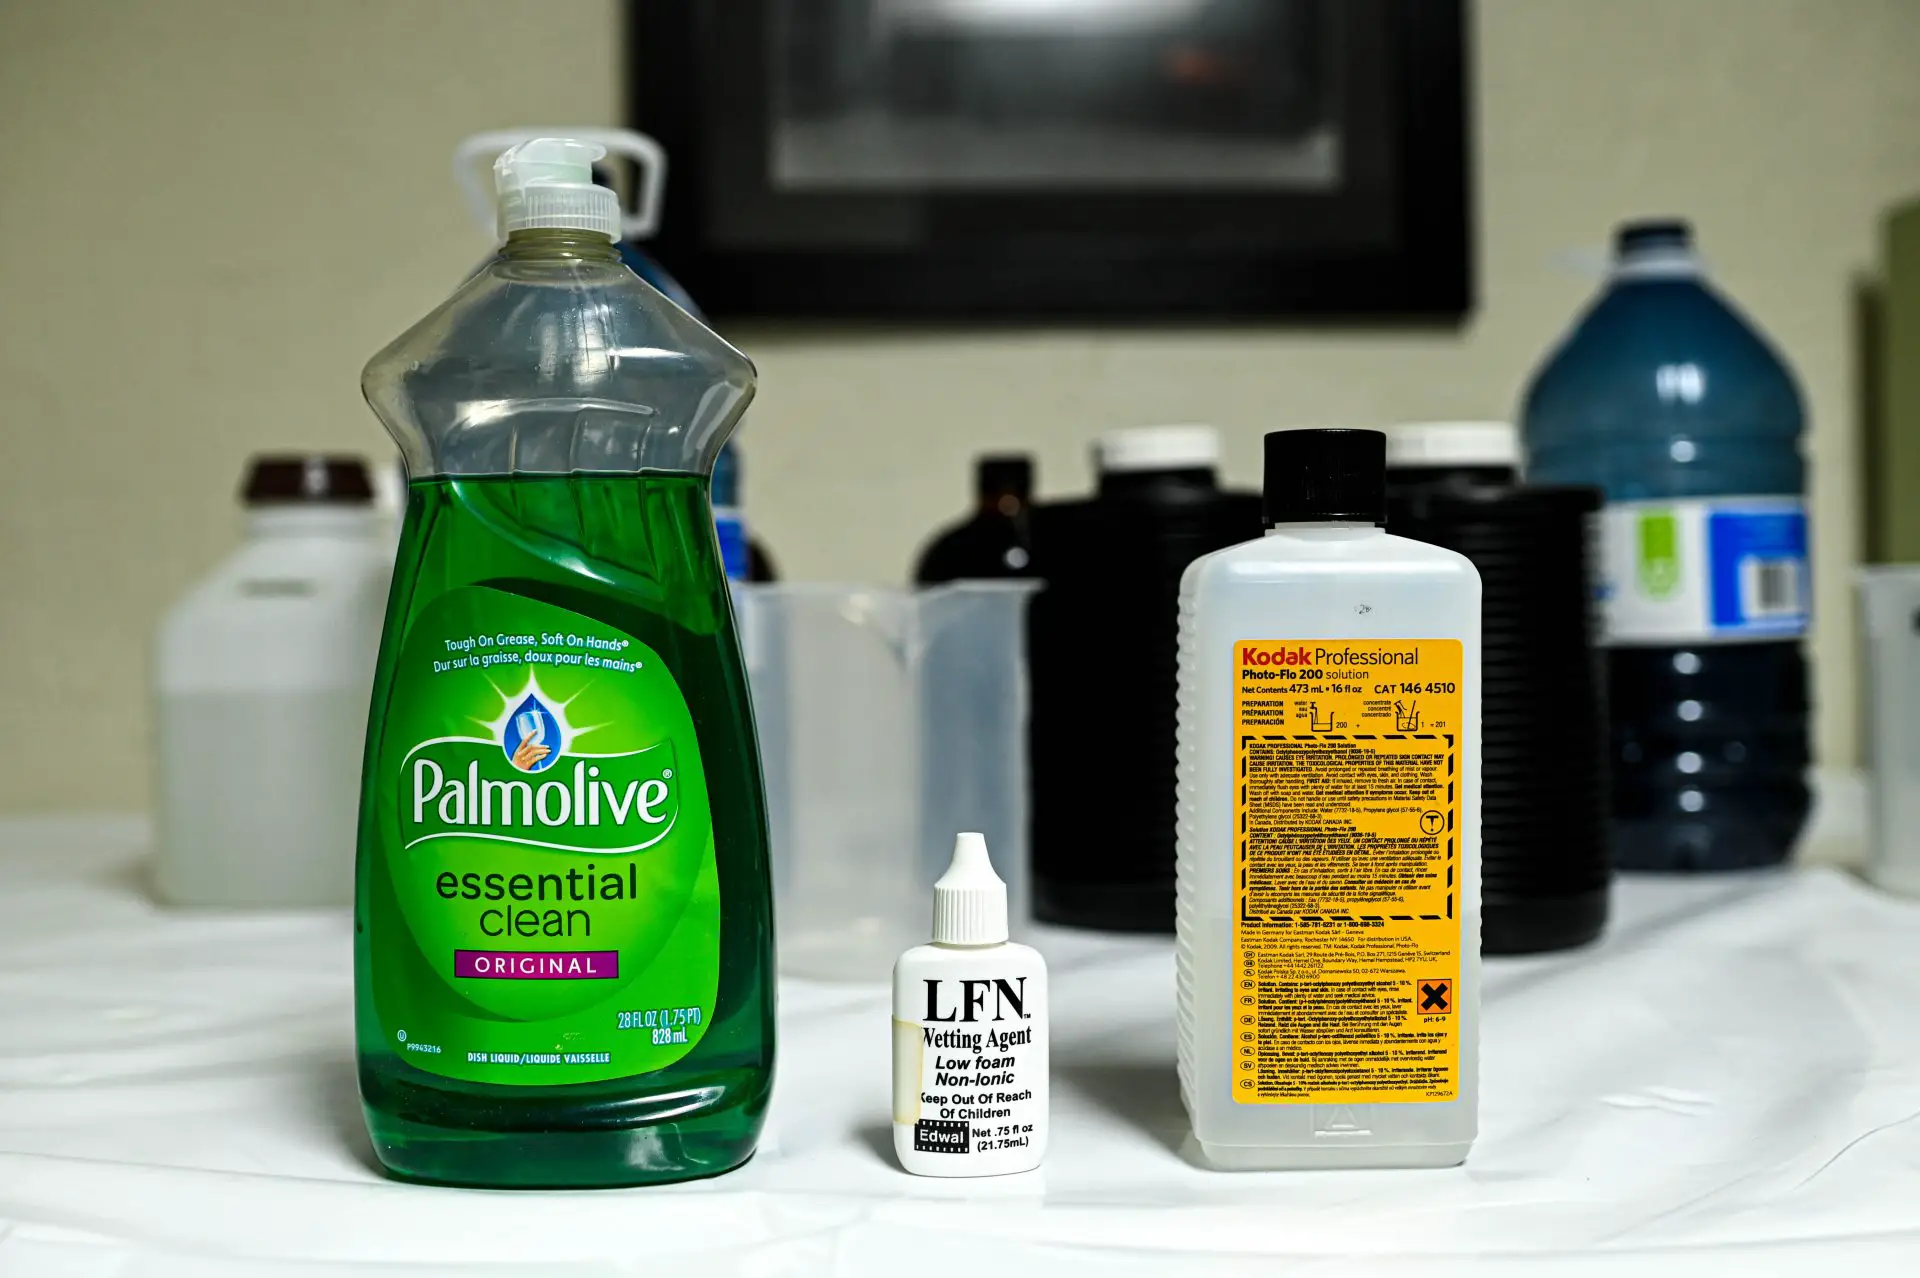
“I prefer Edwal LFN. One drop to about a quart of tap water. No big deal. Never had a problem with LFN.”
Brand alliance and use of the imperial system rather than metric. Also, tap water? Really peasant?! 2⅐/10
“I use 2ml photo flo per 500ml of water. Mixed in a tank without the film reel (try to avoid creating excessive bubbles), slowly lower film into tank, and soak for 2 minutes. Steam up the area I’ll be hanging the film, and hang as quickly as I can. No wiping. That’s my method, people will say it’s way too much photo flo, but I get fantastic results every time.”
Saves on cleaning time by keeping the reel out of the picture, but not sure I agree with dramatically altering the humidity at the last minute by steaming up the room with what I presume to be the shower. 5/10
“I process my film in a 2500 series Jobo tank that holds about 2 liters. After washing the film in the tank I fill it with fresh tap water. I empty a cap full of photo flo 200 into the tank. I agitate the film by raising it out of the water and lowering it back in several times. After about a minute I hang the film up to dry. I never squeegee and have never had an issue”
Tap water again?! What are we, savages?! 1/10
“I use a drop of unscented dish soap. Works great!”
Softens hands while you clean negatives, I’m sure. Dish soap is pretty ghetto though and flo is dirt cheap. 3/10
“I use 1/2 cap full to the developing tank once it’s full after the final rinse. Lift the reels up and down a few times. I squeegee between my index and middle fingers and hang to dry. Been doing it that way for 25 years w/o a problem.”
Simple. Straight forward. Time Tested. 8/10
“3 drops for a 500ml… never had an issue”
Neither has anyone else here bub. 5/10
“The biggest area of uncertainty for me is whether to use it in the processing tank (before taking film off the reels), or whether to use a separate container to dunk the film in it (after taking it off the reels).
I used to do the former, and now I do the latter. Mostly because you see random comments in every one of these discussions (and somewhere in the depths of Jobo’s product instructions) telling you to always do this step off of your processing equipment. This is because it apparently can leave hard-to-clean deposits on things that aren’t your film.
Also, in nearly every comment thread about the difficulty of loading plastic film reels, some smart ass will swear that your problems are because of accumulated wetting agent gunk on the reels (even if you flat-out state that you’re using brand-spanking-new reels and not ones that have 30 years of questionable prior use).
Also test the final solution, making a puddle on a mirror, and let it evaporate. Make sure there’s not a severe sediment left behind.”
While not a complete guide, solid advice. 8/10
“3 parts distilled water, 1 part isopropyl alcohol, and 10 drops of Kodak photo flo. It works best when used in conjunction with a VPI Record Cleaning machine.”
Yeah, I want to turn my film into a Molotov Cocktail. You know they stopped making Nitrate film for a reason. 0/10
“A little dab will do ya”
Technically the truth. 5/10
You Were Warned
Do you have a headache now? So did I. It’s pretty clear everyone has their own method (and their own way of spelling Photo-Flo) and we’ll have to take their word on if it works. I’ve sworn by workflow methods before only to find out later I was messing up big time. The “it’s the way I’ve always done it” is dangerous. As film photographers we need to constantly question our methods.
My Current Work-Flo
I read through all of that and came up with the following solution (see what I did there?), which I have done ever since with good results.
First thing, is I have a dedicated 1 liter container that I use for nothing but flo. Only the film goes inside, no reel, and it is washed separate from everything else. This prevents accidental contamination of other items, an issue I have dealt with before, and shortens overall washing time as I don’t need to scrub the container within an inch of its life.
The mixture I prepare uses approximately half the recommended amount. I use only distilled water to prepare it and remove the negatives from the reel before placing in the mix, avoiding bubbles, much to the dismay of my inner child.
I let it sit for about a minute while I tidy up, and this is the important part, I dip my fingers in the solution and squeegee as I pull the film out. I don’t squeegee with dry fingers. I hang it in my cabinet, dip my fingers in again and squeegee one more time. I’m not trying to choke out my film just get rid of the excess.
In Closing
Is this perfect? Nope. Photo-Flo is a fickle mistress. Too little and you have spots, too much and you have streaks. Don’t use it at all and you risk differential drying. Make sure you rinse your film clips too, as build up will cause streaking. I’ve considered using wood clothes pins and just tossing them after each use, due to this issue.
I know many of you will want to leave a comment telling me you’re “I’ve never had an issue” sure fire way of using Photo-Flo, but I’d much rather hear comically wrong ways to use it. I’ll start: Pour entire bottle into the tank, add two drops of water, mix vigorously.
Hope you enjoyed this bit of fun. The truth is if you don’t have spots when its dry, and you don’t have streaks when you shine a flashlight on it, you probably did fine. If you like my word formations, check out my You Tube Channel.
Until Next Time, Stay Classic!

Share this post:


Comments
Patrick Medd on Photo-Flo: The ONLY Real Way To Use It
Comment posted: 23/09/2023
Johnny Martyr on Photo-Flo: The ONLY Real Way To Use It
Comment posted: 23/09/2023
I would have mentioned the particular problems you or others were trying to address. Harder water seems to leave spots if the film doesn't dry quickly enough but can be fine if it dries faster. How fast the film dries depends on the temperature and humidity of the air as well as how much water is left on the film. How much water is left on the film is affected by how/if one squeegees. But then the use of squeegees brings up the possibility of scratching. And the humidity brings up cupping and curling of the film as well as dust settling on it. And dust can also contribute to water spots I think.
Using distilled water as you've concluded simply standardizes the water quality to where the ambient temperature and humidity can be more variable without causing mineral deposits. But spots can still occur if the air is not warm enough and too much water is left on the film. And probably yes, the dilution of your rinsing agent (which can be Kodak Photo-Flo or any other number of products) affects this.
Squeegeeing with wet fingers will work for some but depending on the oil content of ones skin, may not work for others.
Squeegeeing with a rubber squeegee will scratch the film if the blades are not softened and cleaned before use.
Some people don't squeegee at all and do a final rinse with some alcohol to speed up evaporation and drying.
I probably needn't share my particular method, which works for me year-round for hundreds of rolls a year. Because again, it's all relative to the environment.
So I think that you're certainly onto something by collecting the numerous types of advice and varying methods. But in my opinion, because I've processed for several years in at least four different locations at different times of the year, I am pretty sure that the key to determining ones methods are those local water and environmental factors.
Thanks for the entertaining read!
Wendell Cheek on Photo-Flo: The ONLY Real Way To Use It
Comment posted: 23/09/2023
Jerome on Photo-Flo: The ONLY Real Way To Use It
Comment posted: 23/09/2023
To dry, I first run a small air purifier in the small bathroom for 20 min before hanging the negatives. As a final tip, to prevent curling, I put a small amount of hot water in the bathtub and hang the negatives from the shower head.
Since doing these steps, I rarely have spots or dust. Even better, I started using Tri-X again because it dries flat in the moist air.
Daniel Castelli on Photo-Flo: The ONLY Real Way To Use It
Comment posted: 23/09/2023
I have used the Sprint System of Photography chemicals for over 40 years. They have their version of Photo-Flo called Wetting Agent & Stabilizer. Each bottle is printed with detailed instructions for use with film and enlarging paper. They have instructions on mixing if you use a soft photo sponge, or for drip & dry. A plus is that this chemical has a slight hardening agent. I use a non-hardening fixer, so this is a plus.
I use the drip & dry method. 3ml of concentrate to 1 liter of distilled water. Soak for 1-2 minutes (I use 1 minute). Hang to dry.
I don't know if the Sprint System of Photography is available outside of the US.
One last think. Back in the very early 1970's, a small city near my town had a mini-park with a water fountain. One day, someone dumped a gallon of Photo-Flo into the water. Talk about foam & bubbles! It took weeks to flush out the water system. Eventually, the culprit was caught because the police checked the sales of Photo-Flo at the local camera store. Only one person had bought a gallon a couple of days before the incident. Oh, and the person left the empty gallon jug at the scene of the crime. His fingerprints were all over the jug. It was not me.
Comment posted: 23/09/2023
Richard Politowski on Photo-Flo: The ONLY Real Way To Use It
Comment posted: 23/09/2023
Remember that all films have clear emulsion coatings on both sides except for most 35 mm. films which are usually bare acetate/polyester/plastic on the base side. These films when dried with streaks or spots on the BASE side can easily be wiped down with a slightly damp cloth but only on the BASE side and NOT on the emulsion side.
Johnny Martyr on Photo-Flo: The ONLY Real Way To Use It
Comment posted: 25/09/2023
Huss on Photo-Flo: The ONLY Real Way To Use It
Comment posted: 25/09/2023
I threw away my photoflow and now enjoy spot free negs.
The secret? I wipe the film when first put out to hang with KimWipes. I use four per roll.
Spot and scratch free bliss...
Ronald on Photo-Flo: The ONLY Real Way To Use It
Comment posted: 26/09/2023
1. Distilled water to mix chemicals; distilled water final rinse.
2. A few drops of photo-flouuw (my spelling) in distilled water final rinse, mixed well and gently.
3. Spin the reel in a salad spinner, with the negatives still in it. Thirty hard pumps works for me.
4. Hang in a dust-free place to dry. I used to steam the shower and hang the clip from the shower head; then I made a custom cheap drying cabinet. I got four moving boxes from the local moving supplies store, taped/glued them into one long box, and cut a hole in each end and taped a furnace filter to enable airflow without dustflow. I stood it up on end, put a nipple with a light bulb in the bottom to generate warmth and create a rising column of clean warm air, and jabbed a stick through the top to clip negatives to. I used a utility knife held at an angle to cut three sides of a door (leaving a cardboard hinge) that will open only outwards. I turn on the light bulb when I start developing. By the time the negatives are ready to hang, the cabinet is full of clean warm air. Negatives dry spotless in 20 minutes. Total cost was about $15 USD.
Phil on Photo-Flo: The ONLY Real Way To Use It
Comment posted: 26/09/2023
That said, I stopped using Photoflo when I graduated and was developing at home. I just do a final rinse in distilled water, and carefully squeegee off the film with my fingers while wearing clean nitrile gloves. No spots, streaks, or scratches for me so far. Whereas I seemed to have them regularly in college when using Photoflo.
Comment posted: 26/09/2023
Denton Hoyer on Photo-Flo: The ONLY Real Way To Use It
Comment posted: 01/02/2024
Paul Quellin on Photo-Flo: The ONLY Real Way To Use It
Comment posted: 25/09/2024