M42 is intended to be the universal mount. Unfortunately if you’re using a screw-mount Fujica SLR, that’s not entirely the case. There’s a design issue that prevents some lenses being used wide-open, but I worked out how to fix it.
The Fujica SLR range has a slightly bewildering array of M42-mount models. The earlier ST601 and ST701 relied on mercury batteries. The replacement ST605 and ST705 allowed the use of modern button cells, with the 705 also enabling open-aperture metering with Fujinon lenses. After a few false starts with bargain-bucket broken ones, I ended up with a nice ST605 and its regular stop-down metering.
While getting to know my new camera, I noticed something strange. The last twist of mounting some automatic M42 lenses would also make the aperture close slightly. Other lenses didn’t exhibit the problem. What could be causing it? The lenses were fine, with the aperture snappily opening and closing fully from the action of the pin. The camera looked fine, with the ‘stop-down pusher bar’ inside the bottom of the lens mount moving cleanly forwards and backwards through its full range.
Time for some precise measuring. At its fully retracted position, the bit of the pusher bar that touches the pin was 8.0mm back from the mount flange. I checked one of the lenses that had the problem (CZJ Tessar), and the aperture started to close when the end of the pin was 8.6mm out from the mount flange. Bingo.
There now followed a flurry of measurement of every M42 camera and every M42 lens in my collection. Here’s the results, ordered from smallest to largest:
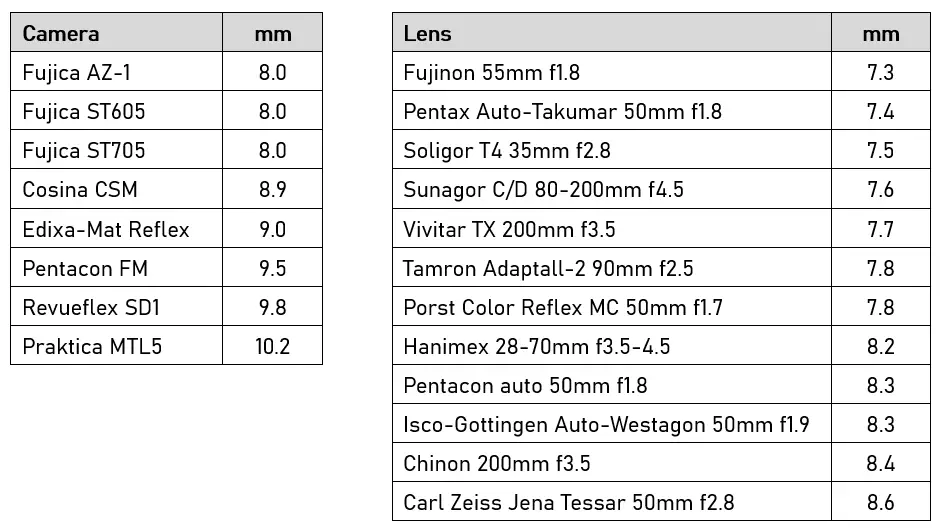
What this shows is that:
- All of the lenses are fine on all of the cameras except the Fujicas.
- 5 of the 12 lenses would have a problem on any of the Fujicas, because they start to close the aperture when the pin is further out than the Fujica cameras allow.
Could it be fixed? I removed the front panel to have a look. First thing to note: Don’t lose the tiny little slotted ‘Oldham coupling’ between the self-timer lever and the mechanism. It’s circled in red below, and is loose so it will probably fall out.
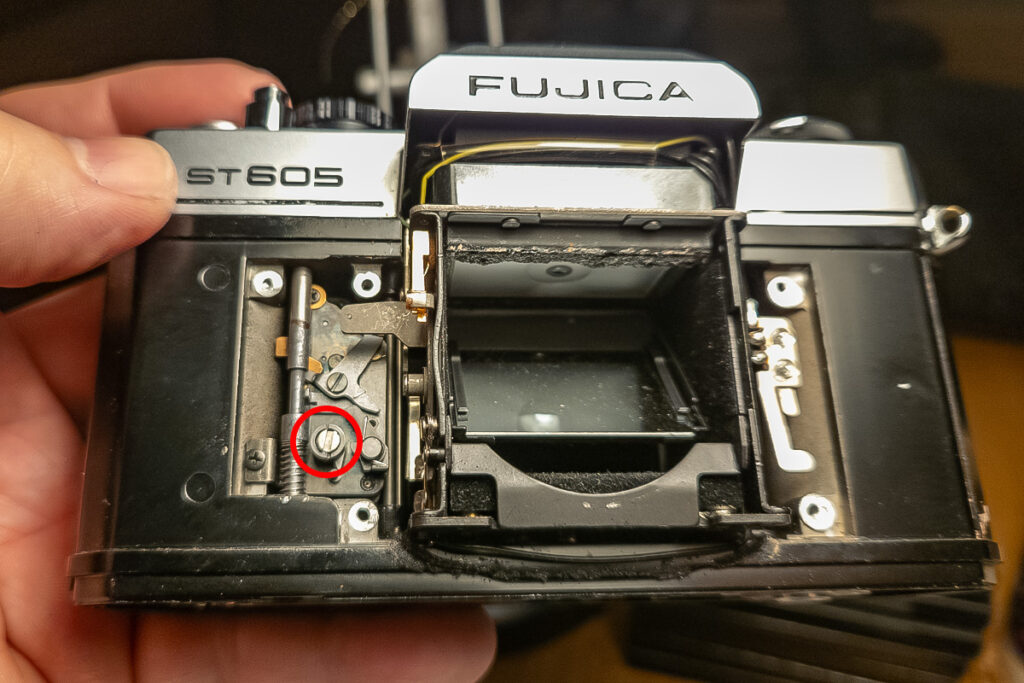
The pusher bar hangs off a pair of hinges on either side of the mirror box. At rest, it’s pulled back by a spring until being stopped by touching the mirror box baseplate. There are two completely separate mechanisms to push it forward. One works with the shutter, to swing out a horizontal lever from its retracted position inside the bottom of the mirror box. The other is a vertical lever on the side of the mirror box, actuated by the stop-down button, that works against a pin on the end of the pusher bar.
The only way to make the pusher bar sit further back at rest would be to file away some material from the bottom plate of the mirror box. To check the feasibility, I needed to swing the pusher bar out to 90-odd degrees so it wouldn’t be in the way. To enable that, I had to file away a corner on the mirror box side plate, to allow the spring pin to move past it. See below:
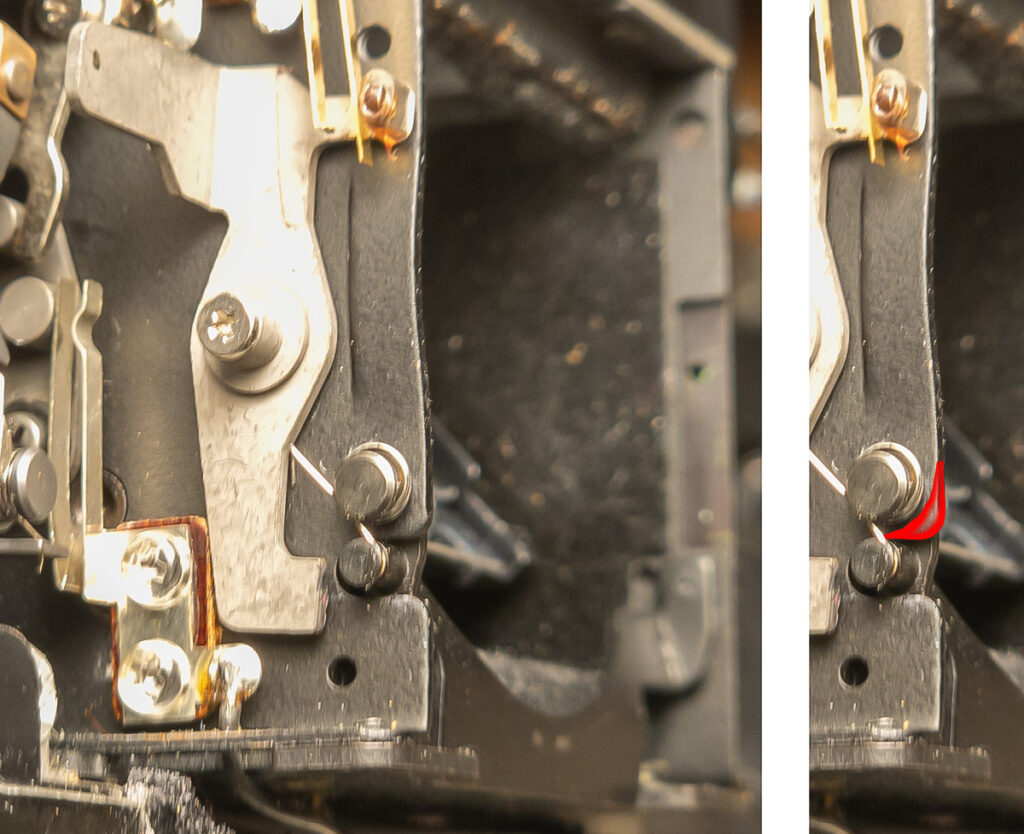
It looked like it would work, but would also involve filing away the same amount of the material from the actuating lever. The hatched area in this picture shows the approximately 1.5mm that needs to be removed (lever shown in the actuated position).
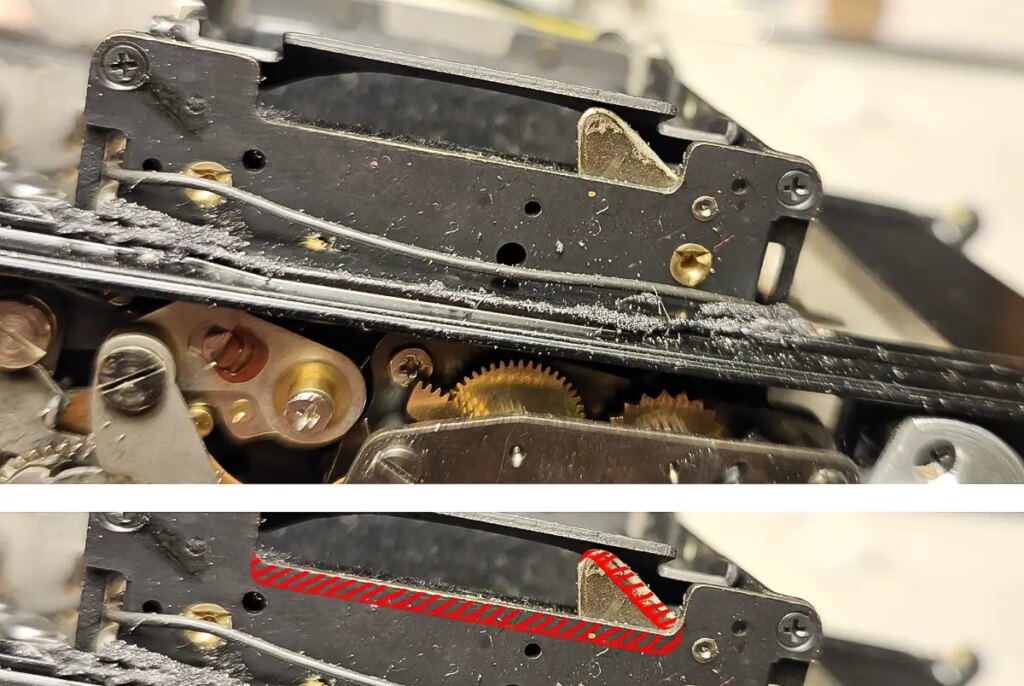
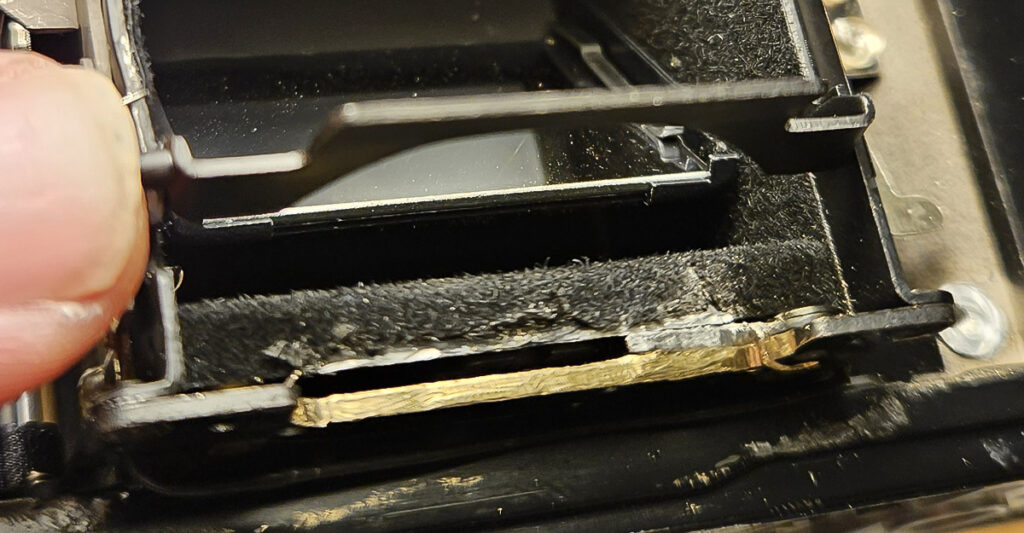
A Dremel-type mini grinder turned out to be the best tool to use. The tricky (and uncomfortable) bit was doing the job upside down, so gravity would make the filings and metal dust fall out the camera instead of into it. This picture below shows the grinding nearly finished on the brass mirror box (gold colour) and the steel actuating lever (silver colour). The finishing is important though, because note how they are tending to merge together. That will prevent the lever moving. You have to carefully clean up and round off the edges with a file and sandpaper to make sure the lever still moves freely.
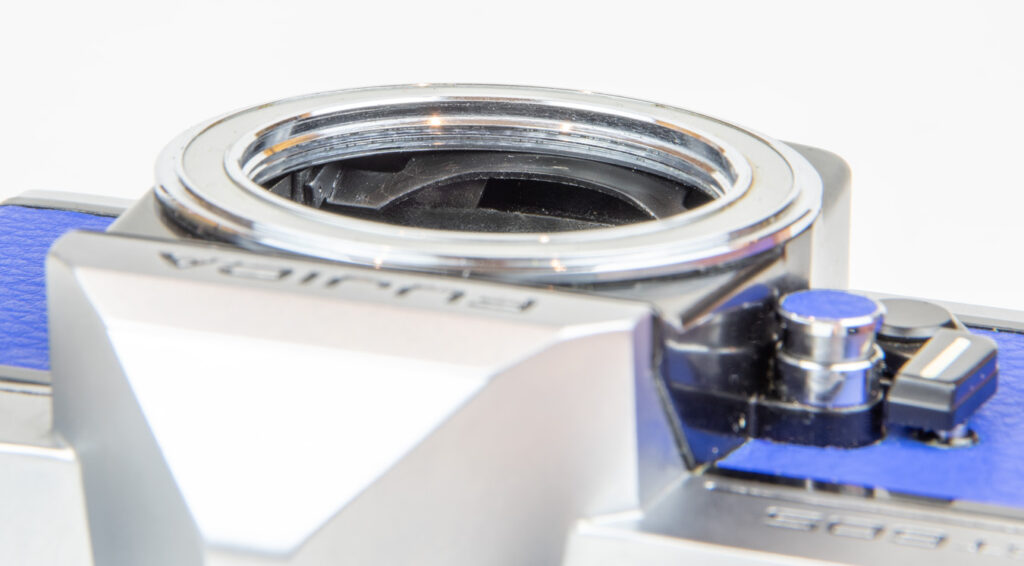
Once it all seemed to be operating correctly, I painted the shiny edges matt black again and reassembled the camera. For finishing flourish, I recovered it with some vivid blue leatherette (because why not?). This picture (taken with the shutter open on B) shows that even though the material has been removed from the actuating lever, it still has no trouble pushing the bar as far forward as it needs to go.
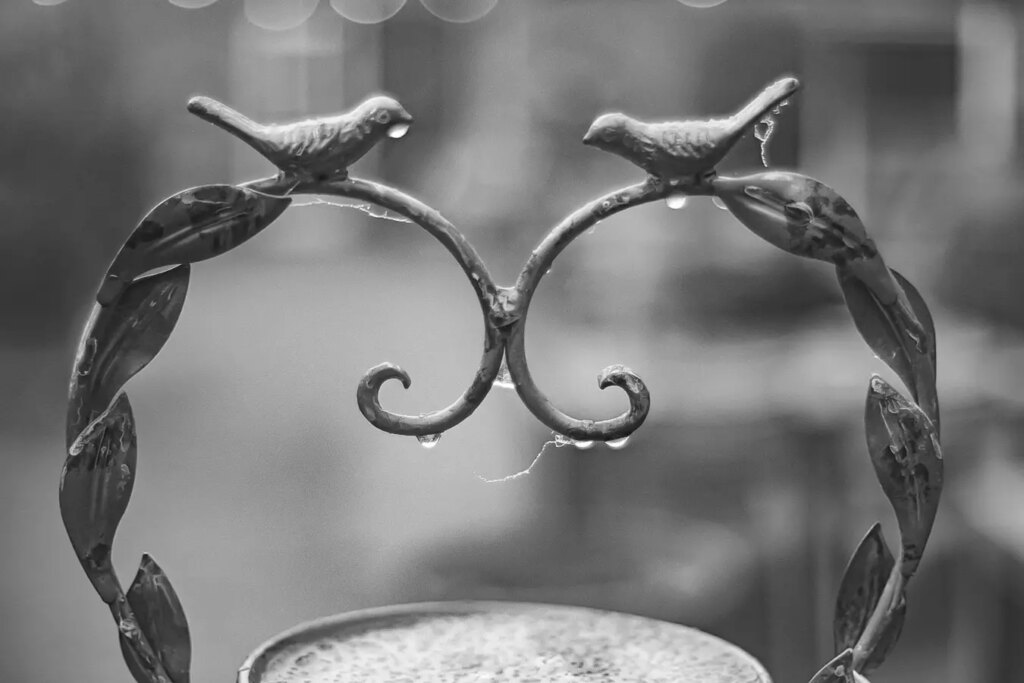
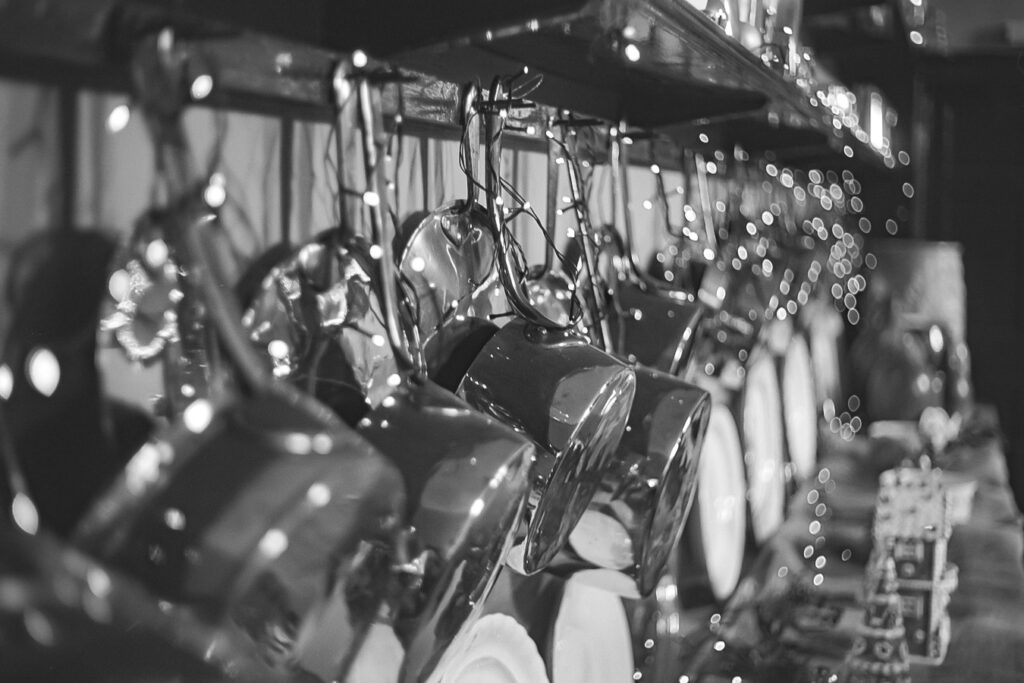
Testing with lenses showed it worked as intended, from wide open to fully stopped-down. For a proper test, I loaded the camera with Ilford Delta 100 and took it out with all the lenses it previously had a problem with. My intention was to shoot the whole roll with the lenses wide open, taking images that would previously have been impossible with this camera and these lenses. The venue was Felbrigg Hall in Norfolk.

Share this post:


Comments
Michael Zwicky-Ross on Fixing the Fujica SLR lens compatibility problem
Comment posted: 26/01/2024
Comment posted: 26/01/2024
Bob Janes on Fixing the Fujica SLR lens compatibility problem
Comment posted: 26/01/2024
Comment posted: 26/01/2024
Comment posted: 26/01/2024
Peter Roberts on Fixing the Fujica SLR lens compatibility problem
Comment posted: 27/01/2024
Be that as it may, it did jog my memory that I had vaguely intended to do a Five Frames featuring the camera when I ran a test roll through it a little while ago. For some reason I never got round to doing it. Perhaps I ought to revisit that.
Comment posted: 27/01/2024
Dave Pearman on Fixing the Fujica SLR lens compatibility problem
Comment posted: 29/01/2024
While I enjoyed your description of the impressive modifications to your Fujica, I have to ask... were they necessary? Surely if a lens is set to maximum aperture that's what you'll get, whether the pin is pushed in or not? As metering is performed with the diaphragm stopped down that wouldn't be affected either. The only drawback would be a (slightly) darker viewfinder image for focusing when you have a smaller aperture set.