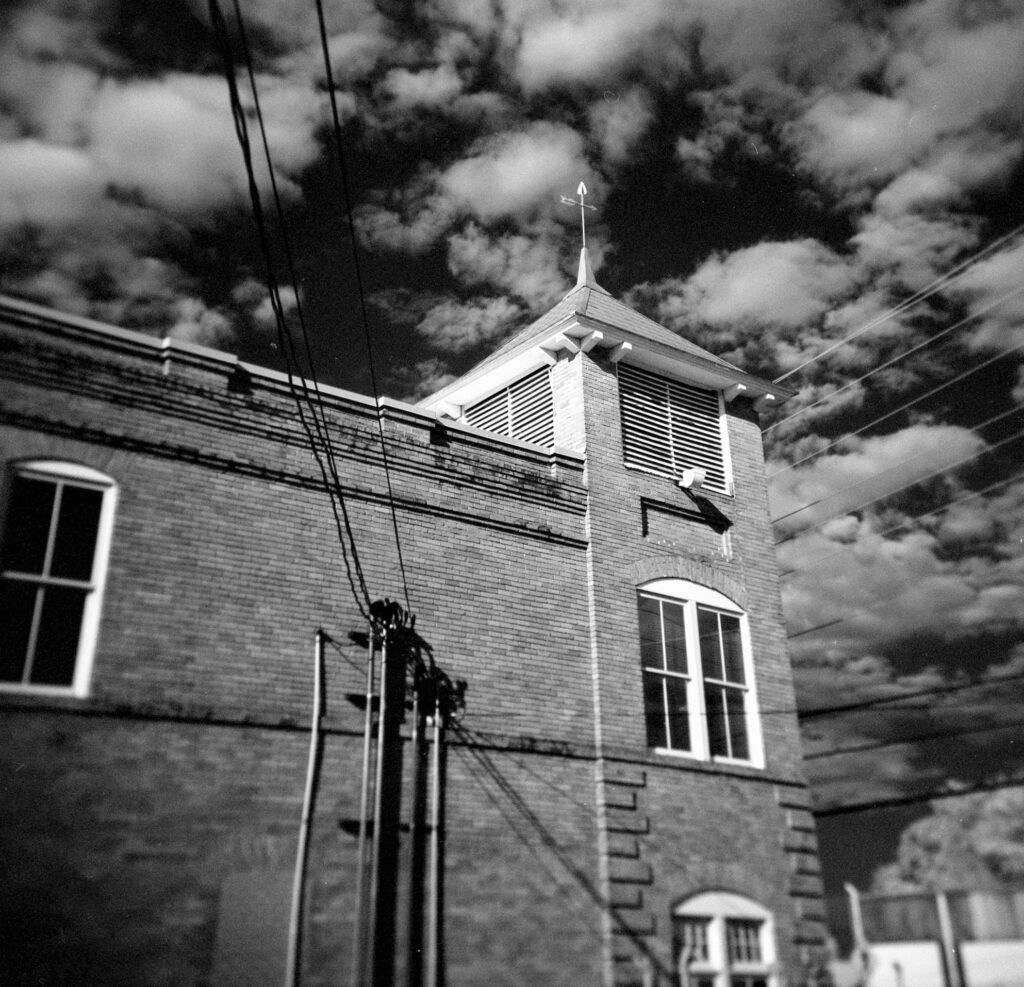
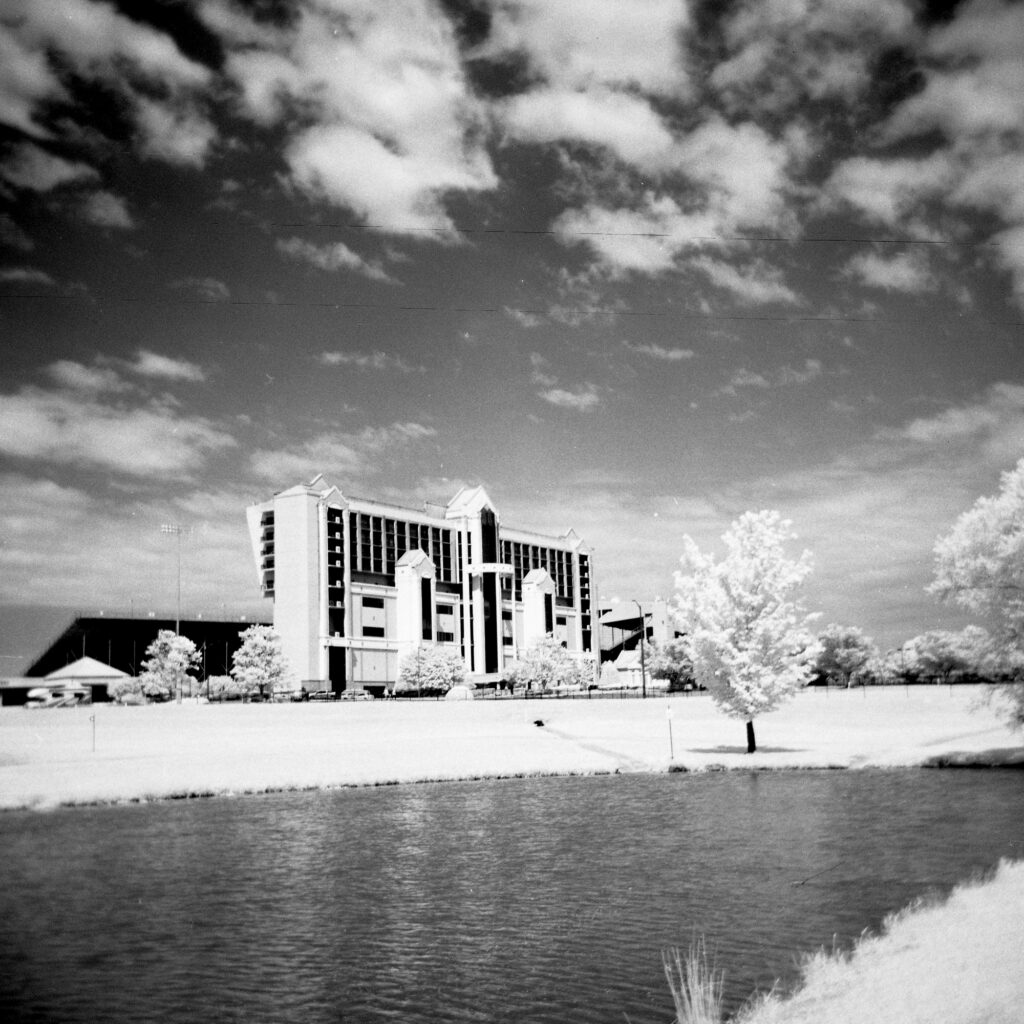
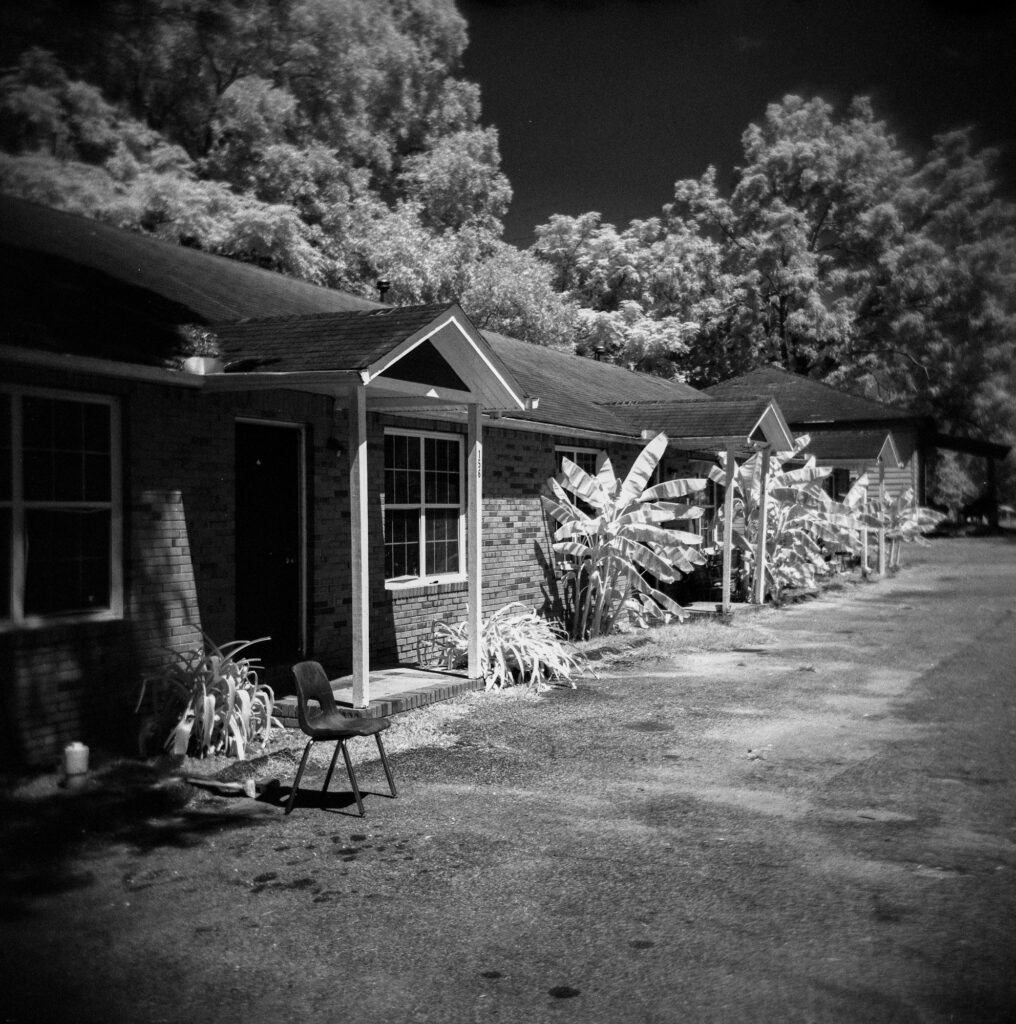
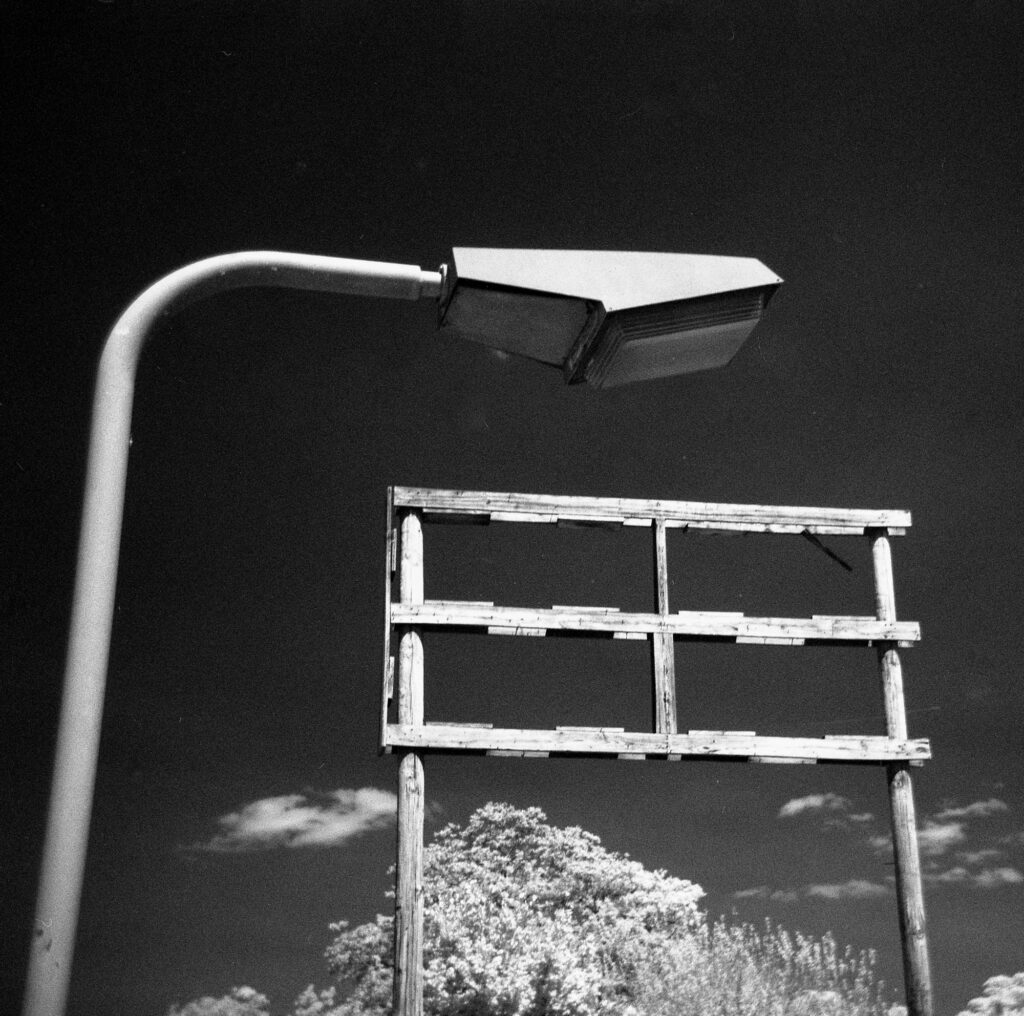
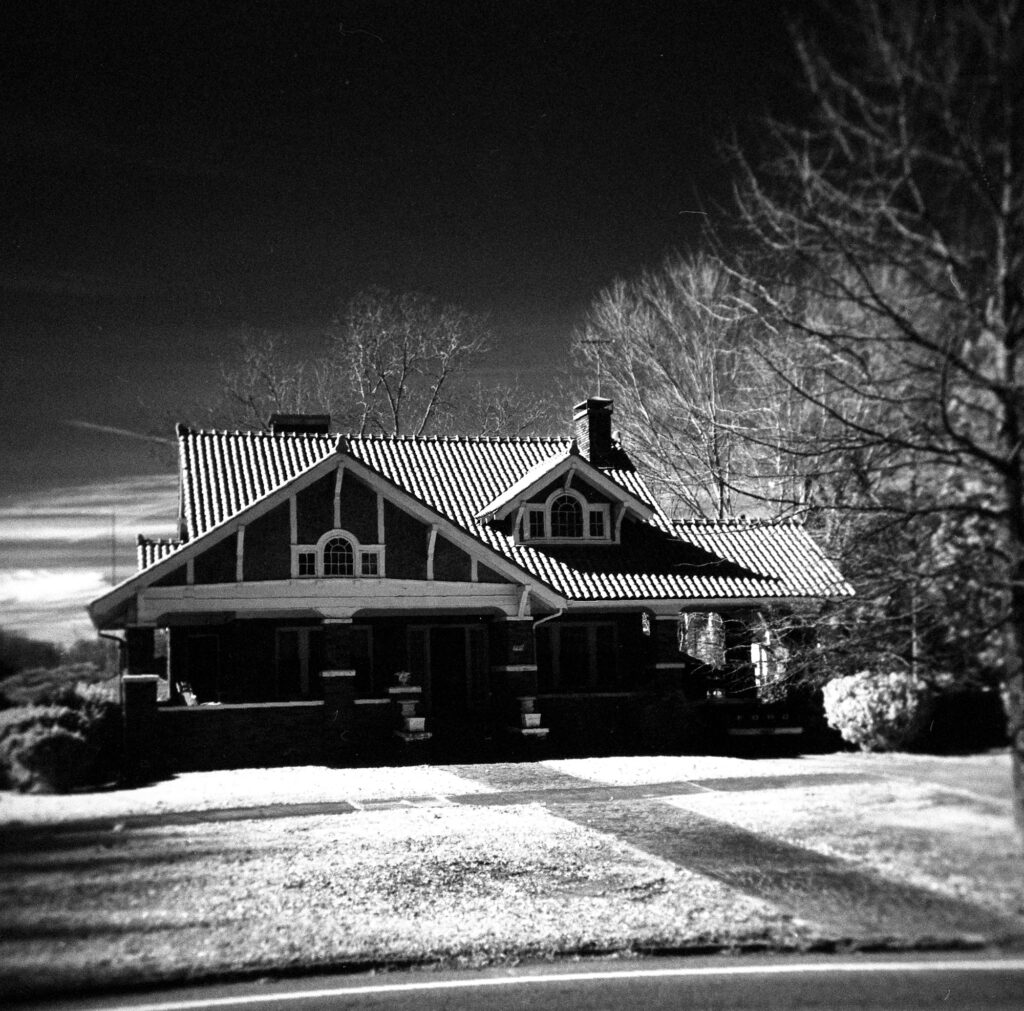
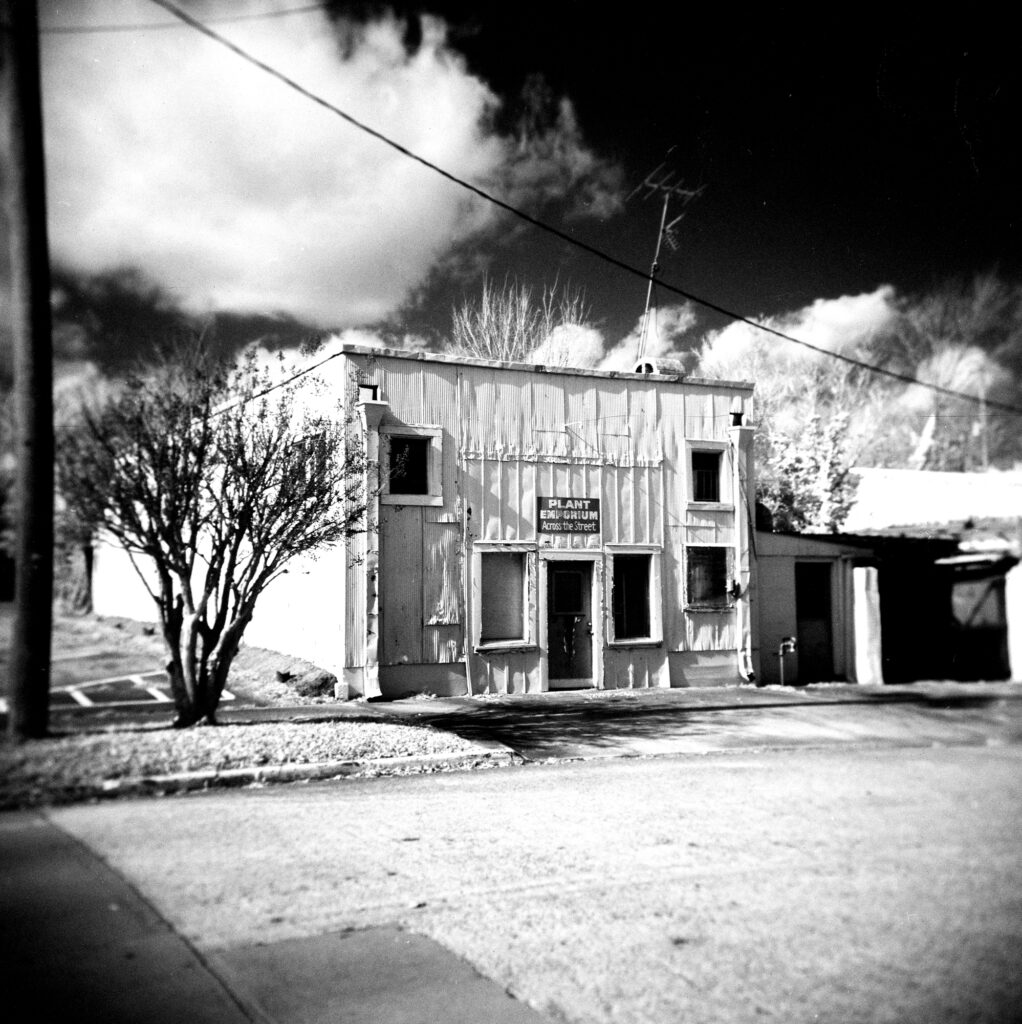
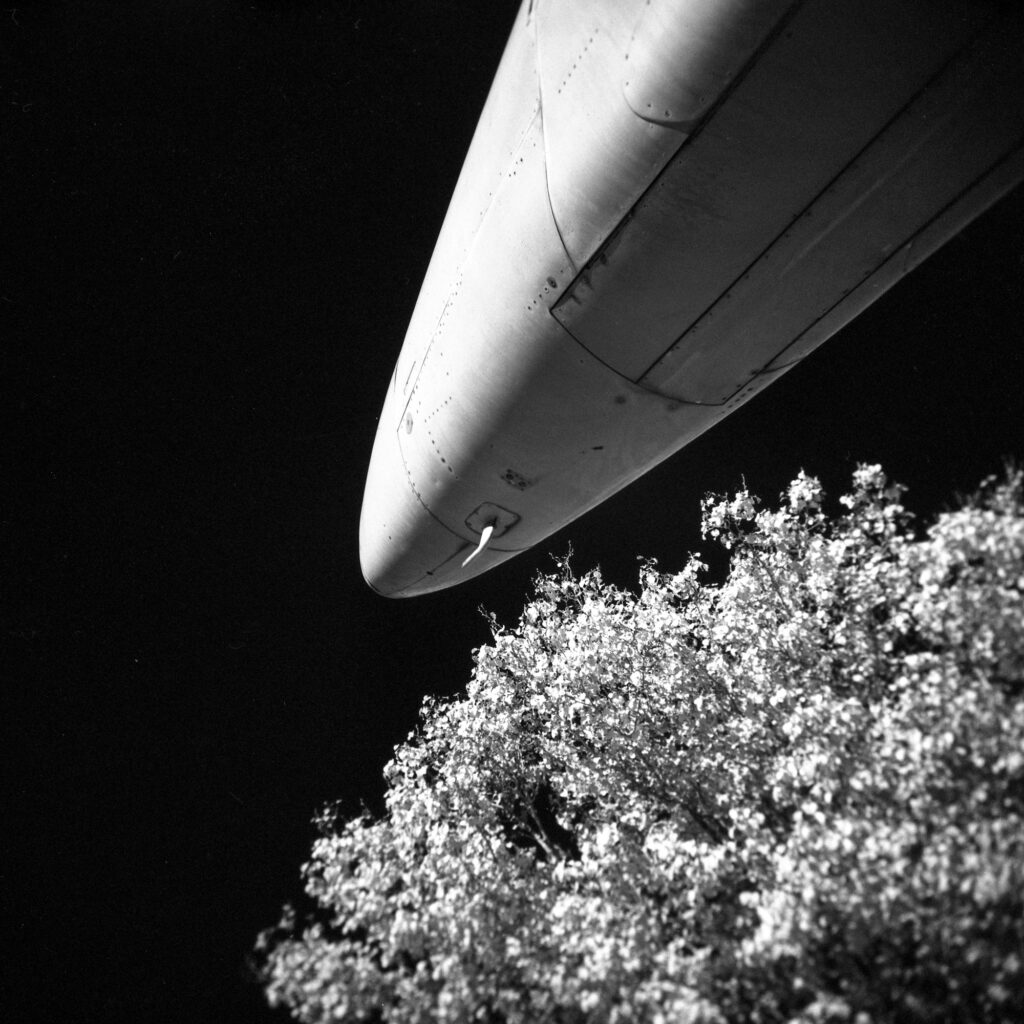
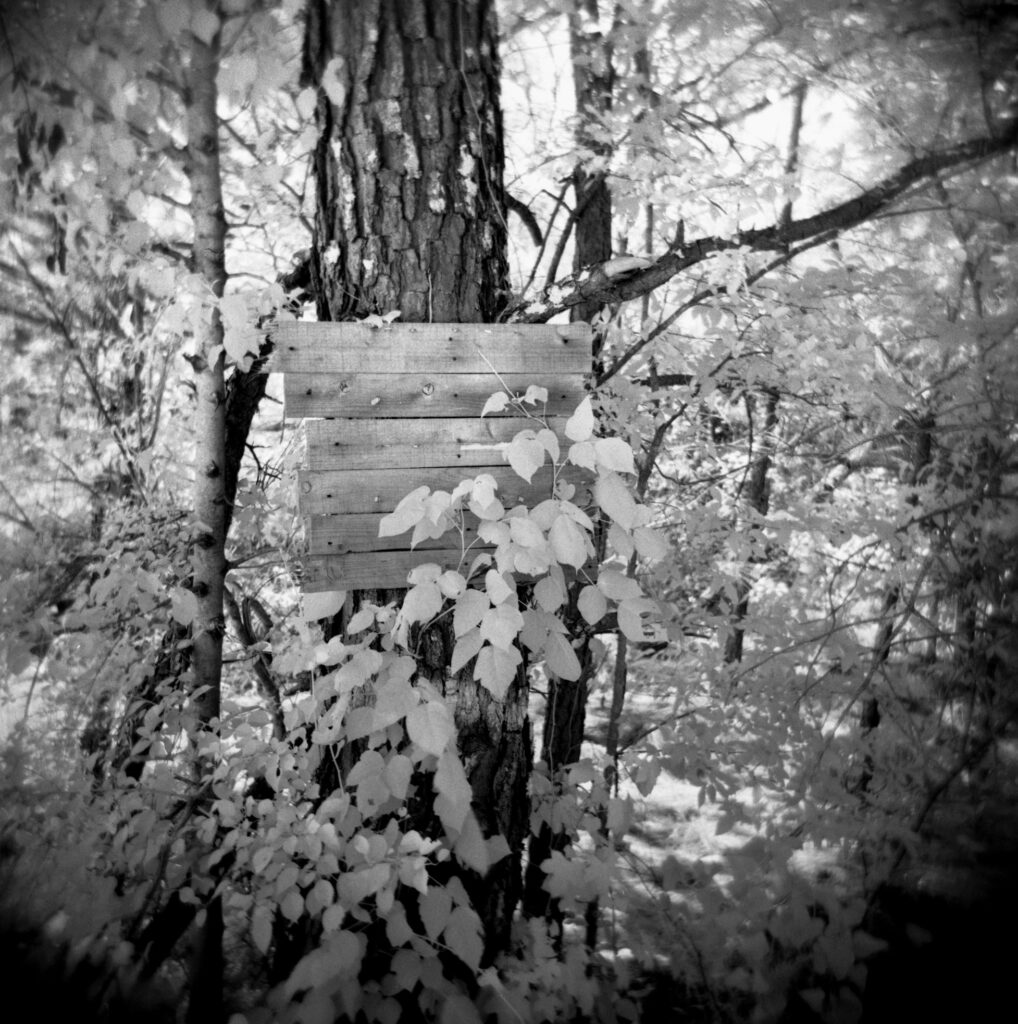
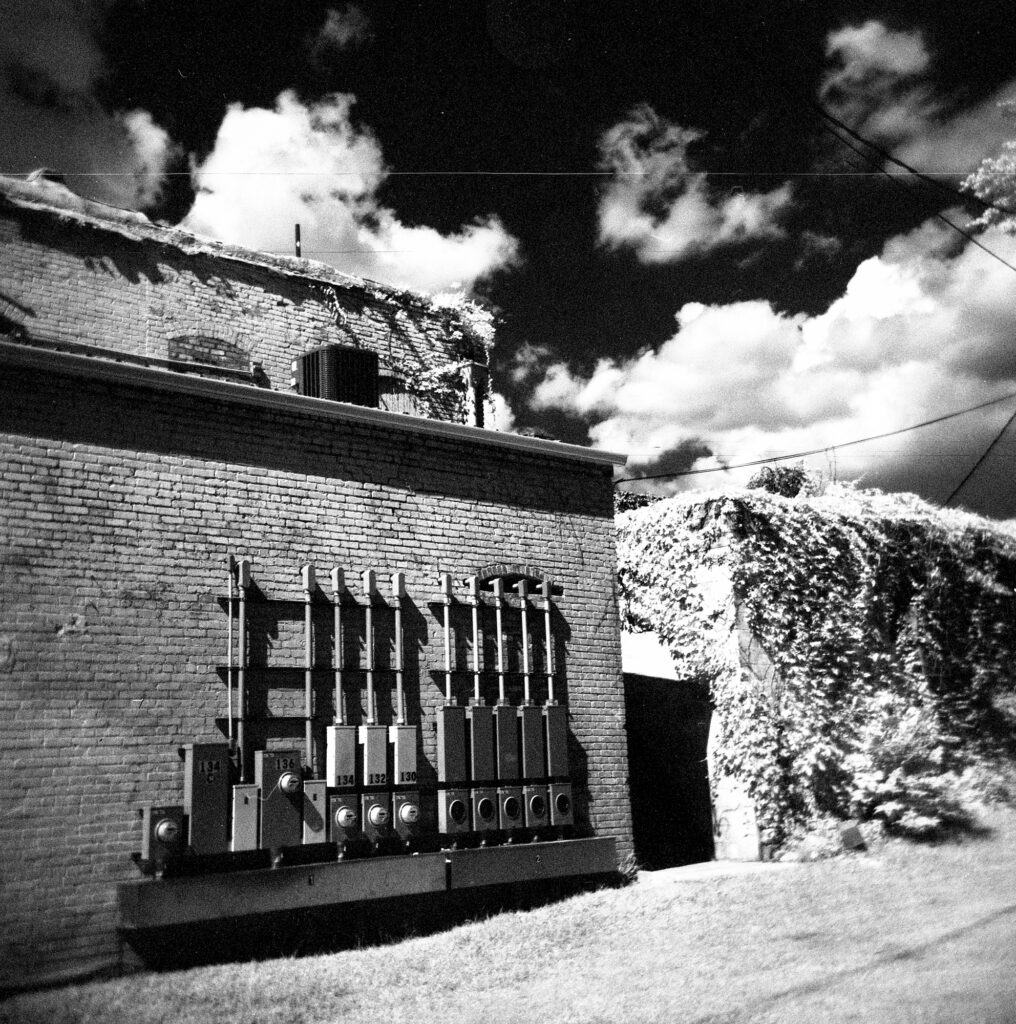
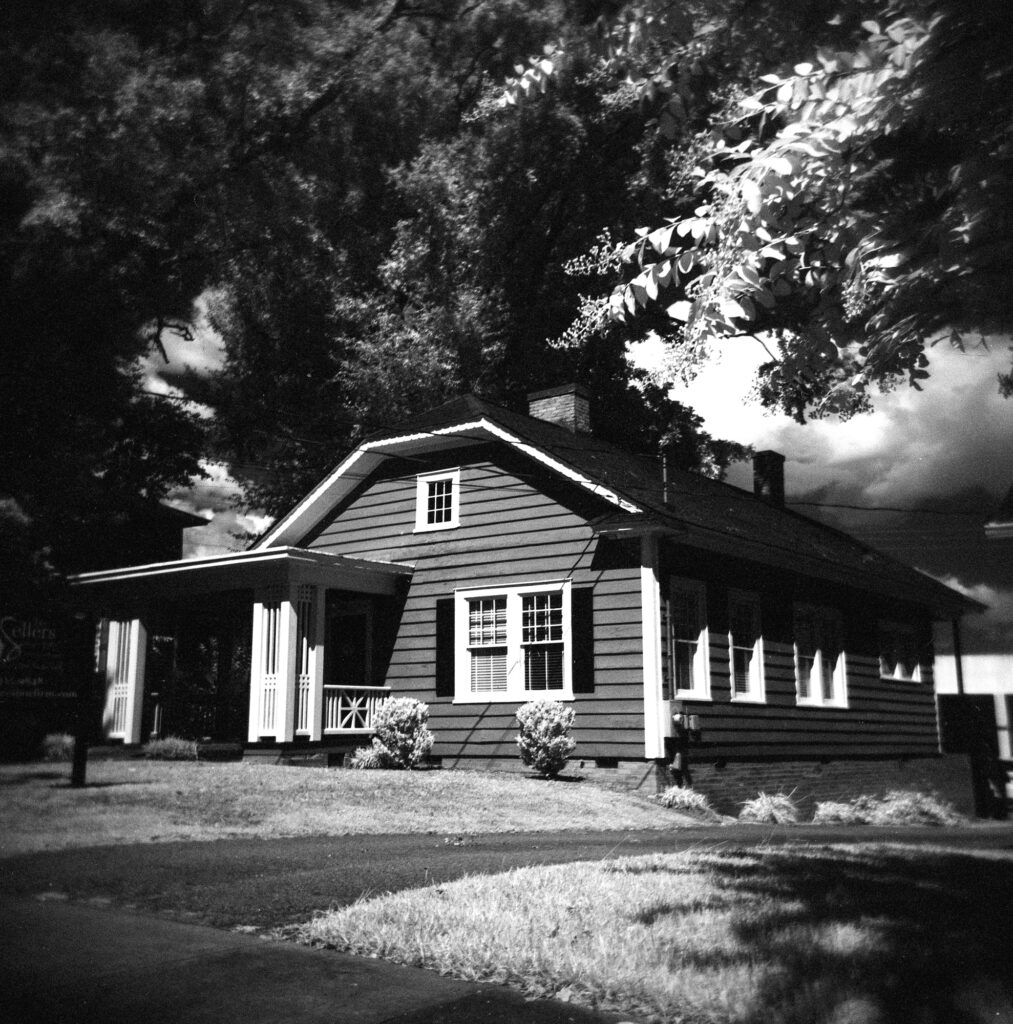
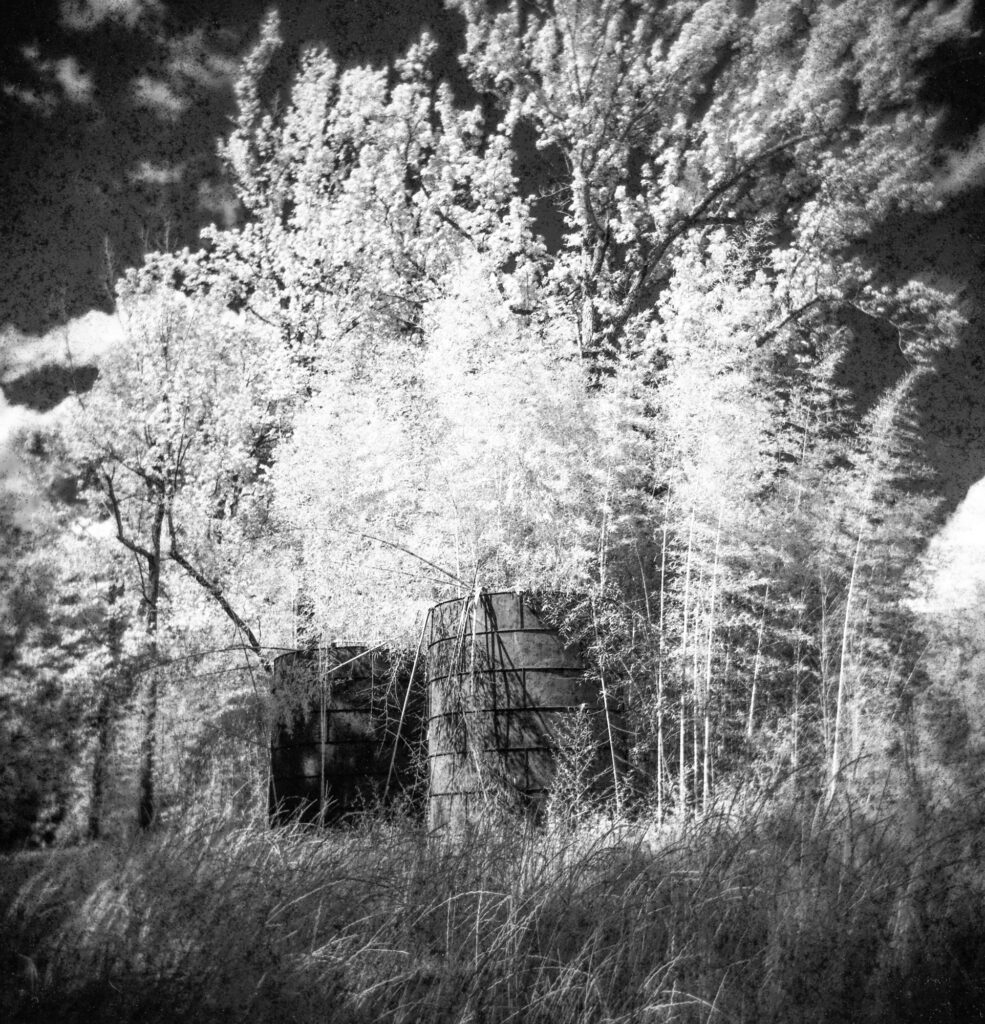
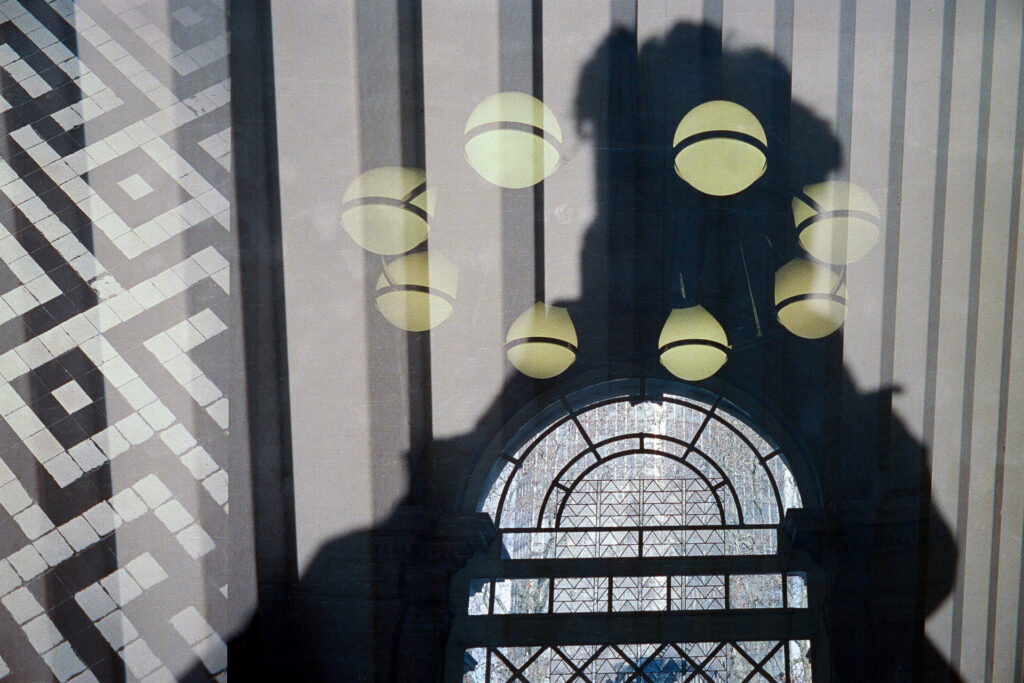
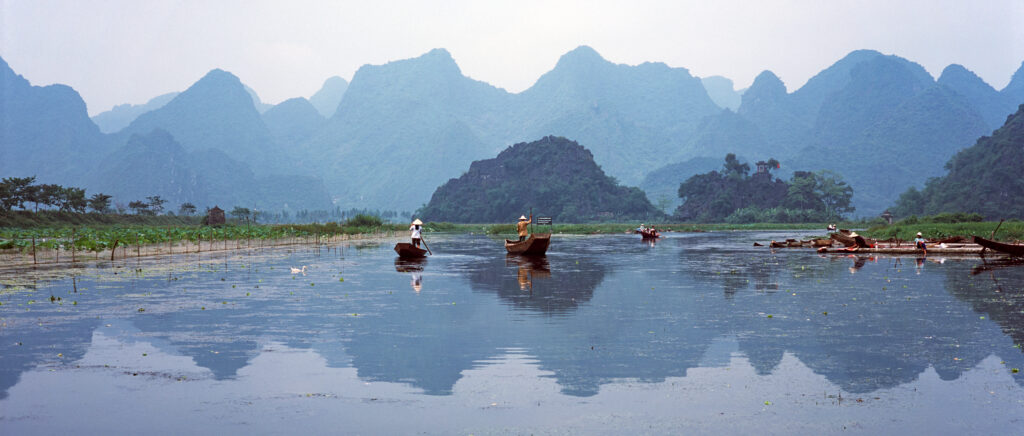
As you will see, these are not your typical Holga shots. High contrast gives the subjects a sharp and eye-catching look that comes from using a Holga with infrared film. You can use a 120 format or 35mm Holga, but I prefer 120.
Infrared images on film require a 720nm infrared filter to get the full effect of high contrast, dark skies, and white foliage. There is no filter thread on the Holga lens but you can press firmly and turn, seating either a 46mm filter or, more likely a 46mm step-up adapter to a larger size for an infrared filter that may be more available. I screwed a 46mm to 49mm step up ring into my Holga and then used a 49mm filter that I already had. I have found most of the cheaper infrared filters do as good a job as the most expensive ones.

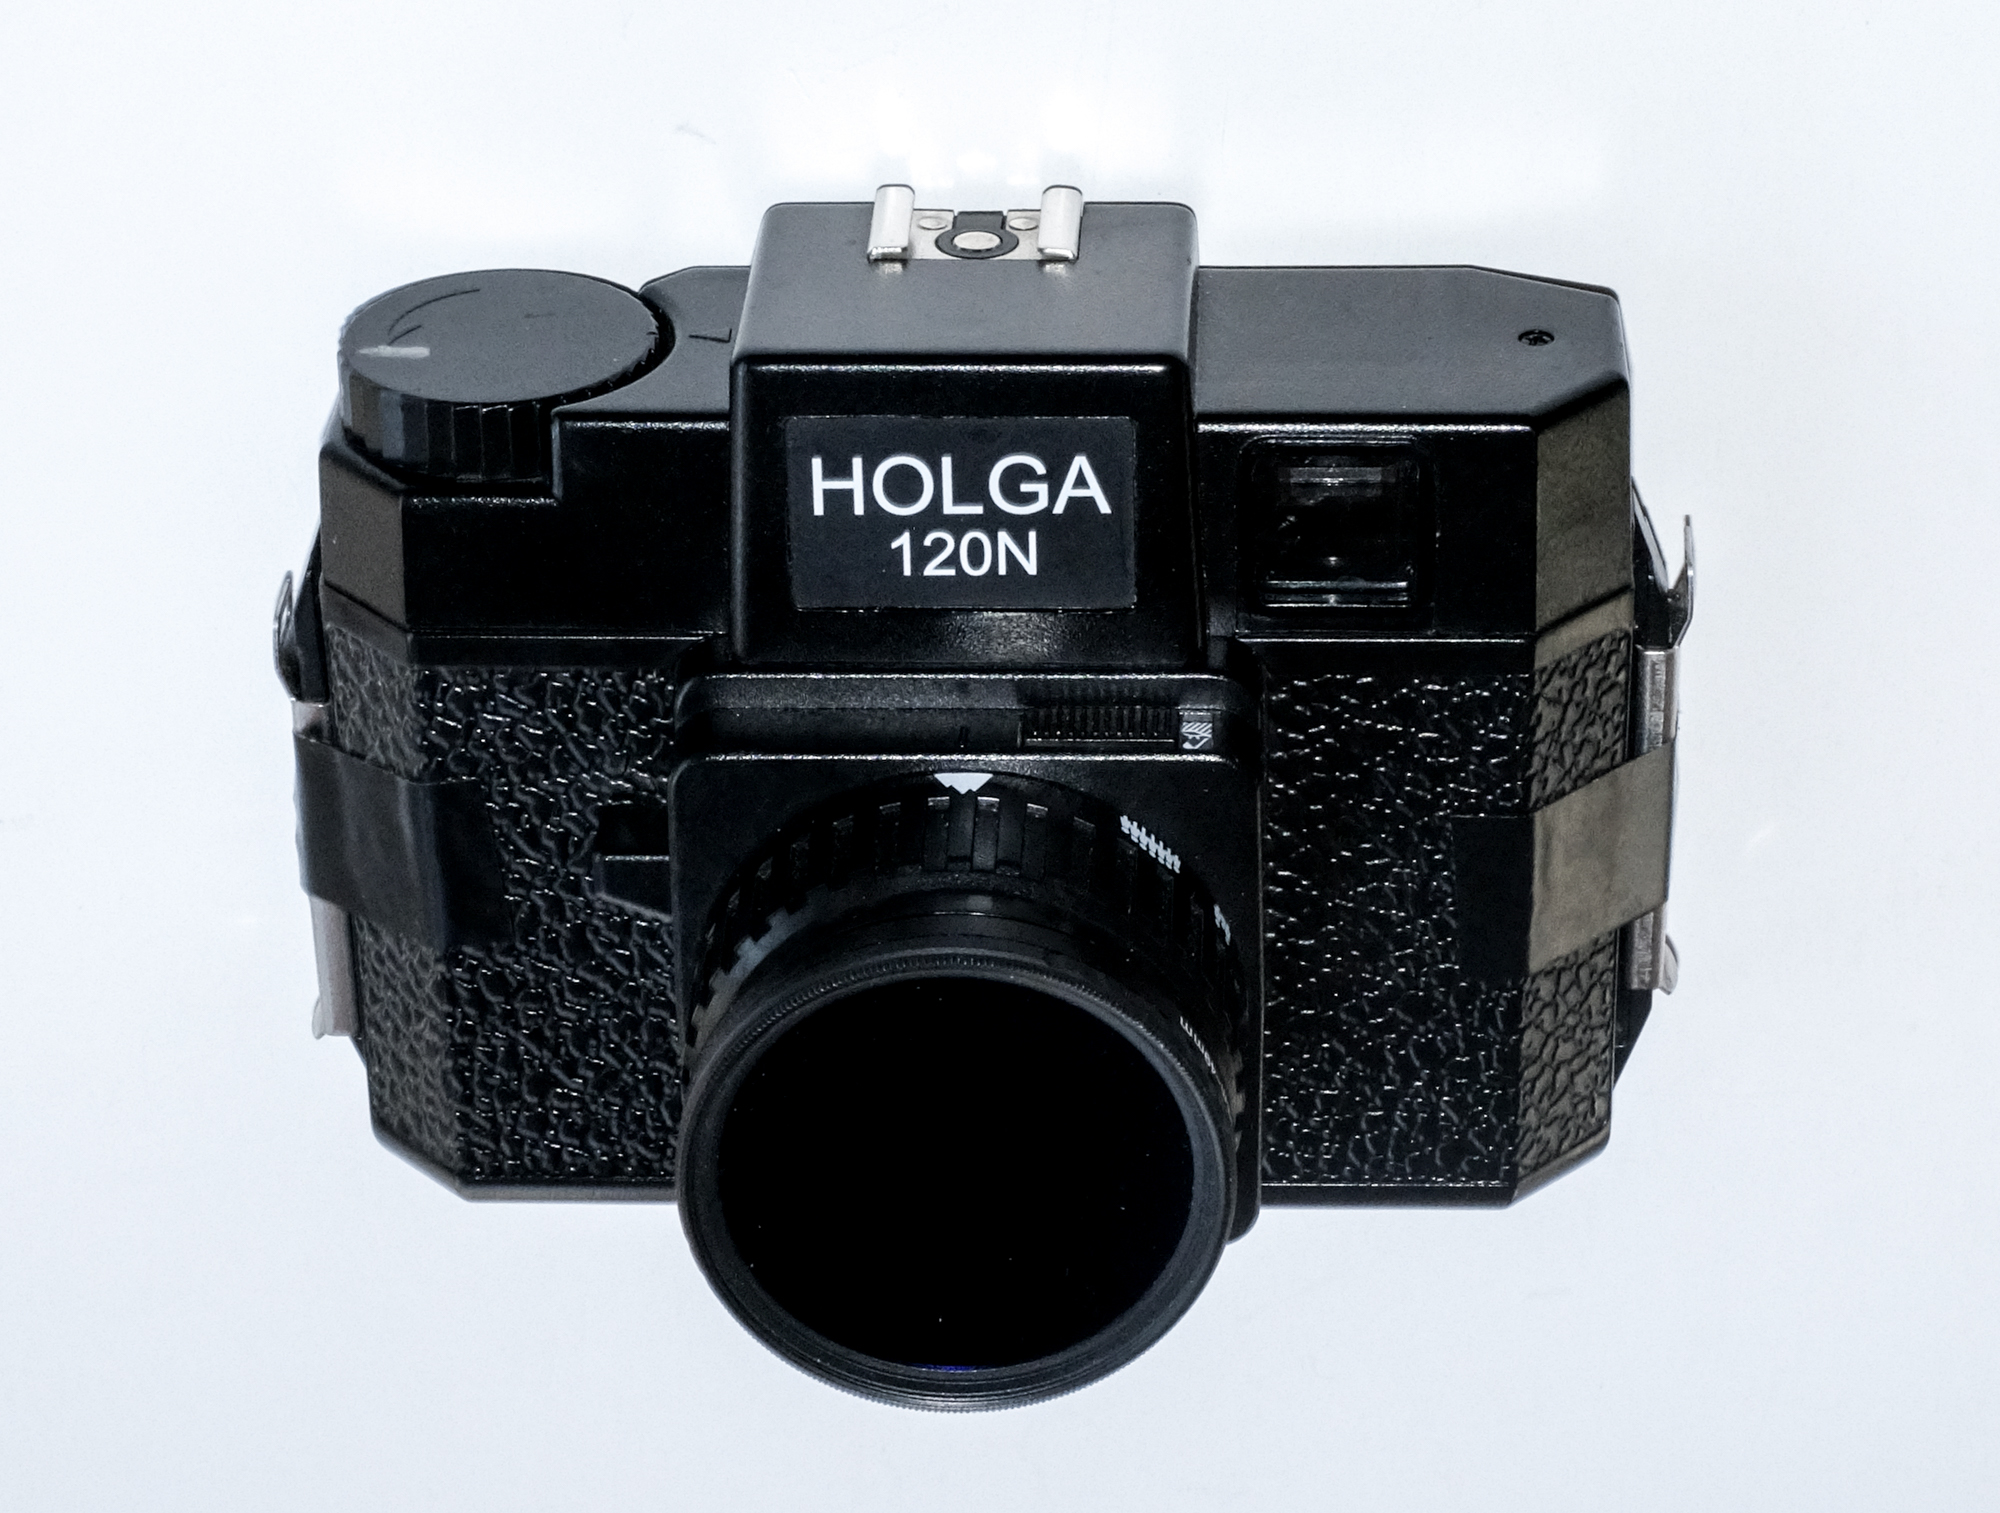
The tape you see on the camera in the picture at the top is all I use to prevent light leaks. It’s use is mainly to keep the latches from sliding or the back from popping off if I drop the camera. That’s what I use on my 12 Holga 120 cameras. I so rarely have a light leak that I enjoy it when I get one.
Unfortunately, the films that are infrared sensitive need lots more light to allow for the almost black filter. Usually five stops more light are required to get good exposures in the bright sunlight that is needed for infrared images. At first glance, a Holga does not seem a likely candidate because of the shutter speed of around 1/100 and fixed f/stops that may be f/8 or f/11. (The two marked stops may even have the same size hole.) These settings add two stops of light, but you still need three stops more. You can use the bulb setting for longer exposures but that requires a tripod, and who wants to use a tripod with a Holga? With the limited settings, the only practical answer is to use fast film with an ISO of 1600. But the common infrared sensitive films are ISO 200 to 400 so what do you do? I simply push the all the films to ISO 1600 when developed. If you send your film out for developing, many labs have an option to push the film 3 stops for a small additional fee.
I have used Ilford SFX 200, JCH Streetpan 400, Rollei Infrared 400, and CatLABS 320 Pro film as all are infrared sensitive and all will do a good job. Which do I usually use? Because of lower cost, great image quality, and frame numbers on the backing paper that show up easily in the red film window, I like Catlabs 320 Pro best. It is nominally rated at ISO 200 so the three stops push gives the total of five stops necessary. I also rate the 400 speed films at 200 for simplicity. I use FPP HC-110 developer, 10 ml stock developer diluted to 500 ml and developed for at least 45 minutes. It is a modified type of stand development that needs you to agitate well in the beginning and from time to time during the 45 minute period. Mixing and total time are not critical and if you let it develop for one hour, it still works fine.
Post processing with an editing program can be whatever you want. If desired, the simplest adjustment is to vary exposure and compare the appearance. If you want to go further, you might want to use the sliders for contrast, highlights, shadows, whites and blacks.
Some subjects work better than others. You can get a good idea by trial and error or search Holga Infrared on your favorite photography site. I have a Holga Infrared album that includes many of the films mentioned above including some time exposures and hand-held ones as I developed the procedure.
If you have problems with the link, I am Neal Wellons or Neal3K on Flickr. Go to my albums and scroll to find Holga Infrared.

Have fun and good luck.
Share this post:


Comments
Louis A. Sousa on Making Pictures Pop with a Holga and Infrared Film
Comment posted: 26/02/2025
Comment posted: 26/02/2025
Gary Smith on Making Pictures Pop with a Holga and Infrared Film
Comment posted: 26/02/2025
Your images certainly do pop!
Have you ever shot color with the Holga?
Thanks for your article.
Comment posted: 26/02/2025
Dan Mountin on Making Pictures Pop with a Holga and Infrared Film
Comment posted: 26/02/2025
I've just recently started using a both a Holga 6x9 Panoramic and 6x9 Pinhole myself. I modified both cameras following instructions on the Inter-Web. Mods included:
- Adding a centerline shoe-mount to both for an old Voigtlander Kompur 6x9 viewfinder I had laying around.
- Adding yarn in the grooves of the back cover to prevent light leaks.
- Strategically placed, foam inserts creating a tighter and flatter film plane and finally...
- A 46mm-49mm step-up filter mount. I screwed the ring in and "cut" my own threads like you, but I secured mine with
cyanoacrylate. A couple drops, let capillary action do it's thing and it ain't moving!
Total for mods to both camera was > $30!
I already had a full set of 49mm b&w filters and as I said, I already had the 6x9 viewfinder. I'd modified a Lumix ZS8 P&S several years ago to shoot Infrared, became totally enamored with the results and use it extensively, but it never occurred to me try it out on my Holgas... until your lightbulb article! Now, I'm going to start shooting Infrared Panoramic and Pinhole shots too!
Woo Hoo! Thanks!
Comment posted: 26/02/2025
Michael Keppler on Making Pictures Pop with a Holga and Infrared Film
Comment posted: 26/02/2025
Comment posted: 26/02/2025
Sroyon on Making Pictures Pop with a Holga and Infrared Film
Comment posted: 27/02/2025
Comment posted: 27/02/2025
RichardH on Making Pictures Pop with a Holga and Infrared Film
Comment posted: 27/02/2025
Comment posted: 27/02/2025
Alexander Seidler on Making Pictures Pop with a Holga and Infrared Film
Comment posted: 27/02/2025
Comment posted: 27/02/2025
Comment posted: 27/02/2025
Ben G on Making Pictures Pop with a Holga and Infrared Film
Comment posted: 27/02/2025
Comment posted: 27/02/2025
Jeffery Luhn on Making Pictures Pop with a Holga and Infrared Film
Comment posted: 28/02/2025
I'm floored by the quality you achieved with a Holga. Your compositions are very dramatic, and intensified greatly by IR.
I had a Nikon D-7100 converted to IR and it was okay, but using IR film does a much better job.Great work!
Comment posted: 28/02/2025
Daniel Castelli on Making Pictures Pop with a Holga and Infrared Film
Comment posted: 28/02/2025
Comment posted: 28/02/2025
Dave Whenham on Making Pictures Pop with a Holga and Infrared Film
Comment posted: 28/02/2025
Comment posted: 28/02/2025
Scott Ferguson on Making Pictures Pop with a Holga and Infrared Film
Comment posted: 01/03/2025
Very cool post. I randomly picked up a roll of 120 Rollei Infrared kind of on a whim. I love the dramatic effect that you got with the Holga and an IR filter. I'm probably going to wait for more greenery before trying it out, and need to figure out the filter aspect. Curious if you or anyone has any experience shooting IR with the more common filters like Red or Green? I might be tempted to experiment with the filters I have before investing in another piece of gear...
In any event, very cool post!
Comment posted: 01/03/2025
Scott Gitlin on Making Pictures Pop with a Holga and Infrared Film
Comment posted: 02/03/2025
Comment posted: 02/03/2025
Jesse Holland on Making Pictures Pop with a Holga and Infrared Film
Comment posted: 28/03/2025