I always found myself drawn to the rather mystical photographs captured at night. Not only that these images are kinda cool, it’s also very practical during the winter season: sitting in the office nine to five, you won’t see much daylight from November till February. Being curious about the hyped motion picture film, I decided to give it a try. So I started a project of night photography with CineStill film in the autumn of 2018. I ended up shooting mainly architectural(-ish) subjects. Buildings have a great advantage for this type of photography: they usually stand still, even for hours. I specifically looked for dark places throughout the city, to obtain images that evoke an otherworldly mood.
Long-time Exposures
Photography at night takes place in a regime very different from the one during the day. It seems that there is no such thing like the “perfect exposure” in the darkness. I will explain that in a mo.
CineStill Film
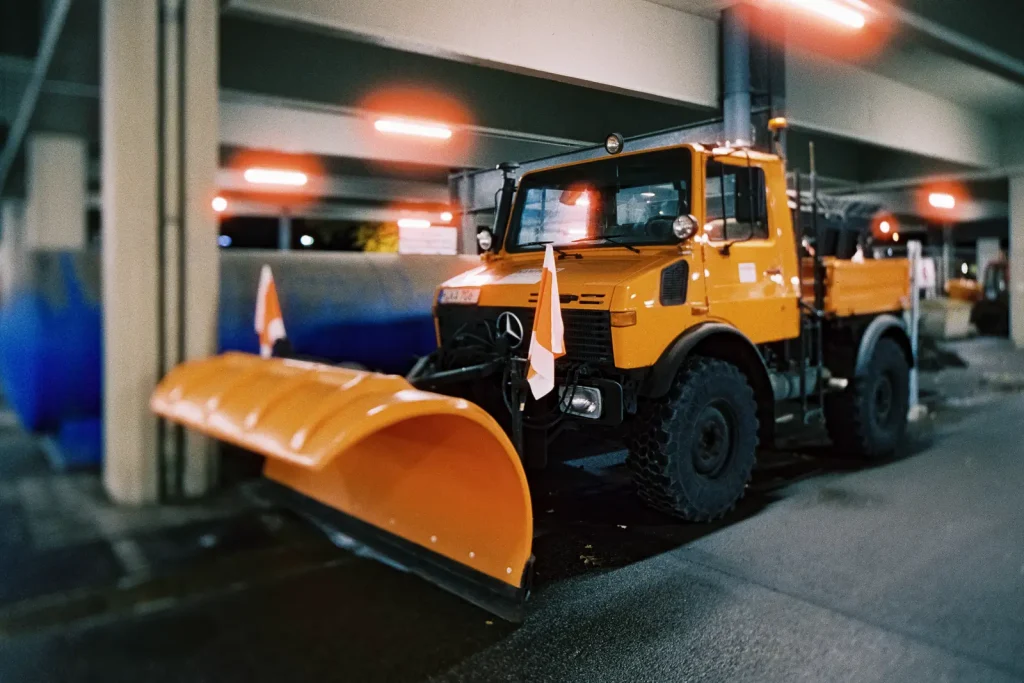
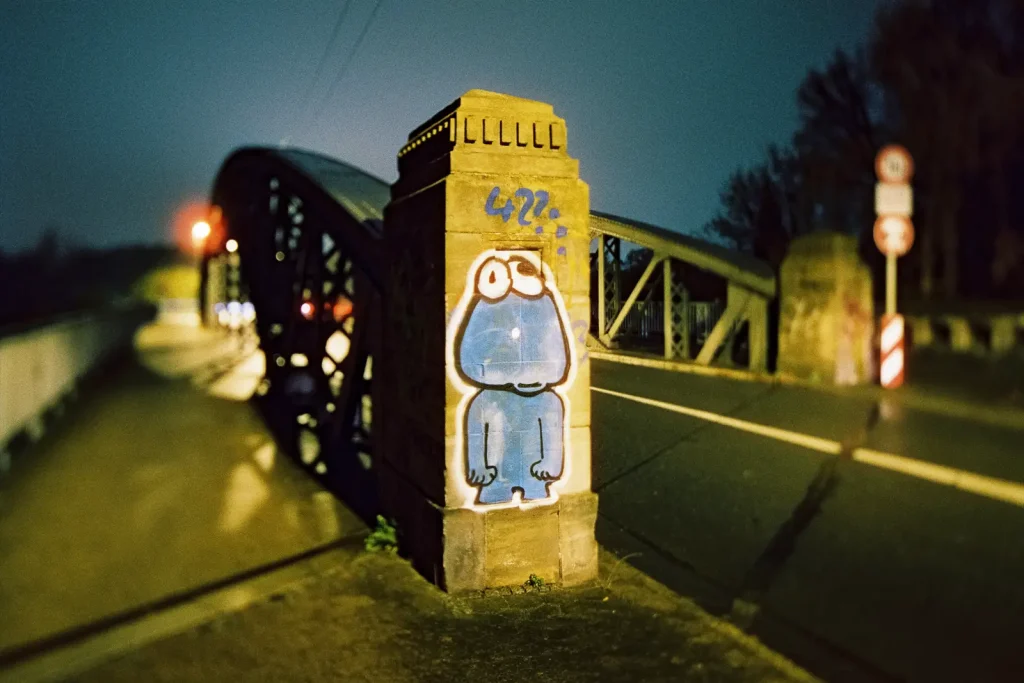
CineStill 800T is a special material based on Kodak motion picture stock. The removed remjet layer makes this film prone to red halation effects whenever point light sources are captured. When I first saw some sample shots on the internet – for instance Christoph Ackermann’s photos from a folk festival – I immediately got hooked by this “feature”. Another oddity these days, the CineStill film is balanced for tungsten light. So, if there is a significant portion of daylight-lit scenery within the frame, this will result in a pronounced blue cast. In conclusion, CineStill provides an almost unique color rendition.
When I decided to try out CineStill back in October, there seemed to be a global supply shortage. I checked the usual suspects, but all stores labeled it out of stock. Close to desperation, I emailed a small lab in my neighborhood – to my luck they had a handful of rolls in 35mm left. I went there and bought them instantly!
Finding the Right Exposure
For my first attempts with CineStill film I went out with a 35mm rangefinder and fast lenses, taking all images handheld. Unfortunately, I exposed too much for the highlights. I should have been leerier of the meter readings: Shooting with shutter speeds of 1/125s or 1/250s in a nocturnal city seems illusionary, even though the CineStill is rated at 800 ISO. Consequently, the results turned out muddy with far too few details for my taste.
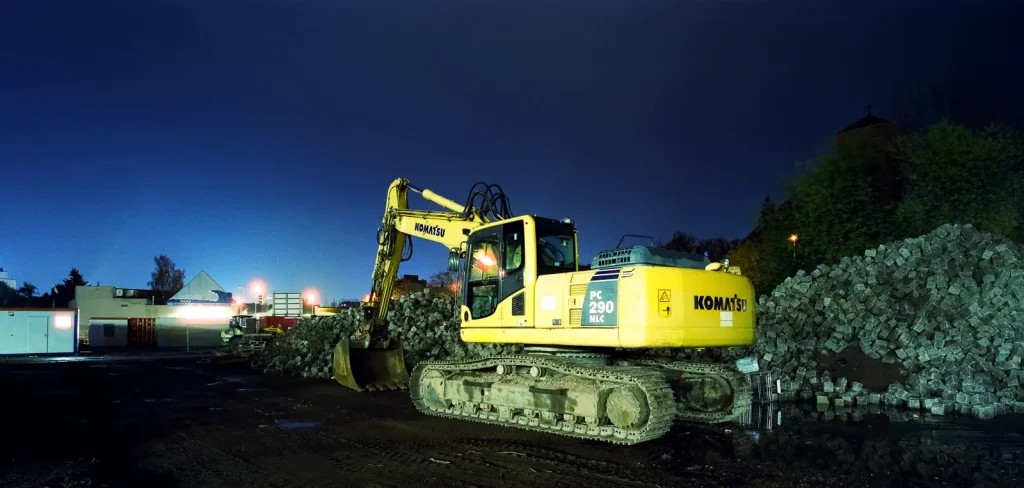
The next time I completely changed my approach: Instead of a “casual” rangefinder I opted for a clumsy SLR set-up including a tripod. Concomitantly, I altered my subjects – from random city shapes towards buildings and machine-like objects. I measured the light with a handheld meter, pointing its sensor towards the ground. I exposed the film at EI 400 and often added generously one stop or two, especially when the metered exposure times exceeded 30 seconds.
Some places I visited were so dark that the light meter could only flash a warning, crying “Too dark, too dark! Out of my range!”. In these cases, I would use my gut feeling to determine the exposure – just open the shutter and wait. And wait. And wait. I guess my longest exposure lasted about thirty minutes. But that’s okay compared to what large format-shooters experience under similar conditions: Taewon Jang wrote about his (highly recommendable) series “Stained Ground” that his average exposure time was four hours, and eight hours weren’t uncommon. Anyway, when out on a night trip your loved one should better not be waiting with dinner for you…
Saving Time
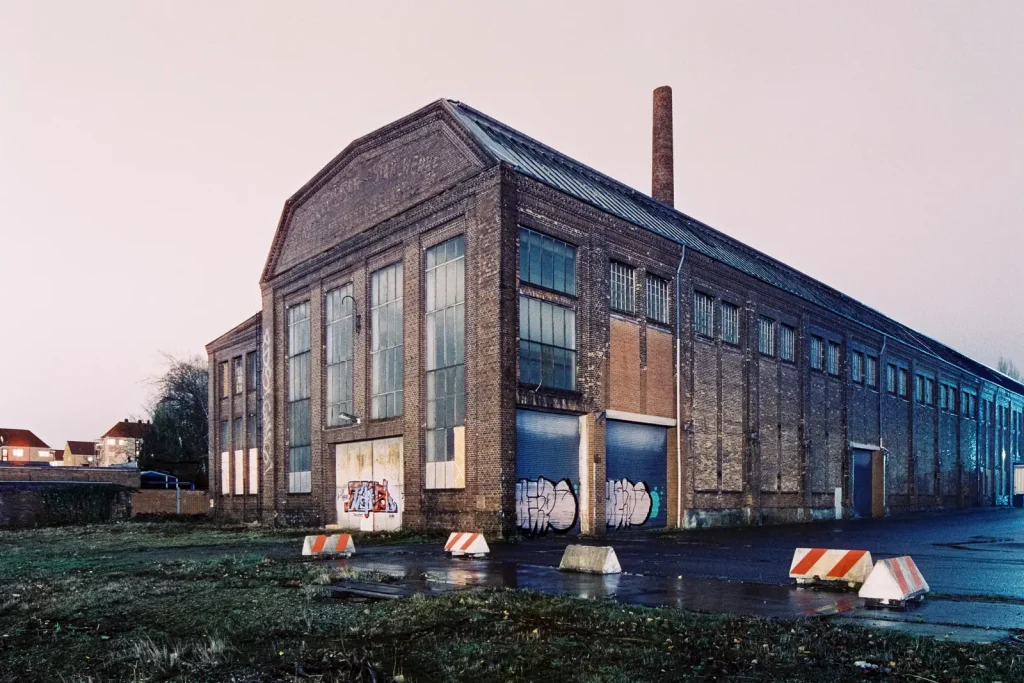
Usually, I prefer f/11 for an extended depth of field. But switching to f/8 occasionally saves (me) a lot of time! Opening the aperture by one stop means cutting the exposure time in half. Let’s say the gap between 1/10 and 1/5 of a second seems negligible – but exposing half an hour instead of an entire hour is a wholly different story. However, investing the time is very rewarding as the night has so many moods to offer.
As I mentioned earlier, there is no “perfect exposure” (for me) when it comes to night photography. The amount of the captured light determines the look and feel: short exposure times will result in rather dark and “nightly” images, (extreme) long times can produce images that resemble daytime photographs. I tend to prefer the latter ones: if exposed that long, film will see more than the human eye. In addition, colors will shift due to the different sensitivity of the individual layers within the material. It is like a small miracle I will never get tired of. With film, there is always this nerve-stretching excitement until you see the results. And with film exposed at night, this excitement is even bigger!
Weather Matters
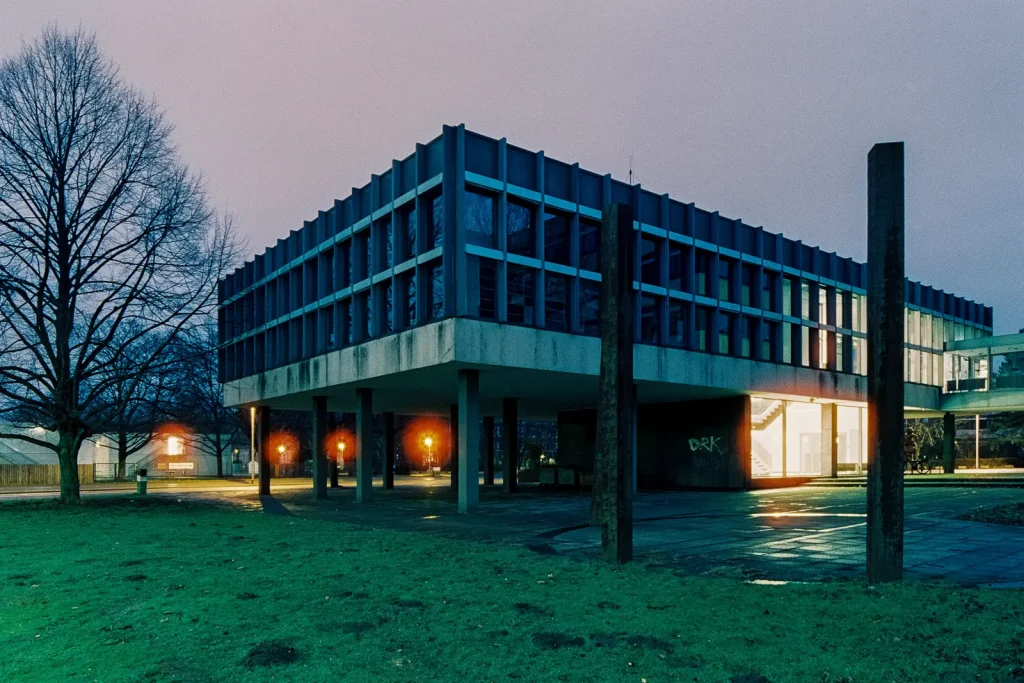
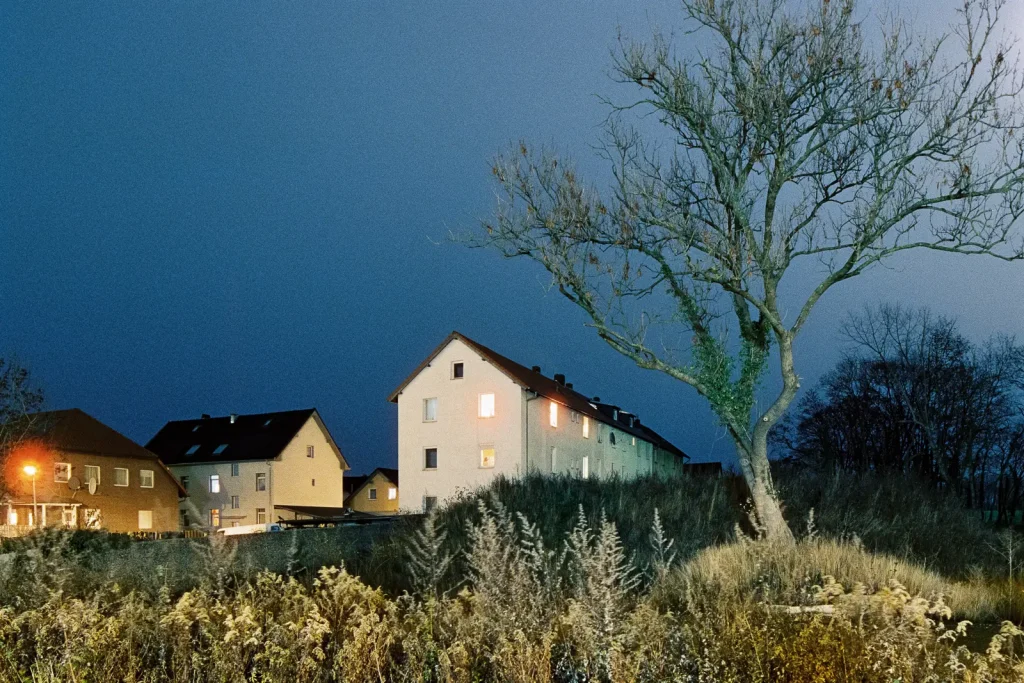
Weather can create some nice effects, even when it’s dark. For a long time, I preferred grey, overcast sky for my photography, resulting in sober, documentary-style images. This has changed, now I want rather emotional pictures – more moods, more colors. I especially like low clouds combined with mist, which occurs from time to time during the autumn and winter seasons. The small water droplets in the air scatter light and therefore decorate lamps with auras. Furthermore, an overcast night sky is considerably brightened up whenever there are well-lit structures beneath. At first glance, some of my images look like taken under daylight – the sky is almost white, but often reveals a faint color cast: muddy-greenish, purple, pale blue. The orange light produced by sodium vapor lamps can even set the sky on fire.
Precipitation can also produce a cool look although I find it more difficult to handle than mist. Rain, for instance: during the day it annoys me but at night it transforms all the surfaces into glossy, reflecting areas. To protect my equipment from getting all too wet I have an old umbrella always stowed in my camera bag. It gets critical if rain is accompanied by wind. When the droplets are blown sideways and hitting the front lens, I have to give up.
My Way into Architectural Photography
Once I dove deeper into architectural photography, I bought my first shift lens. Until then – 2012, if I remember correctly –, I was a die-hard film fan who could never imagine switching to digital. But handling the lens’ different movements (and their combination) proved very difficult for me. I needed a digital camera for training purposes. Therefore, I got a second-hand DSLR from Ebay. It was a Canon 5D “classic” that I used a lot. This camera worked liked a gateway drug, letting me abandon all my film cameras. Subsequently, I replaced the 5D with a more advanced DSLR and also tried a digital rangefinder camera.
It took me five years to realize that I almost never printed any of my digital images. And I missed film – the aesthetics, the handling, and the thrill of the anticipation. Meanwhile, operating the shift lenses had become second nature to me, so I had no excuse for not using them with film. Funnily, I made it through the same development – albeit in the reverse direction. By mid of 2018, I had sold my last digital camera (with exception of the 5D, which I keep for nostalgic reasons).
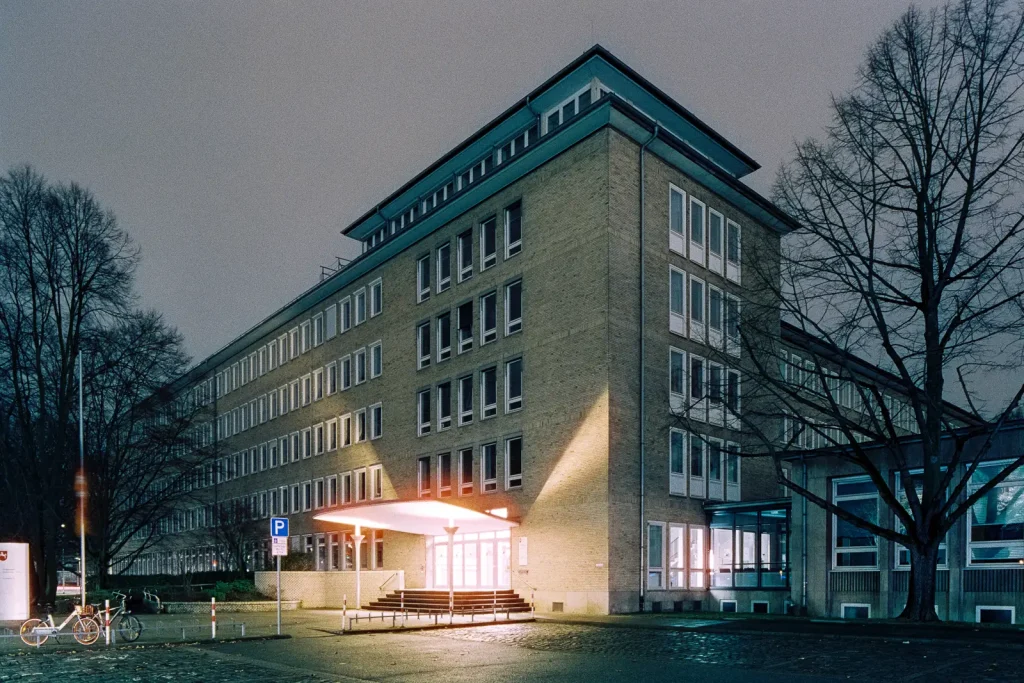
What I really like about architectural photography is that there always seems to exist one spot where the composition works best for a given object. Sometimes, just one meter makes a huge difference. Obstacles want to be overcome – e. g. lampposts, street signs or delivery trucks. Finding the right spot is like a riddle, it’s fun to solve it. Experience helps a lot: I now know perspectives I like, and I can estimate the adequate distance to my subject.
Shift Lenses in 35mm Format
What is a shift lens? A shift lens allows you perspective correction by moving the lens’ elements parallel to the film plane. Thus, vertical lines remain parallel to each other in the image. Canon currently offers two shift lenses in the wide-angle regime for the 35mm format: a 17mm f/4.0 and a 24mm f/3.5. (Nikon has similar optics in its lineup.) I own both but find myself using the 24mm way more often. In case of the 17mm lens, you must move really close to your subjects – otherwise they will appear too distant, at least for my taste. Additionally, the short focal length exaggerates the perspective by emphasizing close objects and neglecting the more distant ones. A further downside of the 17mm is its susceptibility to flares. Canon offers no lens hood to shield the bulbous front element from point light sources.
Both lenses also allow you to tilt the focus plane, what creates the popular miniature world effect. I seldom use this feature – but given the right subject, it can work out great. Some further notes on the handling of these specialized optics: Shift lenses have to be focused manually. However, even at night that’s not a big deal as buildings are more than 10 meters away from the camera, so the infinity setting will do the job. The exposure mode of the camera has to be manual, too. If the lens is shifted or tilted, the in-camera meter won’t work properly anymore and thus making any auto exposure mode useless.
My Trusty Canon SLR
To use these shift lenses with film, I had to buy a Canon EOS film body first. Due to its almost ridiculous low price tag I chose an EOS 1N – and I have to admit, I always wanted to work with one of the former Canon flagships. The EOS 1 is my workhorse: a very reliable and convenient camera, but for my taste a rather unpretentious and clinical one, too. Therefore, we share a solid business relationship, not an emotion-driven love affair. I think, Benn Murhaaya got some similar findings when reviewing his Canon EOS 33.
Two things bother me with the Canon: Firstly, it only allows me to take exactly 36 frames from one roll of film, wasting at least two frames. Secondly, its operations depend on batteries. I think it’s more a psychological thing as both aspects are not overly costly: two wasted frames equal to a “loss” of 2/38 or roughly 5% referring to film and development costs, and my annual battery consumption rarely exceeds 10 Euros.
Further Cameras
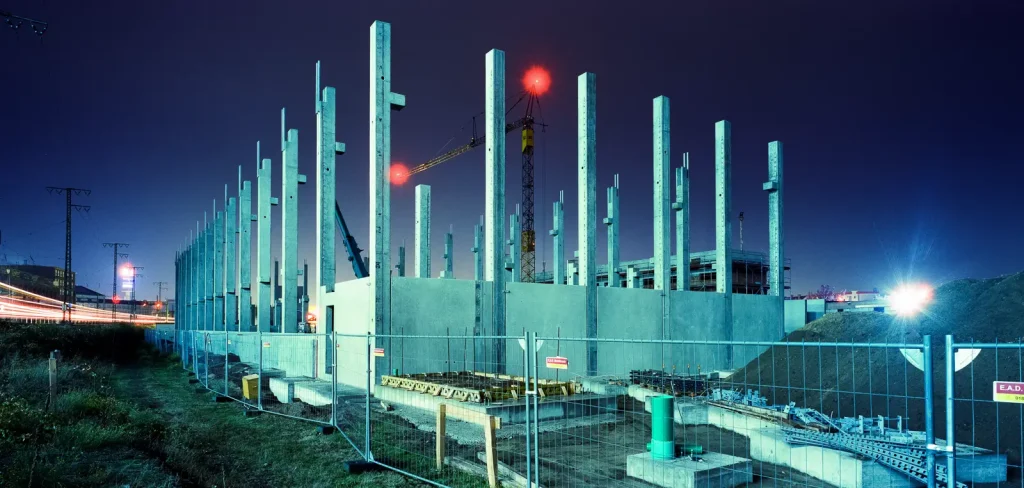
Over time, I got seized by the desire for formats larger than 35mm. At least medium format should work. In a weak moment and looking for a photographic adventure, I acquired an old 6 x 12 panoramic camera – a Linhof Technorama 612. I consider this 2:1 aspect ratio as sweet spot: it is considerably wider than the classic 2:3 ratio but not as squeezed like 6 x 17 (almost 3:1).
The Technorama behaves like a monster: it guzzles film (yielding six, sometimes only five and a half frames per roll), weighs a lot and eats most of the space in my backpack. Though in its day marketed as the world’s largest point-and-shoot camera, it is far from being a easygoing picture machine. With appropriate f-numbers in the range from f/16 to f/45, my exposures consume a lot of time. But I was attracted by a special feature: the lenses have a built-in shift of (fixed) 8mm. That shift predestines the camera for architectural scenes, though the camera has proven itself much less flexible than my 35mm setup (mainly due to the non-variable amount of shift).
For smaller objects – with the size of human or a car – I occasionally employ a 6 x 7 camera. In these cases, I mostly open up the aperture and work with the shallow depth of field to draw the viewer’s attention towards my subject.
Tripod
A tripod is essential for this type of photography. I use a travel tripod that annoys me with its increasing ricketiness. But this tatty companion is far lighter than my regular tripod and therefore collects dust under my wardrobe. A gear head helps to achieve precise alignment of the camera – I think one of the biggest keys to a compelling architectural photograph is a well composed arrangement of lines and angles. Although I try to be as accurate as possible on site, fine-tuning is done afterwards in Lightroom.
My Preferred Subjects
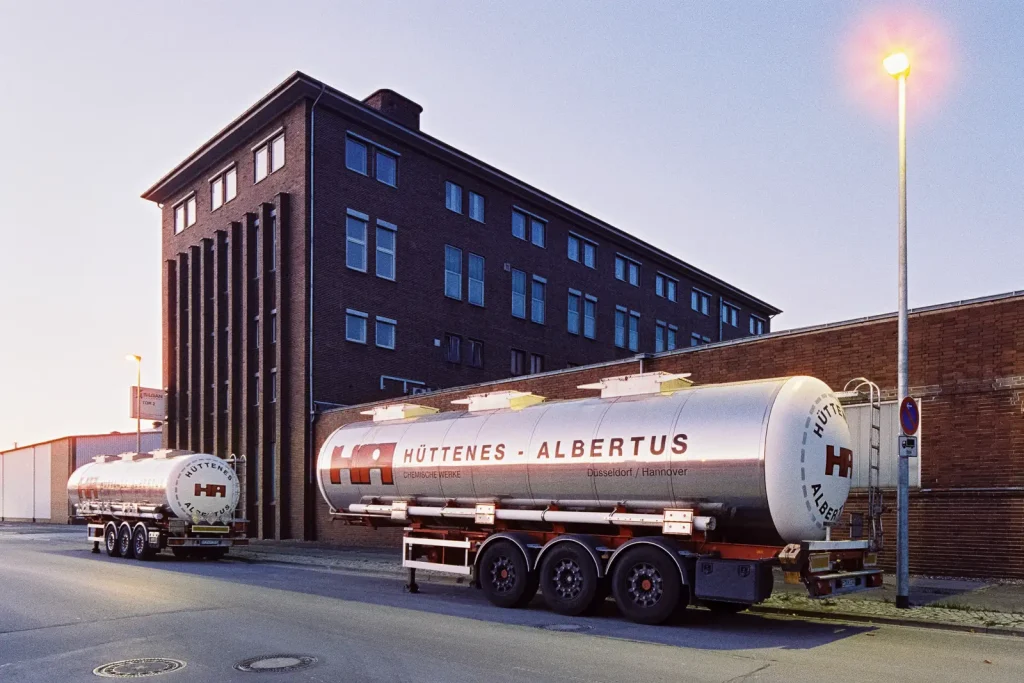
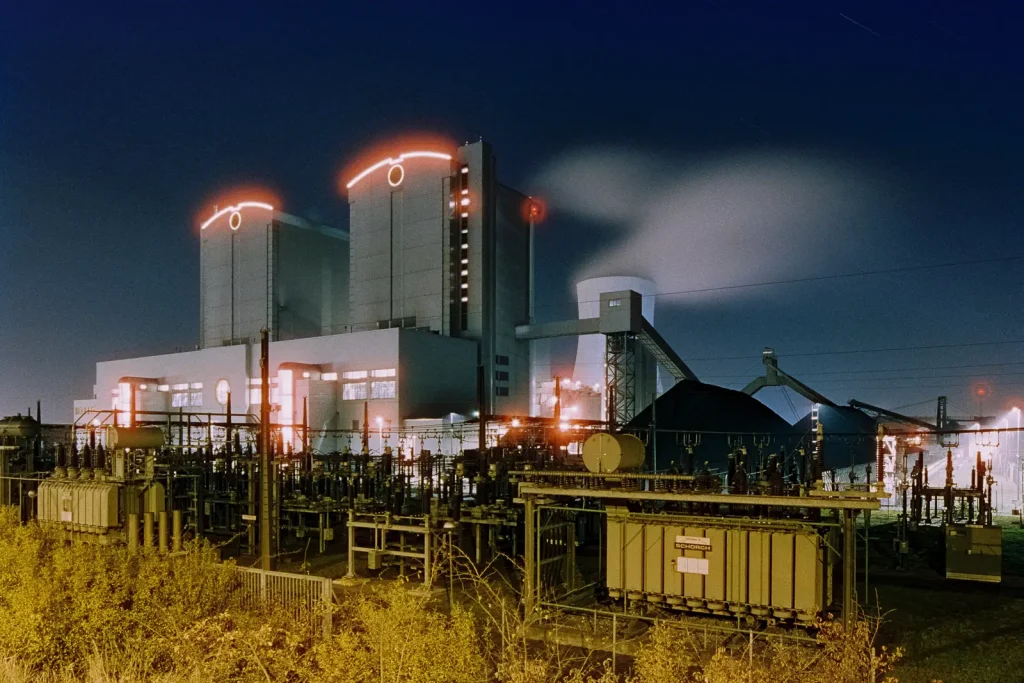
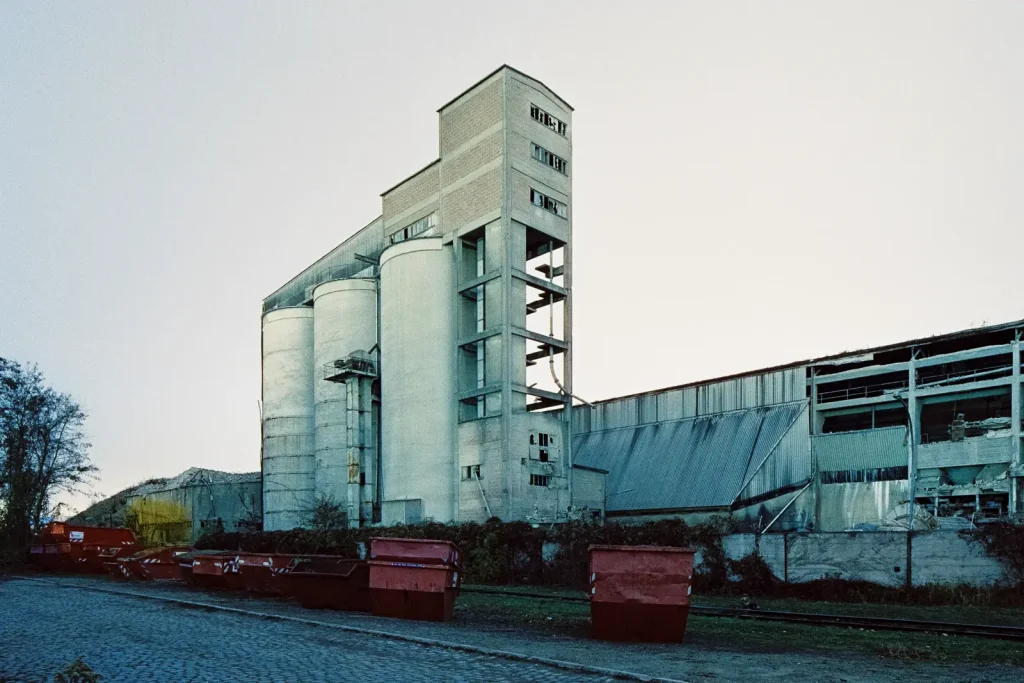
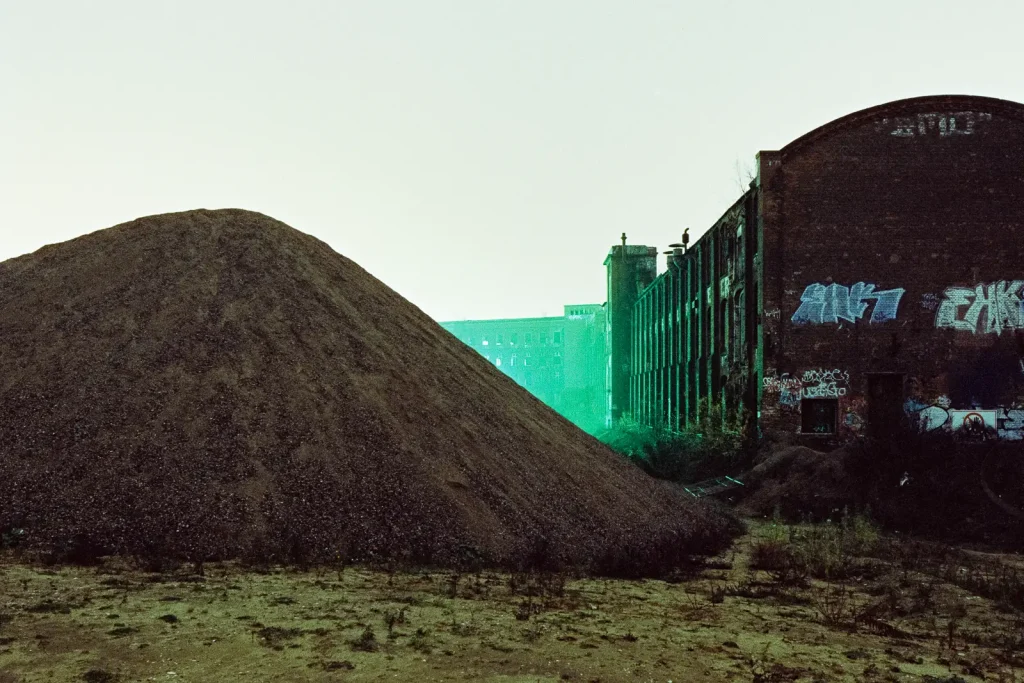
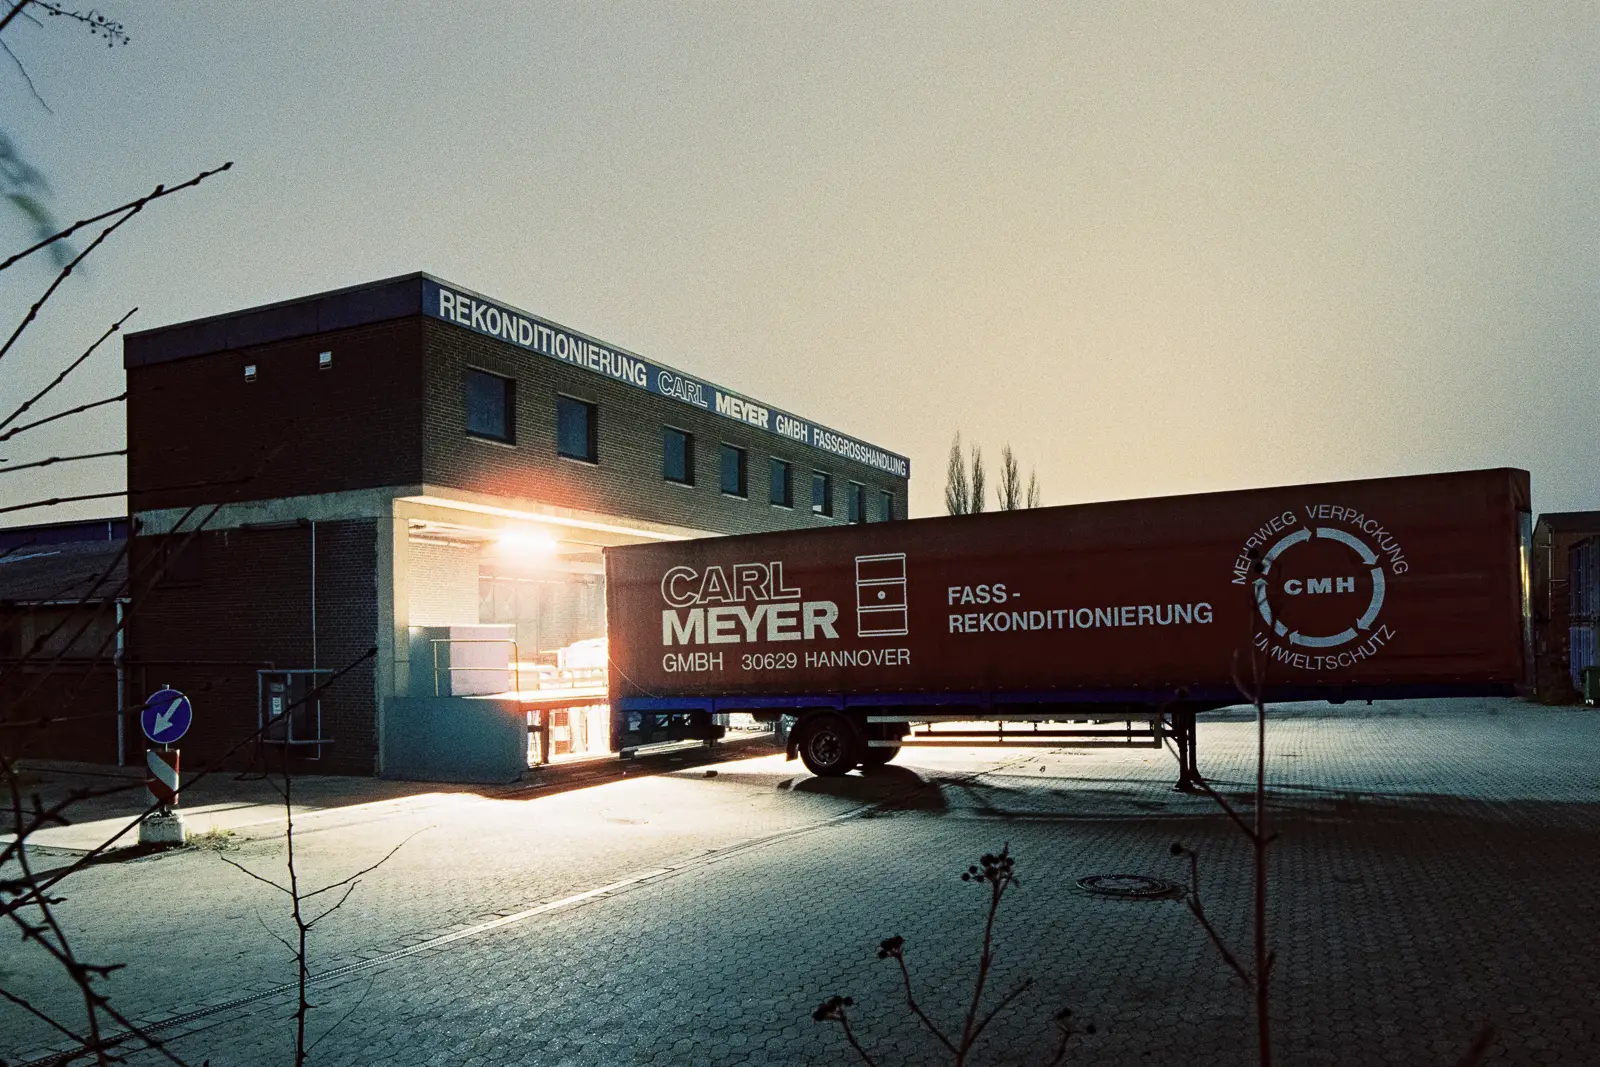
I come from Hanover, a city in northern Germany with roughly 530,000 people living there. According to my impression, Hanover does not enjoy the best reputation among the Germans. Many consider the city as boring – or at least it’s the perfect average: not too small but not too large either. It lacks the plurality and grittiness of Berlin, the cosmopolitanism of Hamburg, the glamour of Munich, the cheerful nature of Cologne. Nevertheless, I like Hanover, and with the years I have discovered the city’s interesting places. But I must warn you: You won’t see my photographic subjects in any of the glossy brochures released by the city marketing. I find myself drawn to rather unpretentious places: industrial areas, harbors, abandoned production plants (Hanover’s industrial heritage mainly consists of ironworking, rubber and cement). The more run-down a site is, the more it attracts my attention.
I’m mostly the only one present when I’m out there taking photographs. If I encounter the shape of another person in the distance, I instantly feel uneasy. Who is this? What are his – or hers – intentions? Visiting these inhospitable places sometimes reminds me of watching a horror movie: You get yourself a nice dose of creeps, then you return to your cozy apartment and have a cup of tea.
Google Maps has proven itself as a fantastic tool for planning my trips. Especially in combination with street view and the bird’s eye perspective, Google’s service provides an almost lifelike impression of a location.
Industrial Areas and Abandoned Plants
This is how it all began: When I was about 10 years old, my mother and I used to take the tram to go to city center. Every trip we passed a Gründerzeit factory building, made of dark red bricks. I loved the building, always trying to get a glimpse at it. Unfortunately and without any further announcement, that factory disappeared from one day to another. It had to make way for a bleak shop selling bleak, cheap furniture. Boy, I was sad! Since I started with photography, my strongest motivation lays in documenting structures that are likely to be demolished sooner or later.
Everywhere around town there are slow transformation processes underway. The older I get, the more sensible I am to these subtle changes. To watch the buildings of former eras vanish makes me feel sentimental. It’s like the old man from next door has died. I can’t stop these transformations but at least I try to preserve some memories with my photographs.
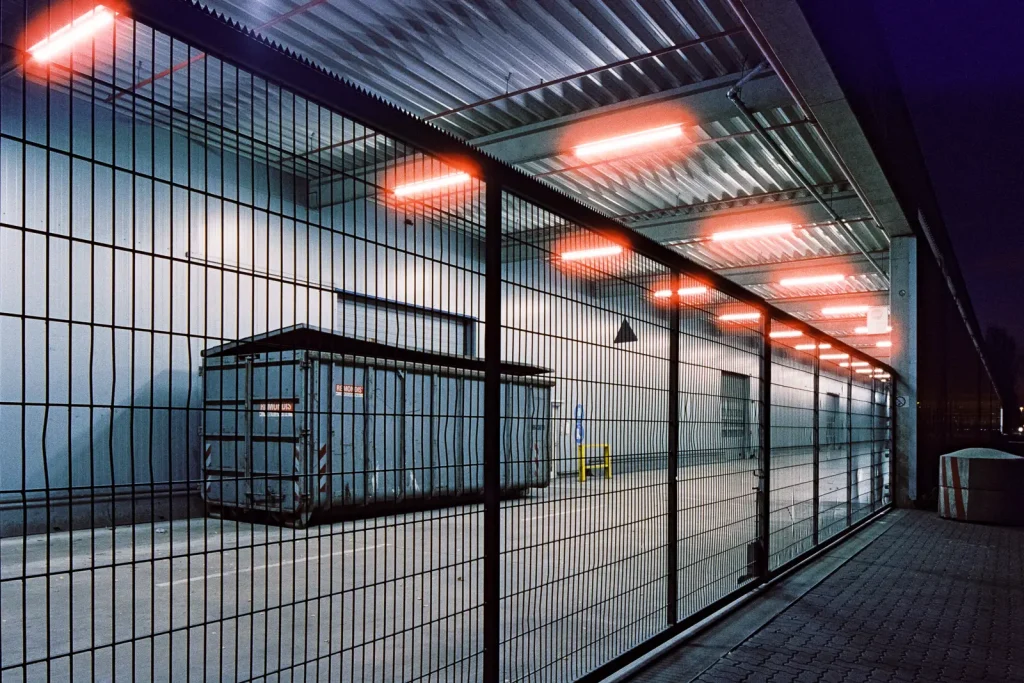
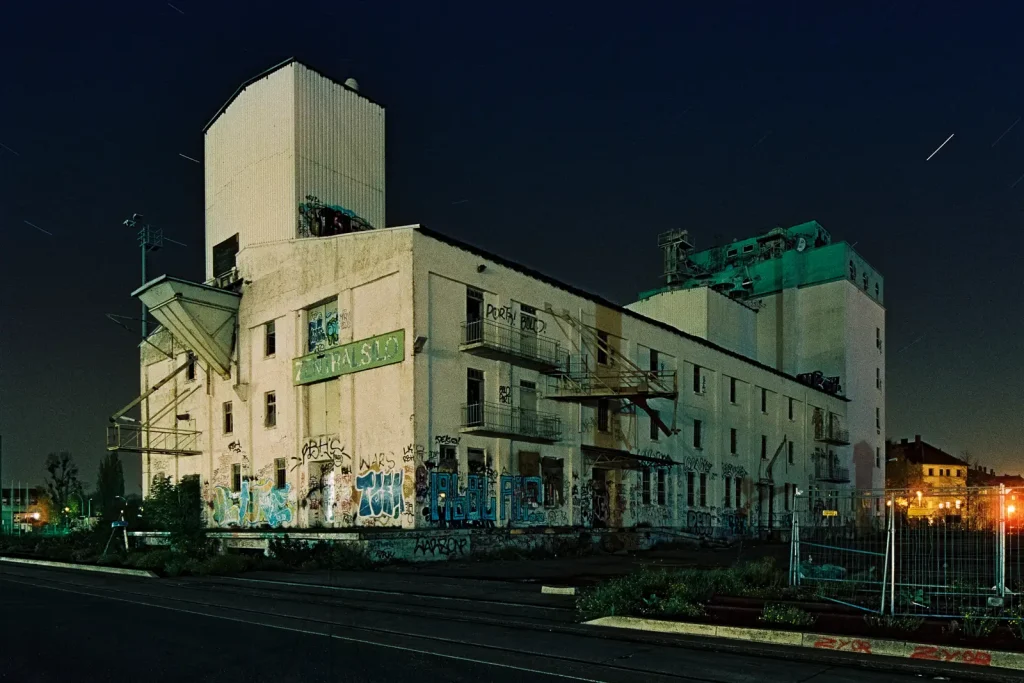
Abandoned factories have the advantage of being easier accessible than their active counterparts. Fences are full of holes and nobody cares. Because these places do not earn money anymore, they often stand in darkness. That’s cool, it allows me to take really long exposures, hereby creating the strange color effects mentioned above.
Inland Harbors
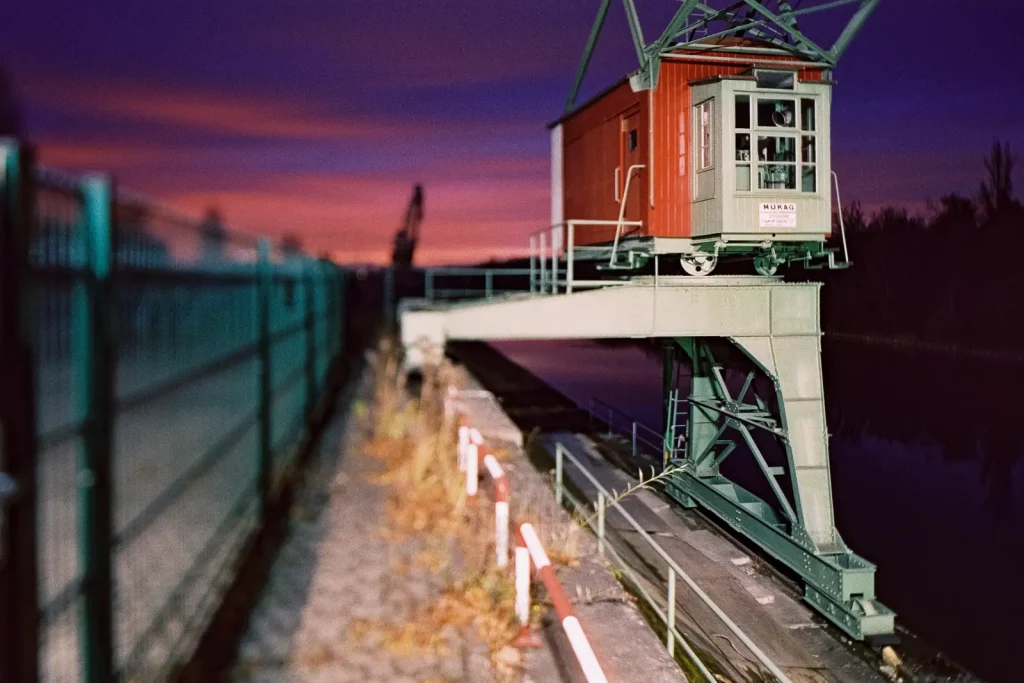
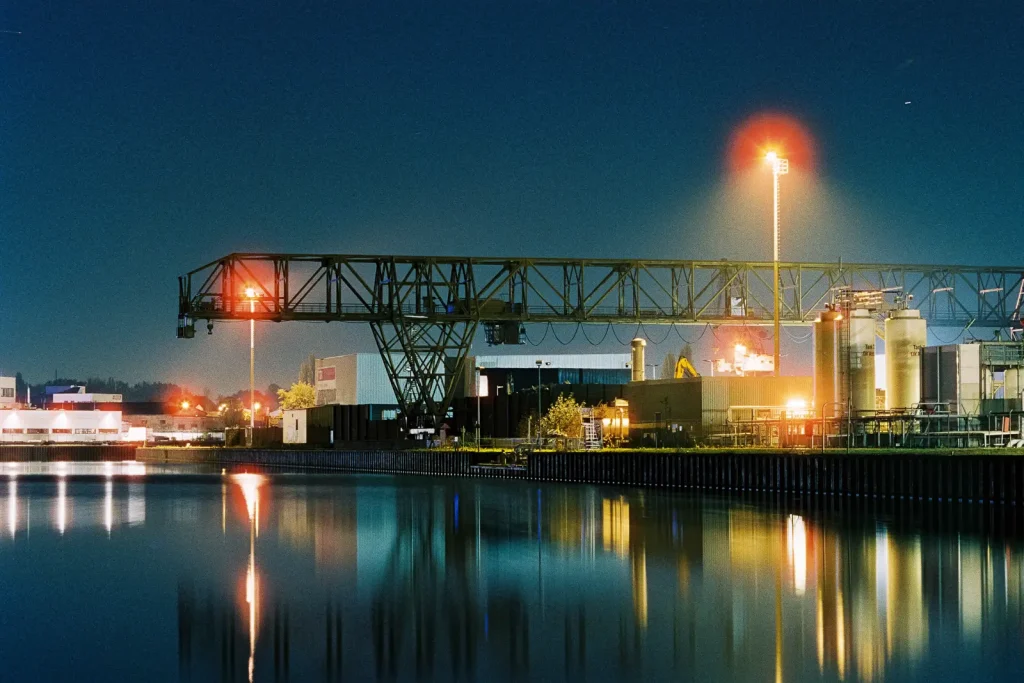
Harbors are places of activity. Ships arrive and depart, collecting and delivering goods. Various infrastructure waits to be photographed: loading cranes, oil tanks, jetties, conveyor belts… Unfortunately, Hanover doesn’t have a port. More precisely, the city has no sea port, but there are several inland harbors located along the Mittelland Canal. The transfer volume of goods is rather moderate; however, these inland harbors provide some nice scenes.
“Ihme-Zentrum” Housing Complex
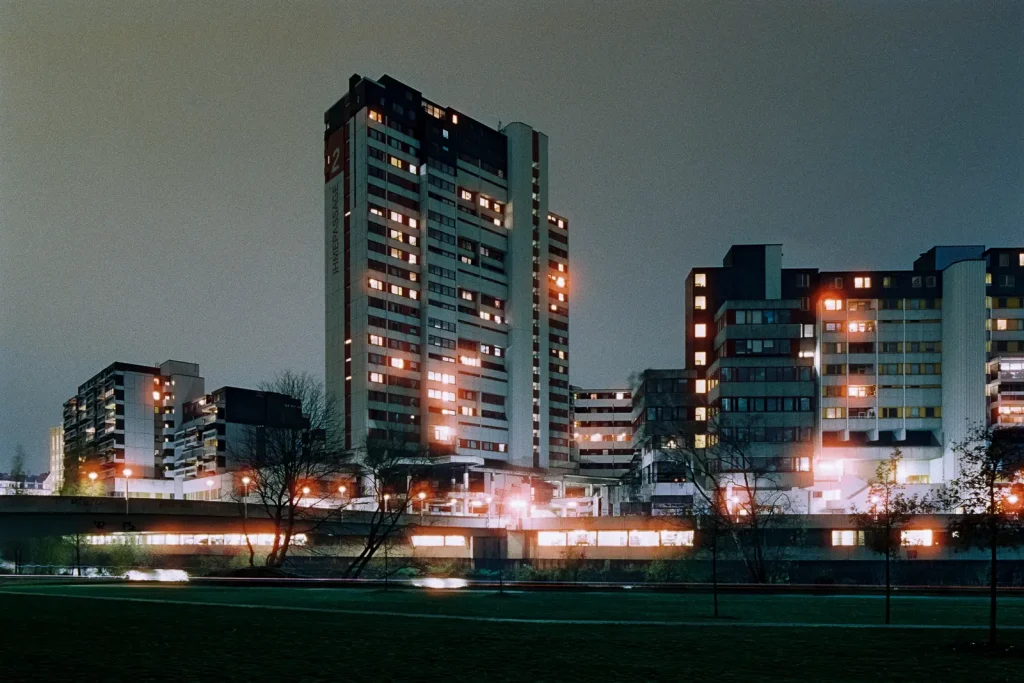
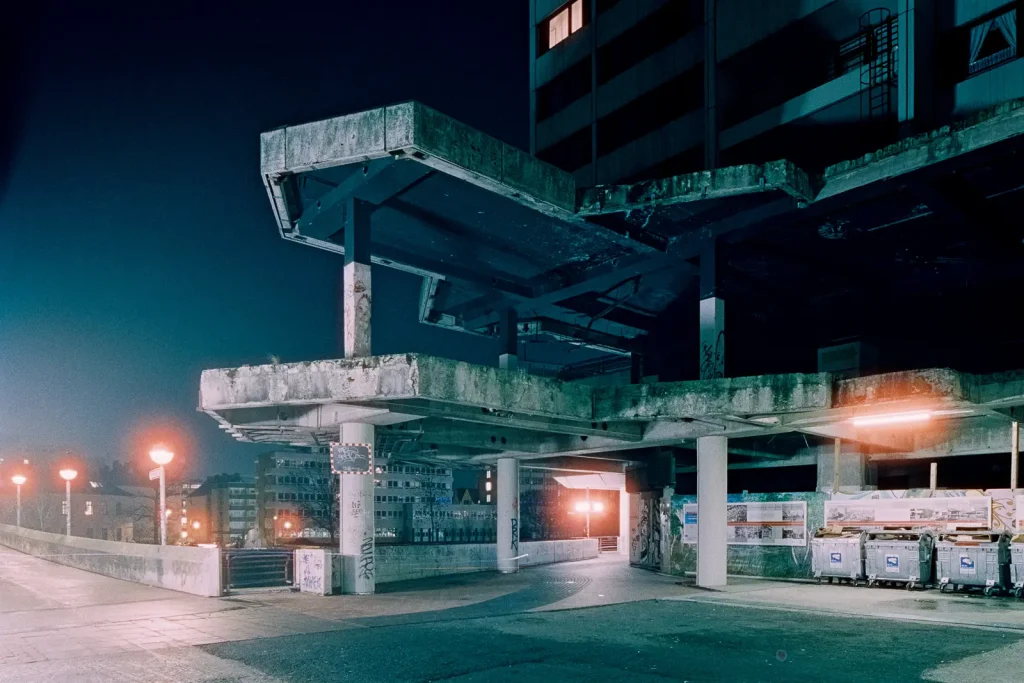
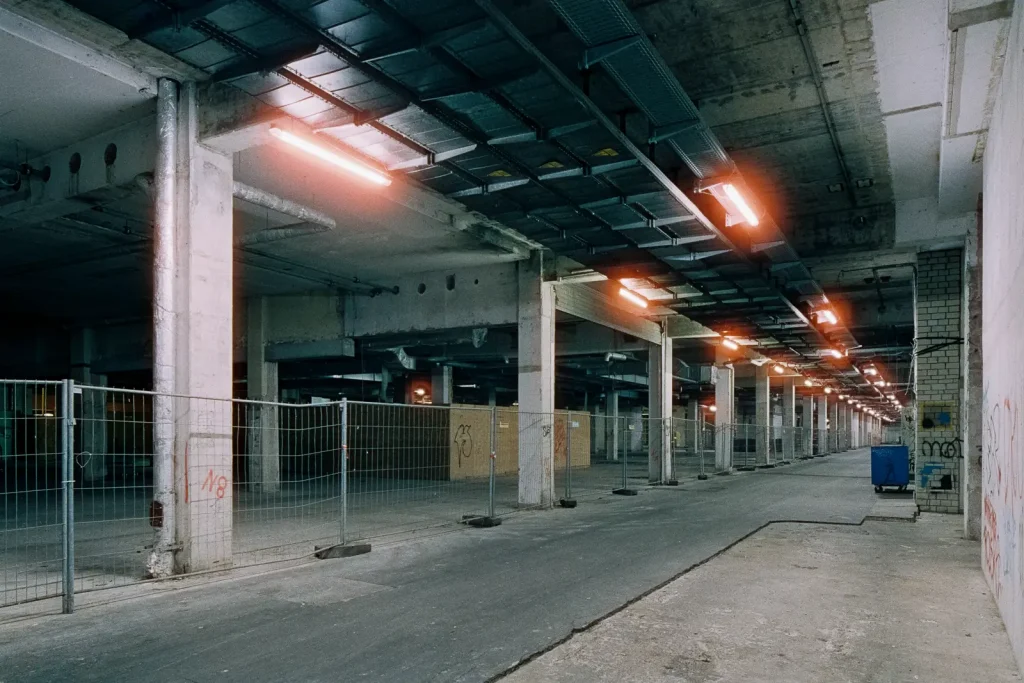
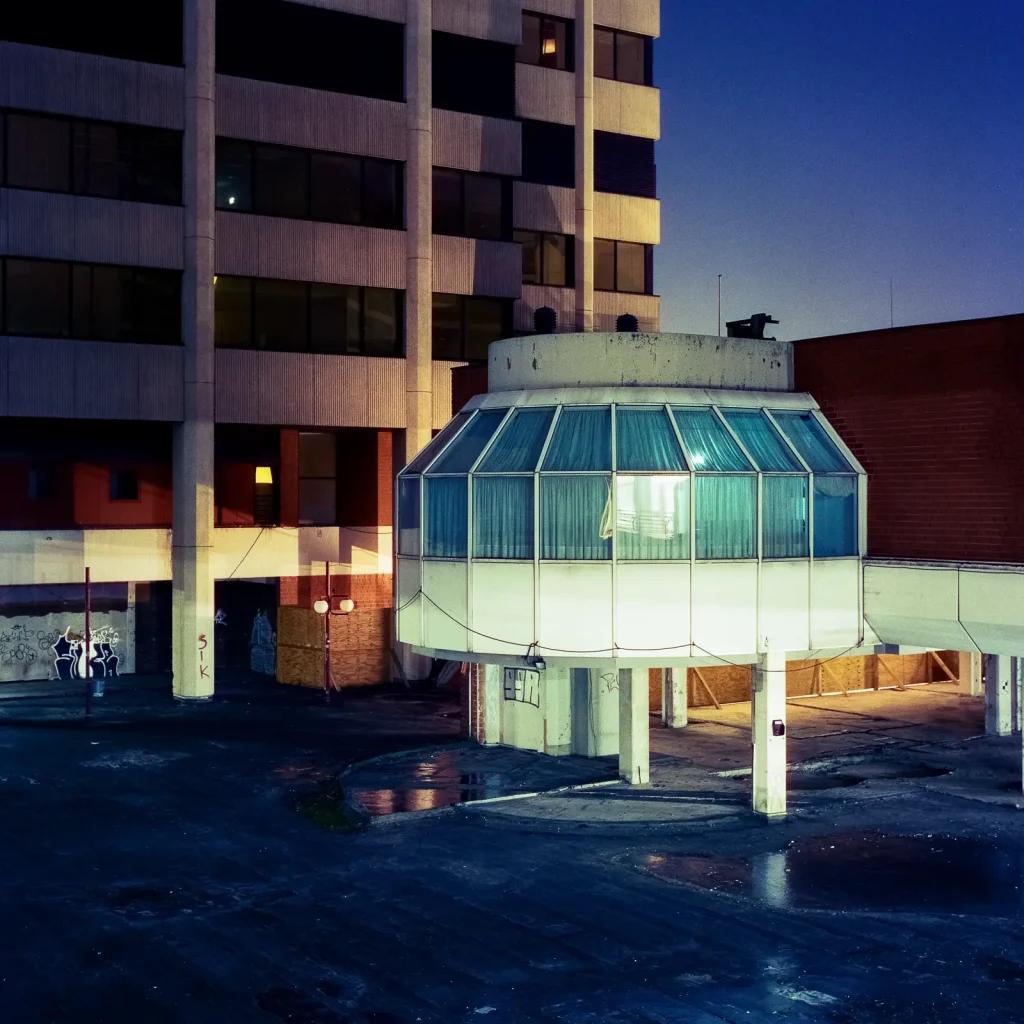
The “Ihme-Zentrum” is a large housing complex and served formerly also as a shopping center. It was built in the early 1970s at the west bank of the Ihme river, becoming home for roughly 3,000 people. But since its erection the Ihme-Zentrum has been sparking controversies, people regard the blocks as oversized and ugly. Its decline already began in the 1990s, with one shop closing after another. Today, the Ihme-Zentrum awaits an uncertain future with ownership changing almost every year.
I have been attracted to the Ihme-Zentrum for years due to its morbid character. The complex with its high-rises (some of the tallest buildings in Hanover) is probably the densest housing area within my reach. Sometimes the skyline reminds me a little bit of Peter Bialobrzeski’s views of Southeast Asian megacities, which he published in the book “neontigers”. I love the concentrated structures of cities like Hong Kong, Shanghai or Tokyo – full of people and with lots of light pollution. Another cool thing of the Ihme-Zentrum is its ground level that never wasn’t meant to have any sojourn quality. This area welcomes you with bare concrete, dumpsters and lots of pigeon droppings. Grey and only lit by luminescent tubes, the extended corridors could serve as a setting for a first-person shooter game.
Filling Stations
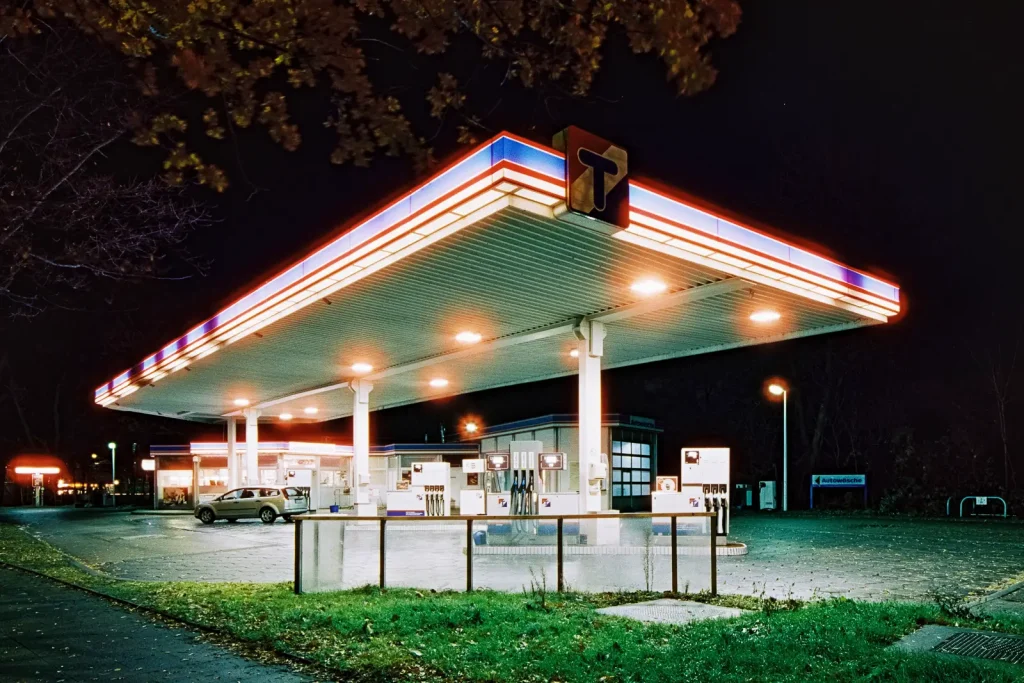
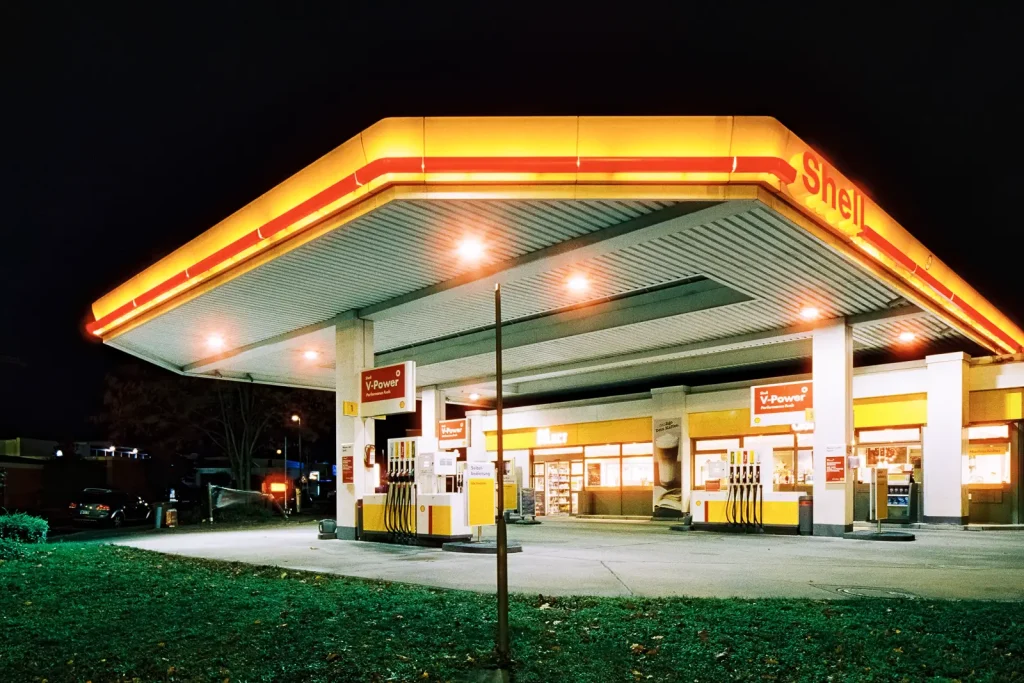
Filling stations offer brightly lit grounds, combined with colorful neon signs – an oasis not only for empty fuel tanks, also a temple of light in the darkness. I appreciate their cinematic look that makes me feel I’m involved in a road movie. Bright as they are, filling stations seldom require exposure times longer than 30 seconds – photographic fast food, if you will. Their frequent occurrence within a city and the standardized arrangement qualifies filling stations as a perfect subject for a series. I think they were also a reason why I started my night photography project with CineStill film.
Random Objects
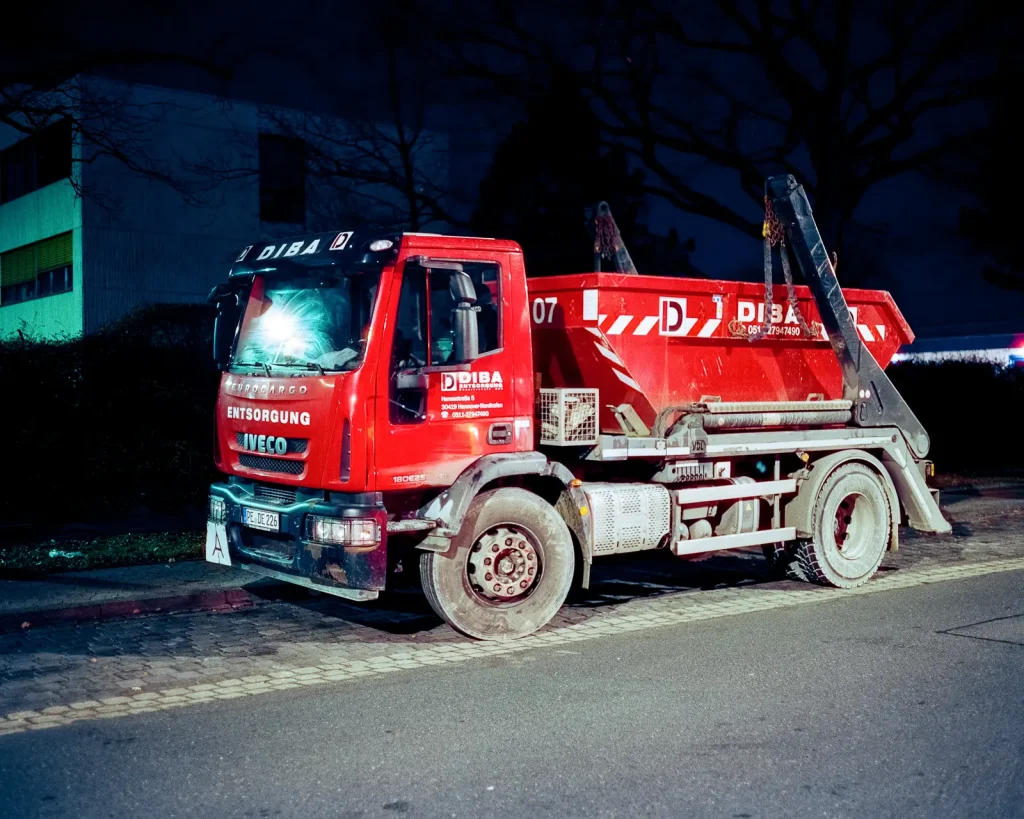
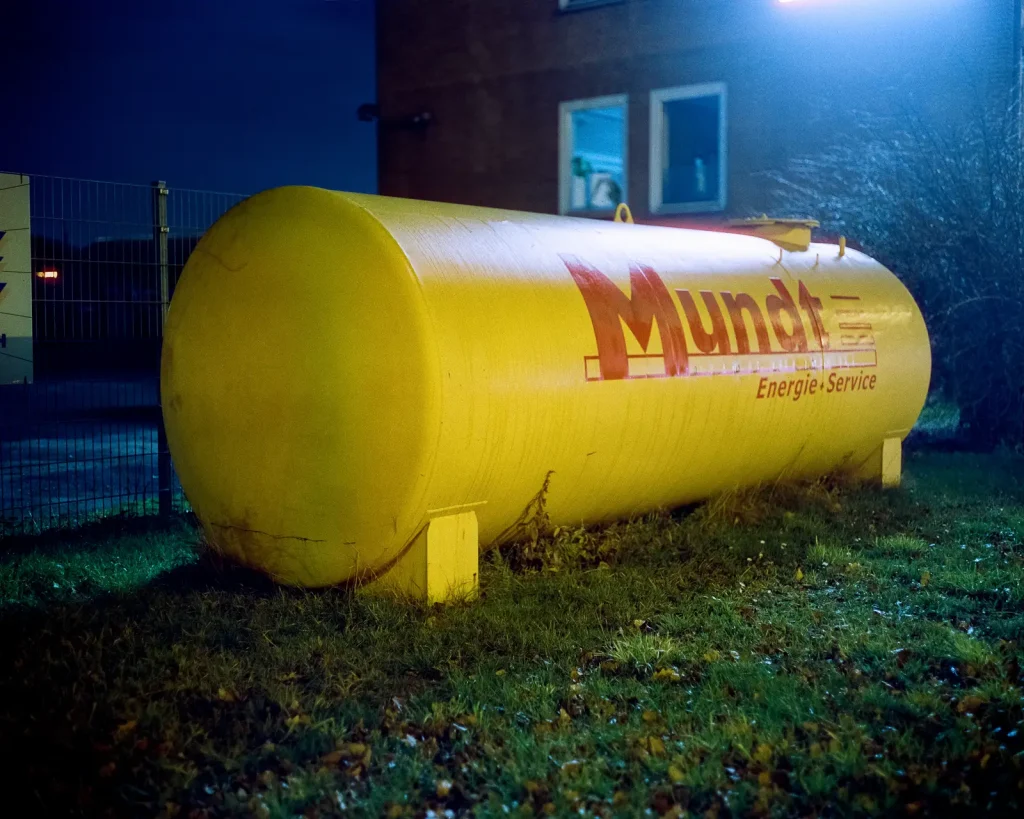
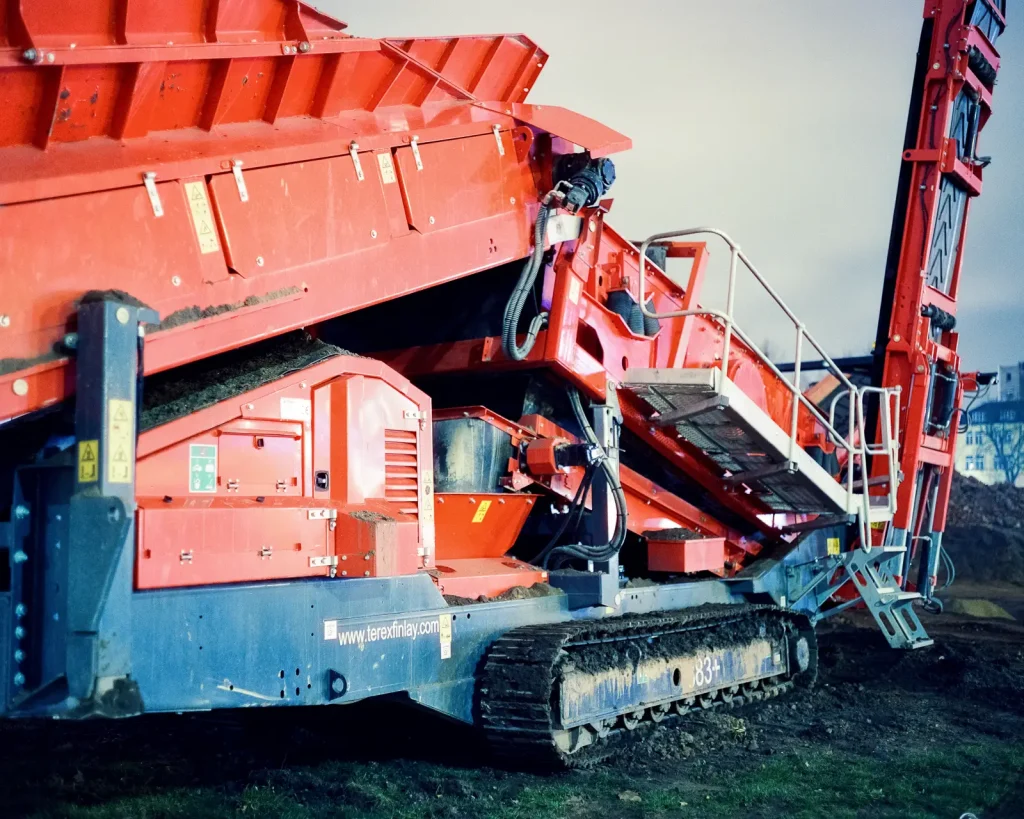
I don’t believe that objects have soul, but I think that any item has an inherent beauty – may this beauty be hidden or obvious. There are countless things, standing at the roadsides of a city: cars, trucks, billboards, hydrants, sculptures, piles of construction material… I slowly discovered these objects as being photographically interesting – at least for me. I have a weak spot especially for all kinds of dumpsters, and I do love construction equipment.
If you made it that far: thanks for reading!
instagram.com/graindeer
Share this post:


Comments
Tom Sheppard on My Dark Side: Night Photography with CineStill 800T Film – By Christian Schroeder
Comment posted: 31/03/2019
You certainly have mastered this film, and in spite of your misgivings there camera has delivered.
Thank you for this post
Comment posted: 31/03/2019
Mike Cunningham on My Dark Side: Night Photography with CineStill 800T Film – By Christian Schroeder
Comment posted: 31/03/2019
Comment posted: 31/03/2019
Comment posted: 31/03/2019
Comment posted: 31/03/2019
M Hunt on My Dark Side: Night Photography with CineStill 800T Film – By Christian Schroeder
Comment posted: 31/03/2019
Comment posted: 31/03/2019
Osh on My Dark Side: Night Photography with CineStill 800T Film – By Christian Schroeder
Comment posted: 31/03/2019
Comment posted: 31/03/2019
Jens Kotlenga on My Dark Side: Night Photography with CineStill 800T Film – By Christian Schroeder
Comment posted: 31/03/2019
(Ich wohne bei Hannover, vielleicht tauschen wir uns ja mal persönlich aus - google mich mal wenn Du magst wg Kontaktdaten)
Comment posted: 31/03/2019
Terry B on My Dark Side: Night Photography with CineStill 800T Film – By Christian Schroeder
Comment posted: 31/03/2019
Comment posted: 31/03/2019
Janet on My Dark Side: Night Photography with CineStill 800T Film – By Christian Schroeder
Comment posted: 31/03/2019
Comment posted: 31/03/2019
Laurent Perraut on My Dark Side: Night Photography with CineStill 800T Film – By Christian Schroeder
Comment posted: 31/03/2019
Comment posted: 31/03/2019
Comment posted: 31/03/2019
Comment posted: 31/03/2019
Barry Reid on My Dark Side: Night Photography with CineStill 800T Film – By Christian Schroeder
Comment posted: 31/03/2019
I agree with your view on the 17mm - it’s a specialist lens for tight spots and not generally useful for architecture and the flaring is a huge problem. I always take a ‘Flare Dinkum’ hot shoe mounted flag if I use the 17 for urban landscapes.
Comment posted: 31/03/2019
Aivaras on My Dark Side: Night Photography with CineStill 800T Film – By Christian Schroeder
Comment posted: 31/03/2019
Comment posted: 31/03/2019
Kurt Ingham on My Dark Side: Night Photography with CineStill 800T Film – By Christian Schroeder
Comment posted: 31/03/2019
Comment posted: 31/03/2019
Kurt Ingham on My Dark Side: Night Photography with CineStill 800T Film – By Christian Schroeder
Comment posted: 31/03/2019
Comment posted: 31/03/2019
Laurie on My Dark Side: Night Photography with CineStill 800T Film – By Christian Schroeder
Comment posted: 31/03/2019
Comment posted: 31/03/2019
Bob Weeks on My Dark Side: Night Photography with CineStill 800T Film – By Christian Schroeder
Comment posted: 31/03/2019
Comment posted: 31/03/2019
M on My Dark Side: Night Photography with CineStill 800T Film – By Christian Schroeder
Comment posted: 31/03/2019
You document your journey through different formats and film with such writer's elegance, and in a language other than your native one. Learned a lot.
Comment posted: 31/03/2019
JB Leman on My Dark Side: Night Photography with CineStill 800T Film – By Christian Schroeder
Comment posted: 31/03/2019
Comment posted: 31/03/2019
Zisis Kardianos on My Dark Side: Night Photography with CineStill 800T Film – By Christian Schroeder
Comment posted: 31/03/2019
Comment posted: 31/03/2019
DaCosta on My Dark Side: Night Photography with CineStill 800T Film – By Christian Schroeder
Comment posted: 01/04/2019
Comment posted: 01/04/2019
JR Smith on My Dark Side: Night Photography with CineStill 800T Film – By Christian Schroeder
Comment posted: 01/04/2019
Comment posted: 01/04/2019
Steve Ember on My Dark Side: Night Photography with CineStill 800T Film – By Christian Schroeder
Comment posted: 01/04/2019
I must say - until seeing your long-exposure work - that I felt Cinestill 800 was really being over-hyped as a trendy, but not necessarily better film for night photography. So many samples published were grainy in the extreme and had that predictable tungsten-blue cast. For night-for-night photos, I've always felt daylight-balanced slide films (or digital) produced more realistic looking night photos than tungsten; but your decision to use this film to portray nighttime colors and tonality in a more impressionistic way is inspiring, and makes me more inclined to be adventurous with the roll of Cinestill 800 that has sat largely unused in one of my cameras since being started!
Thanks again for this most informative, thought-provoking, and well written article.
Comment posted: 01/04/2019
Sroyon on My Dark Side: Night Photography with CineStill 800T Film – By Christian Schroeder
Comment posted: 01/04/2019
Comment posted: 01/04/2019
Bill on My Dark Side: Night Photography with CineStill 800T Film – By Christian Schroeder
Comment posted: 01/04/2019
Comment posted: 01/04/2019
Charles Higham on My Dark Side: Night Photography with CineStill 800T Film – By Christian Schroeder
Comment posted: 01/04/2019
Comment posted: 01/04/2019
carlos albisu on My Dark Side: Night Photography with CineStill 800T Film – By Christian Schroeder
Comment posted: 06/04/2019
Chris Pattison on My Dark Side: Night Photography with CineStill 800T Film – By Christian Schroeder
Comment posted: 06/04/2019
MarkB on My Dark Side: Night Photography with CineStill 800T Film – By Christian Schroeder
Comment posted: 08/04/2019
Ian Koh on My Dark Side: Night Photography with CineStill 800T Film – By Christian Schroeder
Comment posted: 01/05/2019
Comment posted: 01/05/2019
Paolo Lucente on My Dark Side: Night Photography with CineStill 800T Film – By Christian Schroeder
Comment posted: 18/05/2019
Comment posted: 18/05/2019
Boris on My Dark Side: Night Photography with CineStill 800T Film – By Christian Schroeder
Comment posted: 02/08/2019
Comment posted: 02/08/2019
Daniel Sigg on My Dark Side: Night Photography with CineStill 800T Film – By Christian Schroeder
Comment posted: 06/05/2020
I like the Cinestill look quite a bit, especially the colors and halo effect, and would love to try it, but am at the moment 100% dedicated to B&W in my quest for minimalism ;-)
Are you still using Cinestill 800T these days?
Cheers,
Daniel
Comment posted: 06/05/2020
rodney on My Dark Side: Night Photography with CineStill 800T Film – By Christian Schroeder
Comment posted: 11/05/2020
Comment posted: 11/05/2020
Compact Magic: Turning into a Point-and-Shooter – By Christian Schroeder - 35mmc on My Dark Side: Night Photography with CineStill 800T Film – By Christian Schroeder
Comment posted: 12/05/2020
Photographing Buildings and Places in Hannover – by Christian Schroeder - 35mmc on My Dark Side: Night Photography with CineStill 800T Film – By Christian Schroeder
Comment posted: 14/05/2020
The Most Read and Commented upon Posts Published on 35mmc in 2019 - 35mmc on My Dark Side: Night Photography with CineStill 800T Film – By Christian Schroeder
Comment posted: 21/05/2020
Yet Another Night Shift: Long-Time Exposures on Kodak Portra – by Christian Schroeder - 35mmc on My Dark Side: Night Photography with CineStill 800T Film – By Christian Schroeder
Comment posted: 26/05/2020
Dean on My Dark Side: Night Photography with CineStill 800T Film – By Christian Schroeder
Comment posted: 18/02/2022
As I was reading I was trying to place local features that would work as in your images. I'm now going to to go back to the beginning of the post and read again, I seriously doubt that will be the final read.
Thank you so much for posting, I really am excited to begin on a journey of night time photography. A really beautiful post.
Comment posted: 18/02/2022
Comment posted: 18/02/2022