Raw Photo Processor 64 is A Mac only application that can be used on all OSX 10.4 or newer. It is a software written by Andrey Tverdokhleb, a computer scientist and a photographer, along with Iliah Borg, a titan of professional photography. The colors I got on my trials have reminded me the golden days of the color negatives, B&W negatives, and reversal films. Now I can obtain film-like colors from a digital file. And all on the budget. What a joy! I do not judge in any way people who love film-like colors via other software. I have chosen this software due to the lack of all these old film colors in all presets I came across with.
Simply, for me Raw Photo Processor 64 is the best approach to old film colors that are not on the market anymore such those that remind me of the pictures my parents used to take. Raw Photo Processor 64 ver. 4.8.0 (Oct. 2014) (https://www.macupdate.com/app/mac/62244/raw-photo-processor) is a software that tries to reproduce old film colors and I think with huge success, colors that I find only in films that are not sold anymore today. I will talk about each of them in another post. I am not professional photographer nor I try to advertise for those who wrote it. Since no software can do magic in terms of colors I strongly suggest that you can at least try it once.
When I talk about colors I simply state “I like” it or “I dislike it”. Nobody has to argue on this matter. It is simply a question of taste. If you came to this world with a film camera in your hand, chances are you might do. Do you remember Kodak Portra 160NC, Kodachrome 64, Fujichrome Velvia 50 or Fujichrome Astia 100F? How about the B&W negatives such as Agfa APX 25, Kodak Vision2 50D, or Kodak Professional Technical Pan Black and White 25?
Raw Photo Processor 64 is a Mac application that can be used on all OSX 10.4 or newer but not on PowerPC Macs. It is operating flawlessly on a MacBook Air with macOS High Sierra 10.13.6, 1.6 GHz Intel Core i5, 2 GB 1333 MHz DDR3. A complete software with all additional features can be purchased for as low as 15-20 USD as a donation. That gives you access via an unlock code (personalized through email but one can use more than one copy!) to additional features as follows: Multi-CPU Processing, Camera Profiling, Integration, and Workflow Helpers.
Raw Photo Processor 64 works with all Bayer-RBGB sensors (Canon, Nikon, Sony, Pentax and cameras using the same sensor). It will not work on all Sigma cameras that employ a FOVEON sensor (as well as on non-Bayer-RBGB sensors). I used Raw Photo Processor 64 with Nikon D200, Nikon D700, Nikon D800, Fuji S5Pro, Canon 30D, Canon 5D Mark II, Canon 5D Mark III, Canon 6D and Sony a7II even though this one is not listed. A complete list of the supported cameras can be found in the Raw Photo Processor Manual at page 6 (https://www.raw-photo-processor.com/RPP/Overview.html). Raw Photo Processor 64 gave me all the time the film-like colors that reminded me of my youth and those beautiful moments of my life when my parents and grandparents were here.
One has to look at Raw Photo Processor 64 as a first step. So, you can “develop” your Raw digital images on Raw Photo Processor 64 then you need to process your newly developed images in Lightroom or Adobe Photoshop for sharpening, cropping, shadows / highlights and so one and so forth. What sets the Raw Photo Processor 64 apart from other post-processing software is its simplicity. Raw Photo Processor 64 applies all its operations on the Raw file directly for each requested command as opposed to most of other post-processing software that are demosaicing data once and for all then subsequent commands will be operated on the newly interpolated image.
I forgot to mention that there are no sliders to work with as we all experience in Lightroom or Adobe Photoshop but you can use the up and down arrow keys to change the values in each rectangular box. The Raw Photo Processor 64 is a wonderful and easy to use, step-by-step “developer” since it is integrated with picture organizers (i.e. Adobe bridge) or with post-processing software mentioned above. It took me some time to get accustomed to using this software.
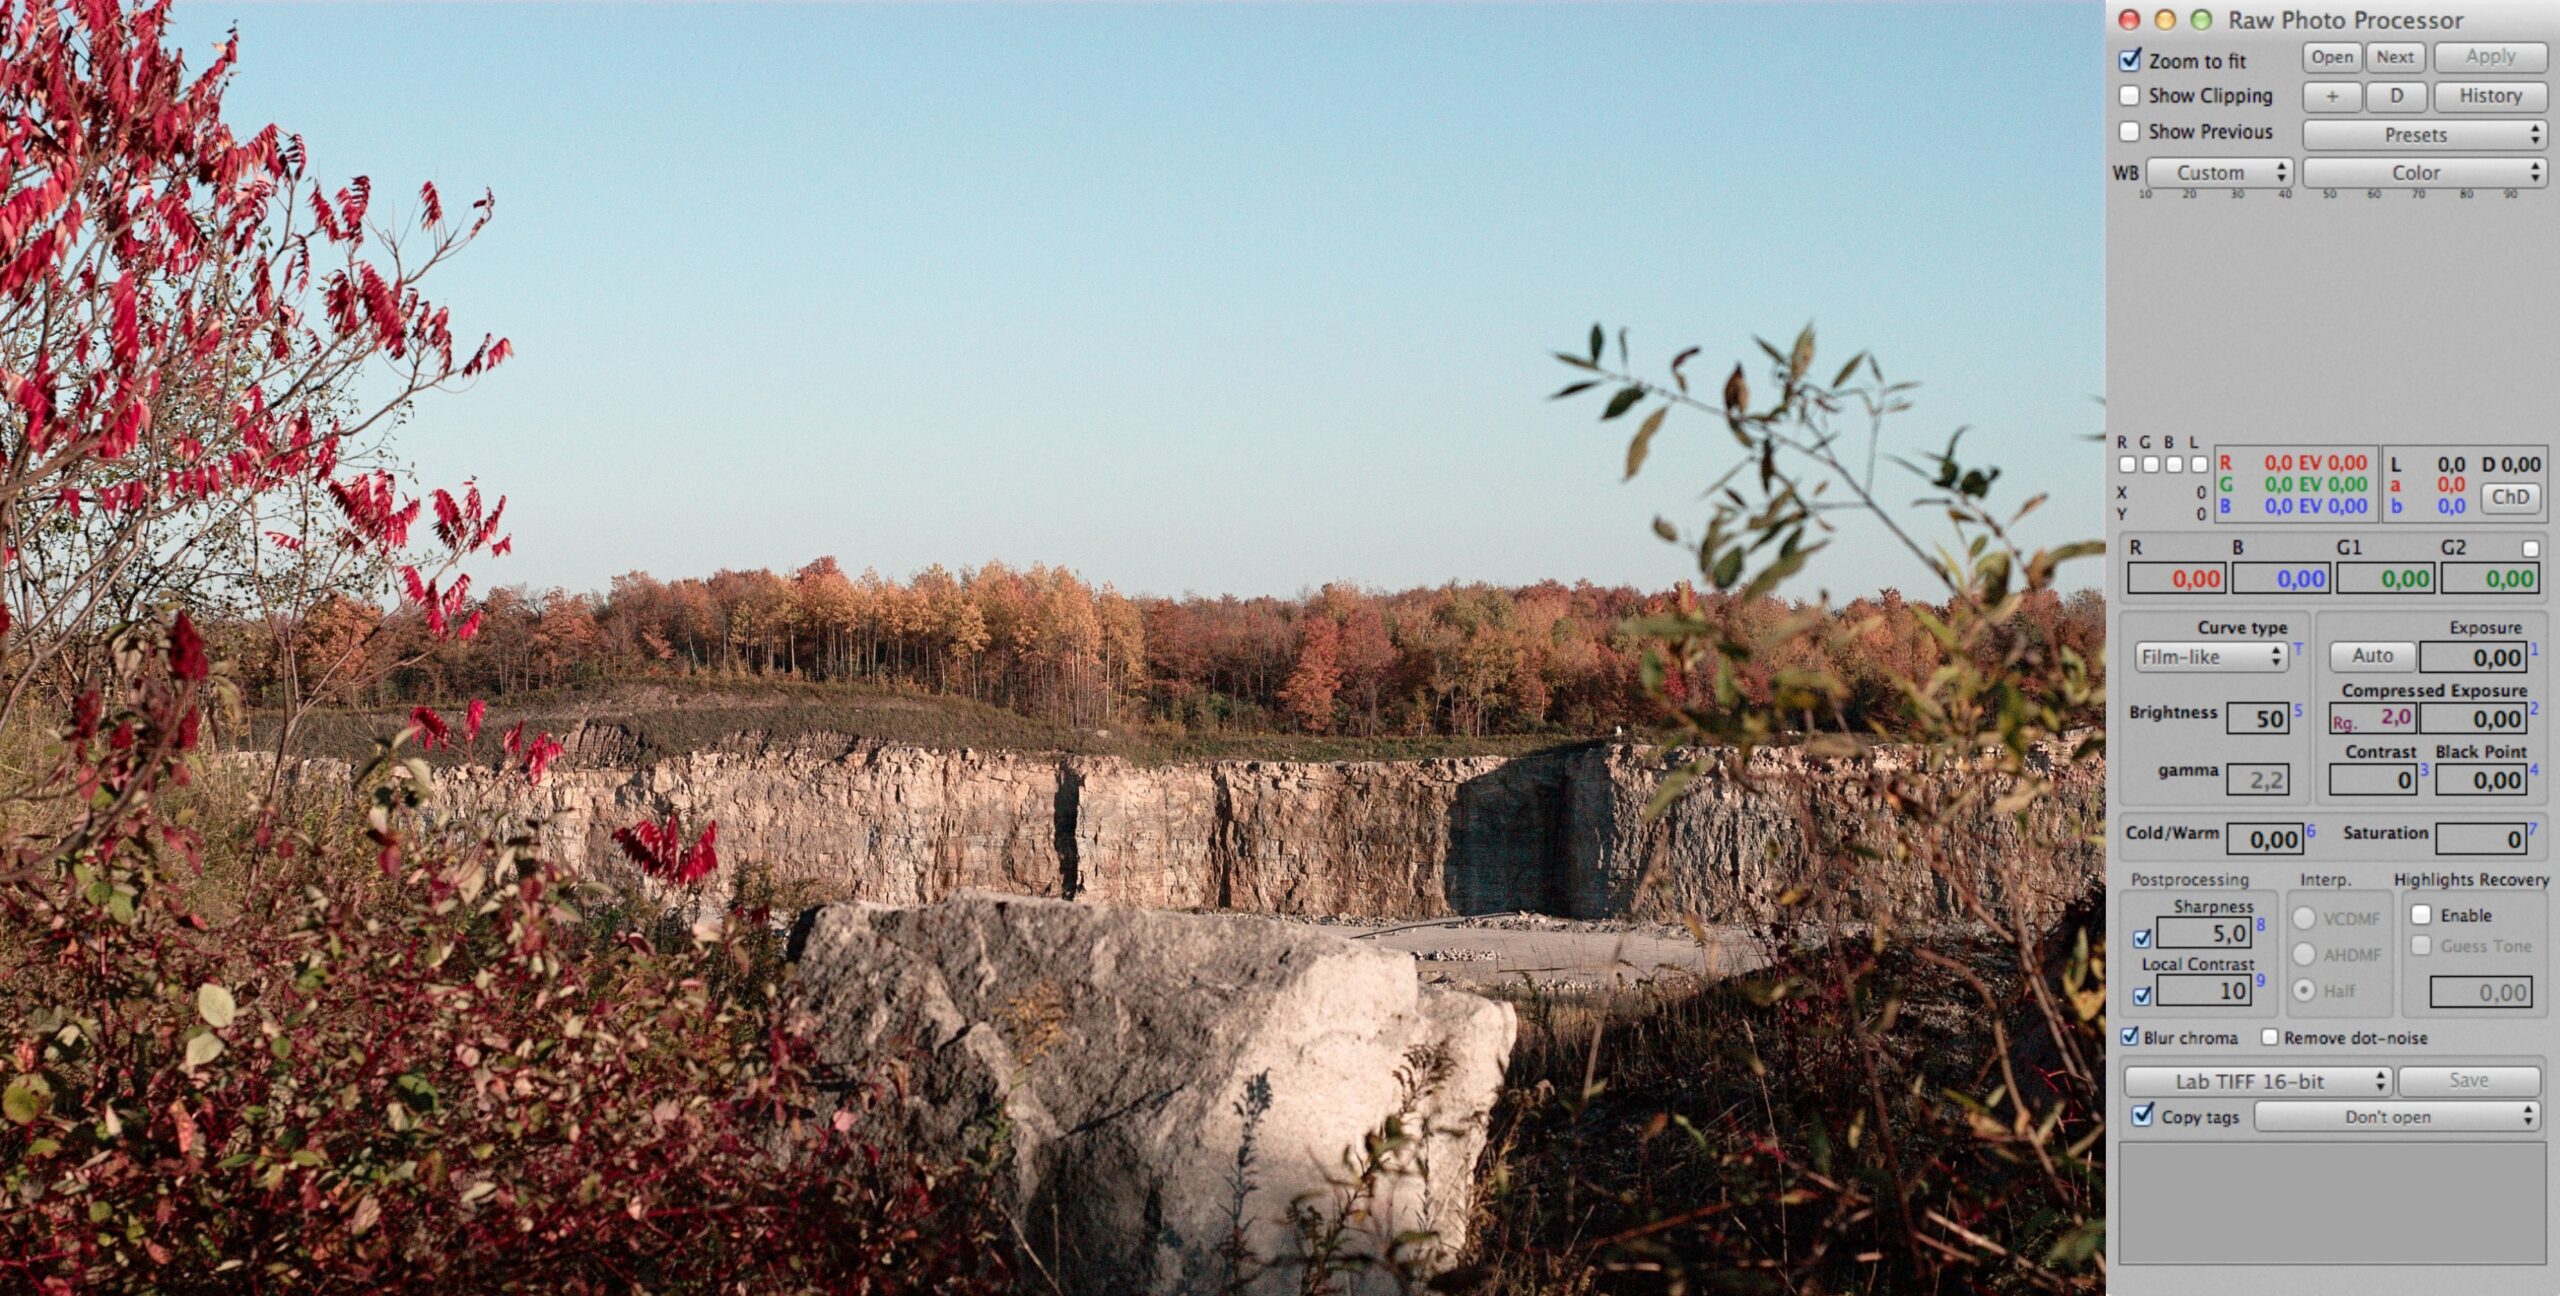
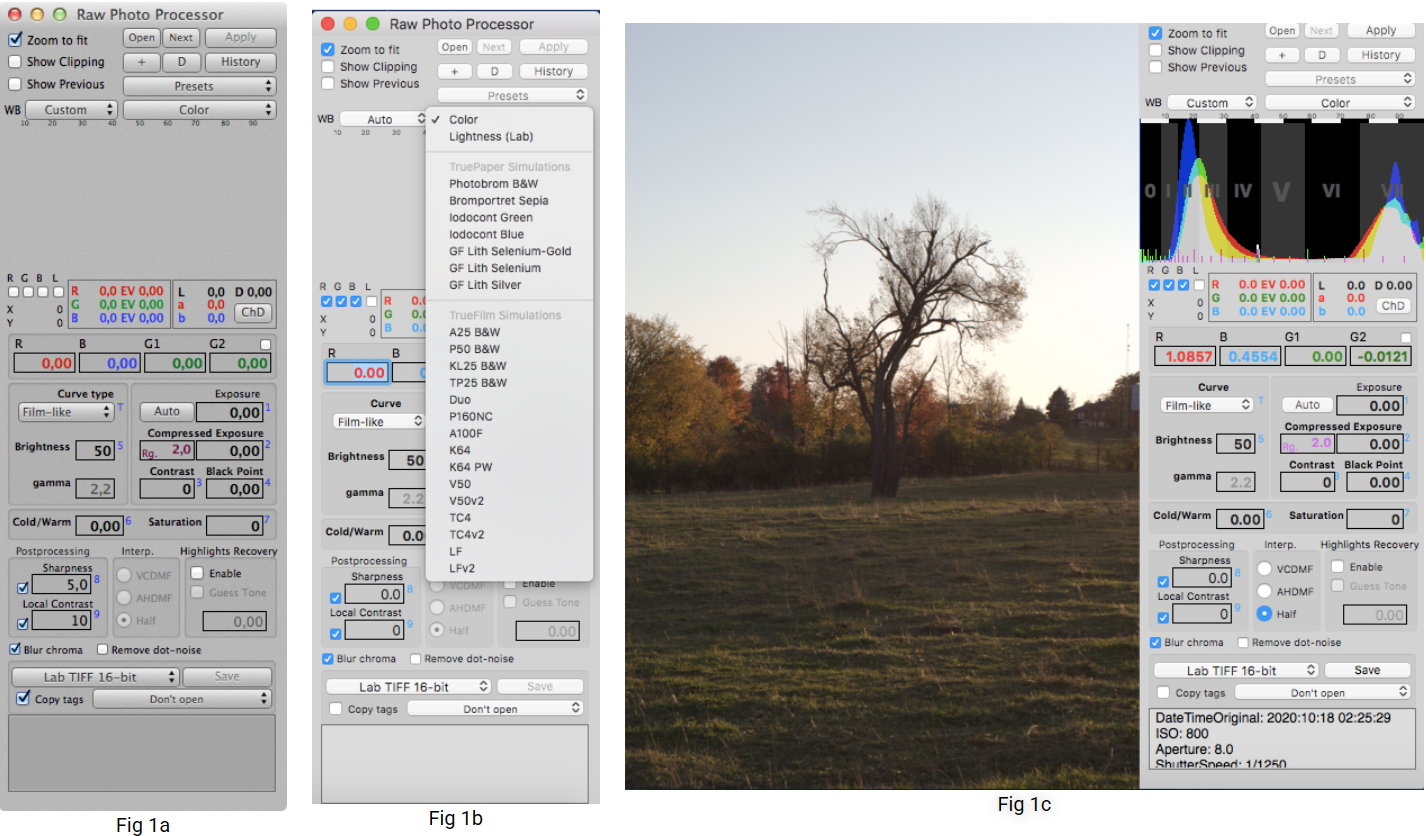
Once you drag and drop the raw file you will come across with this “control panel” – Fig. 1a before and after dragging and dropping your raw file – Fig. 1b and 1c.
Zoom to fit – if a tick is on for the Raw you just dragged and dropped and your file looks not good at all then remove the tick and sun is hovering over your file. You can scroll / drag the Raw image and look at any mm2 of it. This preview window always sets the Half-mode (i.e. half resolution from the real one) in the Interpolation (Interp.) sub-window. That mode means more speed as a result of no interpolation at all with no effect on decreasing the accurate color adjustment.
Show Clipping – be activated in order to checking and correcting for overexposed areas.
Apply – is to be used as its name suggests, after each change you made.
History – button opens the window that contains a record all the actions you performed on a specific file.
The settings can be edited by inputting the data you decide to retain in the designated boxes. + button when pressed adds a record of all the current settings that can be seen on the control panel (see History window). – button removes the recorded history for each file or for all files at once (see History window). O-button opens a specified Raw file. Propagate – button makes a copy (at once) of specified file recorded data into many files (see History window). For in-depth learning of how to use the History you may want to consult Raw Photo Processor Manual pages 14-18.
ChD – button corresponds to the Gamut View (i.e. the 2D diagram of the image pixels in the CIELab space) color values that helps you to set-up the custom printer-profile via sRGB. Gamut View helps you determining the way you should adjust your file with respect to its saturation. If colors are crossing the gamut border then, the image will look flat. The opposite? You will not be able to using the full-reproduction capabilities. A detail explanation you will find at pages 22-24 of the Raw Photo Processor Manual.
Presets – if you decide for a specific film profile and you want to stitch in a panorama many pics you can do it by memorizing those parameters after saving the first as Preset. You have to choose New, then once you load a new picture – press Presets and bingo, you are all set! Same film color profile will apply to your new Raw file. Should you dislike the preset you just did, choose Delete.
Save – saves your work by default in the same folder your Raw corresponding file belongs to.
Color – opens TruePaper Simulations and TrueFilm Simulations – Fig 1b.
TruePaper Simulations let you choose Black&White, Sepia and other kinds of monochrome profiles implemented by Iliah Borg via measurements of specific photo papers.
Black and White Negatives: A25 B&W = Agfa APX 25, P50 B&W = Kodak Vision2 50D, TP 25 B&W = Kodak Professional Technical Pan Black and White 25 / Kodak TP25.
Color Negatives and Slide Film: P160NC = Kodak Portra 160NC, LF = Kodak Ektar 25, K64 = Kodachrome 64, V50 = Fujichrome Velvia 50, A100F = Fujichrome Astia 100F,
Duo = Technicolor 2Strip, TC4 = Technicolor System4 die Transfer (Technicolor 3Strip)|
What film color you choose depends solely on you. Nobody can recommend or argue on your choice. My choice has always been Kodak Portra 160NC and Kodak Ektar 25 both discontinued. Today I prefer as color negatives Kodak Portra 400 even though I find it a little warmer sometimes and Kodak Ektar 100 even warmer but very nice even for portraits under overcast sky only. As for the slide films Fujichrome Astia 100F gives a wonderful tonality, I think. I do dislike Fujichrome Velvia 50 since it looks too saturated on green. The B&W negative Agfa APX 25 reminds me of the film my father / my grandfather used to like. Feel free to like any of them or dislike each of them. Those film profiles are a resurrection of those golden years of film photography. I can only recommend spending more time to compare them side by side. I am pretty sure that you will fall in love with at least one of each be it slide, black & white or color negative. At the end of this brief Raw Photo Processor 64 non-professional description I will post samples of many film profiles.
Save – by pressing this button your newly post-processed file will be stored in the same folder as the original Raw file. Save as – will let you choose another location for your post-processed file. You can prevent from overwriting: Settings > Don’t overwrite files on Save. Raw Photo Processor 64 overwrites files previously saved. Files can be saved as LabTIFF 16-bit, BetaRGB space, BetaRGB L*space, sRGB, sRGB v4 space, HD 709 space and Raw-mode untagged. If you are willing to donate then you can open via an unlock code your Lightroom Raw file directly into the Raw Photo Processor 64.
R G B L channels – the Histogram – Fig. 1c and Fig. 2 shows pixel densities R, G, B, and L*(i.e. Lightness CIELab color space) relative to the current output and individually selectable (the user can include one or all of them). They are not turned on from the very beginning. The density of each channel is displayed relative to the BetaRGB space.
A calibrated histogram shows three scales: EV (steps of 1/3), L* (ten steps) and the Ansel Adams’ Zone System (7 zones from 0 to VII). L* scale is located on top of the histogram as an alternate, white and black strips. The Ansel Adams’ Zone System Scale consist of alternating black and dark-gray vertical bands labeled with a Roman numeral each. This Zone System Scale can be used together with the color-picker region (i.e. a small region / rectangle that you choose on your Raw file) in order to make it a reference for your custom WB and to correct parts of the image which density you want to modify. In his Zone System Scale Ansel Adams placed Caucasian faces in zone V or VI. In the same time, the same zones should be used if you are looking for an enhanced detail.
By pressing the ⌃ Control key concomitant to selecting a region on your picture (i.e. the color-picker), positive and negative gold-coloured EV numbers appear at the beginning of each Adams’ Zone. These numbers indicate the amount of correction in order to achieve the average of the area you selected to the beginning of that zone. The selected area is represented by that gray and thin vertical line generated by the color-picker region. If you either manually enter the gold-colored number into the Compressed Exposure rectangle or click on it (inside the Histogram) then Raw Photo Processor 64 will add that number into the same Compressed Exposure rectangle. By holding the ⇧ Shift key concomitant to clicking on that number it will add a half of zone more hence reaching the center of the chosen Adams’ Zone – see Fig. 2 below.
The EV scale is located at the bottom of the Histogram. One full stop (1 EV) – is presented as long tick whilst 0.33 EV stop appears as small tick. By changing the Contrast, Brightness, the EV scale changes too. The thicker and taller mark that can be seen in the Histogram is the mid-tone point of 12.5% as opposed the old value of 18%. My DSLRs have their digital meters calibrated to the 12.5% value.
By default, the developers do not turn on the R, G, B, L channels apparently to ensure that you can choose what channels you want to use.
Any of the vertical lines (R, G, B but L* channels – you will not use L* though) can be used in order to modify EV using the values given by the color-picker region (using ⌃ Control key). In order to achieve that you should modify the value of the G – green channel or whatever channel looks stronger but first you should untick both Sharpness and Local Contrast. The EV values are located below the Histogram.
It is also possible to display the Raw Histogram before alterations such as the demosaicing and WB. In order to achieve that you should select Raw RGB TIFF 16-bit or 8-bit then set the Curve to Gamma and give a 0 value to all channels (R, G, B, G1, G2). Same result can be made by choosing the UniWB in the WB (Custom, Auto, As Shoot, UniWB). The Raw histograms do not show G1 and G2 values separately.
Under Brightness you see gamma with a default value of 2.2 exposing a distribution that helps examining the Raw file. By changing it to the value of 1, the sensor initial distribution is revealed. I keep the value of gamma at the default (i.e. 2.2). Any clipping per each color channel during data acquisition (exposure), during WB or during a specific color space conversion are easily seen via the Histogram (all these are mandatory when setting up a Preset).
When you define a region on your raw file by using the color-picker tool then the Histogram refers to that region being averaged. When no region is selected the Histogram refers to the entire file. Same applies for WB.
WB (4 – Channel WB White Balance) – operation that has to be performed in early stages of post-processing – opens Custom, Auto, As Shot, UniWB. If you store custom values then you can access these retained values by choosing Custom. After finishing adjusting the brightness-contrast adjustment, you can proceed with WB. Coefficients of exposure correction can be adjusted for each R B G1G2 channel. Here is the main difference in between the Raw Photo Processor 64 and any other raw converter by allowing you to directly play with these coefficients. This way you do fine-tune the White Balance.
The numbers that appear in R B G G1 Channel Balance boxes change when reading your Raw file WB. These numbers in EV represent the differences (relative) between the fourth channels.
Increasing the value of R channel and decreasing the value of B channel (no change for G1 G2 channels!) will increase the color temperature similar to the result achieved with sliders in Adobe Photoshop. Decreasing the value of R channel and increasing the value of B channel (no change for G1 G2 channels!) will decrease the color temperature similar to the result achieved with sliders in Adobe Photoshop.
Increasing the values of both R and B channels (no change for G1 and G2 channels!) the result will be similar with an increased tint in Adobe Photoshop. Decreasing the values of both R and B channels (no change for G1 G2 channels!) the result will be similar with a decreased tint in Adobe Photoshop.
Increasing / decreasing the value of the R / B channel should be done with the same value in all of the above cases.
The tonality (shift of colors) in Raw Photo Processor 64 can be achieved via the Cold/Warm button which is nothing but a WB shift (i.e. conversion filters). WB can be altered as well by changing the value of the coefficients. Same result can be achieved by selecting an area on your Raw file using cmd ⌘ which should be assigned as the Adams’ V Zone (i.e. neutral grey) then click Apply.
Presets of White Balance – as specified by the authors three WB presets are available: software authors-defined, user-defined, digital-camera defined. User-defined Presets – Settings > Create WB Preset > Name you assign (which option will appear in WB button and can be deleted as well). To create a WB preset you proceed in a similar way you always do: a picture of a gray card (i.e.18%) in the same light intensity (i.e. cloudy, fluorescent, daylight, tungsten) as your subject will be saved in your camera. That user defined WB as you know is much more accurate than both camera-defined and software authors-defined.
If you want to transfer your Custom WB (set-up by using a 18% grey-card) from one picture to another then you need an unlock code (via a small donation) and follow the instruction at page 12 in Raw Photo Processor Manual.
Auto – button makes the auto correction based on the G channel.
Exposure – i.e. Exposure Compensation is the mandatory step to preserve highlights and shadows. Raw Photo Processor 64 displays the images the way they are recorded by the camera sensor which means that the two histograms should be identical on each channel (R G B) as well. The integral histogram should then follow the same trend. Clipping (on each channel) can be avoided by clicking on the Auto – button while holding the ⌥ Option (alt) key using the strongest channel. Compressed Exposure will be a better approach to solve this (see the second paragraph and the Highlights Recovery paragraph).
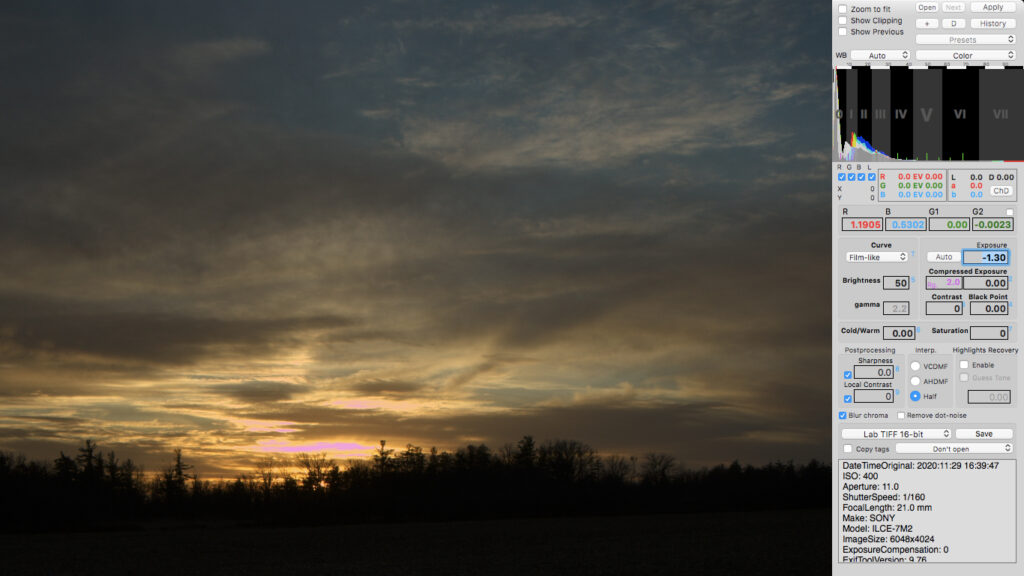
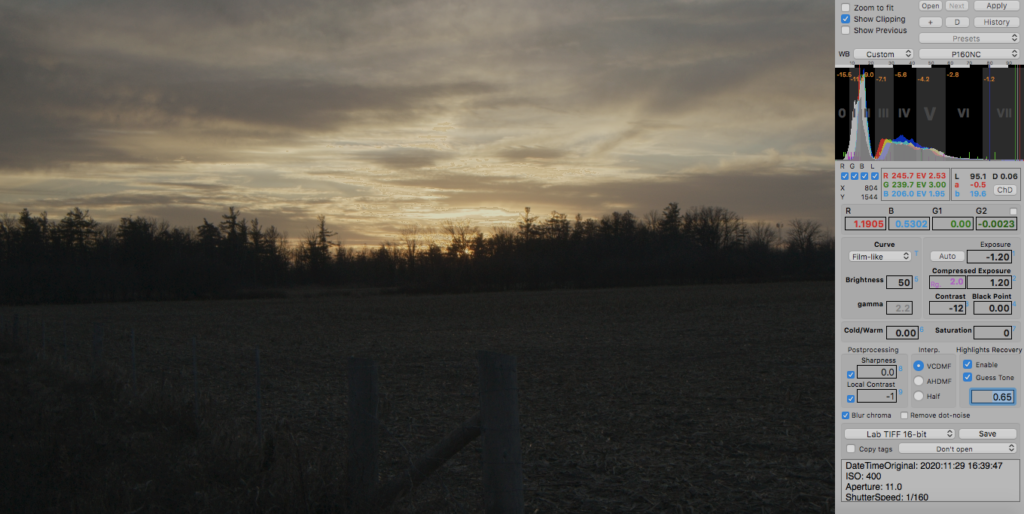
Case I – Sun set light (Natural light) – original file was ARW (SONY a7II w/ Voigtländer Color Skopar 21mm f3.5. In Photoshop it is probably very difficult to impossible to obtain a proper Exposure Compensation. I will try to follow the procedure described in the Raw Photo Processor 64 Manual to see if I can solve this. A negative value for Exposure gives a pinkish coloration in regions of highlights that are blown-out – Fig. 3a and Fig. 3b below.

To help with solving this blown-out region I have the Compressed Exposure similar to Exposure Compensation. In order to get rid of that clipping shown in the Raw file above a negative value for the Exposure should be employed while keeping the Compressed Exposure at 0 or a positive value, then enabling Highlight Recovery, then Guess Tone and playing with its values. Make sure not to pass Guess Tone threshold value because that can screw-up all your work (use only small steps!).
Another way is to apply from the very beginning Highlight Recovery through the Enable option. As soon as you tick it, the software applies an Exposure with a negative value imposed by activating the Highlight Recovery in order to compensate for the overexposed part of the image. Then you have to activate the Show Clipping option, apply a Compressed Exposure equal with the value of the Exposure with the + sign. Next step is playing with the Guess Tone values until you find the threshold value that corrects the blow-out part of the image (use small steps). Show Clipping is your guard that will let you know when to stop playing with the Guess Tone – Fig. 4 below. Now the file can be exported to Ps or Lr.
Then, with a minimal adjustment of the Local Contrast and Contrast I can recover overexposed areas so that pinky sky problem is solved – see the Highlights Recovery paragraph at page 27 Raw Photo Processor Manual. The reconstructed image can then be exported into Lightroom or Photoshop for shadows adjustments. Again, Raw Photo Processor 64 is complementary to Lr / Ps.
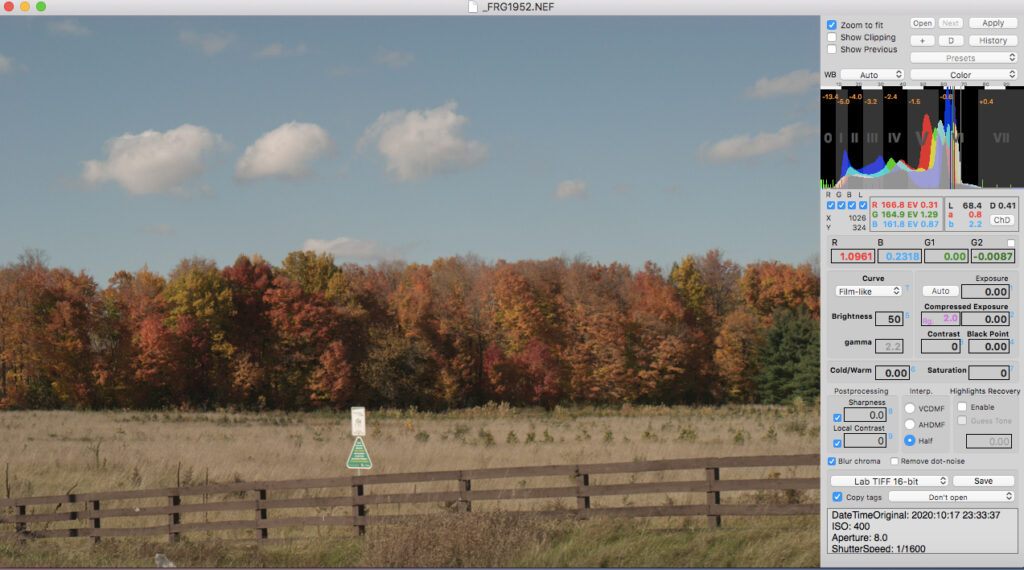
Case II – Mid of the day light (Natural light) – original file was NEF (Nikon D200 w/ Nikkor 50mm f1.8 AI-s)
Here the pinky sky appears as soon as you want to correct it via Exposure the above Raw image – Fig. 5. Please note the -1.08 value of the Exposure. Show Clipping option was activated from the very beginning. Next step was to activate Highlights Recovery both Enable and Guess Tone – Fig. 6a below.
A value of 1 of the Guess Tone gave a nice blended of the overexposed area solving the pinky sky. Next step before exporting the picture to Lightroom or Photoshop you may want to choose one film color. Below – Fig 6b we have chosen Portra 160 NC (P160NC) since we really love its color profile.
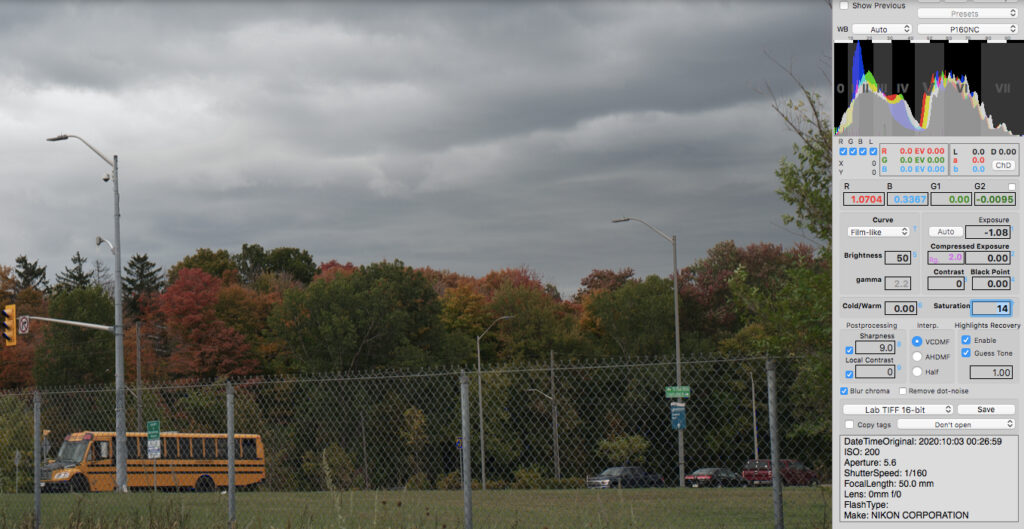
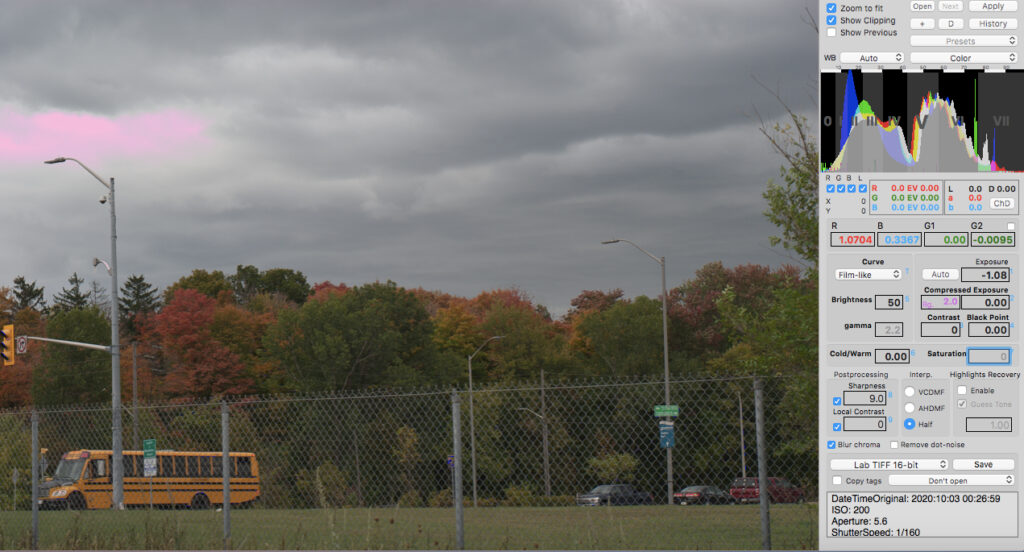
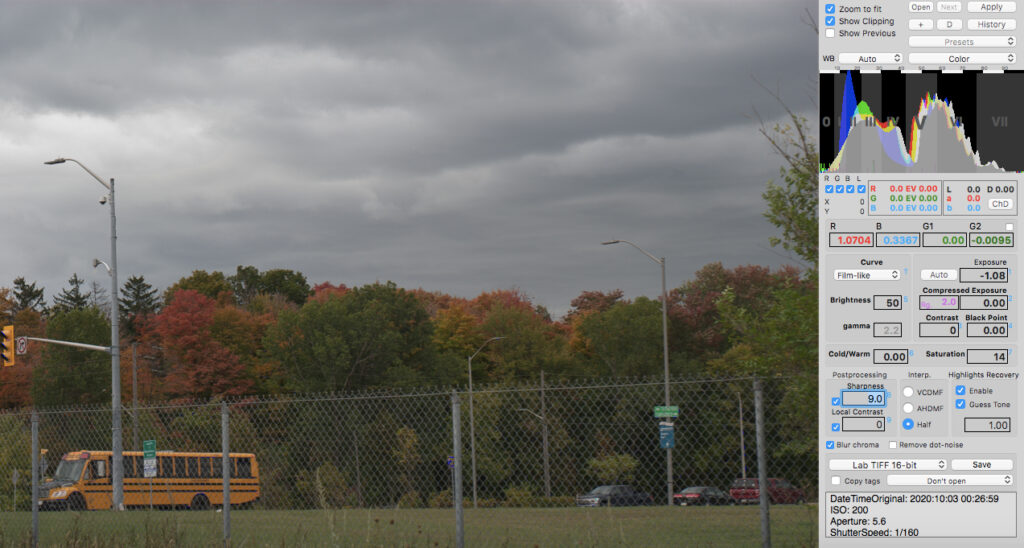
How Raw Photo Processor compares with Lightroom? Raw file processed in Lightroom can solve the overexposed part of the sky but will not reach the refinement Raw Photo Processor offers to us. Judge it for yourself! Fig. 7 below shows the same .NEF file processed. You should not forget that in order to achieve a good blending of the overexposed area in Lightroom I had to decrease both saturation and contrast. Please note that I work on Raw Photo Processor with a 14 value for Saturation.
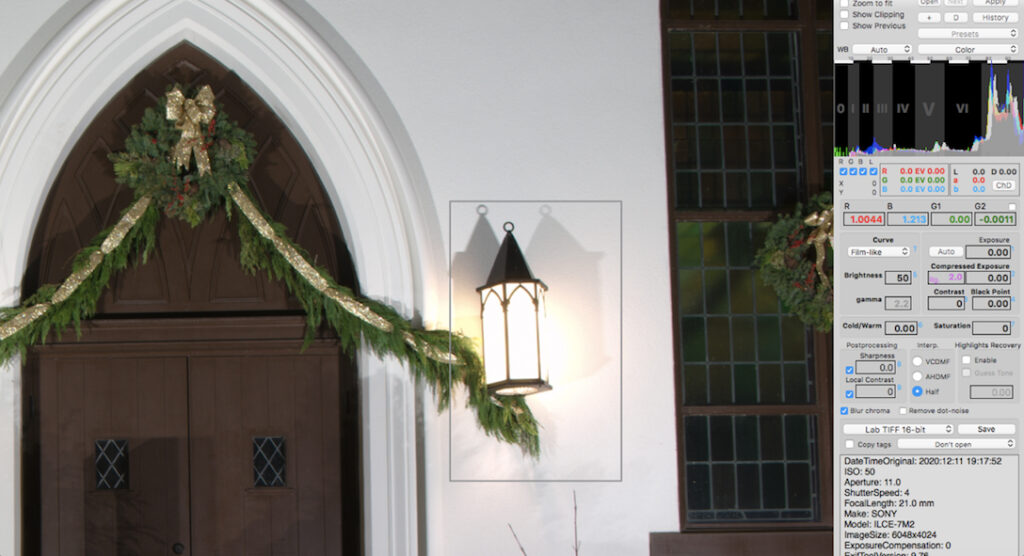
Case III–Low light (Artificial light) – original file was ARW (SONY a7II w/ Voigtländer Color Skopar 21mm f3.5). I will continue using Highlights Recovery feature of the same software on another RAW image. After the drag-and-drop step – Fig. 8 I followed the procedure described at page 27 in the Raw Photo Processor Manual – Highlights Recovery. Please note the input-output field / panel (IOF) on the right-hand side of each image. Once the Raw file was opened Highlights Recovery was enabled – Fig. 9 below. As a result, the Exposure with a value of -1.22 appeared in the IOF. Then I moved forward and enabled the Guess Tone and played with its value until I end up with the blended area around the right hand-side candle. Good care should be taken here since the Guess Tone has a threshold value that should not be surpassed. After obtaining a good blend I adjusted Compressed Exposure to a value very close to the one of the Exposure as described in the Raw Photo Processor Manual. Then I adjusted the Exposure to a value of -1.18 followed by the Local Contrast and the Sharpness adjustment – Fig.10. Again, the first -1.22 value of the Exposure was given only by enabling the Highlights Recovery. I had to play with the parameters in the IOF in order to find a good balance amongst all the parameters to get a good blending around the right-hand side candle. Please note that Raw image – Fig. 8 was acquired at Sharpening -3 at ISO 50 – Sony a7II w/ Voigtländer Color Skopar 21mm f3.5.
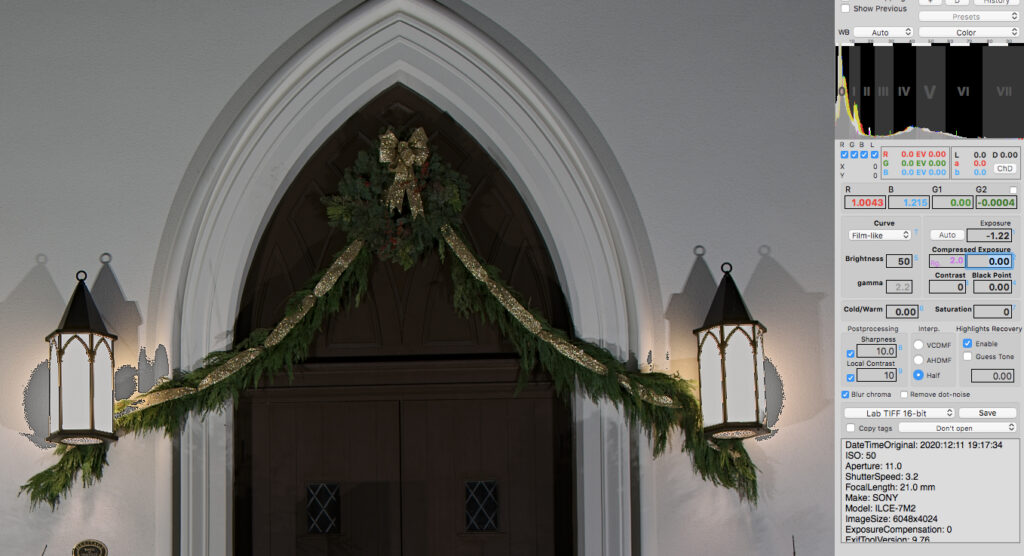
So, am I done with my Highlights Recovery? I think so since the software clearly shows that the final image has no unresolved highlights in the area previously shown – Fig. 11 below.
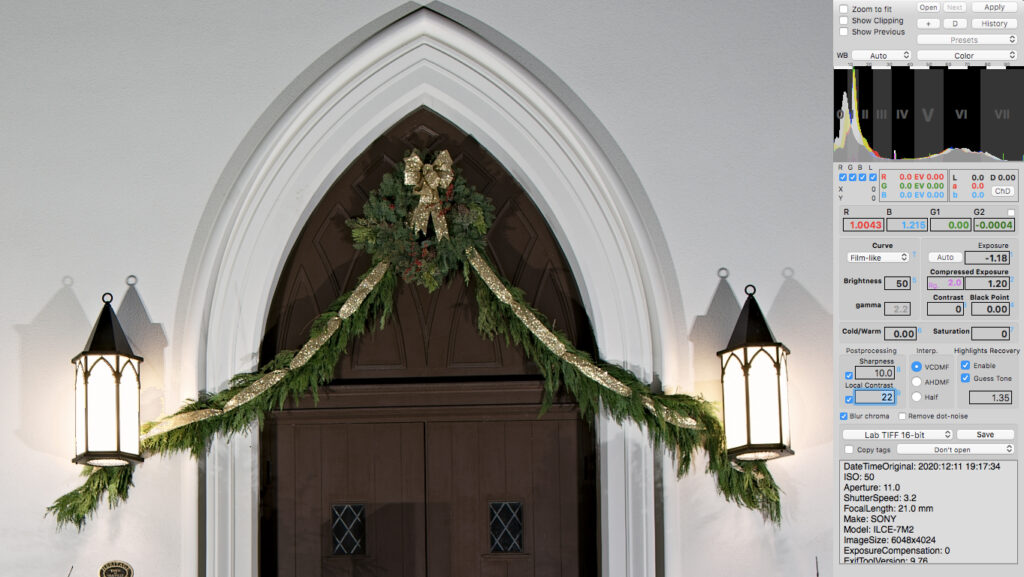
Below is the Raw file as dragged-and-dropped – Fig. 12. Please note the Clipping. Below – Fig. 13a and Fig.13b – side-by-side the two images: left via Lightroom vs. right via Raw Photo Processor. To me the image processed via Raw Photo Processor clearly looks better since some burning is still present in the Lightroom processed image.

Compressed Exposure – does not creates clipping in overexposed areas. When used together with the Exposure, Compressed Exposure has either a 0 value or a value identical but with + sign compared to that of the Exposure (please see the above examples). The authors recommend the Compressed Exposure parameter for negative exposure corrections, this way avoiding the pink coloured sky in overexposed areas. Compressed Exposure plays a key role when used in conjunction with Highlights Recovery as I have shown in the discussion for each of the 3 cases. Please note: in order to have a properly exposed picture the value of the Compressed Exposure should always be of equal positive value or 0. Both Exposure and Compressed Exposure are given in EV units.
Black Point – used to circumvent clipping of hard shadows. The scale shows percentages from 0 (i.e. zero correction) to 99 (i.e. solid black image). Negative values will decrease the black saturation of shadows. Positive values that compresse the shadows though not cutting them off can highly improve the image. The authors consider that a Black Point value between 0.1% to 1% work perfectly.
Brightness – for an image which has a lot of highlights the way I proceed is to brighten the image but when I want to pull back the highlights I will adjust the exposure slider and not the brightness one. Here seldom is necessary to adjust the Brightness value. Brightness along with Contrast give the film-like tonality possible through measurement of the film density.
Sharpness – this parameter is not to be adjusted since you want to continue post-processing your file in Photoshop or Lightroom. I did adjust this parameter many times when I was fully satisfied with my post-processed images here before exporting them as .tiff. In order to correctly proceed to using Sharpness I have to disable Zoom to fit. Please, remember that with Zoom to fit active many images look compressed therefore and blurry, so judge the sharpness of your image only at 100% zoom. Should you consider to further post-processing in Photoshop or Lightroom then you can set a value of 0 (zero) or deactivate it. Please remember that a Sharpness applied here can affect your final image should your image is to be further post-processed.
Simulations mode / TrueFilm Simulations (⌘ L) are digital effects that DO A FANTASTIC JOB. They mimic that MAGIC of each of the films I grew-up with: Ilford, Agfa, Kodak, and Fuji. This selector is positioned immediately to the right-side of the WB button. All Simulations mode (i.e. TrueFilm Simulations and TruePaper Simulations) were produced by the photo scientist Iliah Borg via measurements of films and photo papers through scientific means (i.e. Black & White, Sepia, and all negative and positive color film that were making history – they all are presented in the Color paragraph). Should you decide to use any of the Simulation modes then you should first select the one you like then play with the parameters so that you end up with an image to your liking. Please note that White Balance and Saturation settings have both a huge influence on contrast and tonality of all Black and White modes and that different settings can simulate different filters.
Saturation it is a kind of taste – I have to make a clear distinction here between saturation of the film and saturation of the digital file. Here I have negative film saturation and positive film saturation. I will never give up using film cameras because I think that saturation of the digital file is always excessive. Negative film saturation is way behind that of digital files so that for the highly trained film user it can be very easily identified. Even positive film saturation especially that of Fuji Velvia 100 (highest saturation of any film these days!) or Kodak Ektachrome 100 can be easily identified when compared to a digital file. Neither digital file lovers nor film lovers are wrong since different people will see excessive saturation as a good think while the other will see it as a bad think. So, film lovers, know which saturation they like to have on a positive film or a negative one. The authors of the Raw Photo Processor did here a fantastic job trying to reproduce in a digital format the saturation of different negatives as well as positives.
Auto – correction via G channel.
Cold / Warm – as its name says: cold or warm tonality of the image.
Local contrast – make sure you do not over do it since it can create halos! This type of contrast works on boundaries of the image in order to enhancing the contrast without affecting the tonality of the image as opposed to enhancing Contrast (i.e. regular contrast). This technique is based on a method of unsharp masking called High-Radius, Low-Amount (HiRaLoAm) introduced by Dan Margulis an expert in reproduction and digital color correction.
Blur chroma – as its name says, used to decrease chroma noise (i.e. color noise) applied to Lab*a*b channels.
Remove dot-noise – removes noise of the single hot / dead pixels that appear at large ISOs in shadows. This option is not a noise filter and therefore does not work on the overall detail.
Lab TIFF 16-bit (by default) – is the output the authors recommend in order to preserve colour information. Also is recommended to try BETA RGB for accurate processing.
Interpolation – RPP supports 3 + 2 = 5 interpolation methods: Half, AHDMF, and VCDMF + 2 methods 2/3 and VNG designated only for Fujifilm X-Pro. Half is the default. As the name suggests it is a color-accurate and fast half-resolution recombination (with a loss of resolution!) into one RGB pixel of the four single-colored pixels RGBG. Please note that Half is not a method of interpolation and this is why the authors recommend the use of VCDMF instead.
Raw-mode, untagged – has 2 modes: Raw RGB TIFF 16-bit and Raw RGB TIFF 32-bit. This mod can be accessed at the very bottom of the IOF panel (shortcut: ⌘ F)
Complete EXIF data – a huge collection of all you need to know about your file.
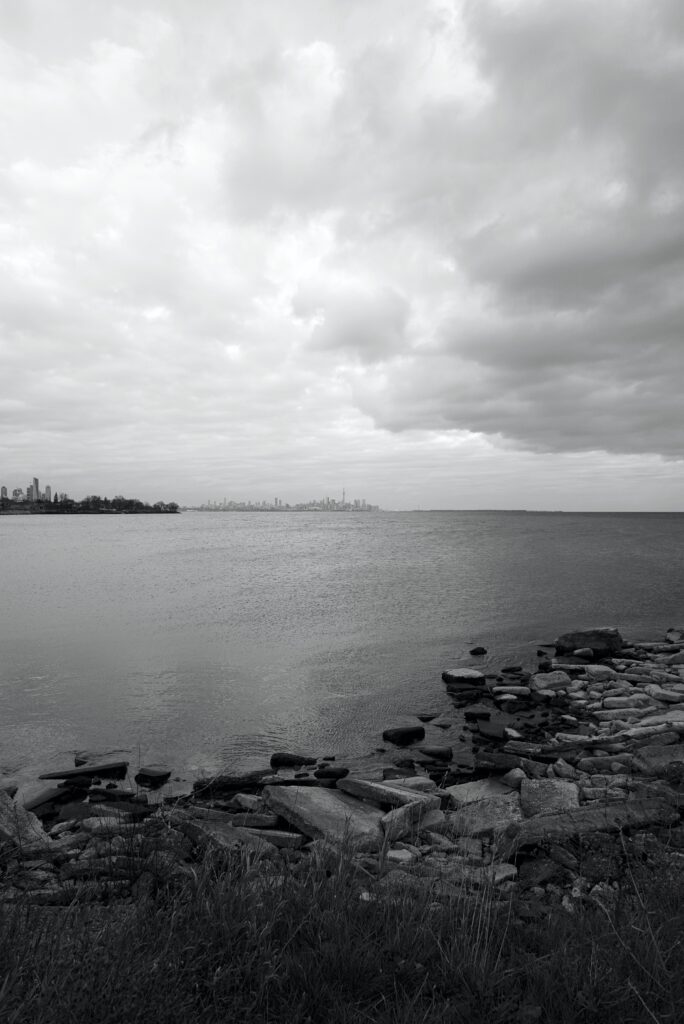
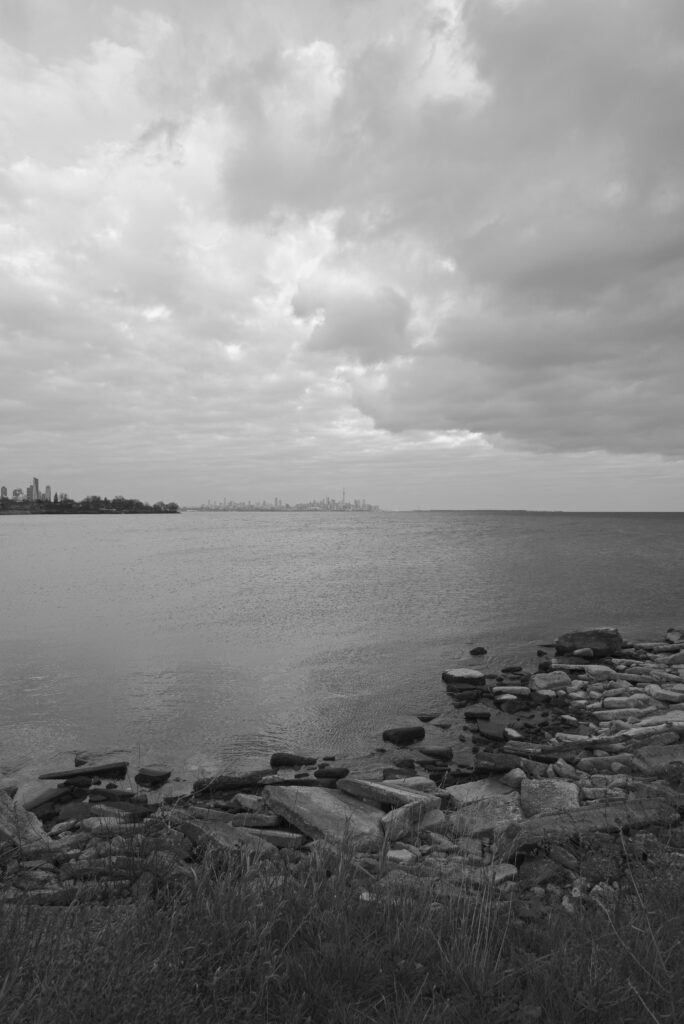
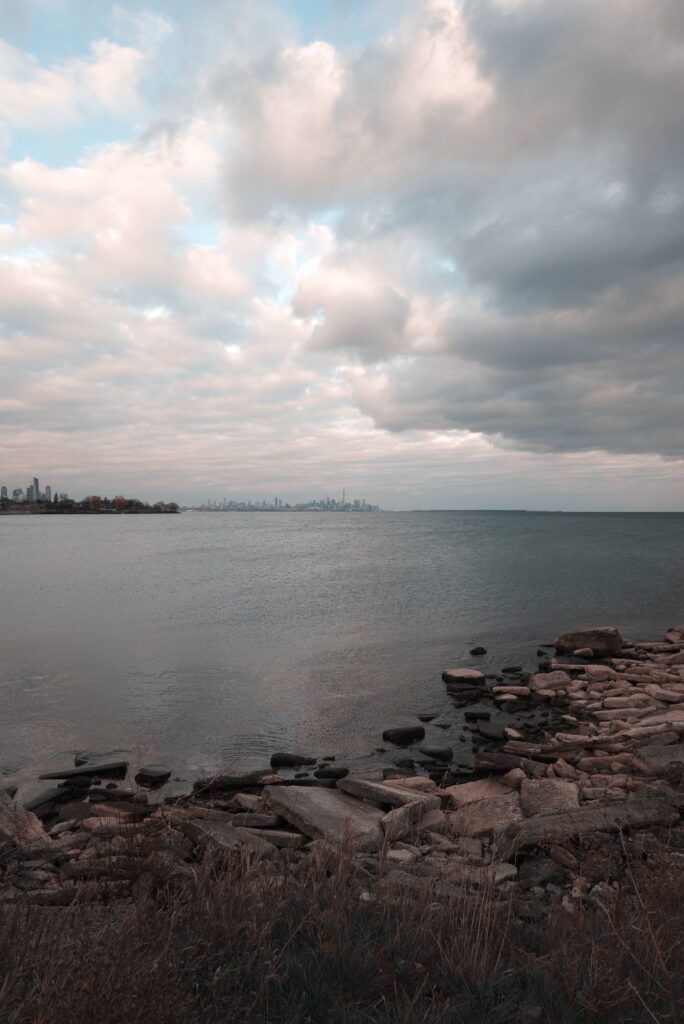
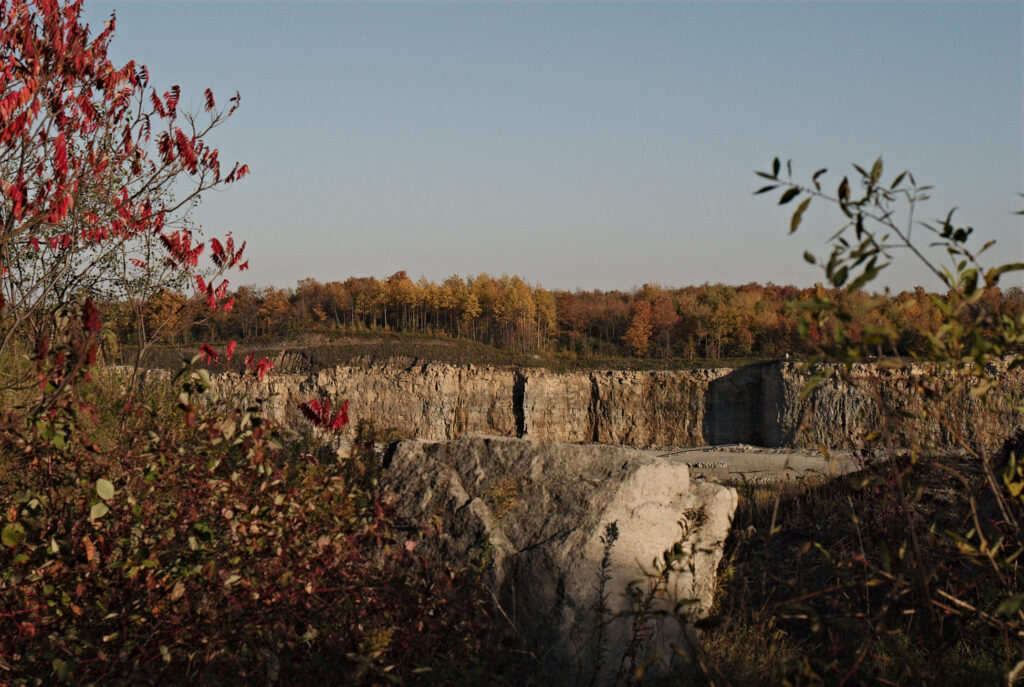
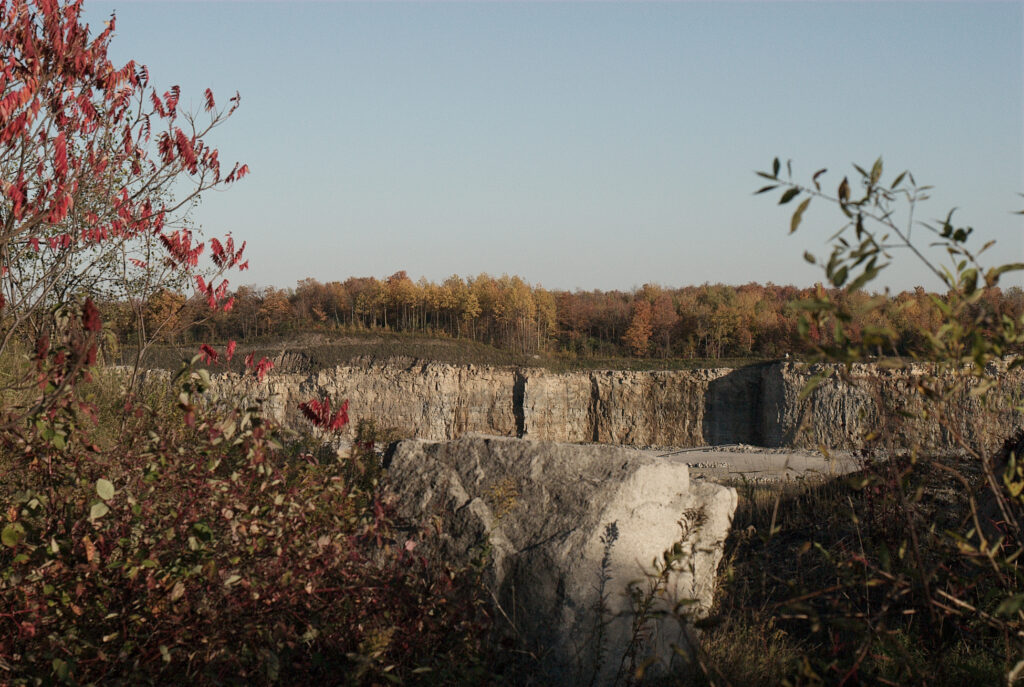
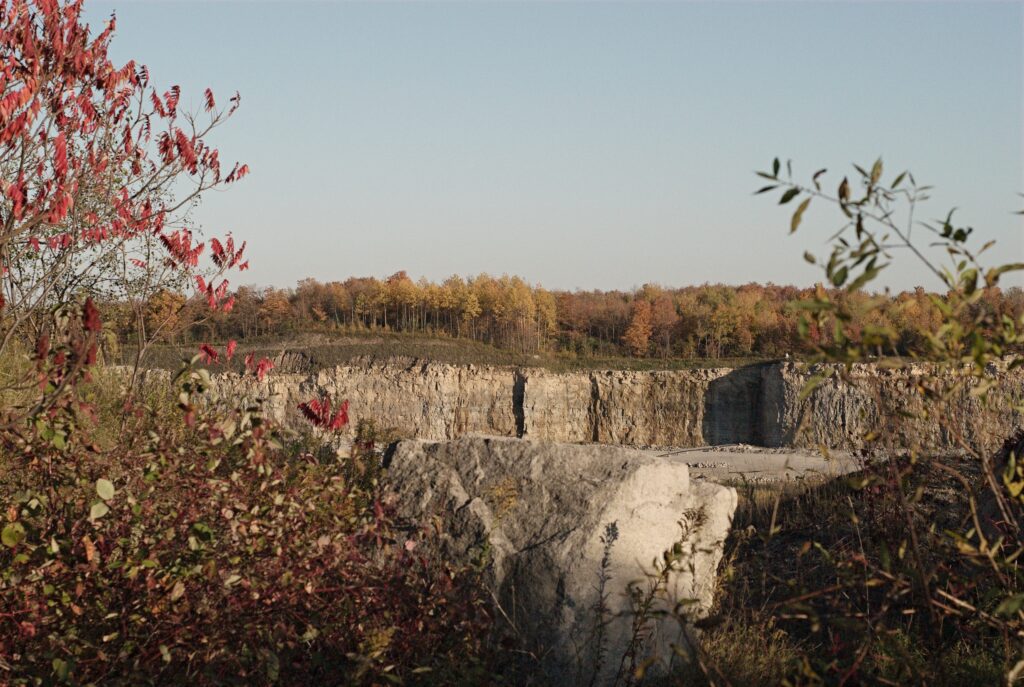
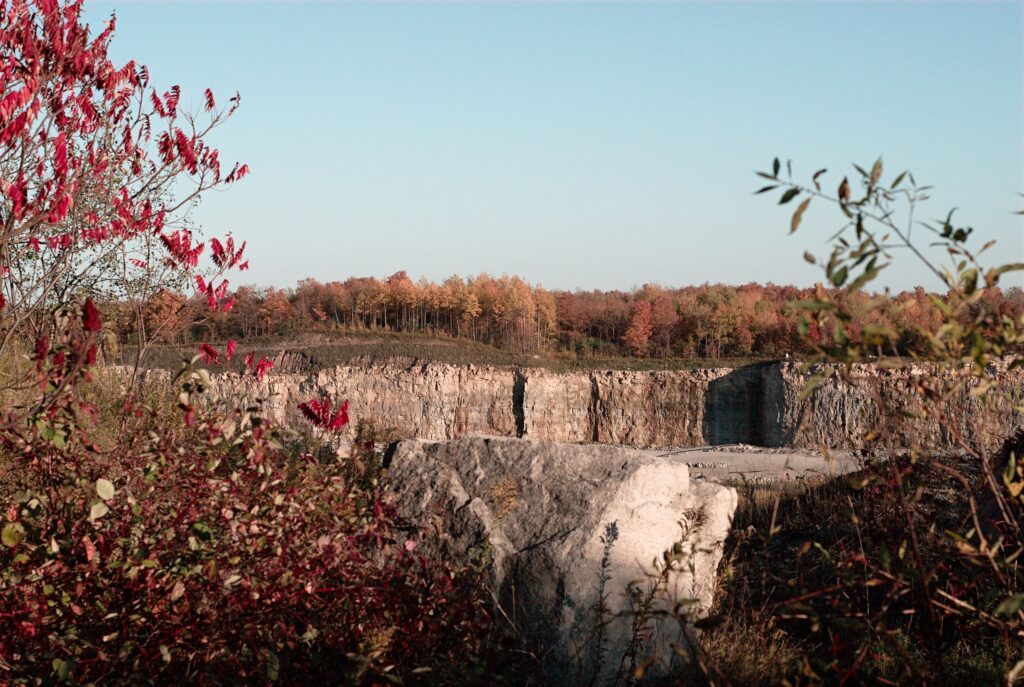
Examples:


Final Thoughts
From the very beginning I have fallen in love with this post-processing “tool”. Why? The film-like colors for each film profile of the Raw Photo Processor 64 are simply breath-taking. I, as film lover, have always dreamt of pastel colors not saturated as those DSLRs sensors are always delivering. I do not underestimate other film presets. I just say that they did not suffice to my eyes since I cannot remove pastel film-like colours from my brain. I always found digital colours of many films presets I tried way too punchy and therefore far away from real colors. In addition to that, Raw Photo Processor 64 has a fast-learning curve and I see no difficulty for the novice to use it at its full extent. Raw Photo Processor 64 should be regarded as a complementary “tool” to Photoshop and Lightroom and not at all as a substitute. Pictures below were shot with both a 15-year old camera, a Nikon D200 with Nikkor Ai-s 50mm f1.8 pancake lens and a 10-year old Sony A7II with Voigtländer Color Skopar 21mm F3.5. Pictures were post-processed with Raw Photo Processor 64. Pictures were exported some as Lab TIFF 16-bit and some as JPEG 100% sRGB. Some but not all of them had minimal adjustments (shadows/highlights) in Photos on a 9-year old MacBook Air. An extensive and comparative discussion about images produced by these film-like profiles in a future post.
Share this post:


Comments
Scott Micciche on Raw Photo Processor 64 – Digital Film Photography
Comment posted: 31/03/2025
Comment posted: 31/03/2025
davesurrey on Raw Photo Processor 64 – Digital Film Photography
Comment posted: 31/03/2025
If only there were a version that ran on Linux or Windows I would buy it immediately.
Comment posted: 31/03/2025
Gary Smith on Raw Photo Processor 64 – Digital Film Photography
Comment posted: 31/03/2025
Great result examples.
Comment posted: 31/03/2025
Comment posted: 31/03/2025
Comment posted: 31/03/2025
Jeffery Luhn on Raw Photo Processor 64 – Digital Film Photography
Comment posted: 01/04/2025
Thank you for this extensive review and tutorial of this software. I'll certainly try it. I quit paying for the Adobe Suite when they went to the subscription model and quit offering a discount for education professionals. BooHooo. Photoshop Elements is very weak and I've been looking for a decent editing software. Besides processing, does this software offer any feathures like retouching, layering, etc?
Comment posted: 01/04/2025