I suspect a large percentage of us film photographers will have heard of Kodak Aerochrome. It’s that film that renders foliage red/purple, costs an absolute fortune and is rare as hen’s teeth. What we might be less aware of in our analogue-bubble is Kolari Vision, a company who has managed to create the ‘IRChrome’ lens filter that when mounted on a full spectrum converted digital camera emulates the look of Aerochrome with only a need for basic post-processing.
Sound interesting? It certainly did to me! So I got in touch with Kolari to see if they would be interested in me reviewing their entry-level (gateway drug) ‘Kolari Pocket‘ camera.
Kolari Vision – A bit of background info
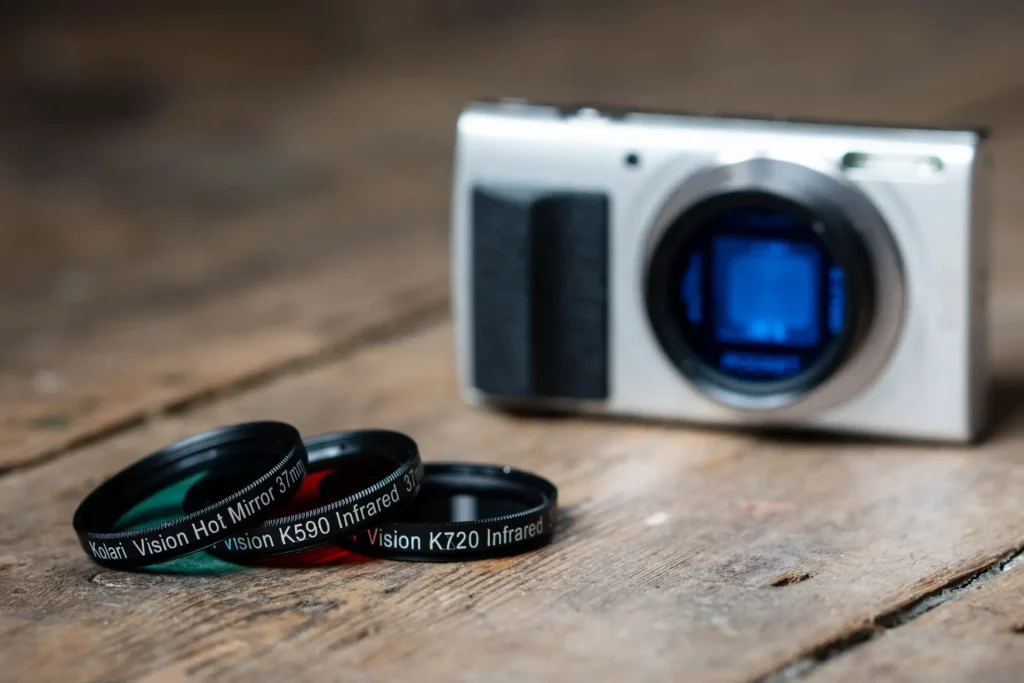
Ok, this kit is fairly fringe, so I feel a little bit of background info might be helpful. Kolari are a company mostly known in the digital photography and scientific imaging worlds for modifying digital cameras. The work Kolari do involves removing the hot mirror filter from standard digital cameras, replacing it with various other filters and then supplementing those filters with screw-on lens filters to achieve a fairly broad spectrum (excuse the pun) of different results.
Now, if you’re not into this sort of thing, or indeed not usually interested in digital cameras there might be a whole lot of info there that goes over your head? In simple terms, the hot mirror in a digital camera is a filter that sits in front of the camera’s sensor to cut non-visible infrared and ultraviolet light. By removing this filter Kolari creates what’s called a “full-spectrum camera”, or in other words a camera that “sees” infrared and ultraviolet light. The results from these modified cameras are impacted by the non-visible part of the spectrum, and thanks to the way digital camera image processing works, look quite unnatural with fairly pronounced colour shifts.
This might not sound ideal, but actually, with the use of the aforementioned filters – both on the sensor and on the lens – this increased sensitivity to parts of the spectrum that can’t be seen with the naked eye can be harnessed scientifically to help isolate subject matter that reflects non-visible light. I have a friend who works in biochemical testing, and he uses cameras like this regularly to help highlight various chemicals and the like within the subjects he’s testing.
More specifically to our interests as photographers, these colour shifts can also be harnessed to create images with whacky, but often aesthetically pleasing colour or contrast shifts. In fact, there is a whole load of “false colour” and black & white types of photography that involve harnessing this expanded sensitivity to different parts of the spectrum.
To see some examples, you can read about some of the processes that involve harnessing the infrared part of the spectrum on Kolari’s website here.
Parallels in film
Everything I have talked about so far involves the use of digital cameras, but this sort of photography has been around since long before digital. As such, there are a good few parallels in the world of film photography.
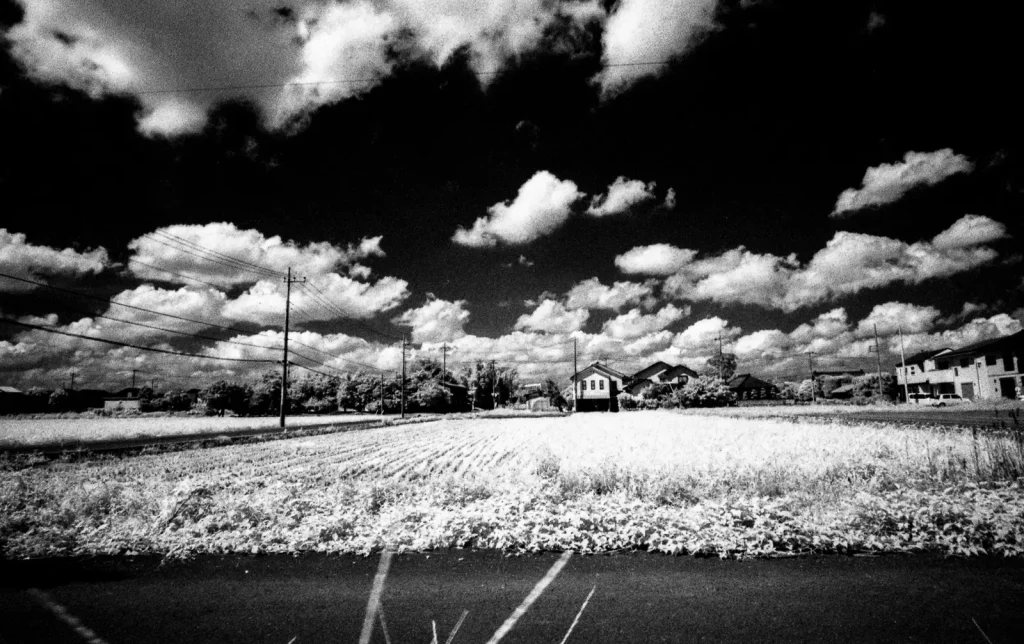
Rollei’s Infrared film, for example, is a black & white film still made today that is especially sensitive in Infrared light. Results from shooting this film have stronger contrast – and due to the fact that it reflects IR light – the foliage in the image glows white. You can see some more shots by Steven Bleistein here.
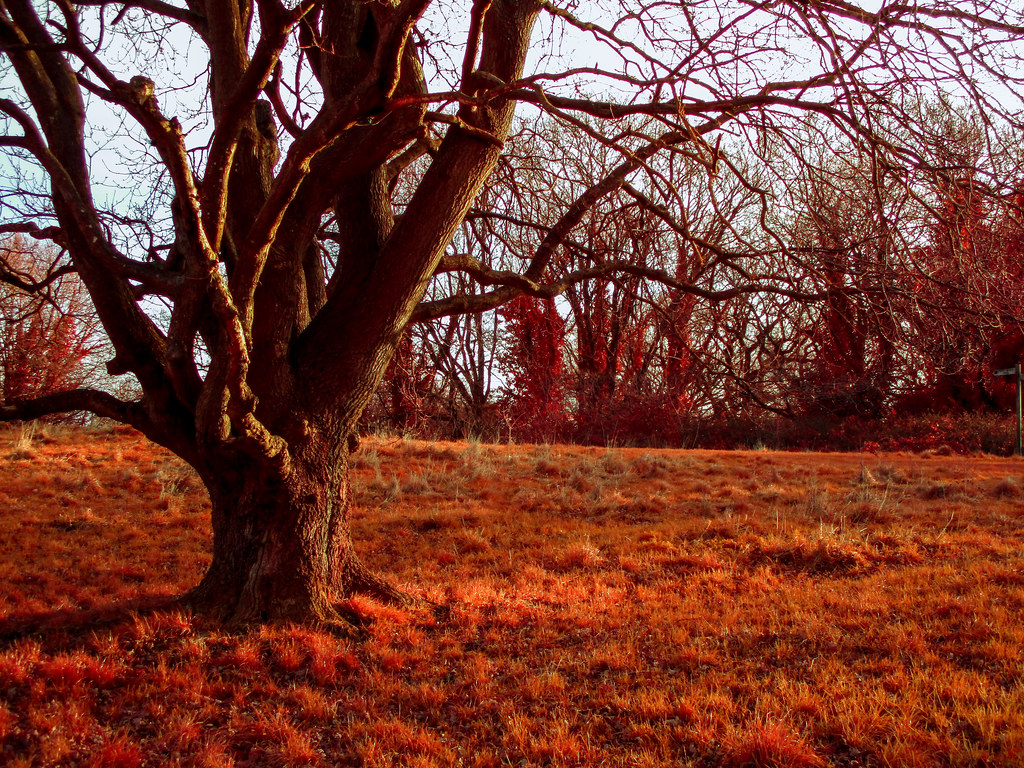
There are also colour films that take advantage of being able to capture non-visible light. Kodak Aerochrome is one such film. Kodak Ektachrome Professional Infrared EIR, otherwise known as Aerochrome was a false colour film designed for both artistic and scientific purposes. Results vary depending on the subject, but its most striking characteristic is that it turns foliage from green to red/purple.
I actually really like the look of some of the results from Aerochrome, but I’ve never taken the plunge and bought any myself, largely because of the fact that it’s no longer made and has, therefore, become quite expensive and more tricky to find.

The IRChrome Filter
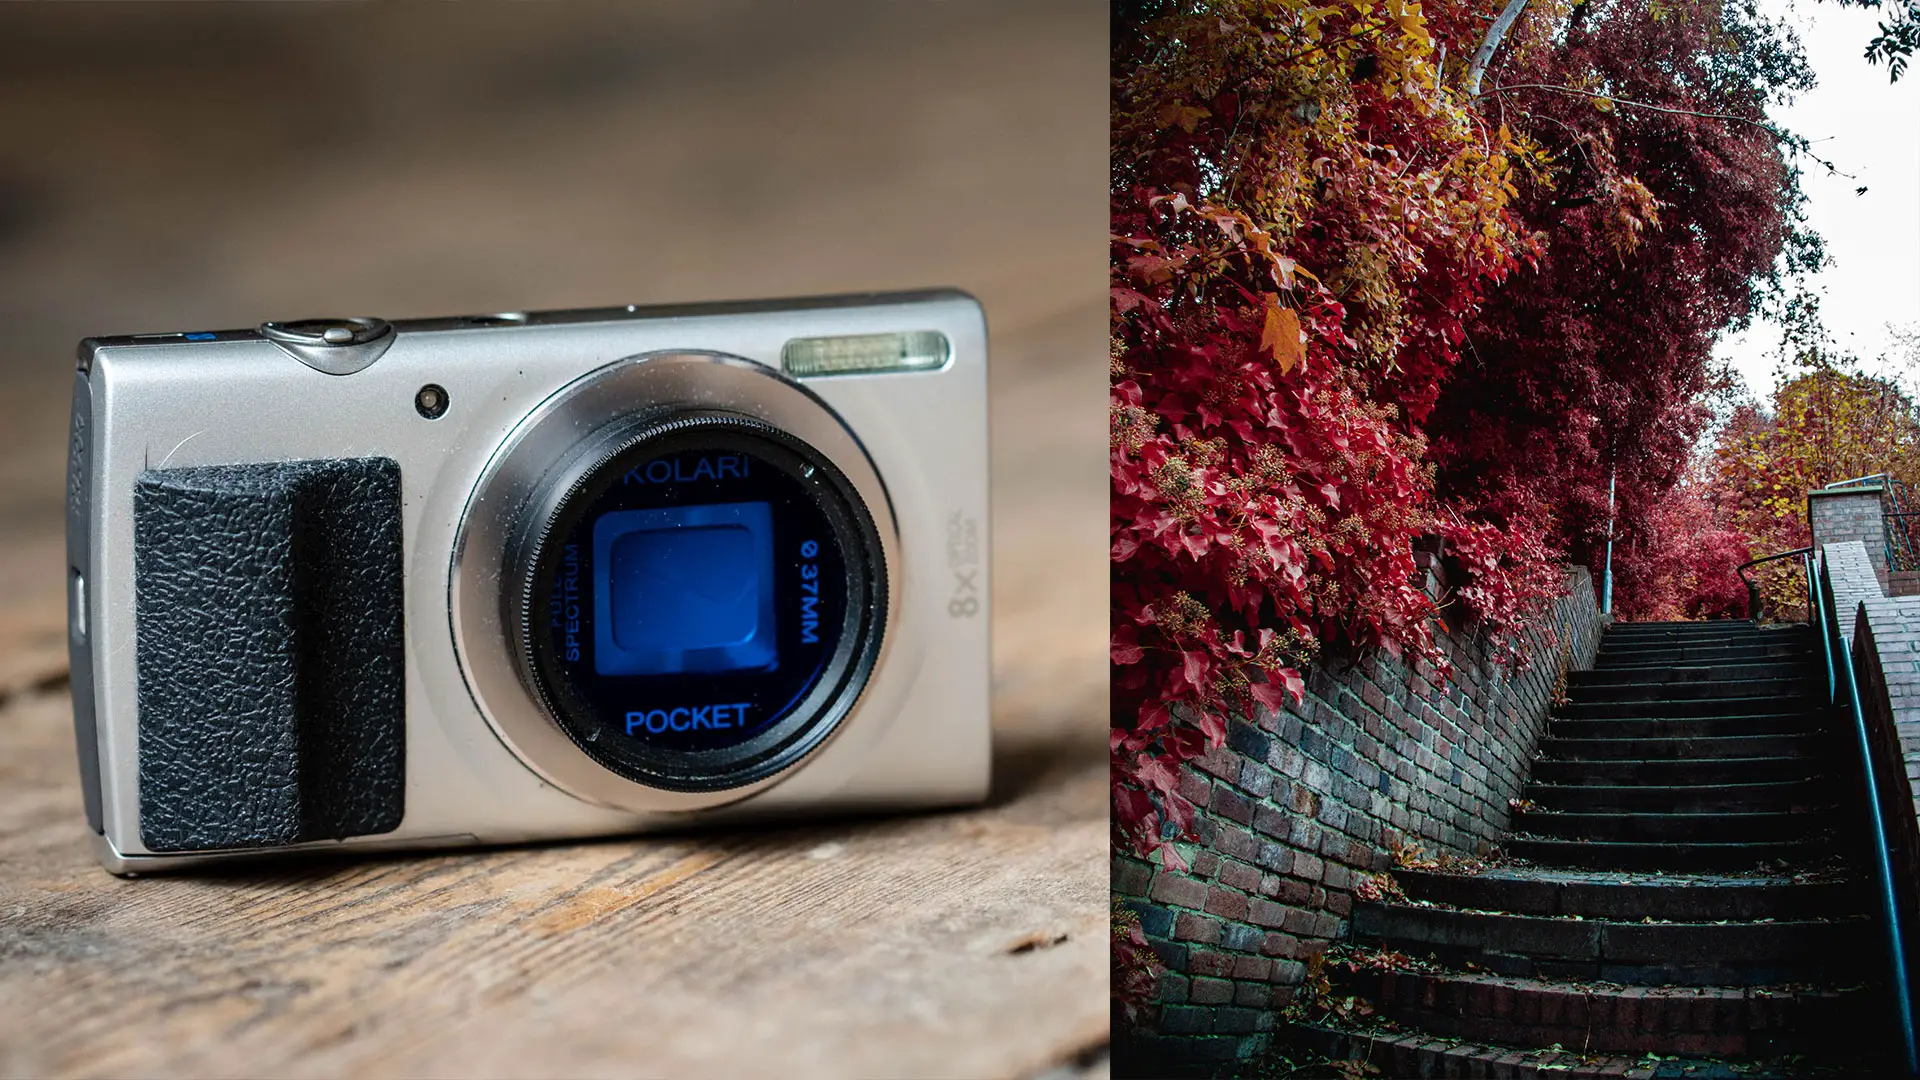
Which brings me neatly to what most attracted me to the idea of the Kolari IRChrome filter. The IRChrome filter is a screw-on filter that’s designed to be attached to the lens of a full spectrum modified digital camera.
With this special filter attached to a full spectrum digital camera, visible and non-visible light is filtered in such a way that when combined with way the camera responds to the non-visible and visible light, the resulting images are a very close emulation of Kodak Aerochrome; and that’s without the need to do much in the way of post process. You can read a bit more about the IRChrome filter and Areochrome with examples comparing both on Kolari’s website here.
Barriers to entry
Unfortunately, despite me being aware of the IRChrome filter since it was announced, and despite it all sounding quite like something I would enjoy experimenting with, I’d not been taken with the idea enough to put my money down.
The issue is, if you want to experiment with this type of photography the cost of entry has traditionally been a little steep, or at very least a little daunting. As whilst digital photography makes the taking each shot a lot less expensive, there is the initial investment of buying a camera and paying to have it modified that gets in the way.
The Kolari Pocket
Which is where the Kolari Pocket comes into play. It has always been possible to buy a cheap point & shoot digital and send it to Kolari for the full spectrum modification, but that would require choosing an appropriate camera, finding one to buy, sending it off, then buying the filters etc. Whenever I have considered all this in the past, it all just seemed a little bit too complicated to me, not to mention potentially quite expensive… especially if I didn’t like the outcome.
What Kolari has done with the Kolari Pocket is create an entry-level package to help people get over these initial barriers to entry. In fact, what it feels to me like they have done is made a bit of a gateway drug into the world of non-visible light photography.
At a fairly low price point, the Kolari Pocket is a compact camera that comes with all you need to take your first steps into the world of non-visible light photography. Specifically to this review, they even do a kit that comes with the IRChrome filter. Once I found this kit existed, I found myself very interested in giving it a go!
The Specs
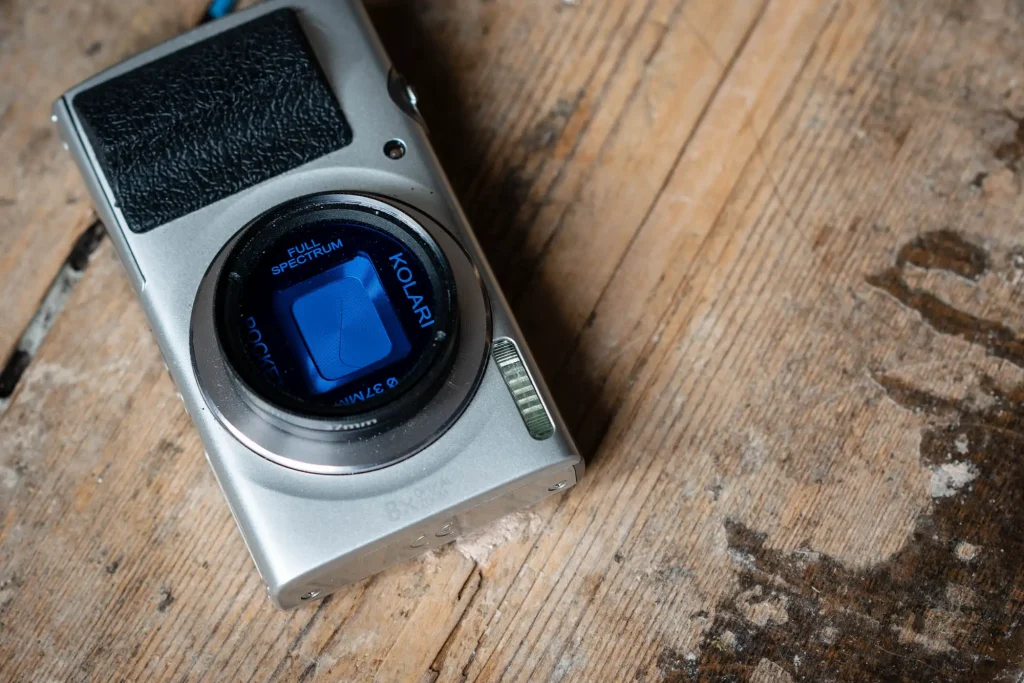
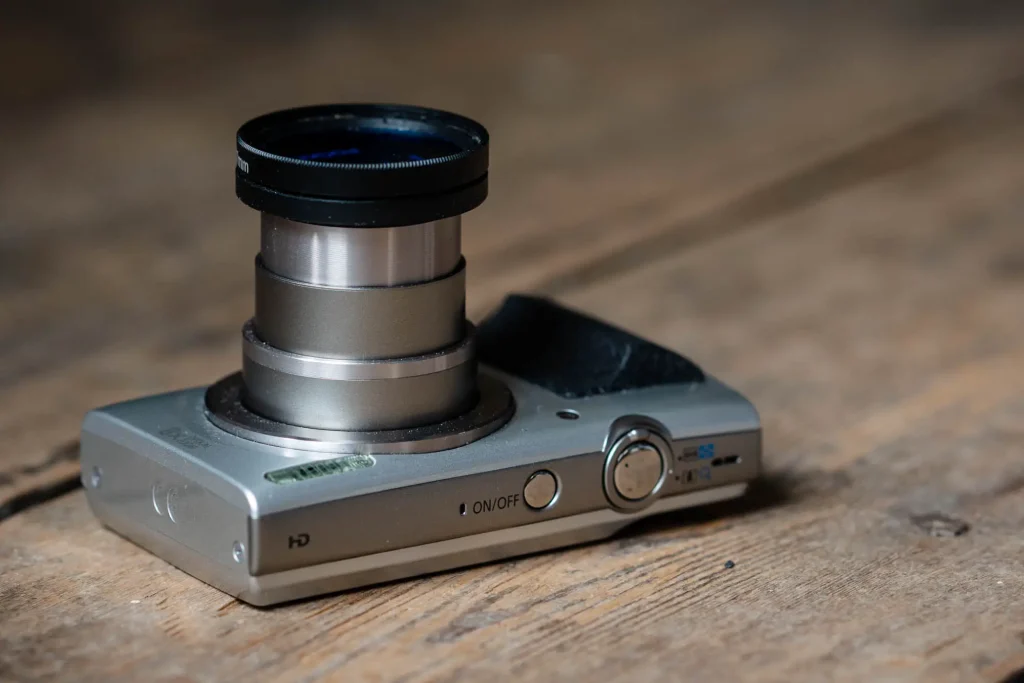
Ok, so I suppose I had better start with a bit about the camera itself. The Kolari Pocket is actually a Canon ELPH 180 (IXUS 175 in the Uk). This is a camera that when bought unmodified could have been picked up new for about £150. In short, in its unmodified form, it’s a very basic entry-level point & shoot digital camera.
The world of point & shoot cameras is a strange one these days. When I was retailing cameras in the mid-2000s there were hundreds of these types of cameras available. Then smartphones happened and they all but disappeared. I suspect the market for this type of compact camera is limited to people who refuse to have a smartphone. As such, there really is very little to this thing. And I mean that both functionally and physically.
Controls and features
The camera itself is a very basic bit of kit, and as such, does have a few quite significant limitations. I’m not going to bore you with the ins and outs of every feature and control, suffice to say the basic camera only really allows a few key overrides.
Basic controls
Since the Kolari Pocket doesn’t have any real manual controls, the two most useful features are the exposure compensation and manual ISO control. In fact, short of making sure the camera was outputting DNG files, these were really the only features I initially cared about. As I will come to, later finding out that it also allows you to take a white balance reading off a white card would prove very useful too.
The Lens
It also has an 8x zoom lens with a 28mm equivalent wide-angle and 224mm long end. I must admit, I don’t own any other cameras with that extent of telephoto capability, so it was unlikely I was going to use it to that extreme. The 28mm wide end is nice, even if the lens is a touch slow at f/3.2 (-f/6.9).
Limitations
This smaller maximum aperture isn’t the only limitation either. As I’m sure most people will understand, compromises are made when making cameras this small and cheap.
Sensor size
The primary compromise is in the sensor size. It has a 1/2.3″ sensor, which is about equivalent to the sort of sensor inside a smartphone and, of course, it comes without a lot of the computational functionality that smartphones now come with.
There are two key limitations this small sensor and relatively low tech processing have on results from cameras like this. The first is that the results they produce at higher ISOs are either quite noisy or smeary due to heavy handed noise reduction. The second is that they tend to have fairly limited dynamic range which can result in lost highlights and shadows.
Lens Quality
Alongside the small sensor, it’s fairly safe to assume that a lens of this zoom range in a camera this small and cheap is not going to be up there with the finest optics you’ll ever find. As I will come to, the main issues I stumbled over would turn out to be colour fringing and barrel distortion. But I will get to both of these in more detail in a moment.
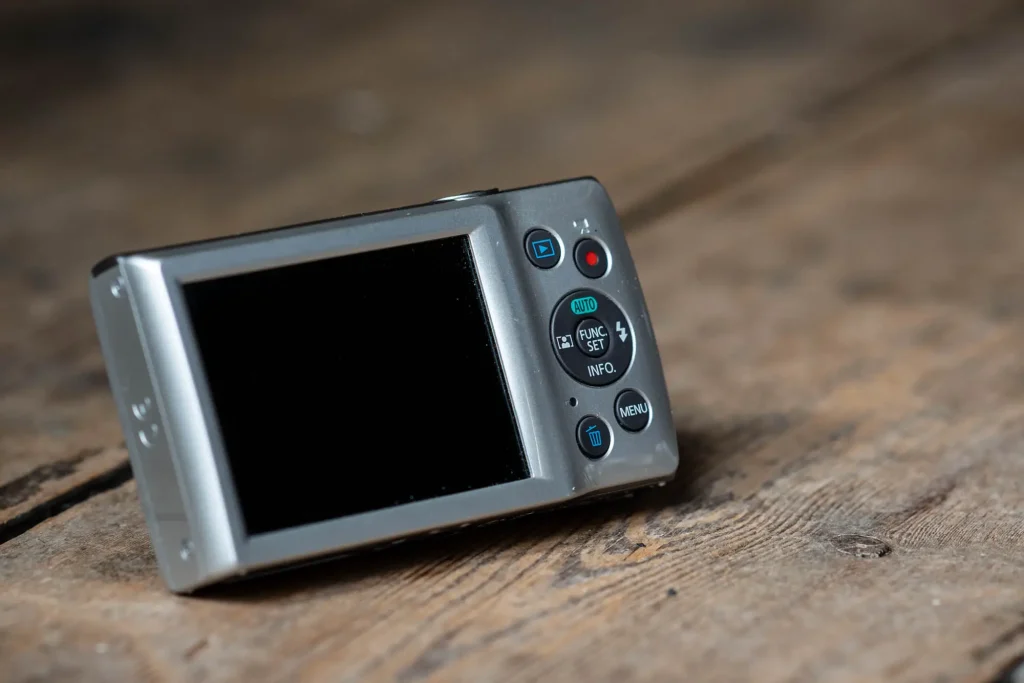
Screen Size/Quality
Finally, screen quality… it’s just not that great! Again, this is a small cheap camera, so you need to set your expectations as such. In practice I found that it really only acts as a device for framing rather than judging the quality of the final image.
Shooting the Kolari Pocket
All this stuff might just sound like a load of bad news? Well, in some ways it is, but at least to me – in the important ways – it isn’t! Apart from anything else, I quite enjoy working within a fairly strict set of limitations. But, beyond that, if you approach this camera with the idea that it’s not about creating perfect images, and concentrate more on the idea taking advantage of the weird and wonderful colour shifts that it’s capable of when combined with the IRChrome filter, then actually, a little bit of magic happens!
The funny thing is, I say all this as someone who actually learnt this the hard way. When I first got the Kolari Pocket my initial approach was to attempt to get the absolute “best” quality out of it. This mentality was fuelled by two factors. The first was some beginners luck, and the second was the fact that the Kolari Pocket can be supplied hacked to shoot RAW.
CHDK for DNGs
There are a couple of other brands that make point & shoot cameras of this like the Canon IXUS 175 the Kolari Pocket is based on, but as far as I understand it, there is one key reason that Kolari chose this particular Canon – that being, it can be hacked to shoot RAW DNG files.
As I understand is, Canon cameras are some of the only digital cameras that are easily hackable. I must admit, I don’t know a huge amount about this subject, but what I do know is that Kolari uses the “Canon Hack Development Kit” or “CHDK” for short to specifically open up the possibility of shooting DNGs with the Kolari Pocket. They do this by offering the camera with an optional SD card that’s set up and preconfigured to run the camera with the added CHDK features.
To my mind, buying the camera with this SD card is a bit of a no-brainer. It adds the option to shoot RAW which does of course open the possibility for greater tinkering with the files. Unfortunately for me, as I’ve alluded, shooting it this way sent me down a bit of a proverbial garden path that resulted in me loosing sight of what makes this camera so much fun! As I’ve said, this was not helped by some fantastic first results.
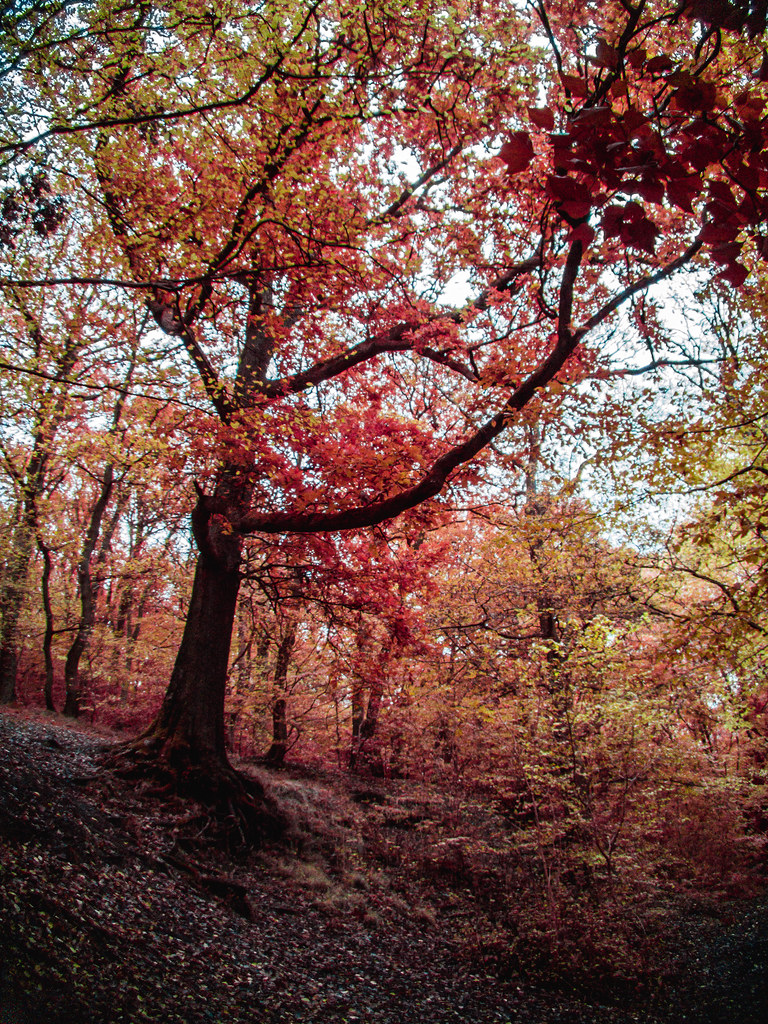
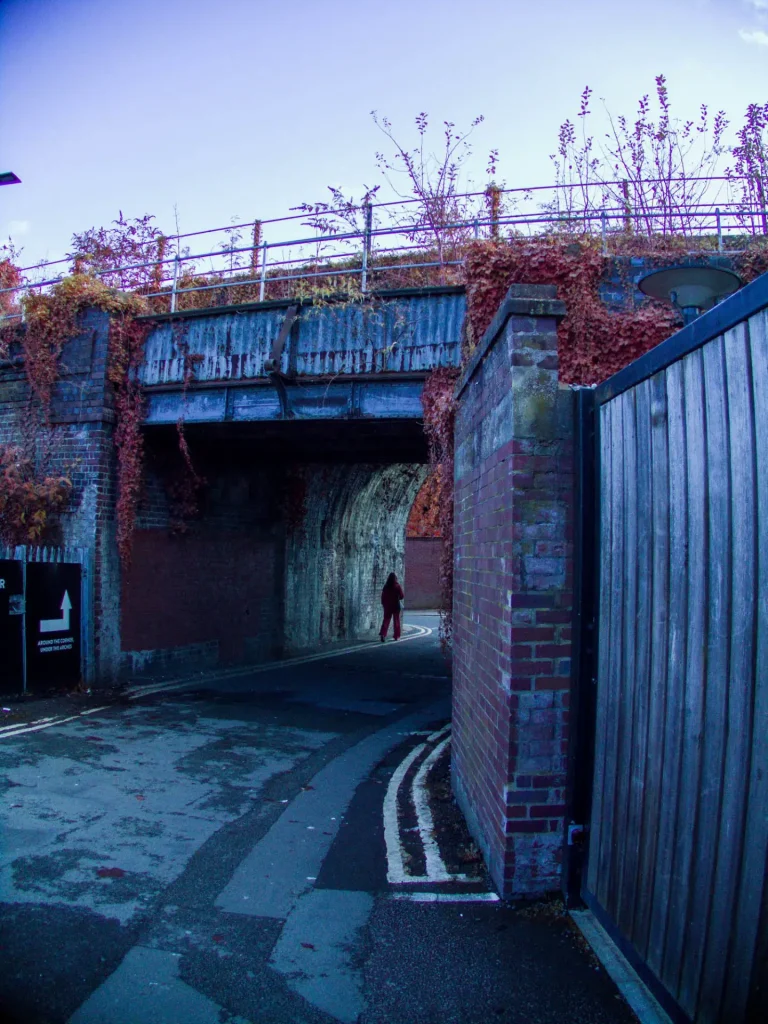
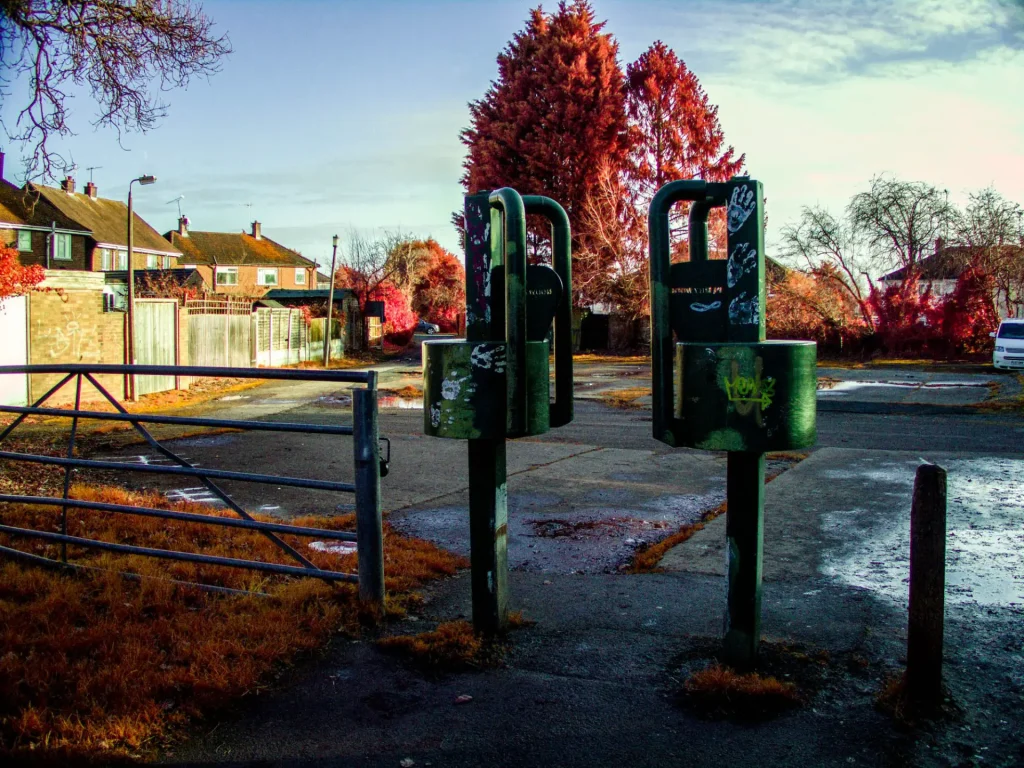
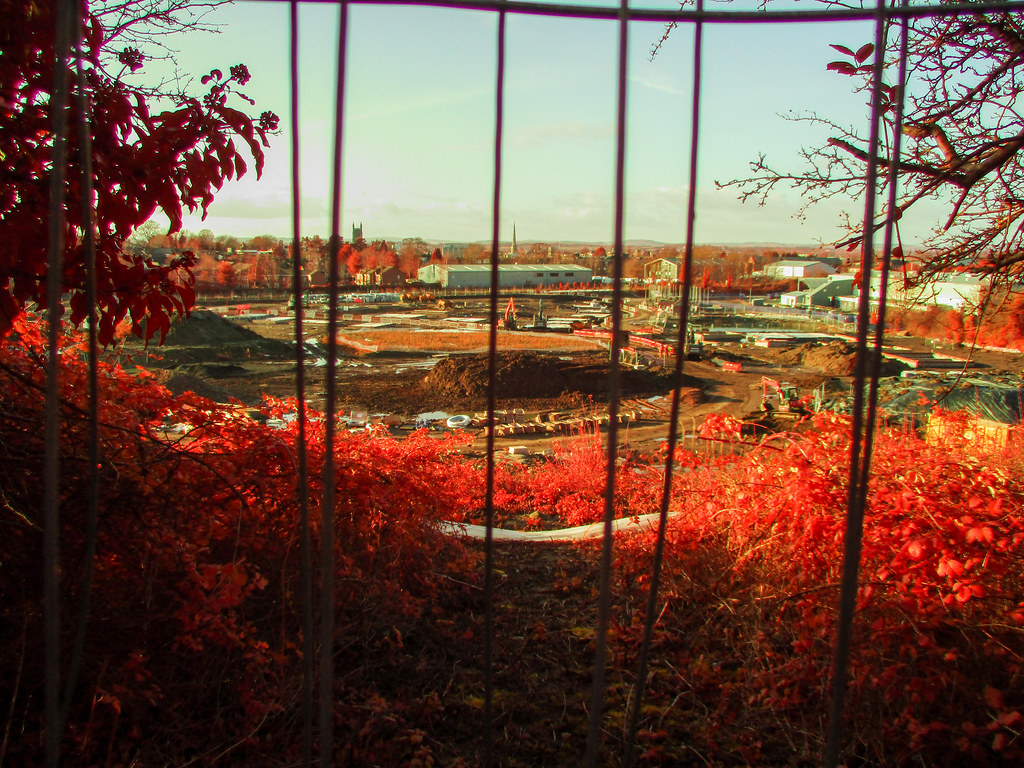
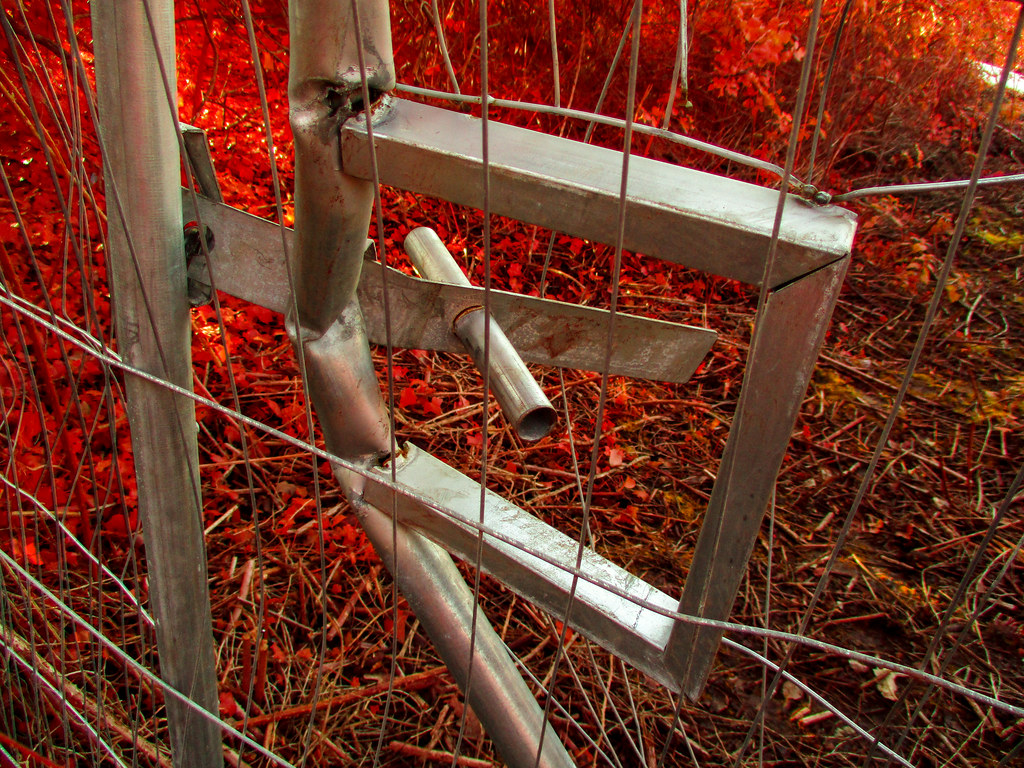
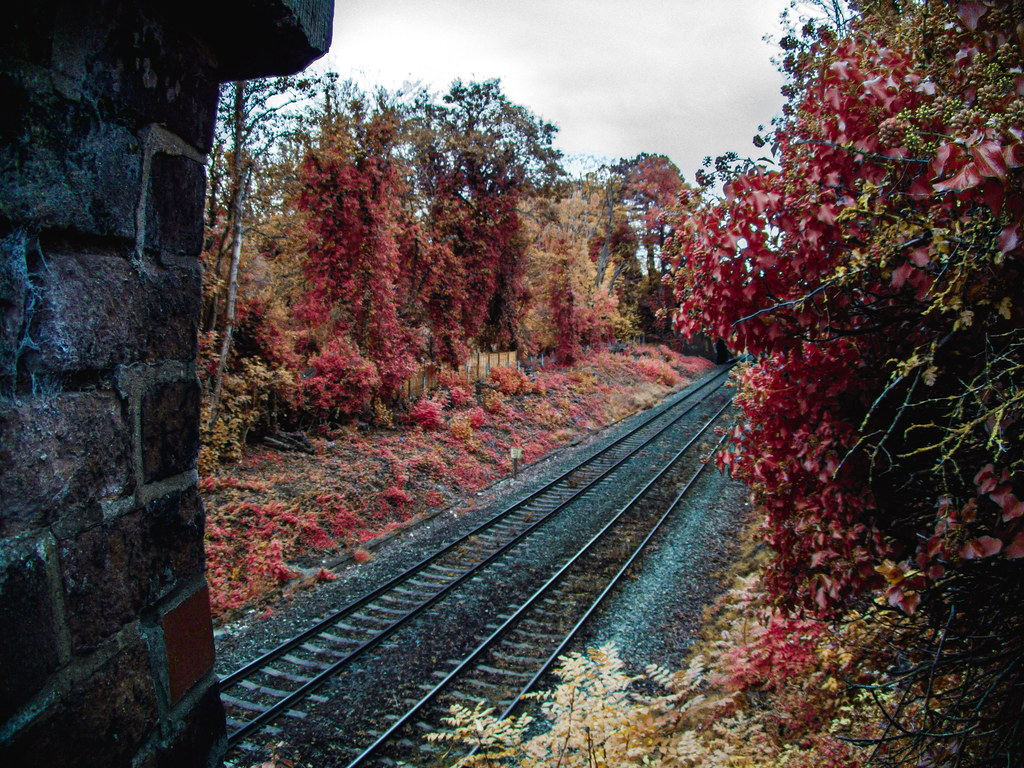
Beginners Luck – My first results
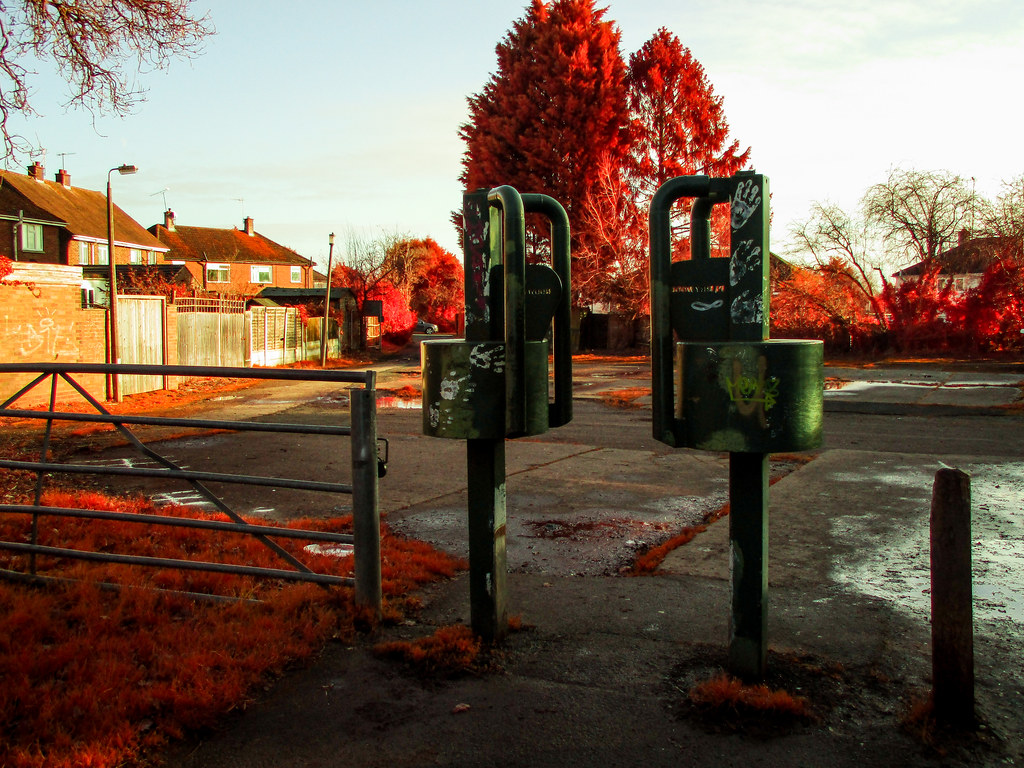
When I first got the camera toward the end of last year, I had some fairly strong ideas about what I wanted to do with it. I liked the idea of combining some foliage with a bit of industrial architecture. So that’s what I did! Now, I should say, there was a little bit of work that went into this image in Lightroom, but the work was far from onerous. I hope you’ll at least agree that on face value it’s quite impressive for a point & shoot camera.
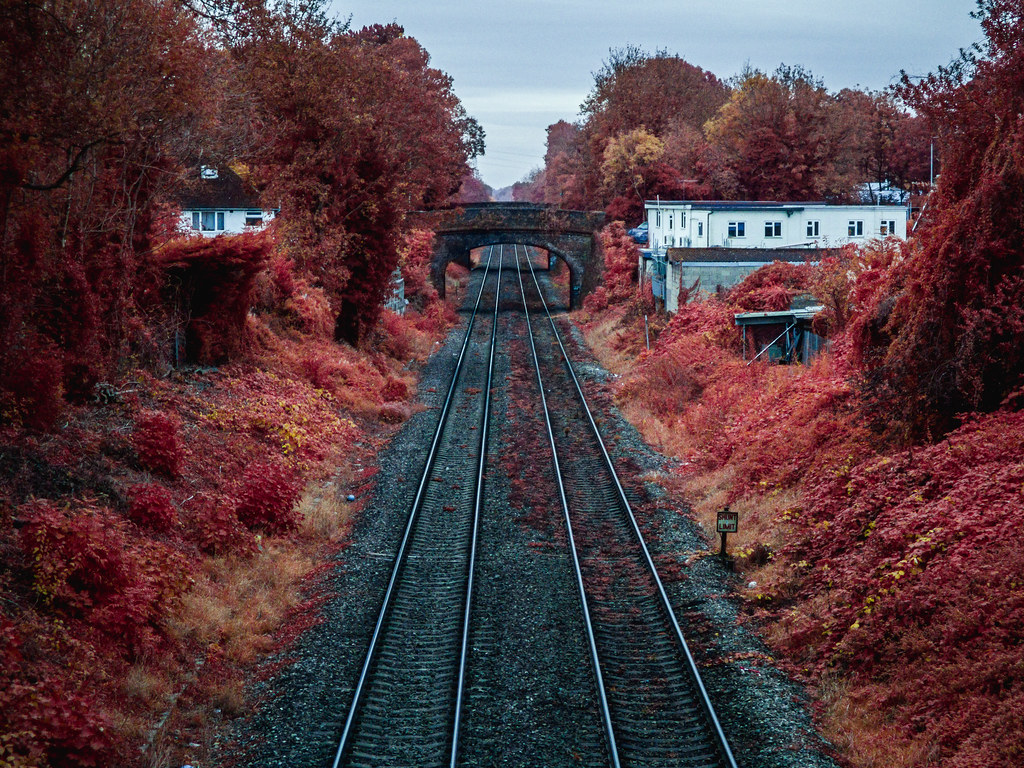
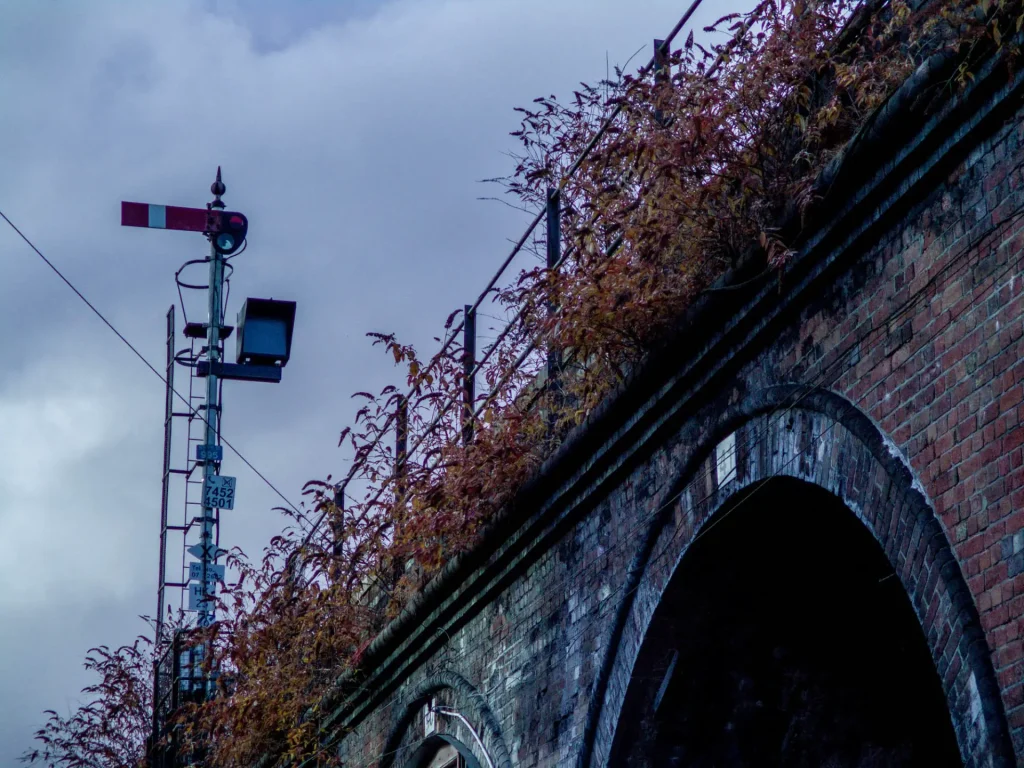
That being said, the first results did hint at some of the pitfalls I would eventually find in shooting RAW – those being some fairly strongly pronounced barrel distortion, some notable purple fringing.
Barrel distortion
The first thing I noticed was the huge barrel distortion that’s abundantly visible in the image below. This is a product of shooting this camera in DNG format. When shooting in JPEG the camera applies quite a big chunk of lens correction. This is not unusual in any digital camera these days, so certainly isn’t unusual here.
Of course, it’s also very correctable in Lightroom, should you desire, so I wasn’t too phased. In fact, since shooting images with a camera that turns foliage red isn’t really about trying to capture an accurate interpretation of the scene anyway, I figured I would just leave it as part of the photo.
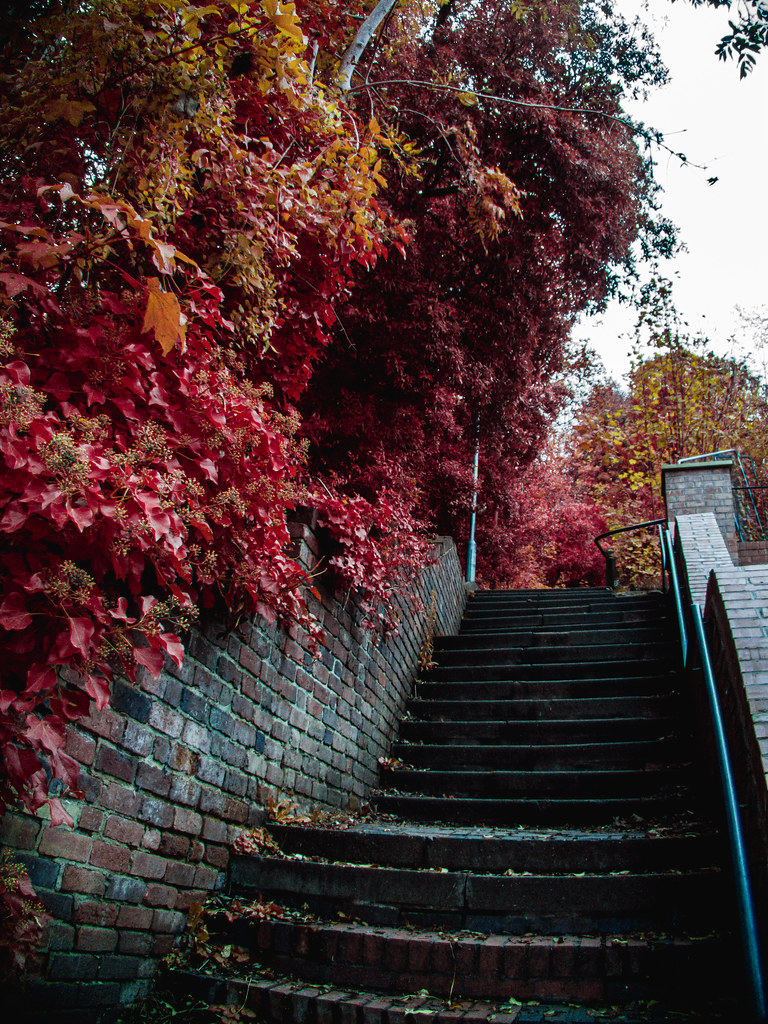
Purple fringing
As mentioned, the other thing I noticed in these first results was an abundance of purple fringing where the trees met the sky. Since the Kolari Pocket creates a JPG file when shooting in DNG, I could see that the cameras internal image processing was doing quite a good job of removing the issue. I could remove it in Lightroom too, but it was definitely an added step in the processing workflow that I hadn’t originally considered.
Second results – the garden path
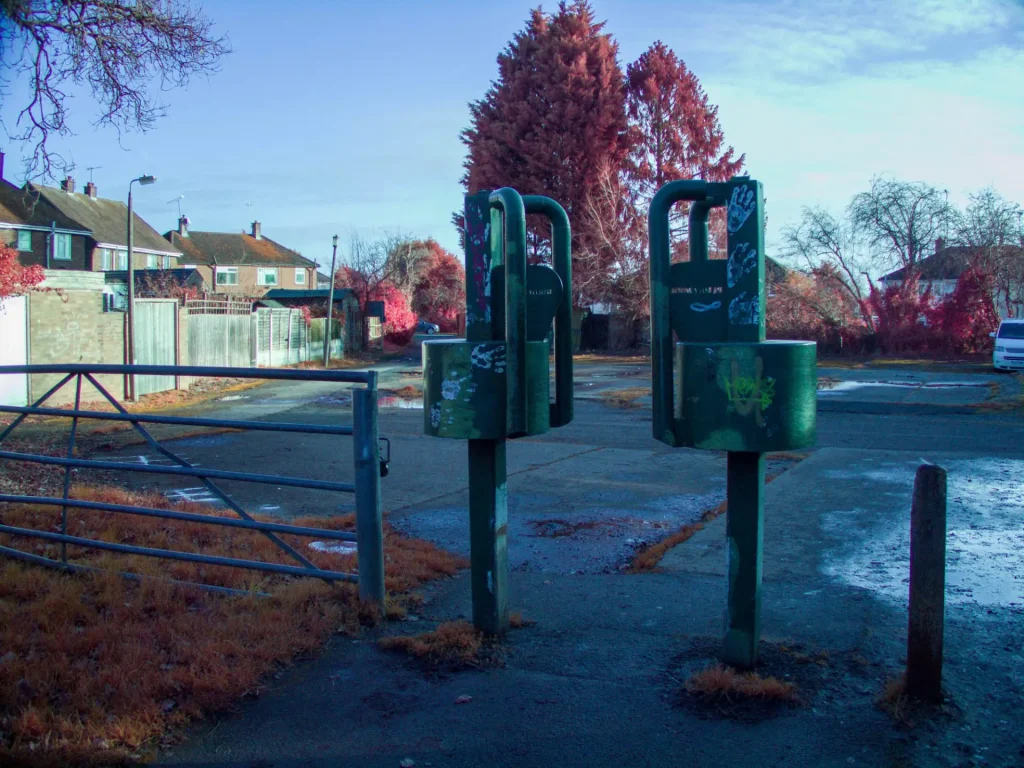
Largely unperturbed – in fact, arguably somewhat spurred on by this initial success – I started carrying the Kolari Pocket everywhere with me. It really is so tiny, I hardly noticed. I wanted to see if I could capture something with a bit of blue sky in the frame so decided to take some shots on a more sunny day. This was where I discovered what would become the biggest RAW image processing hurdle I found with this camera, and the beginning of the aforementioned garden path toward somewhat unnecessary dissatisfaction.
In fact, I had actually spotted what would turn out to be the issue on the first results. When Processing them, I noticed that to get the white balance to the point that I was happy with the tone of the images, I had to ramp up the temperature slider in Lightroom right to 50,000k – and that was in cooler light. Shooting on a sunny day where the light is already warmer, the 50,000k limit in Lightroom just wasn’t enough to shift the white balance to where I wanted it. The result was a few images that however much I tried to tinker with them, were just a bit too blue-shifted for my taste.
A little bit confused by this I emailed Kolari who told me that this was a bit limitation of this little camera when shoot in DNG – it just wasn’t designed to work like this, so I was bumping up against its limitations. But, if I use a white card to set the white balance before taking the shot, the cameras internal JPEG image processing will shift the white balance even further than Lightroom can, and the results would be closer to the warmer/redder look I was looking for. The problem was, of course, this internal image processing would only impact on the JPEG output and not on the DNG RAW files which bypasses the JPEG image processing. In short, this solution only works on the JPEG files.
Me being me (stubborn), I wasn’t happy with this answer. I wanted to shoot DNG and still get the results I was after. At this stage I learned a little bit more about both this type of photography and indeed the quality of after-sales care that Kolari provide. I emailed William, my contact at Kolari, and over the course of about 50 emails (little exaggeration) he talked me through a few options that might help me achieve the look I was after. This included sending me a few camera profiles to play with. You can read more about how these are made and used on Kolari’s website here.
Unfortunately, in the end the colour profiles weren’t the answer that worked best for me in terms of nailing down the exact look I was after. The answer instead – at least I thought at the time – was to open the DNG files in Lightroom, slide the white balance slider all the way to 50,000k then from Lightroom open them in Photoshop, then save them in Photoshop to create a TIFF back in Lightroom. Doing this would reset the white balance slider to how it works with none-raw files and allow me to warm up the images further.
Initially, this felt like a bit of a result, but after taking a few more photos I began to find the whole process rather tedious. One of the ideas I was sold on when looking at the IRChrome filter was that I wouldn’t have to spend too much time faffing in post process. I certainly didn’t expect to be exporting the files into Photoshop just to bring them back into Lightroom again. It all just felt a bit clunky to me.
Embracing the Kolari Pocket JPEGs
I must admit, it was at this stage that I decided to put the Kolari Pocket down and step back from it for a while. I’d started writing this review and had got bogged down in some convoluted description of the process I was undertaking to get the results I wanted. But whenever I came back to the review, it just didn’t feel like I was working within the spirit of this camera. It’s a point & shoot, I should be able to use it as such and get shots that I like.
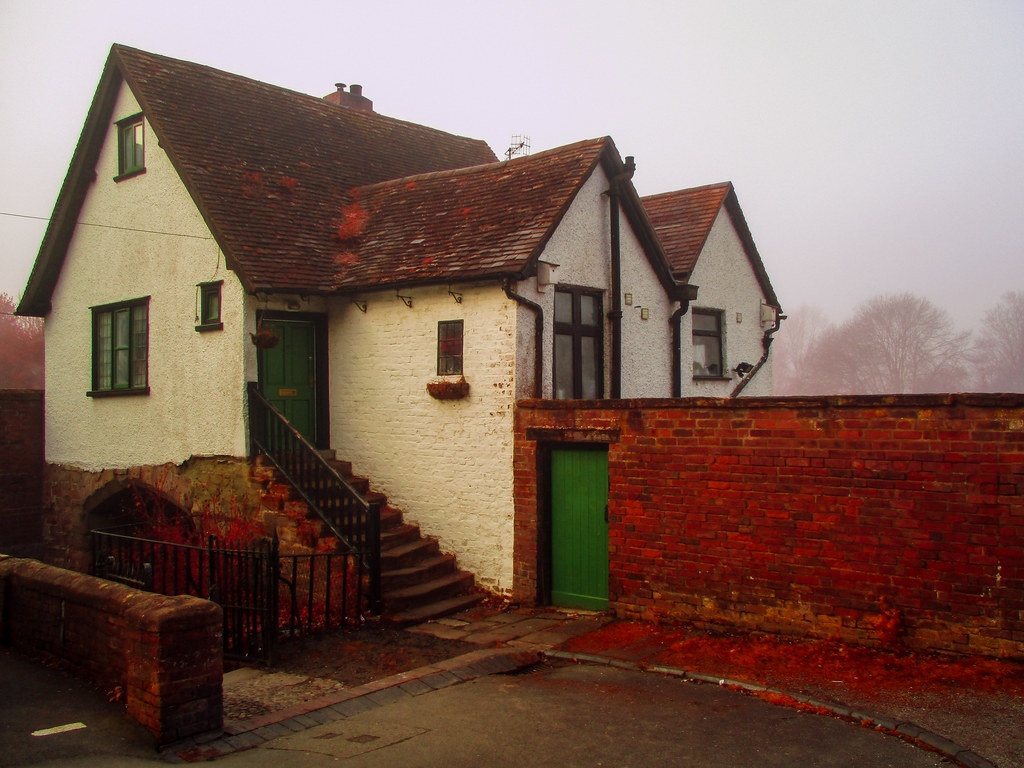
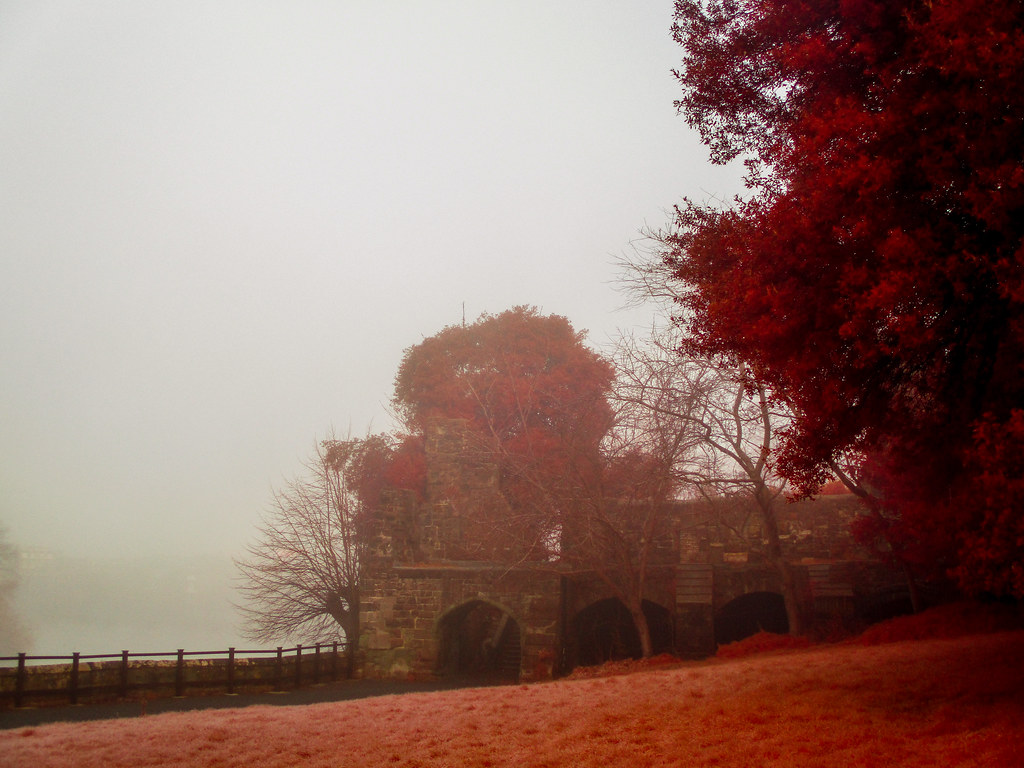
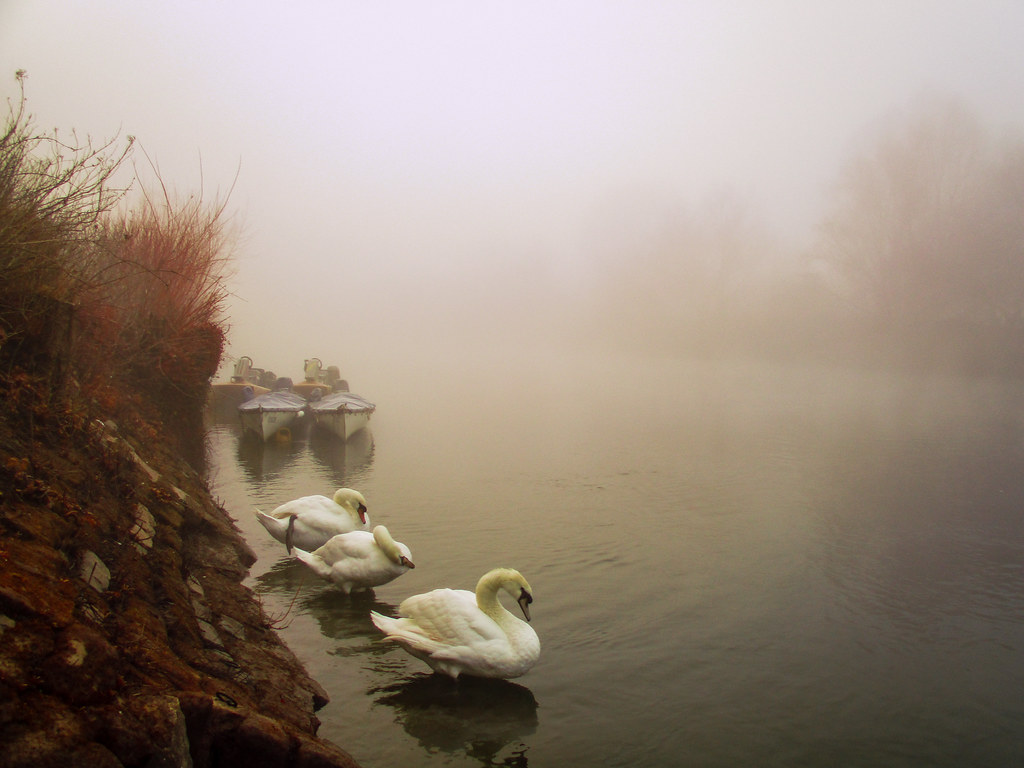
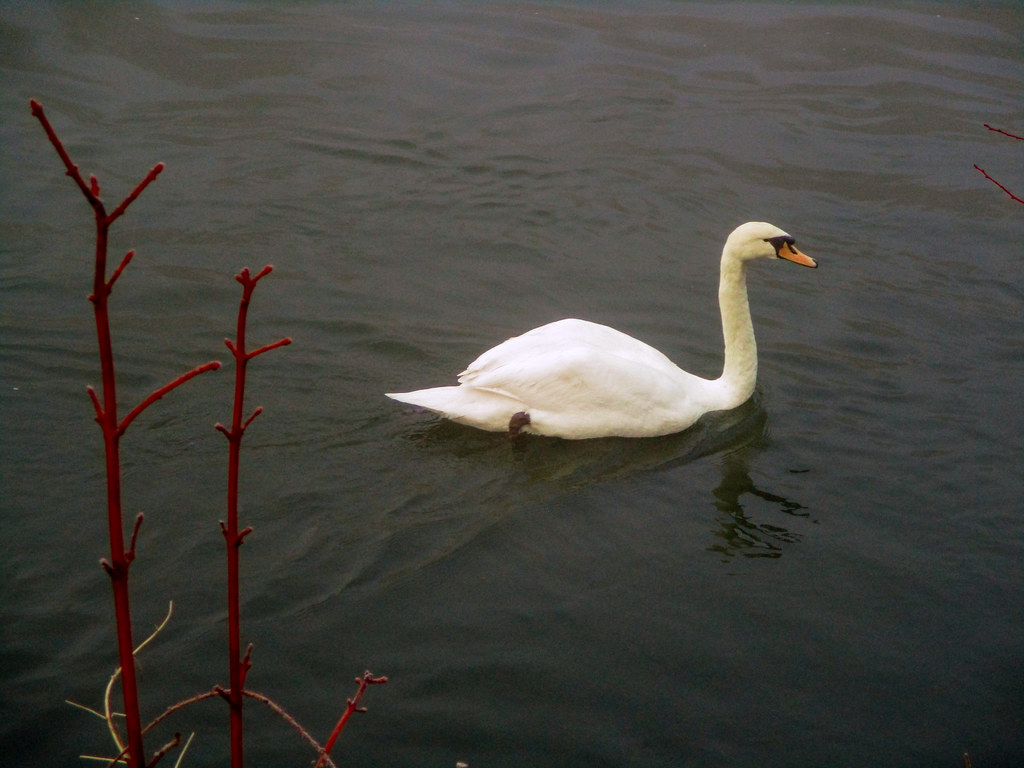
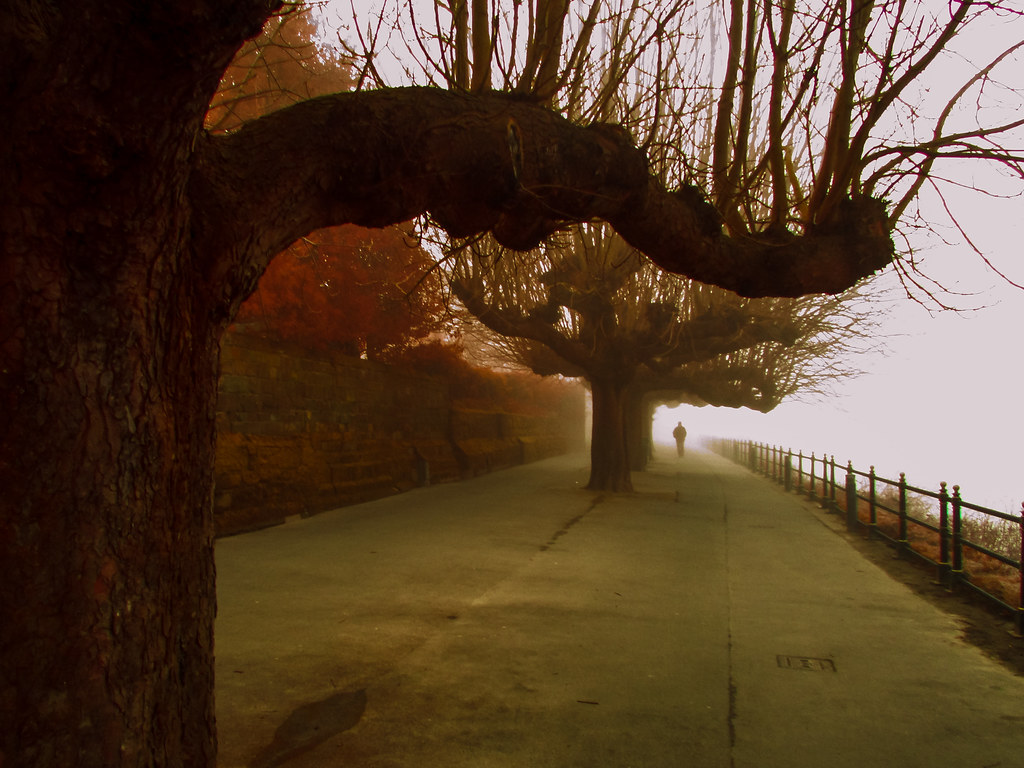
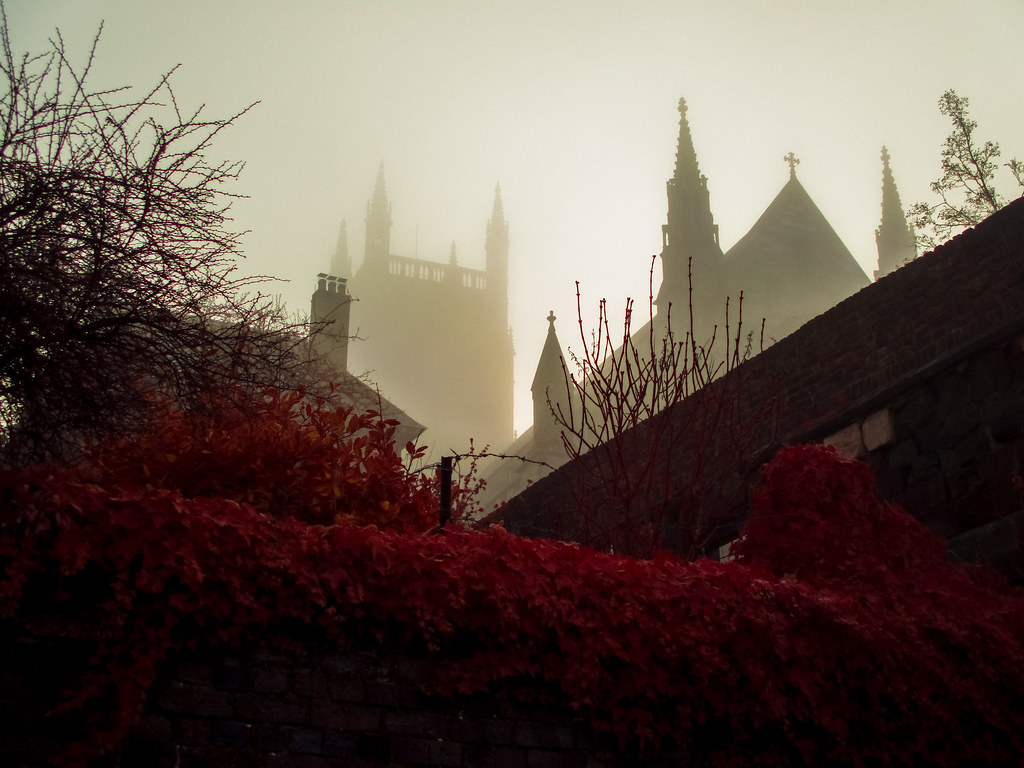
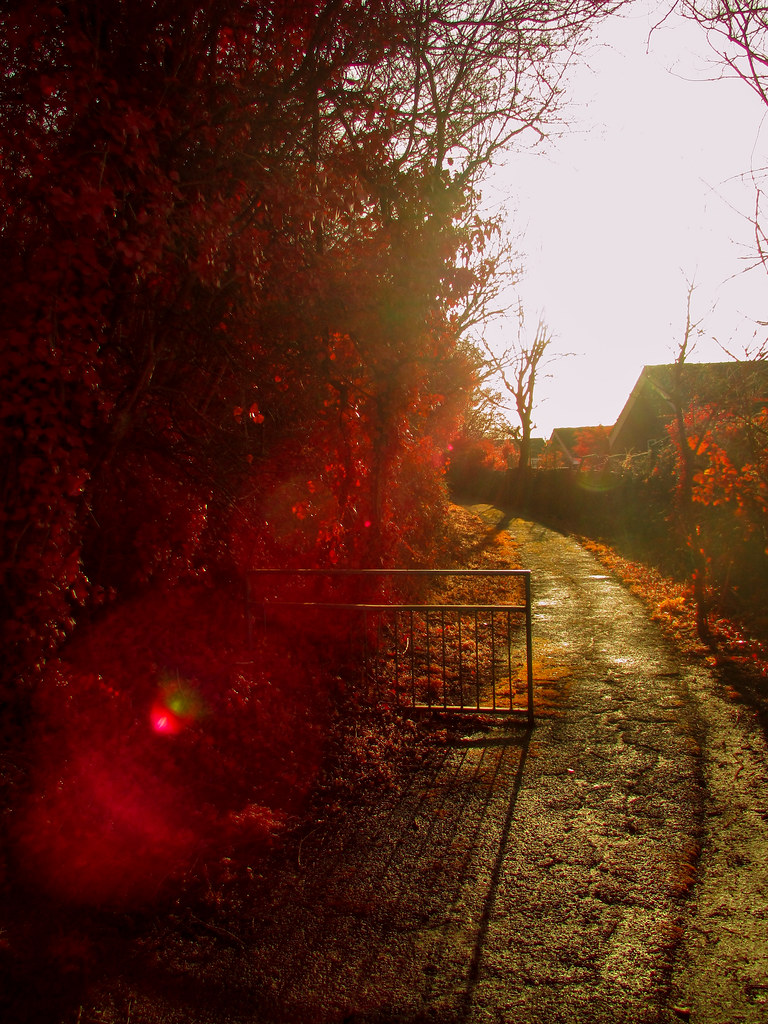
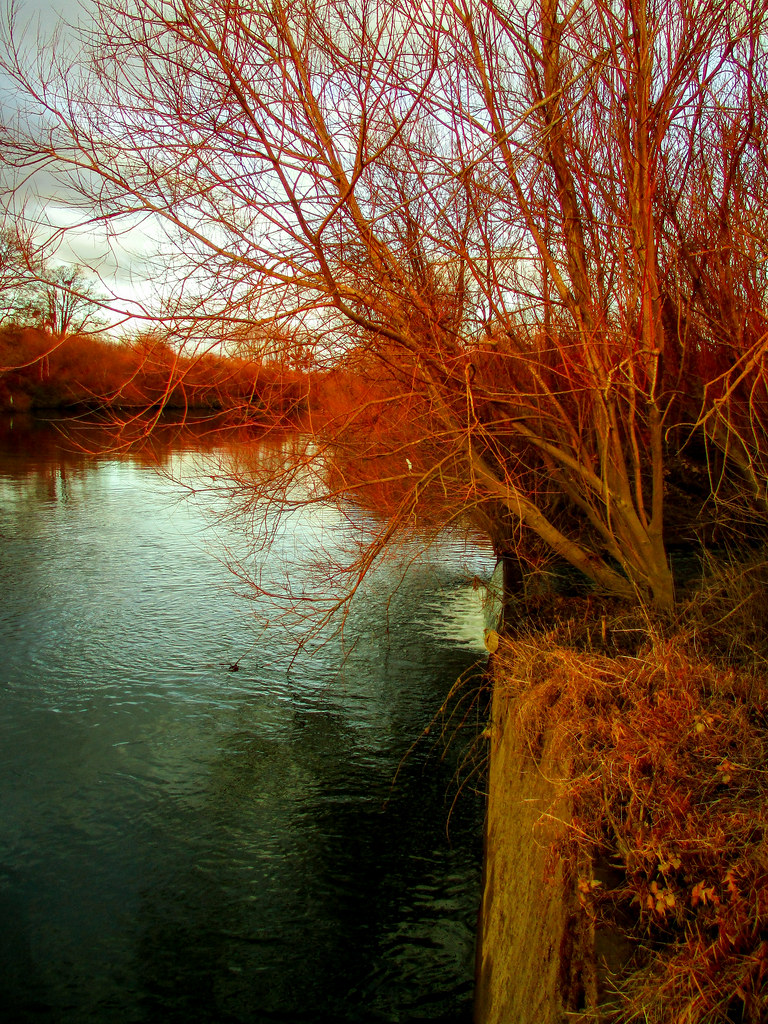
Then one day, I opened the curtains in the morning and spotted that it was foggy outside. It seemed like a good chance to take some snaps, so when I went downstairs the first thing I did was go to the camera cabinet… and the first camera that caught my eye was the Kolari Pocket. I pocketed it, got ready for work, took the kids to school etc, then headed down to the river near work to see what I could snap.
The Kolari Pocket was still set to the custom white balance it was set to the previous time I had taken it out which was quite warm-balanced. Shooting in DNG it still shows the JPEG preview on the back, and as I was snapping away looking at the shots on the slightly crappy screen I was quite happy with them. They didn’t look perfect, but they looked ok.
When I got back to the office and imported the files, rather than go down my convoluted image editing process, I decided to hone in on the JPEGs which looked quite a bit closer to what I wanted from my images. And low and behold, with a bit of very minor tweaking I ended up with some really nice results that actually looked not too far from what I guess Aerochrome would have looked like in the same shooting circumstances.
Re-energised, I then decided to look back at some of my previous images. Since every photo I had taken up until that point had a JPEG and DNG, and the later ones were taken after custom setting the white balance, I managed to find a whole load of other images that I had previously spent ages over – that with minimal tweaks to the JPEG file – I could make look much more how I had originally envisaged that they would look.
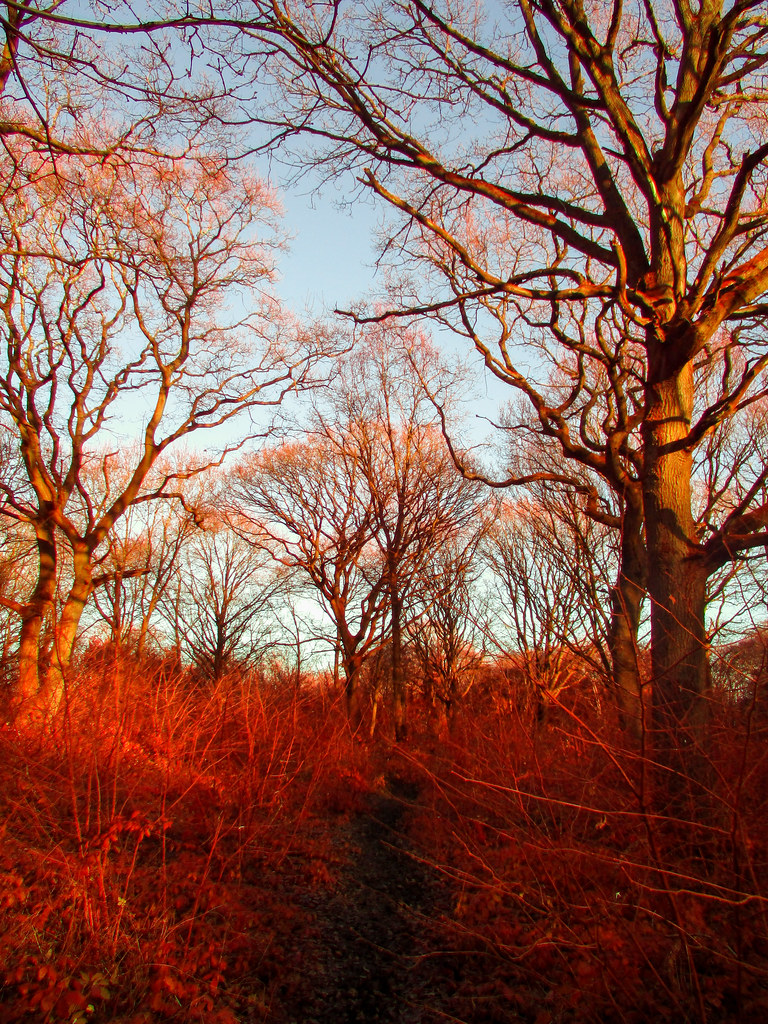
I also realised that I didn’t have to worry so much about the distortion and the purple fringing was also a lot less of an issue. Of course, thanks to the camera’s overenthusiastic noise reduction there were some files that were a little bit smeary, but actually, I found myself a lot less bothered by this than I expected to be. In fact, overall, I’m really happy with a lot of the images I have managed to get out of this camera now I’ve realised that it’s best not to overthink how I shoot it, set the white balance with a white card, and just do basic edits the JPEGs.
That being said, I am still so pleased with the first images I achieved, I think I would always choose to shoot it in both DNG and JPEG – when the light is right for the DNGs to be processed in Lightroom, it definitely brings the best out of the Kolari Pocket’s capability…
Final thoughts on the Kolari Pocket
I’ve had a bit of a rollercoaster with this camera in the time since I’ve had it. I loved the first results, then found myself wondering down a bit of a path to disappointment. In the end though, once I let go of my initial desires to attempt to extract the absolute best out of it, I’ve found myself back at a point that I really like what I’m able to achieve with it… and more importantly, I’m able to do so with relative ease.
Despite the frustrations, I’m not sure I would change the experience either. It’s been one of those times where I’ve been forced to think really hard about what I am doing, and ultimately let go of some of my original desires and goals. In fact, I’ve had to set aside a load of prejudices about lower quality point & shoot cameras and learn to really embrace their shortcomings as part of the creative process.
There’s little getting away from the fact that the Kolari Pocket is a basic point & shoot camera that just happens to have been modified to do something that it’s not supposed to. Take into account that it’s been hacked to shoot DNG and been full spectrum modified and you realise this little camera has been modified to do something it isn’t supposed to twice over. Add to that the fact that it’s a camera that originally would have only cost about £150, and it almost feels like a bit of a surprise that it works at all.
And yet, for all of this, when combined with the IRChrome filter, it’s still abundantly capable of producing images with a really unique look to them that, quite genuinely, aren’t far from the sorts of results you might expect from Aerochrome. I expect the same can be said when using it with the other filters that come in the kit too.
To me, all this makes for an unquestionably fun little camera that really opens the doors to non-visible light photography. Which, is, I believe, exactly what the Kolari Pocket is designed to do!!
In fact, I joked earlier on in this post about how I felt the Kolari Pocket is a bit of a gateway drug… Well, this really has been the case for me. I’ve been that taken with the experience and results that I have ultimately decided to have a Fuji X100 modified too… I’ll be back with more thoughts about that another time…
For now, if you find yourself taken with my results, you can get yourself your own Kolari Pocket from their website here (use the code ‘hamishgill’ and you get yourself a little discount too!
Share this post:


Comments
Terry B on Kolari Pocket & IRChrome Filter Review – Digital Aerochrome in a Tiny Package!
Comment posted: 16/03/2020
I'd seen some interesting IR images on the internet and I thought that I'd like to do that. I read up a little about camera conversions and decided that a full spectrum conversion was best as it allowed total freedom with IR filters of different wavelengths, whereas with a specific wavelength conversion conversion I'd be limited to just the one. Also, very important I felt, was the ability to use an IR/UV suppressing filter that would emulate the hot filter that had been removed.
All went swimmingly at first. I decided to push the boat out a little and purchased a full spectrum converted Fuji X-M1, as I am already a Fuji X user and could use my lenses on the M1. I duly purchased several IR filters and the IR/UV suppression filter and thought I was all set to go. But no, things didn't turn out as expected. Firstly, my preferred image editing software didn't do too well a job, and after some reading on the web and purchasing a bespoke book, I learnt that I needed a swapping channels facility. This, I discovered was available with RawTherapee, and it seemed I also needed Gimp, both of which I downloaded. Sadly, the UI and I didn't get on well at all, and after some experimentation I gave up.
Now up pops your review of the Kolari IRChrome filter, seemingly to be the answer to my prayers, and my interest has been re-awakened. But I should like to know, did you have to use the colour mixer facility to swap channels, or does the filter alone come close initially with the result you were looking for?
Comment posted: 16/03/2020
Comment posted: 16/03/2020
Comment posted: 16/03/2020
David Allen on Kolari Pocket & IRChrome Filter Review – Digital Aerochrome in a Tiny Package!
Comment posted: 16/03/2020
I used to shoot Ektachrome transparency film on a regular basis as an art student back in the early 80s. Really miss the stuff now. I can do pretty decent B W digital IR stuff with my Pentax KP (in body software) and my Fuji X10 ( Hoya R72 filter on monochrome mode) but the likes of colour IR have eluded me in the digital age. Maybe send my Pentax K-01 off to be modified........
Comment posted: 16/03/2020
Comment posted: 16/03/2020
Comment posted: 16/03/2020
Comment posted: 16/03/2020
Charles Higham on Kolari Pocket & IRChrome Filter Review – Digital Aerochrome in a Tiny Package!
Comment posted: 17/03/2020
Bernhard on Kolari Pocket & IRChrome Filter Review – Digital Aerochrome in a Tiny Package!
Comment posted: 22/03/2020
thank you for this article. One week ago, i started my first IR experiences with a modified Canon EOS 600D (700nm IR filter). So i am in moment interested in such stuff.
Best regards and stay well
Bernhard
Comment posted: 22/03/2020
Neal Wellons on Kolari Pocket & IRChrome Filter Review – Digital Aerochrome in a Tiny Package!
Comment posted: 09/04/2020
I look forward to reading your results should you continue with the idea. I recently found this site and look forward to learning lots more as I also shoot lots of film cameras too. I like JCH Streetpan 400 with a 720 nm filter for film IR.
Comment posted: 09/04/2020
Chris on Kolari Pocket & IRChrome Filter Review – Digital Aerochrome in a Tiny Package!
Comment posted: 17/04/2020
PS Nice photos
Comment posted: 17/04/2020
Fuji X100 - Kolari Vision Full Spectrum Modified - First Impressions - 35mmc on Kolari Pocket & IRChrome Filter Review – Digital Aerochrome in a Tiny Package!
Comment posted: 20/04/2020
Brandon on Kolari Pocket & IRChrome Filter Review – Digital Aerochrome in a Tiny Package!
Comment posted: 05/09/2020